


It is a common saying that you don’t really want to know how sausage is made. Actually you do! Sausage and Beer are proof that God loves us. Just as your beer should only include water, barley and hops, your sausage should only include meat and spices. There are few ways to guarantee that other than to make your own.
Note: There is an update to this recipe here. It turned out a bit better, but the steps are still detailed in this post.
My mother is allergic to Beef and Pork due to a tick bite (or several). There are many problems with a red meat allergy for one who spent a lifetime in the south and has grown to enjoy all kinds of pork and beef. One item that she especially missed was Italian Sausage. Ah, you say, there are Turkey Italian Sausages in the cooler at my local grocery. Not so fast. If you read the label, that sausage is is in a collagen casing and it will list beef as one of the ingredients. Artificial sausage casings are made from collagen which is harvested from the hide, bones and tendons of dispatched animals, typically cows. So store bought poultry sausage is still off limits to a person with beef and pork allergies. What to do? Make your own, but use a casing made from vegetable collagen. The ones I used are available here.
Here is an overview of making beef and pork free Italian sausage:
Step 1: Clean, Clean, Clean
Salmonella is a very real threat when dealing with poultry. It is essential that you practice food safety. Before you event start, get safe and keep your work area sanitized. Here are some general suggestions.
- Everything that comes into contact with raw meat must be sanitized with bleach.
- Get everything you will need out prior to handling raw meat so that you are not contaminating other areas (opening cabinets and draws with chickeny hands).
- When you are finished with each stage, clean up and sanitize so that the next phase starts clean.
- Food should not be kept in the danger zone longer than essential. This is above 40 degrees F and below 140 degrees F. This is the temperature range where bacteria can breed.
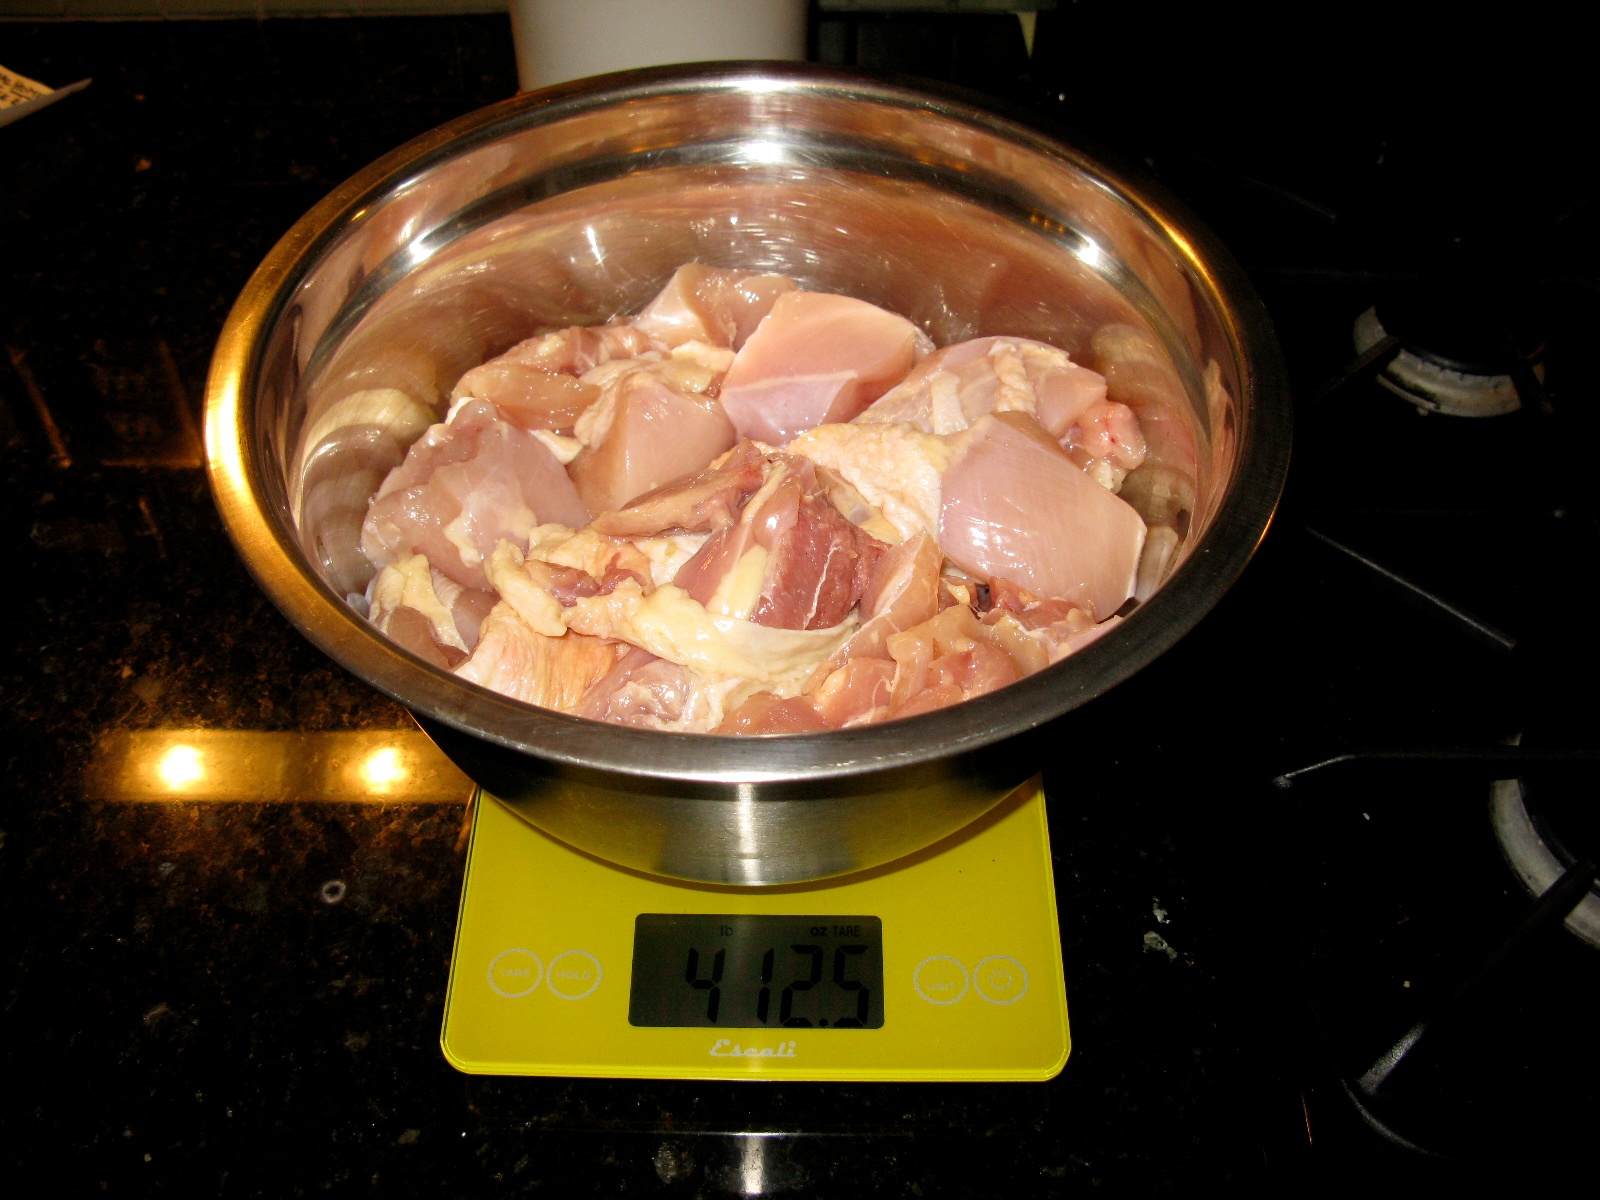
Step 2: Choose Your Meat
There are many web sites that give recipes for poultry based sausage. The key is that you really don’t need a recipe per-say, you simply need to understand some of the basics.
- Poultry is by its nature dry so you want to leave in as much fat as possible.
- You can leave the skin on and I recommend it as it is a source of fat and flavor in what might be a dry product otherwise.
- A mixture of white and dark meat is ideal as an all white meat product will be dry. If you want lean, then by all means, go lean. It is your sausage!
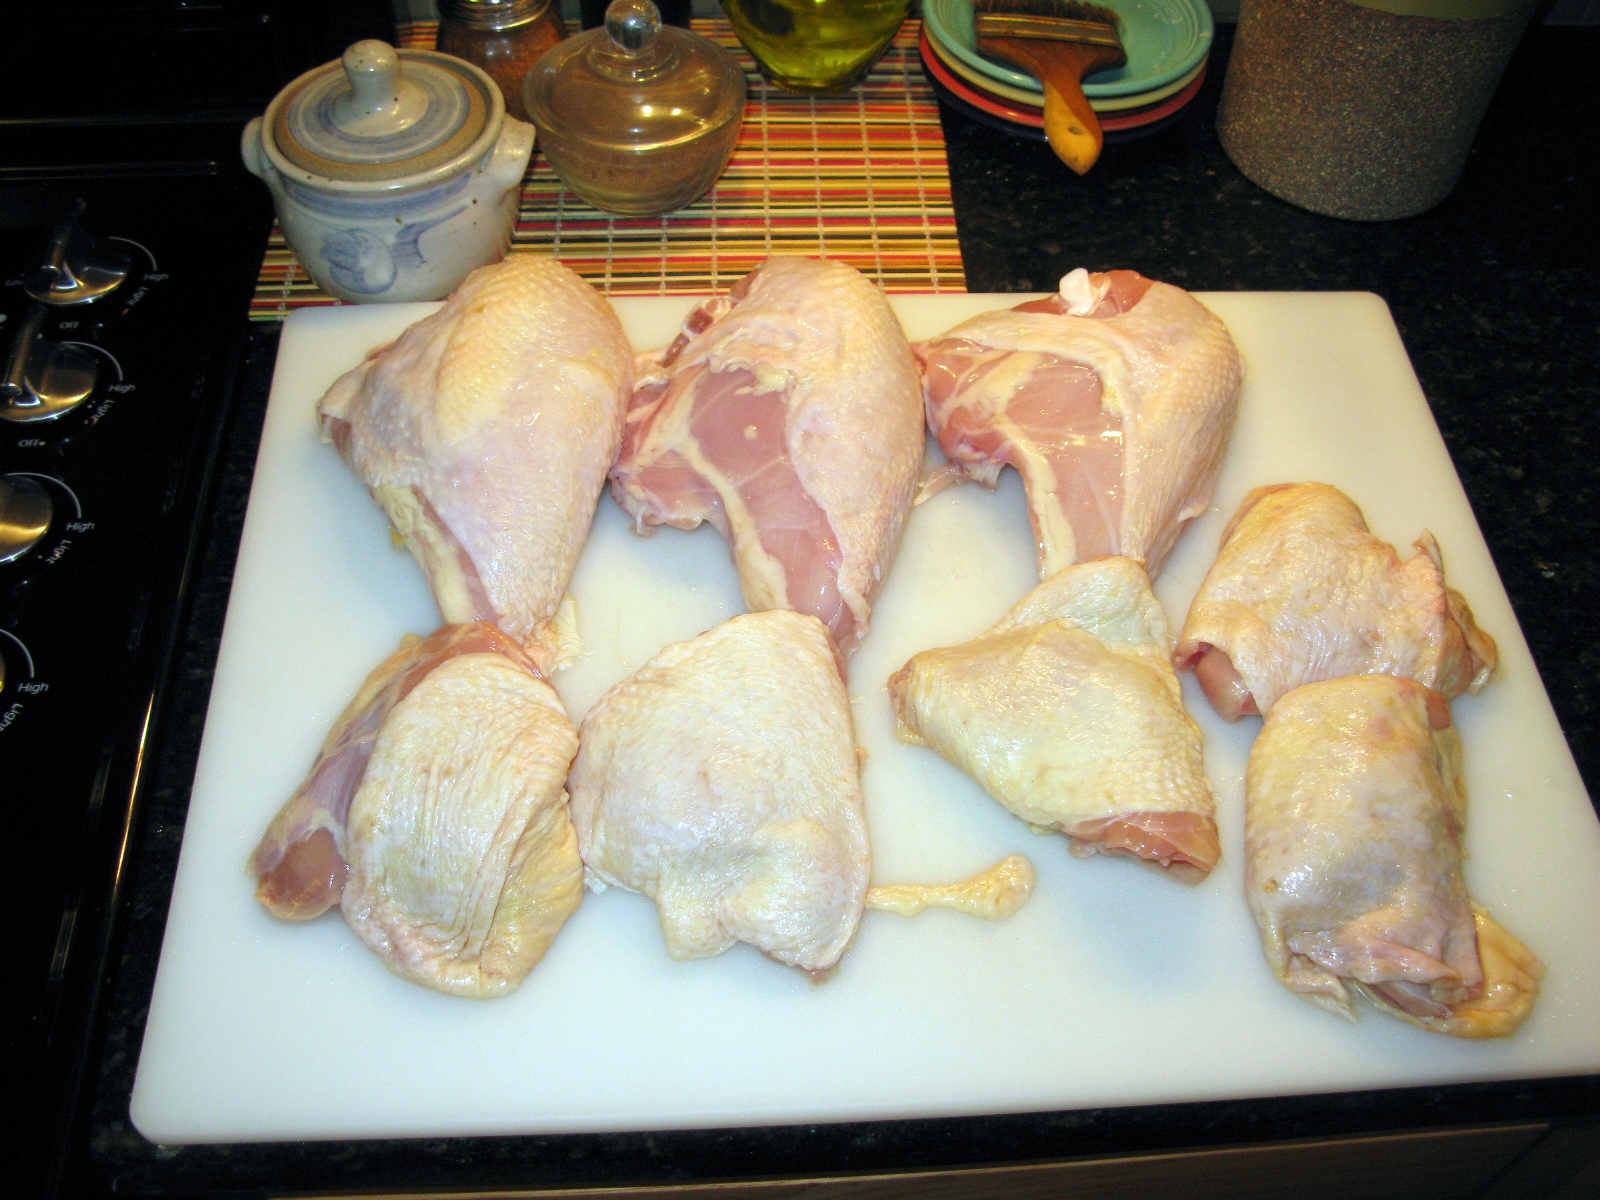
Step 3: De-Bone
Remove and save the bones for stock. Leave as much of the fat and skin as you can if you want a more authentic sausage. Cut into smallish pieces (with the opening of your grinder in mind) and then put in the freezer while you clean the entire work area then prep your spices. Grinding meat is easier if it is near freezing. When chilled, the fat and meat is stiff so it cuts rather than crushes.
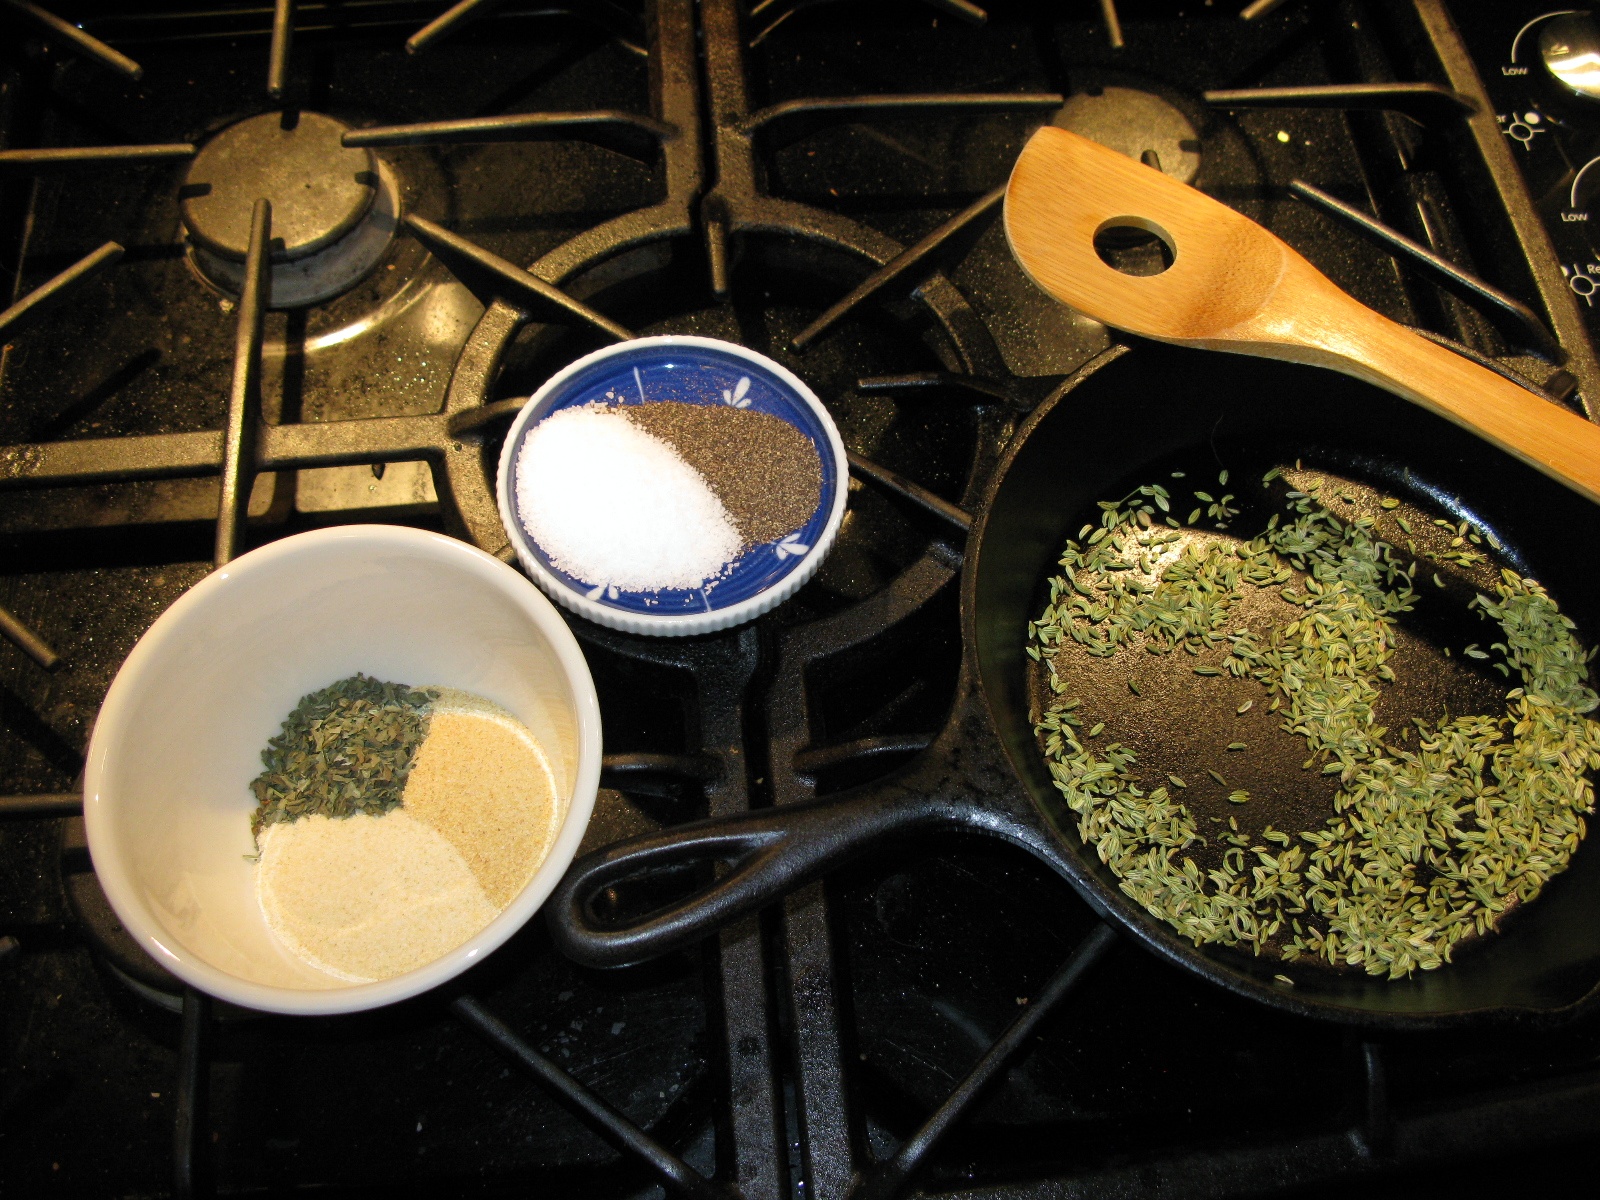
Step 4: Spice
Italian style sausage is generally fennel, garlic, pepper and salt. You can add red pepper flakes if you like and other ingredients as your mood dictates. Here I am adding (to about 5 pounds of meat), T indicating Tables Spoon:
- 1 T Fennel Seeds
- 1 T Granulated Garlic
- 1 T Granulated Onion
- 1 T Salt
- 1/2 T Pepper
- 1T Dried Basil
The Fennel seeds are roasted to bring out their flavor and when done, half are ground and half are used whole. To roast them, I simply put then in a cast iron skillet on low/medium until you hear a pop now and then and can really smell the fennel. I use a mortar and pestle, but if you have a food processor, then give it a spin. Don’t get caught up in thinking you need to know some exact “recipe”. A table spoon of each spice for five pounds of meat is a good starting point. If you want more, add more. The idea is to make a sausage that appeals to you. If you don’t like the above spice mix, there are thousands of others on the net.
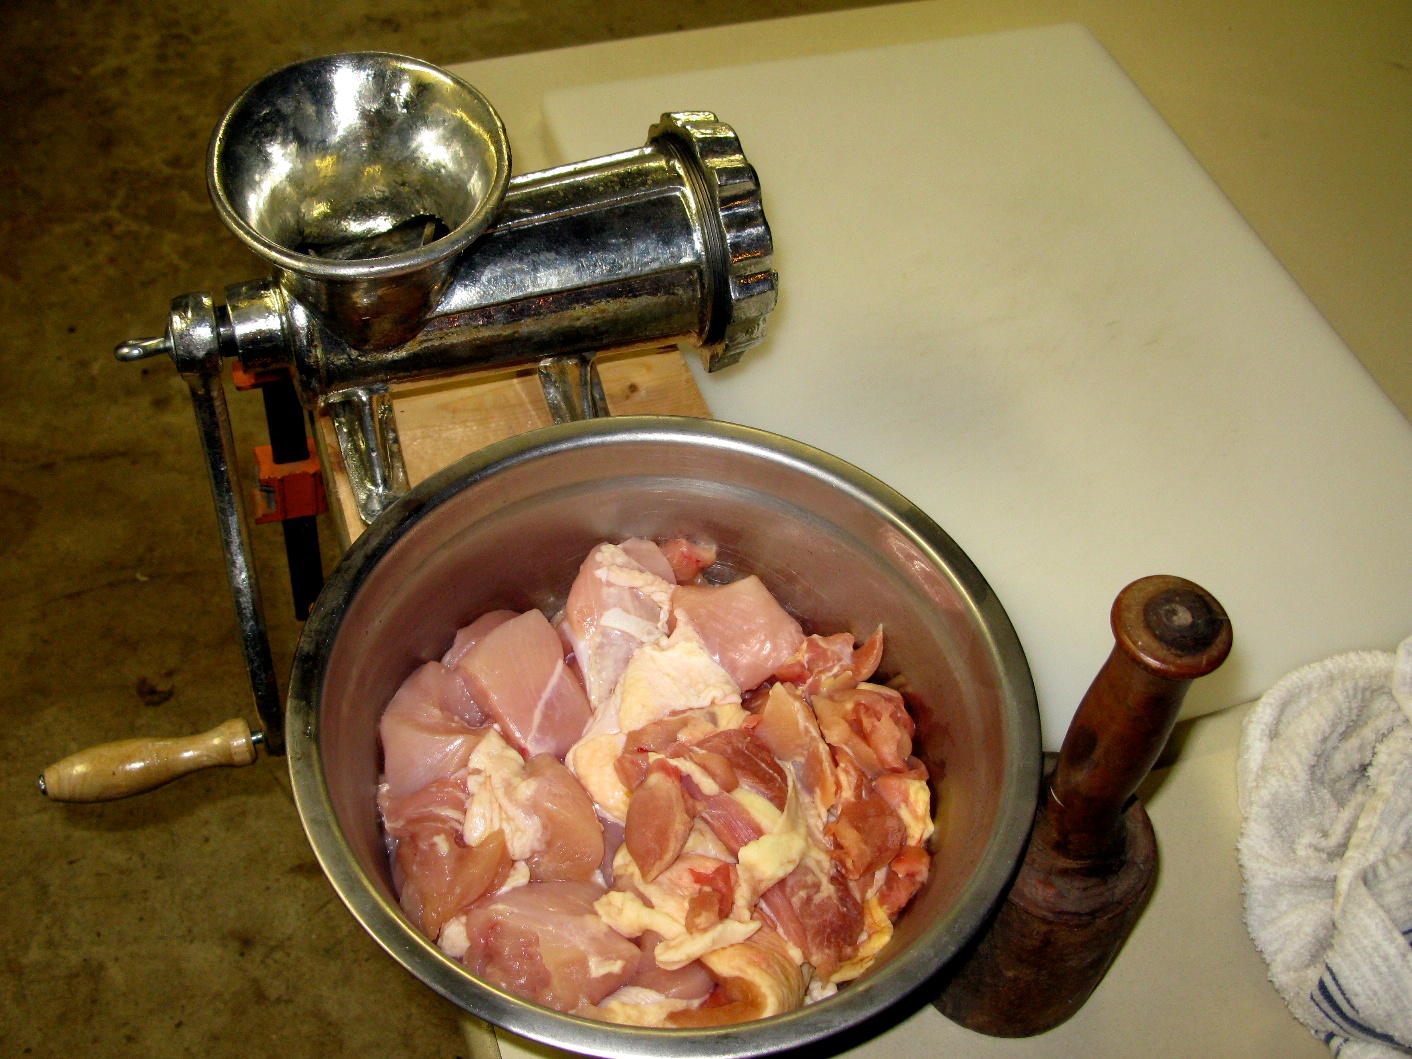
Step 5: The Grind
With the meat chilled you can begin the grinding. It is also a good idea to place your grinder or grinding head if you use an electric grinder in the freezer for an hour as well. To the extent that you can keep the fat cool and solid, you will improve the outcome.
Work the meat quickly through the grinder. This is a process that takes time and effort if you are using a hand crank grinder. Keep moving and keep an eye on the fat solids to make certain you are not melting them. As soon as it is ground, put it back in the freezer and clean the work area.
Step 6: Seasoning
Add the spices (again, you can experiment and don’t need to feel as though you are forced to follow any particular formula). Once the spices are added, you need to add enough fluid so that the mixture will flow. In this case I added about 3 ounces of vermouth. You could use red wine, water, chicken stock or any other flavorful liquid. You want to use just enough liquid so that when the meat is squeezed in your hand, it runs out rather than making a ball. Once you have mixed in the spices and liquid, it goes back in the freezer and you clean up again.
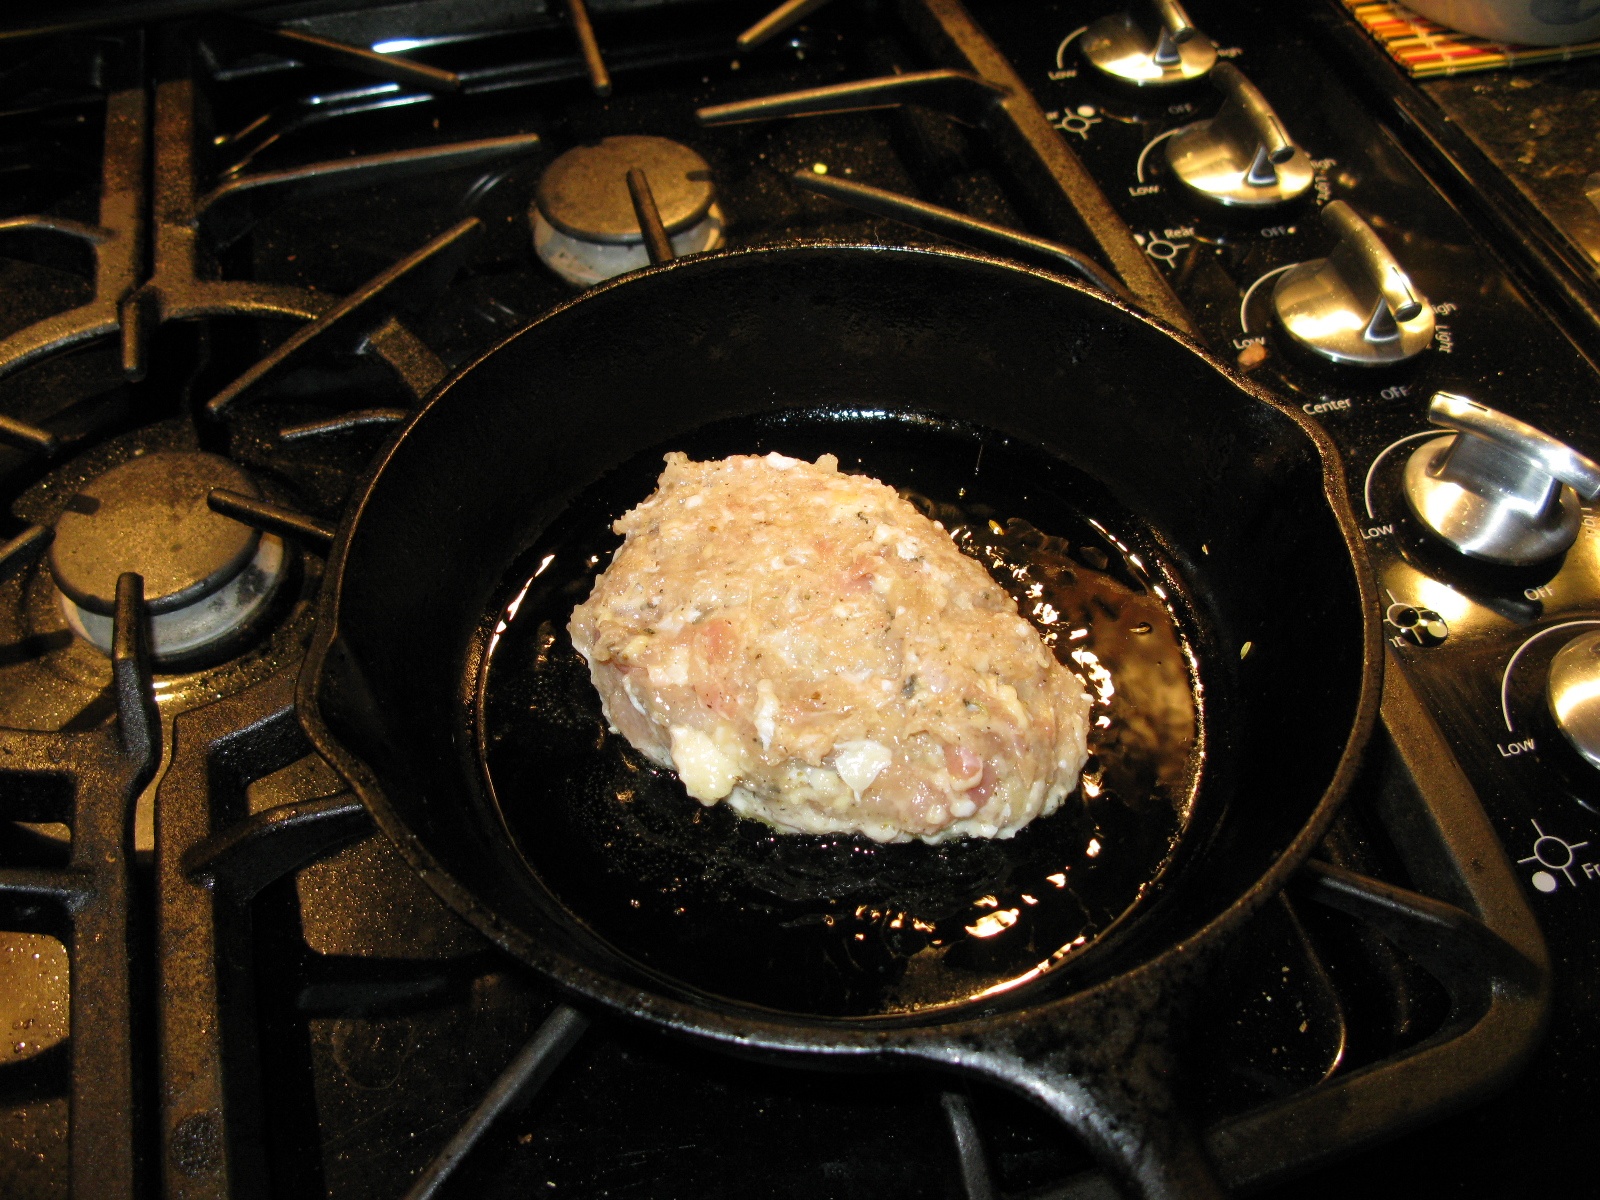
Once seasoned, you can run a test of the sausage to see if you like it. I made a patty and cooked it up. Taste it and decide if you like your end result. You can adjust seasoning and spices at this point easily. Keep in mind that the flavors will develop over night as the granulated spices re-hydrate so it is OK if the patty is just shy of the flavor mark you are looking for.
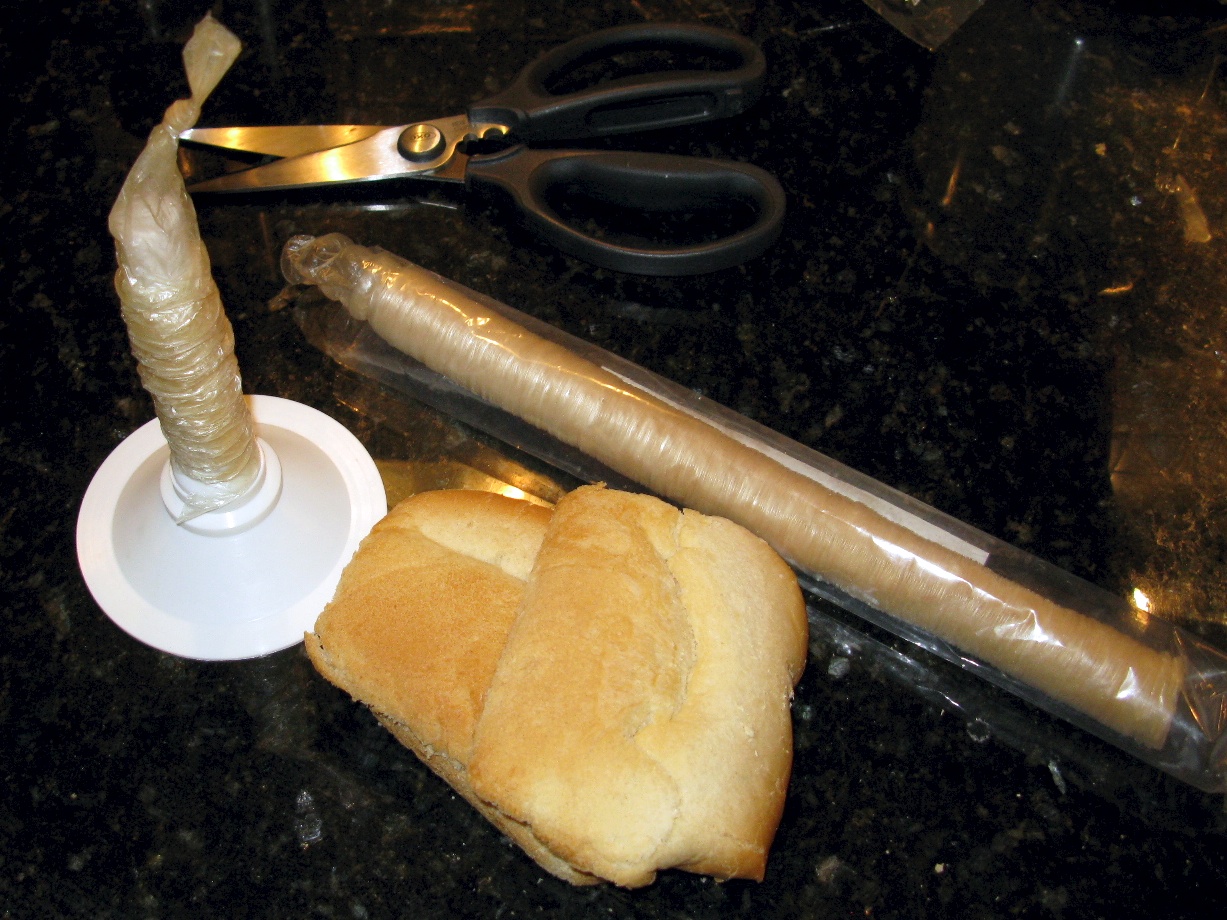
Step 7: Stuffing the Casings
Before you can stuff the casings, you need to clean out the grinder. I use old bread to force out the left over meat. The casing comes on a long tube and it will not fit on the stuffing tube all at once. The vegetable casing is pretty small so you have to work to get it onto your stuffing attachment. You should liberally wet your stuffing tube before putting the casing on. I found about two inches of casing could be cut off and then applied to the stuffing tube. The end of the casing is tied in a knot, you could also use twine.
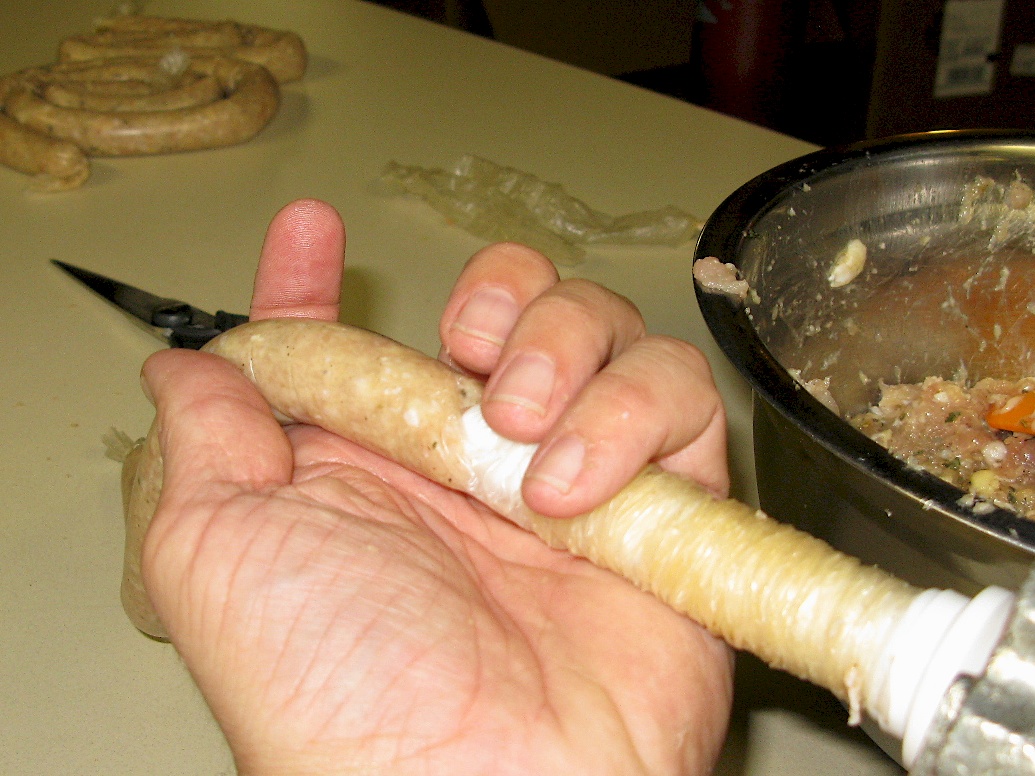
With the stuffing tube on the grinder and your casing on the wet stuffing tube, you can slowly turn out the sausage. If you have a spacer for your grinder, use it. If not, use the largest grind size you have to avoid re-grinding the meat too finely. As the sausage comes out, you want to guide it with one hand and keep a slight amount of pressure on the casing at the same time. If you overfill the casing, it will break. If that happens, you can take the broken section out, re-tie the end and add the sausage back into the grinder.
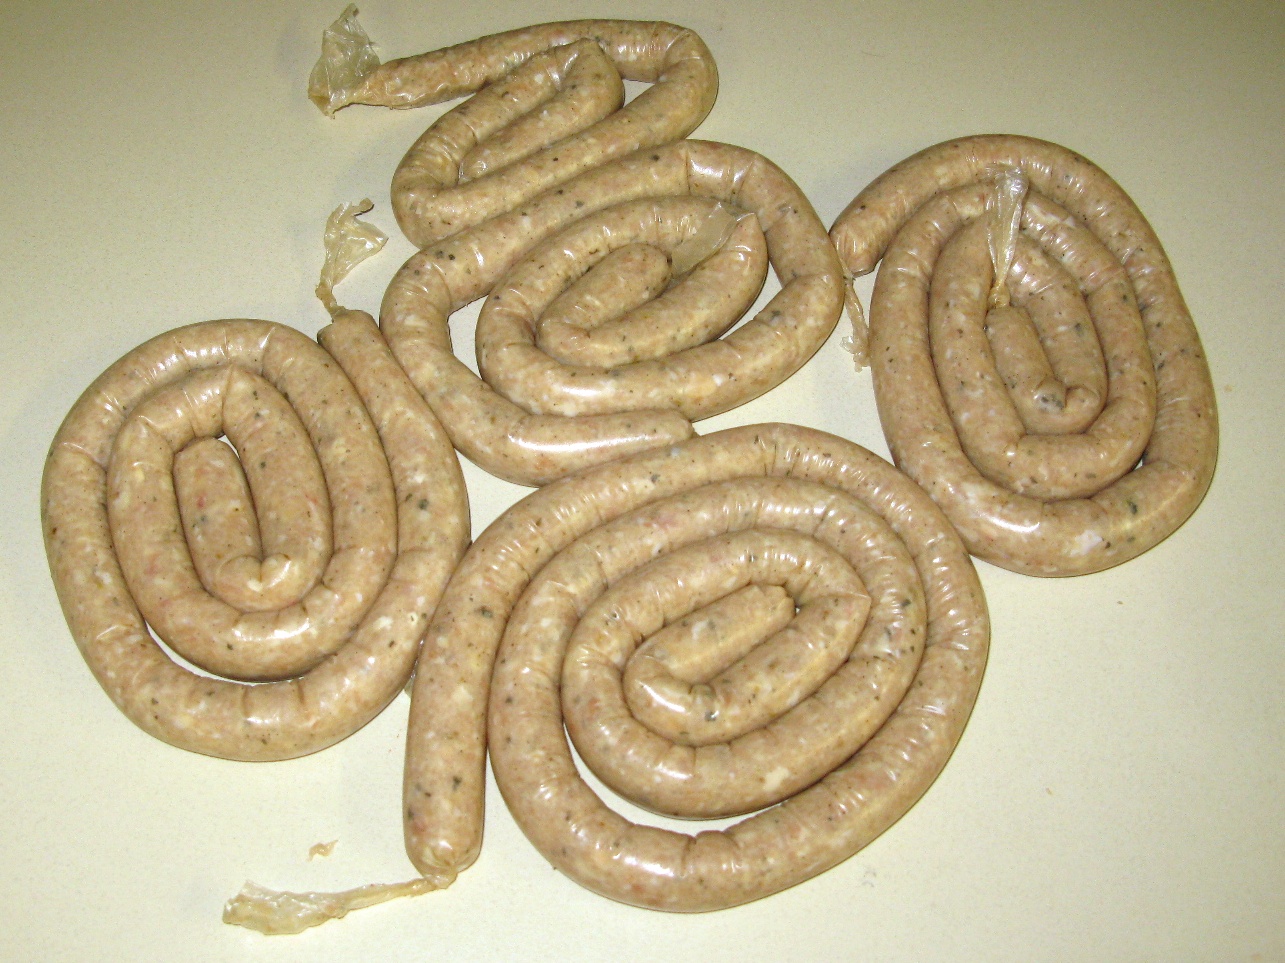
Four five pounds of meat, I needed to reload the stuffing tube four times. There is a fifth coil in the image, as I overfilled it and it broke! The vegetable casings are fragile!
You form links by taking a segment of sausage and twisting it. You want to twist every other link, not every link. The first link is twisted towards you (three to five times), you skip a link, then the next one you twist away from you. You are looking to plump up the casing and tighten the skin. If you over do it, the casing will break. Once you break one or two, you will get the hang of it. Once the links are formed, you need to move the pile to the refrigerator for a day or overnight to firm up the links, allow the collagen to set and the flavors to bloom. After they are placed in the refrigerator, clean up once again!
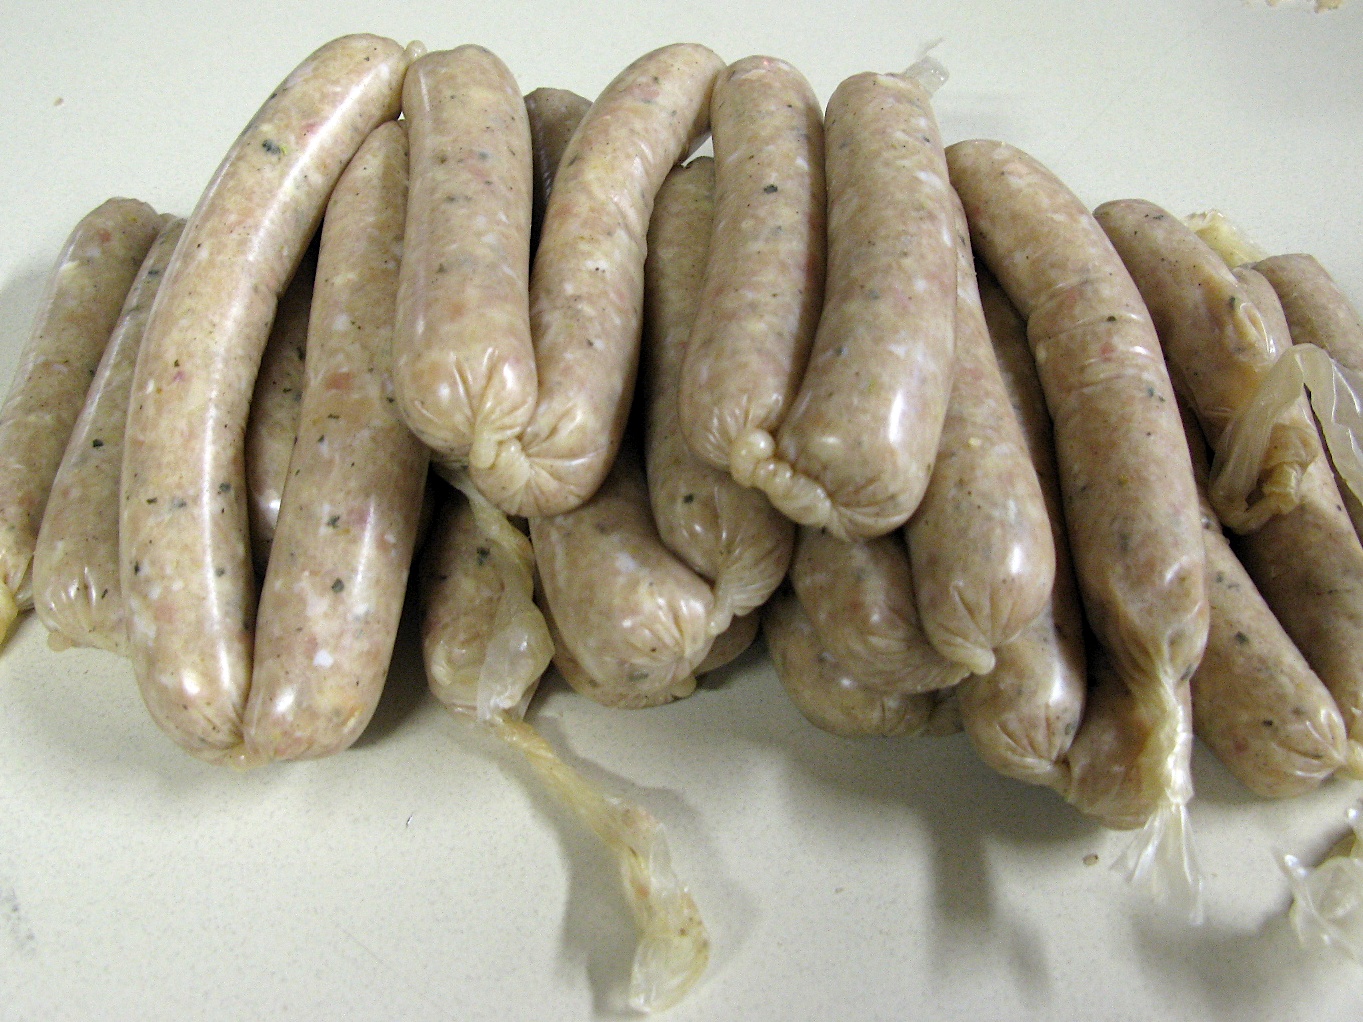
Step 8: Separating the Links
After allowing the sausage to set, they are cut apart with shears or a knife. Here I have made two piles, one for “fresh” eating (in the next few days) and one for freezing.
The end result is a nice plump chicken sausage with good Italian flavor. The next time you make them you can try an Asian blend with ginger, soy sauce in place of the liquid and perhaps some Chinese Five Spice powder. The sky is the limit and you know what is inside your sausage.
What a nice blog but I fear that you have set the bar impossibly high. I look forward to the next entry.
True! But nothing is better than a geek and his/her food! Right now I am working on a comparison of charcoal that is actually a lot of fun. Thanks for your interest.