
Making and Arts and Crafts/Mission style bed: I needed a new bed (and lots of other furniture). I like the Arts and Crafts style and have access to a stash of quarter-sawn white oak.
Here is an overview of making the bed in case you are embarking on a similar project.
Design
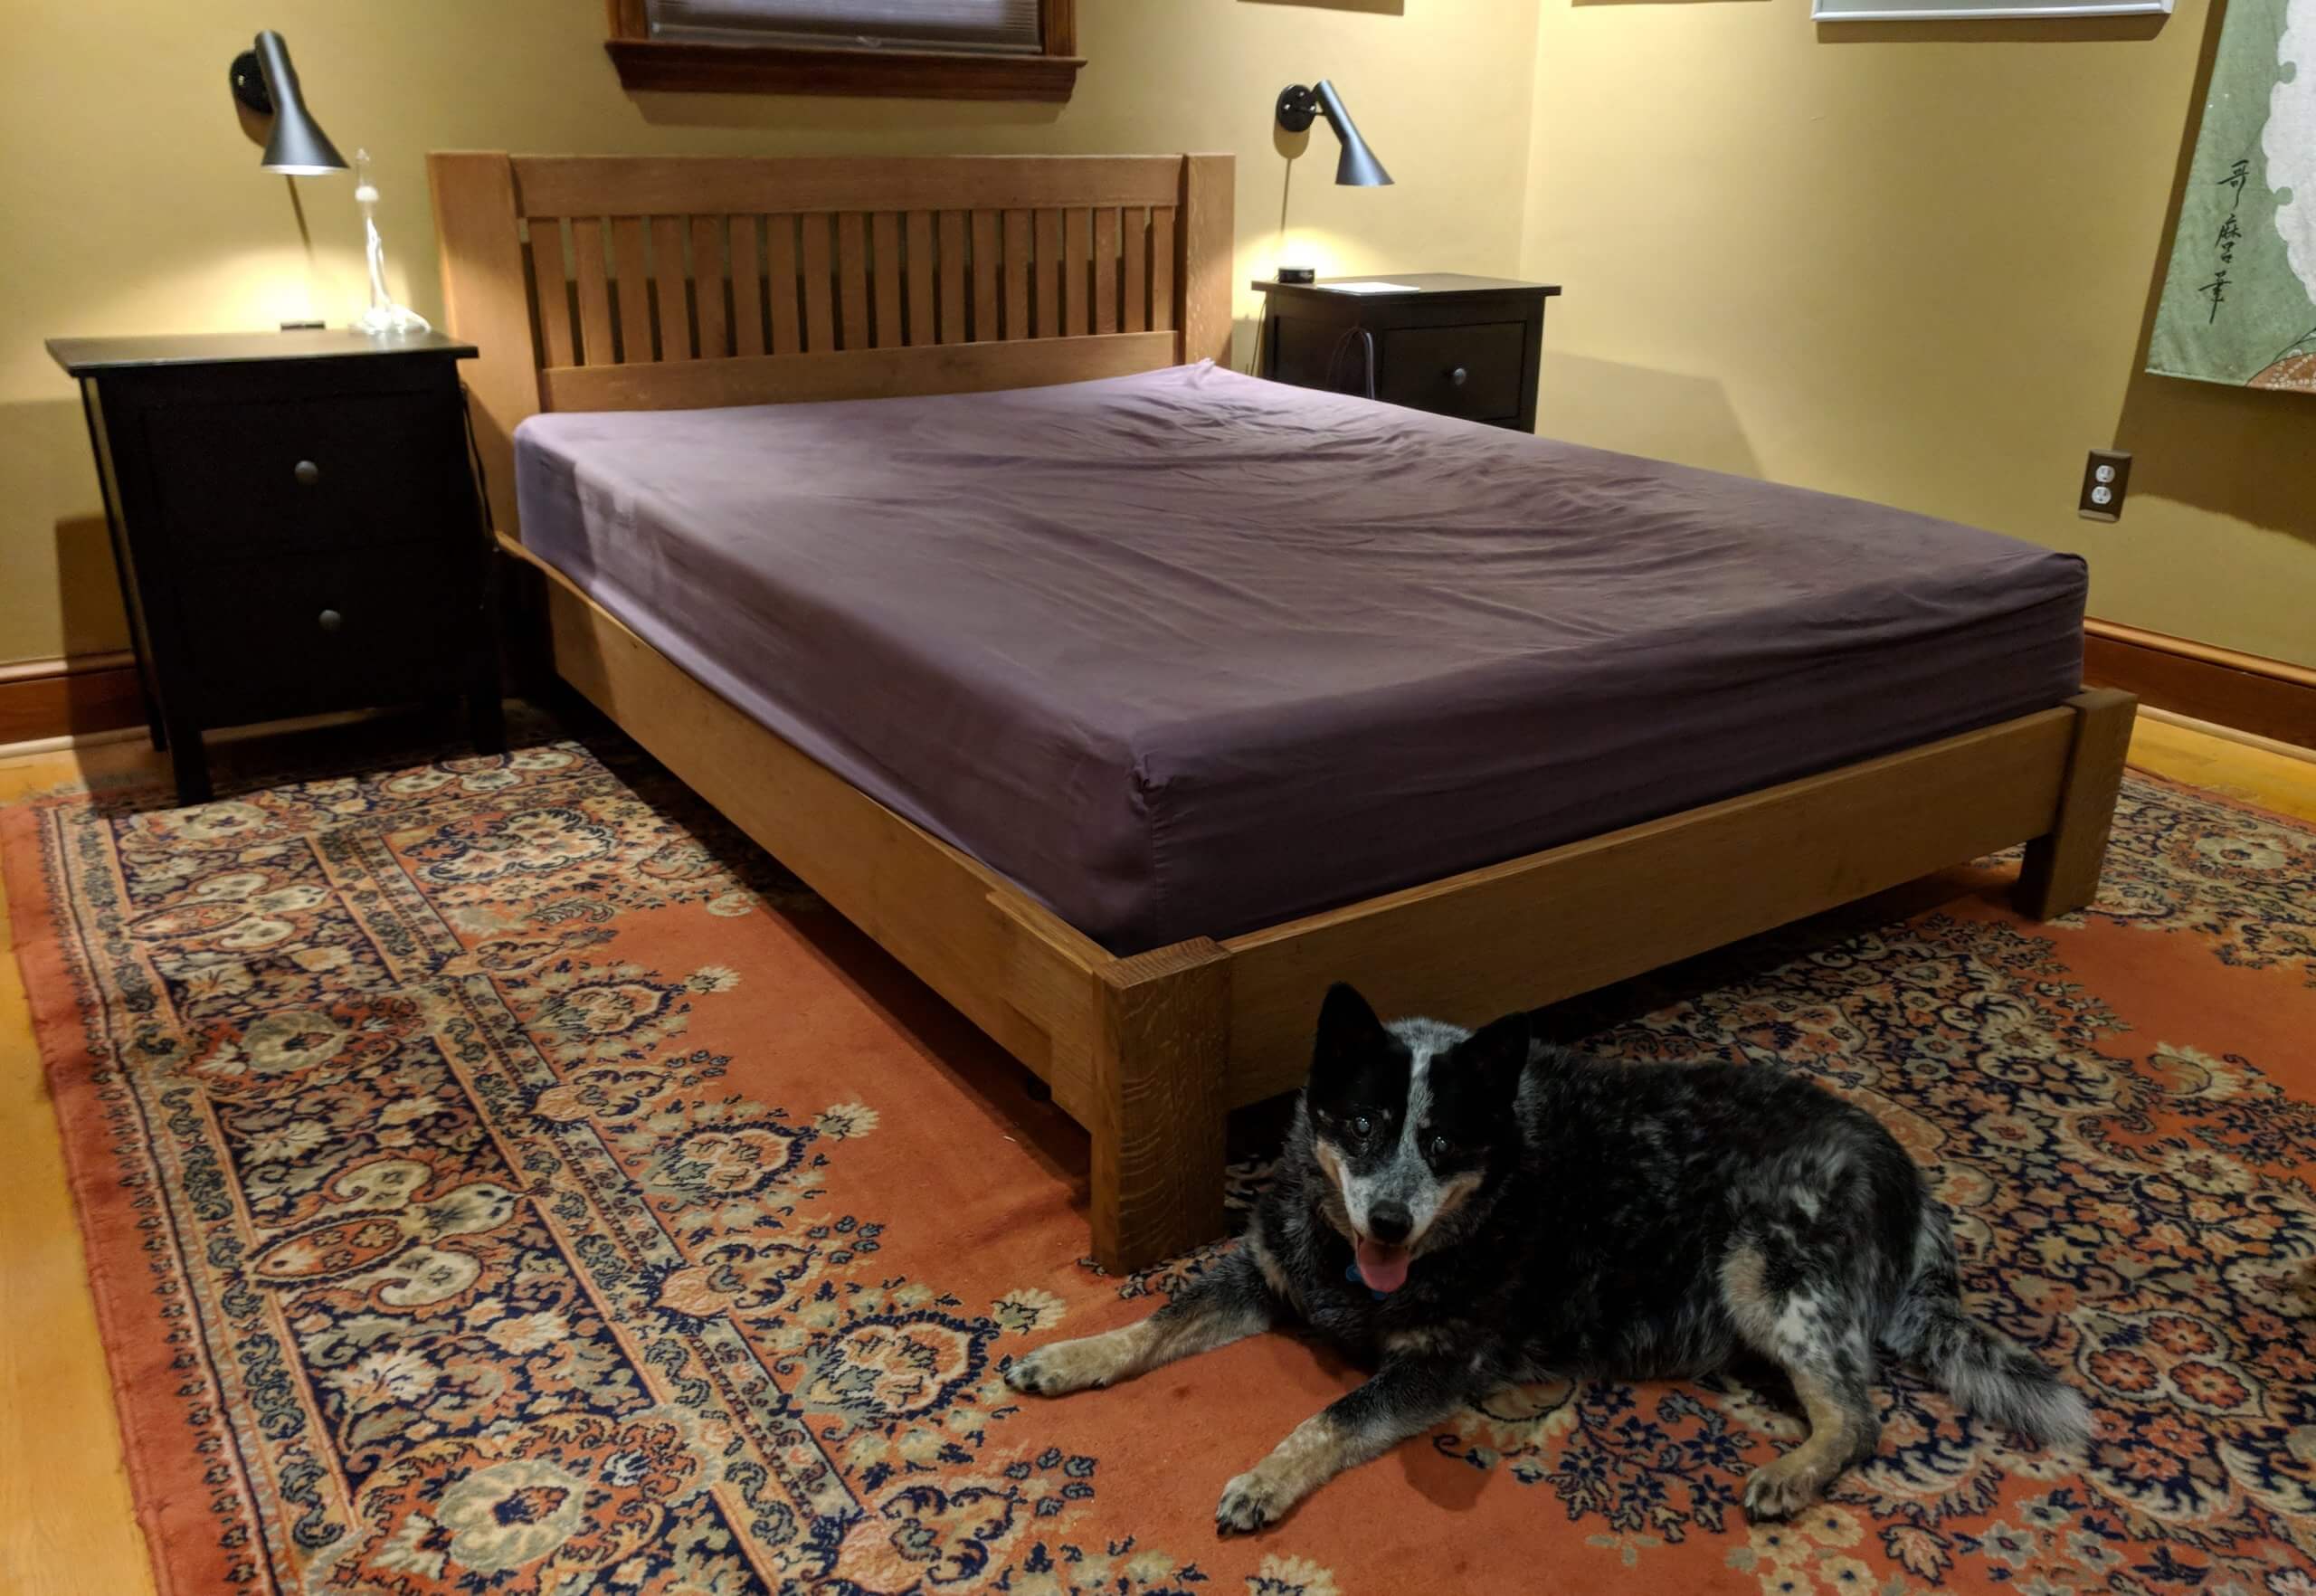
Mattresses come in standard sizes, so it is easy to decide how big to make your frame. A queen is 60″ by 80″ so I went for that size with 1/2″ extra for room for bedding. I am accustomed to a platform bed with no boxspring, so I had to tweak the style to work with that form. The legs can be raised or lowered to suit your needs. I am also very tall so I can’t use a bed that has a footboard that extends above the mattress, so again the design was adjusted to fit the bill.
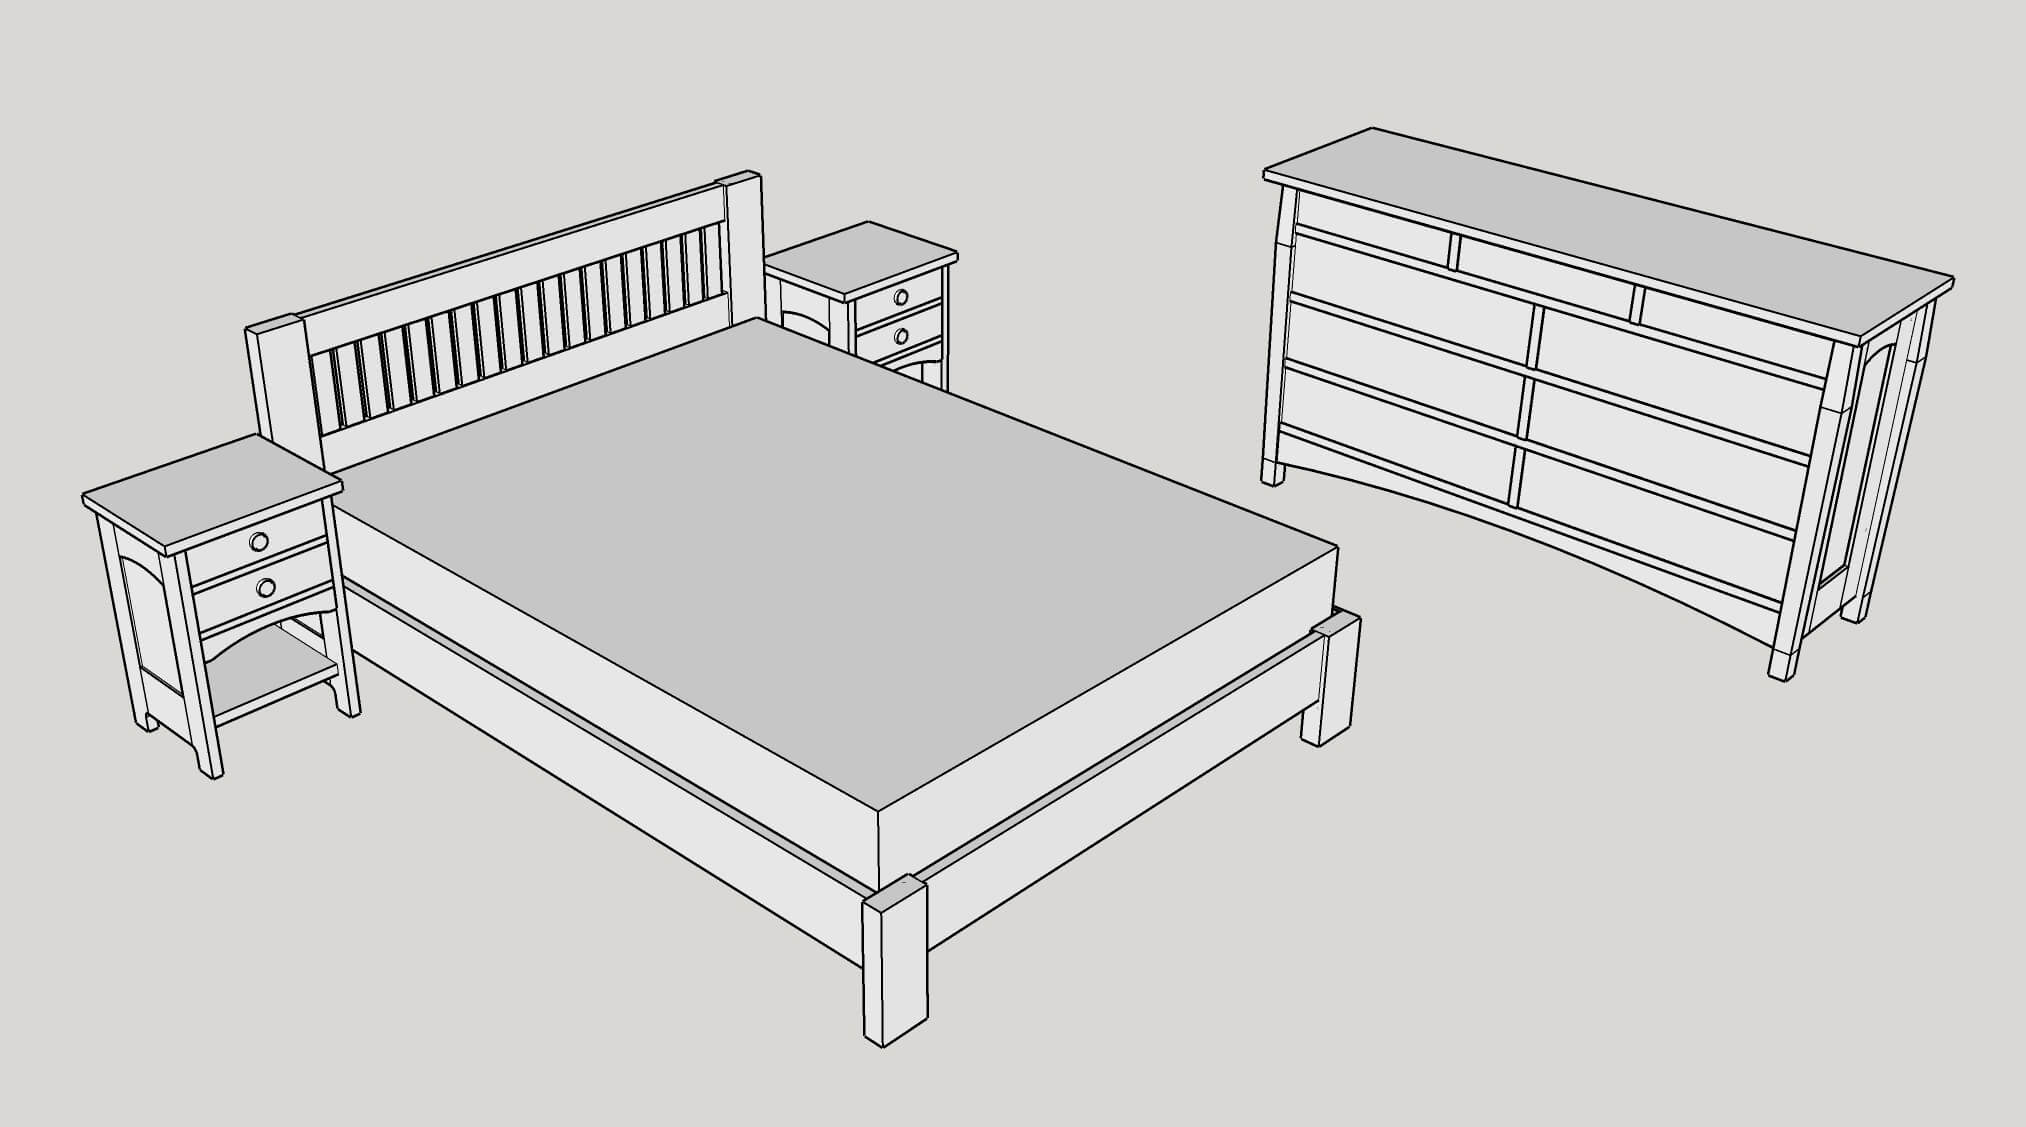
I started with a complete design of the bed with the supporting night stands and dresser, working for a unified look with some connecting elements. I love SketchUp and typically design with it after making rough pencil drawings. It is easy to tweak and adjust as needed and in this case I was able to get the bed to night stand height ratio I was seeking.
The dresser build is here and the night stand build is here.
Milling Lumber
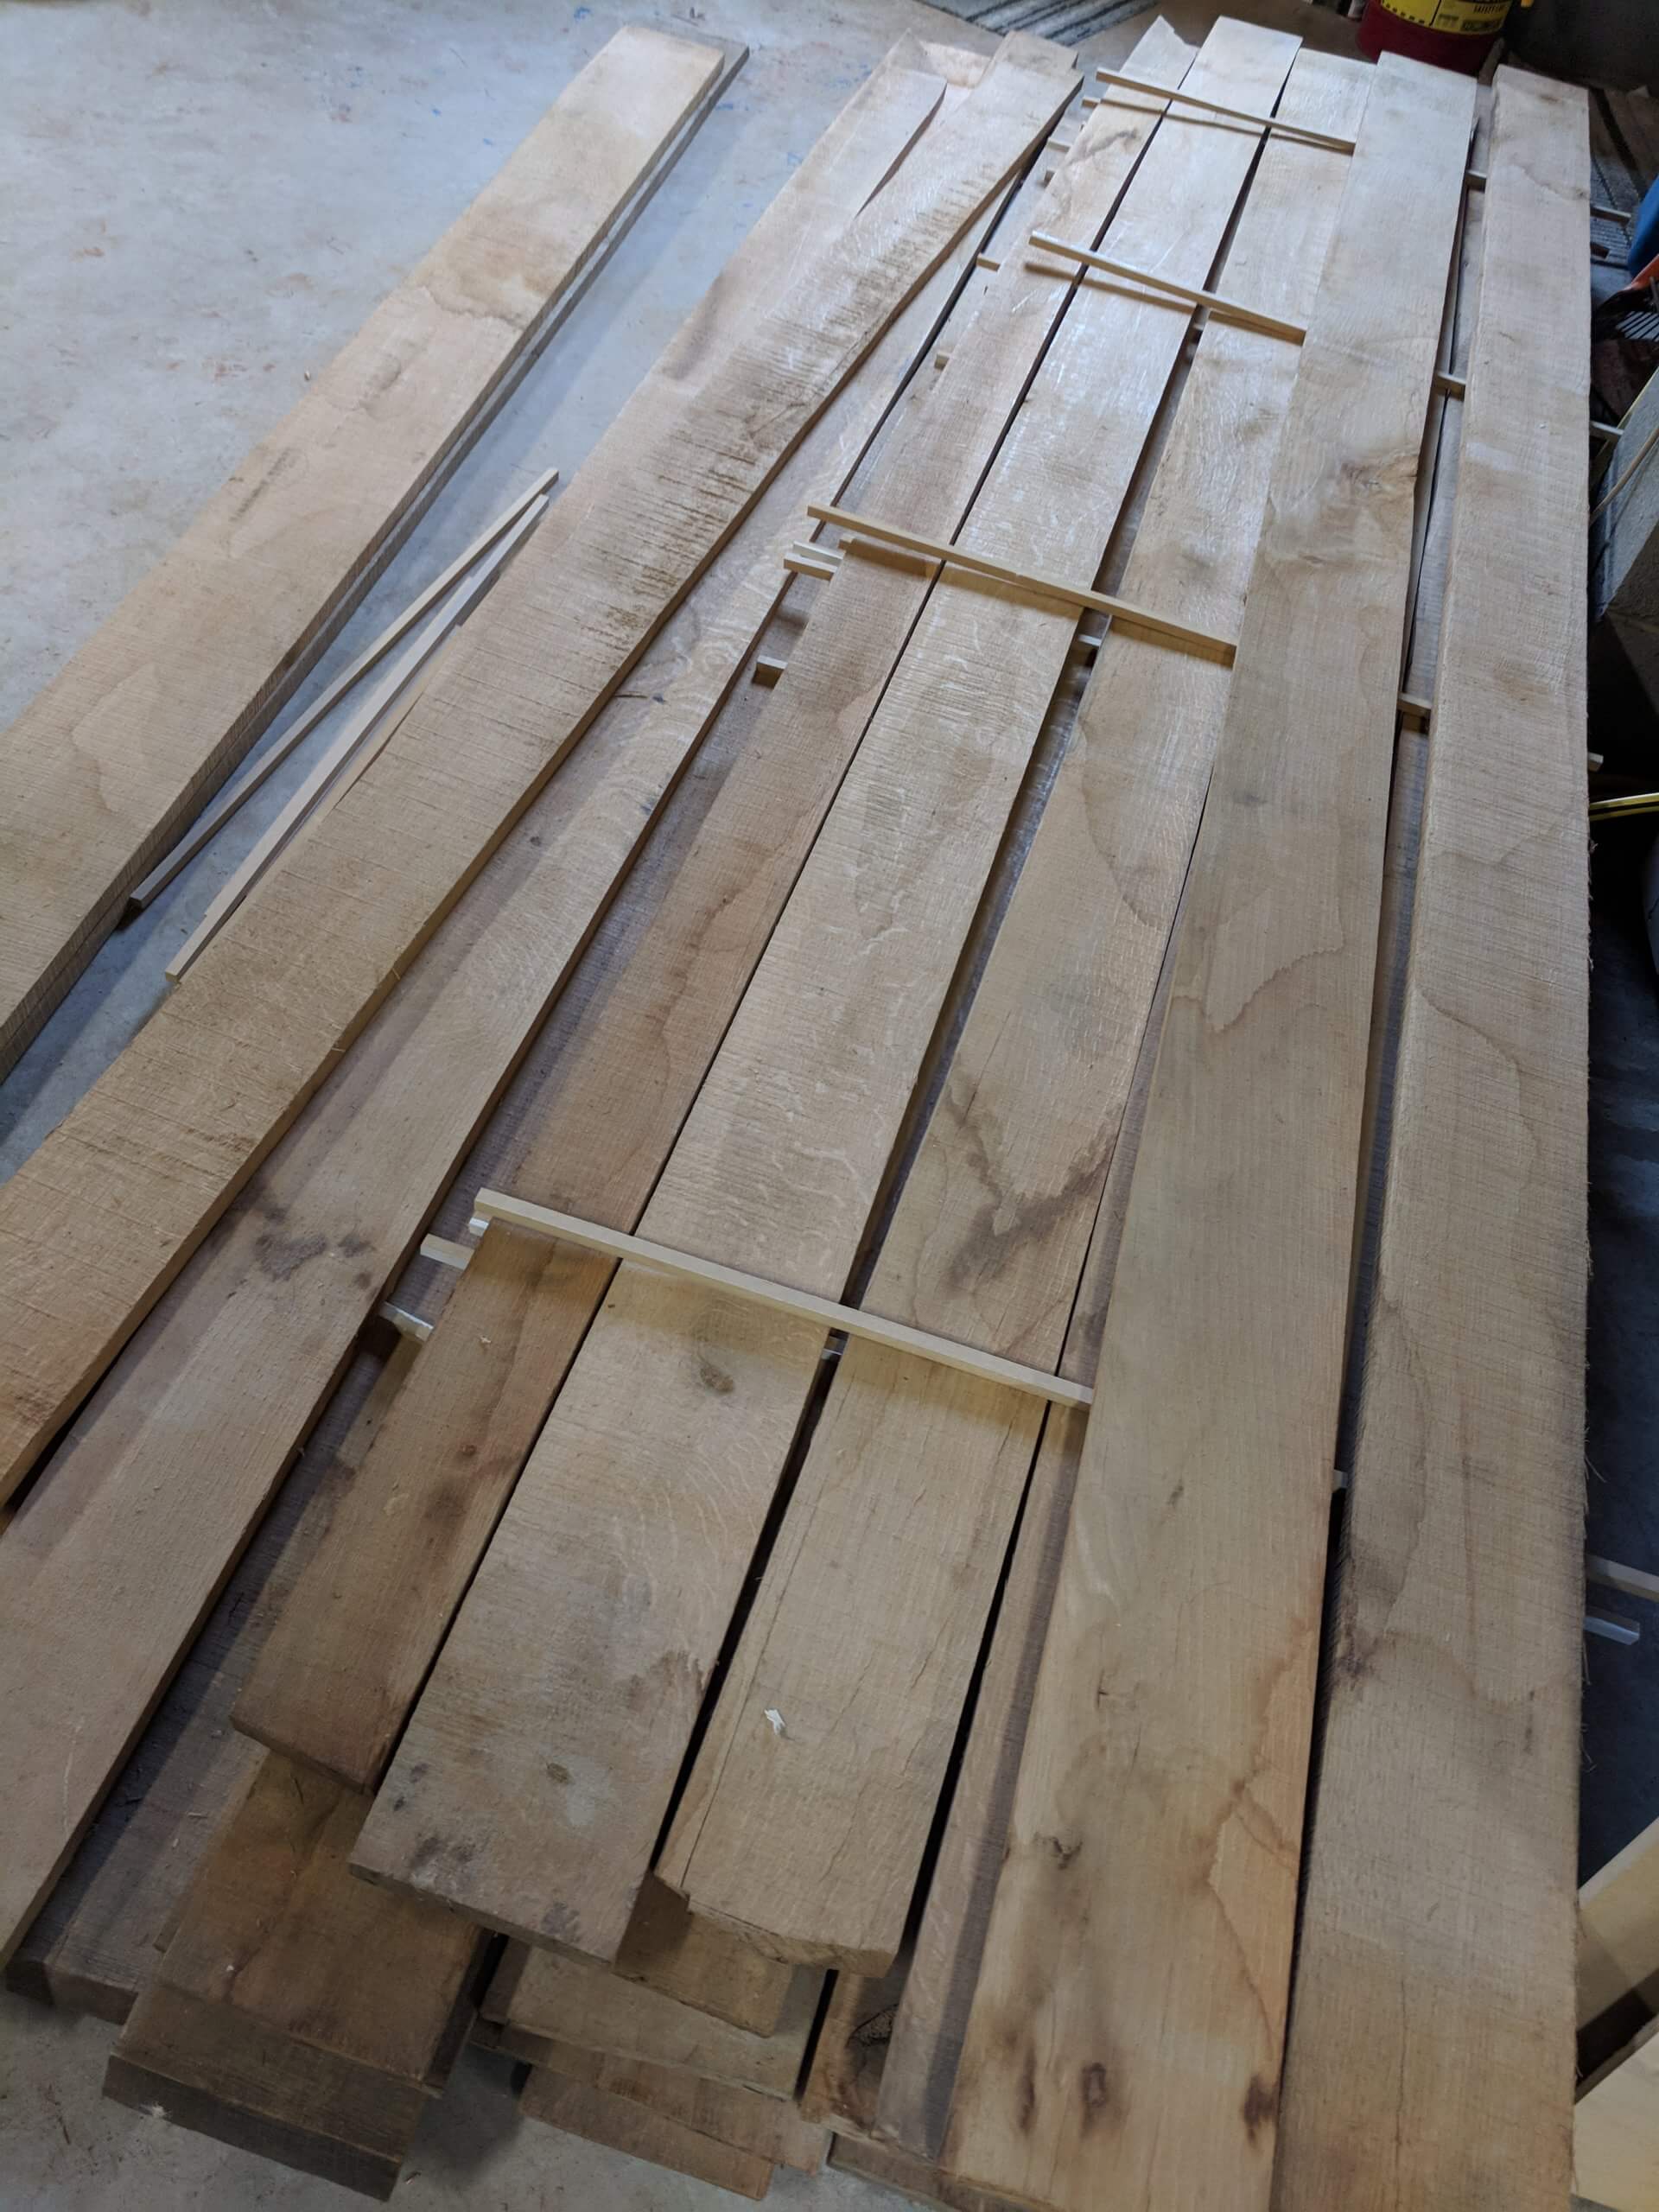
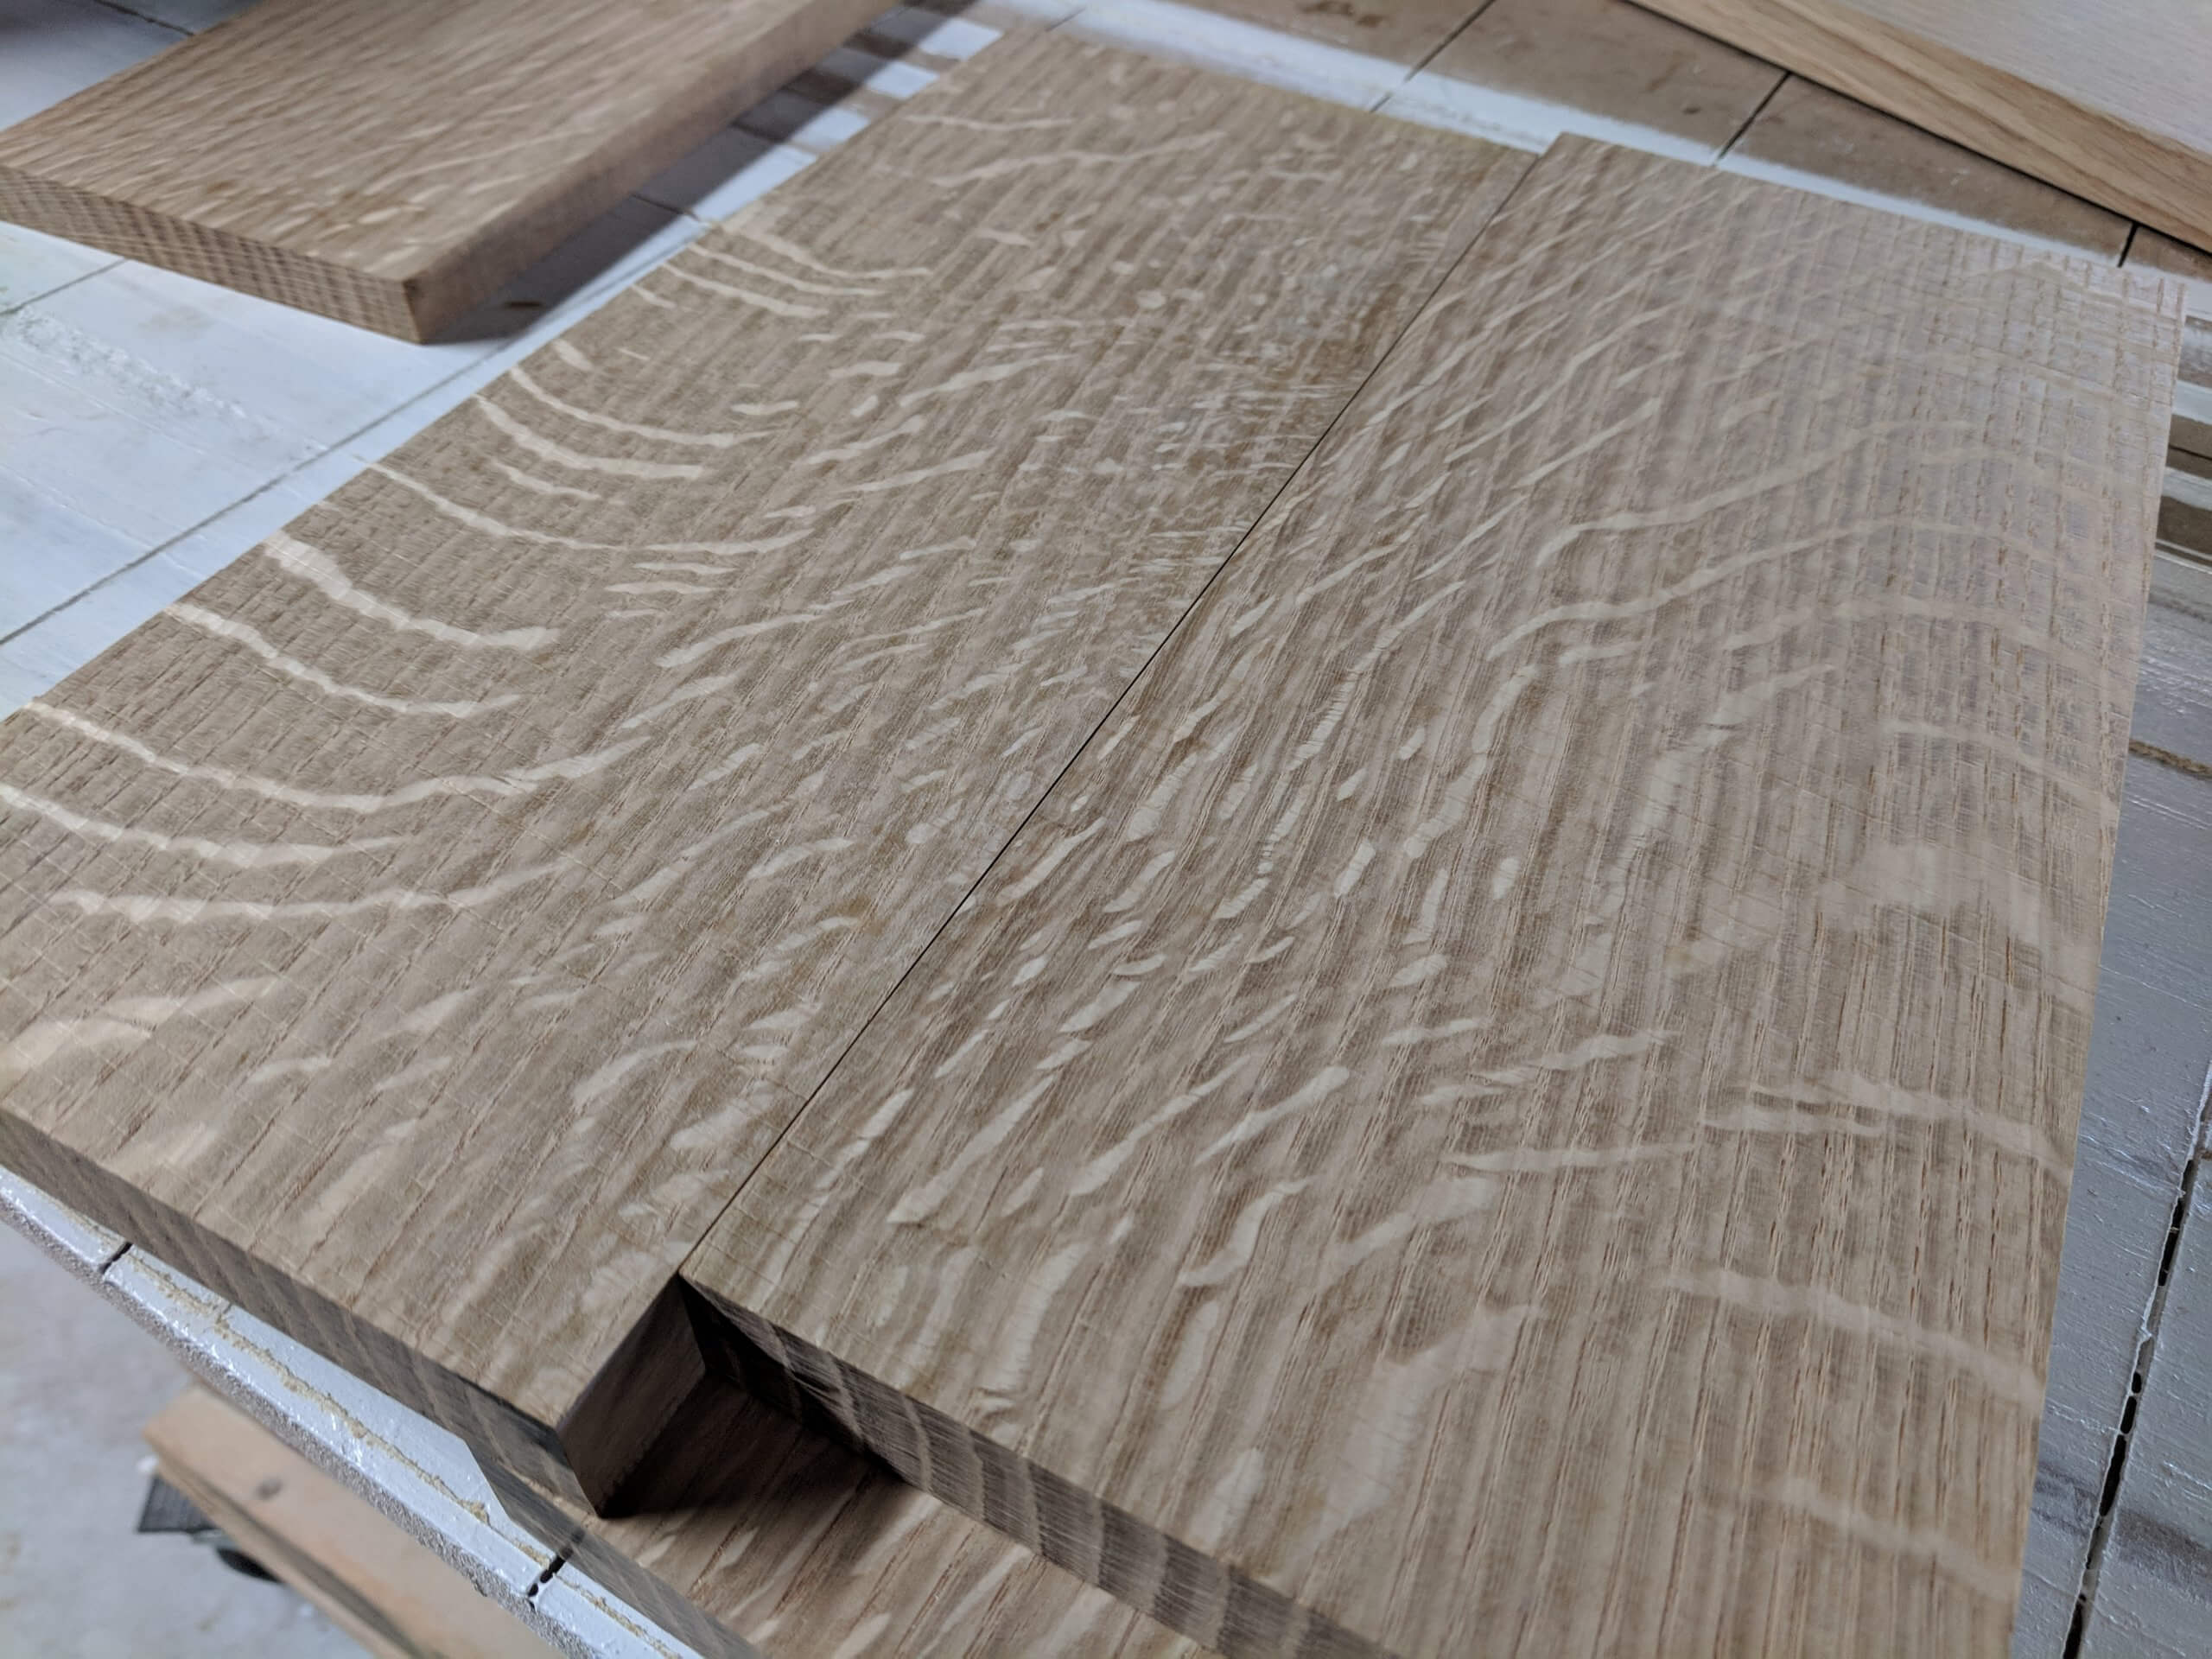
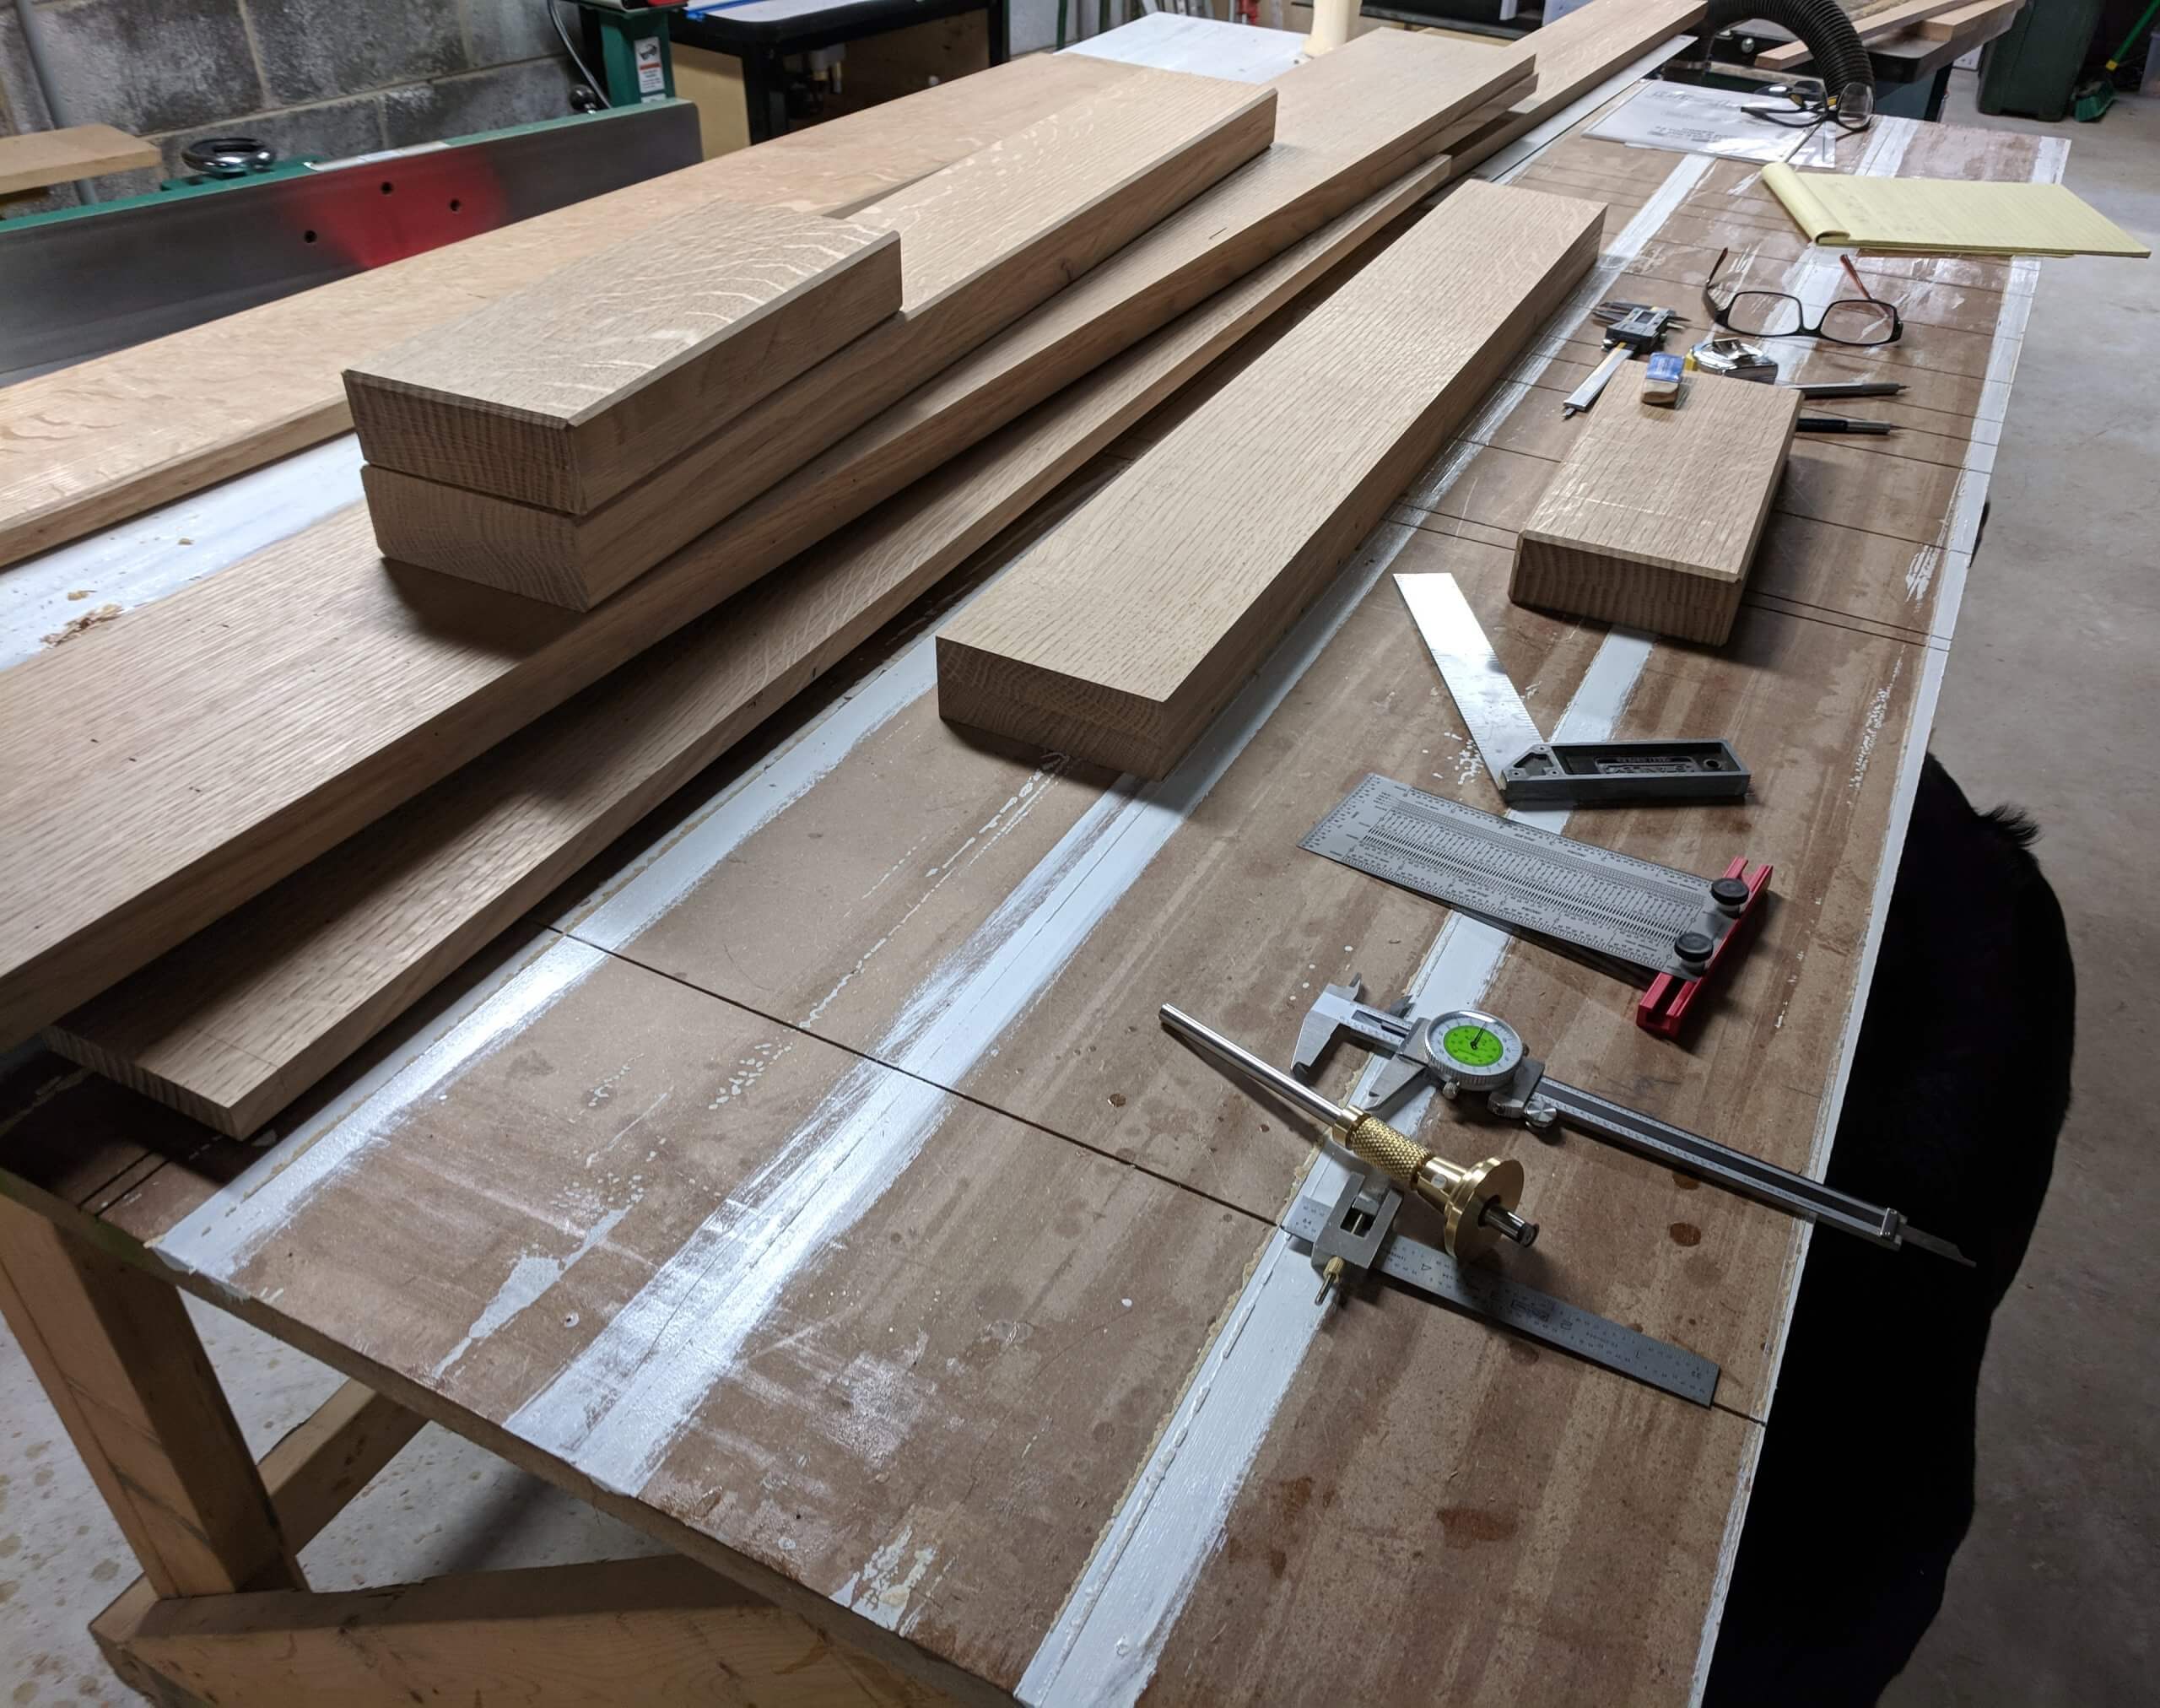
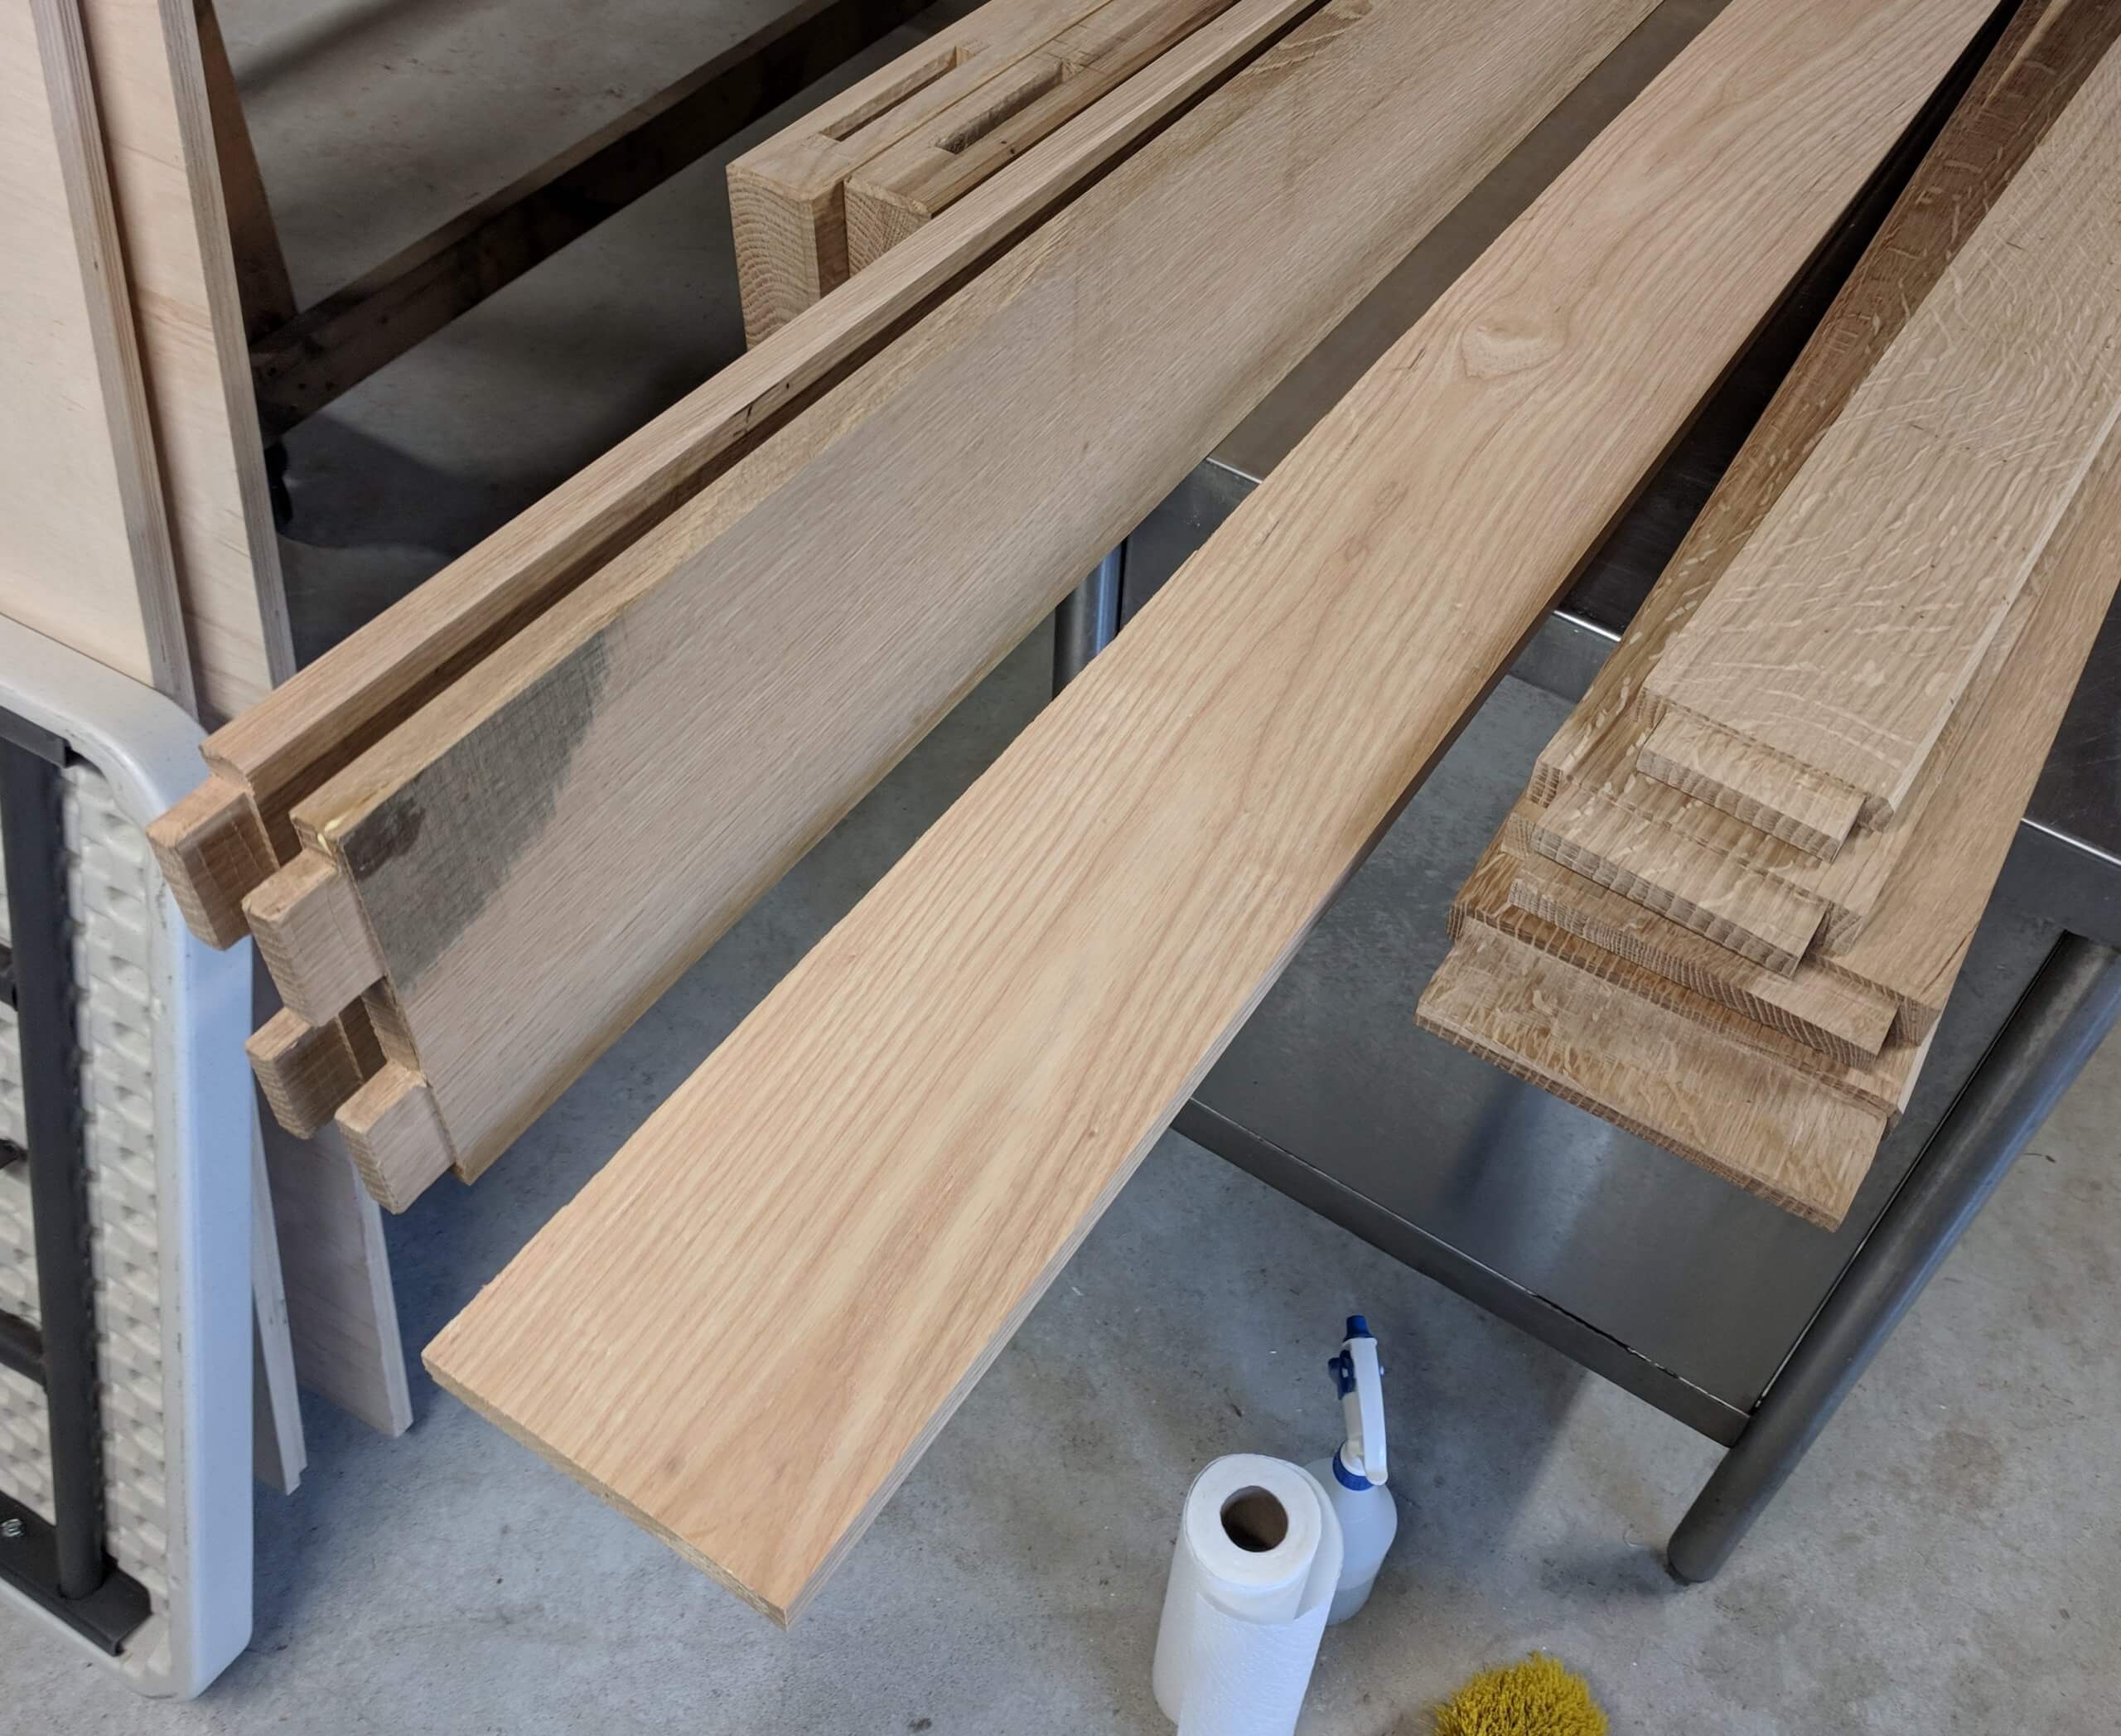
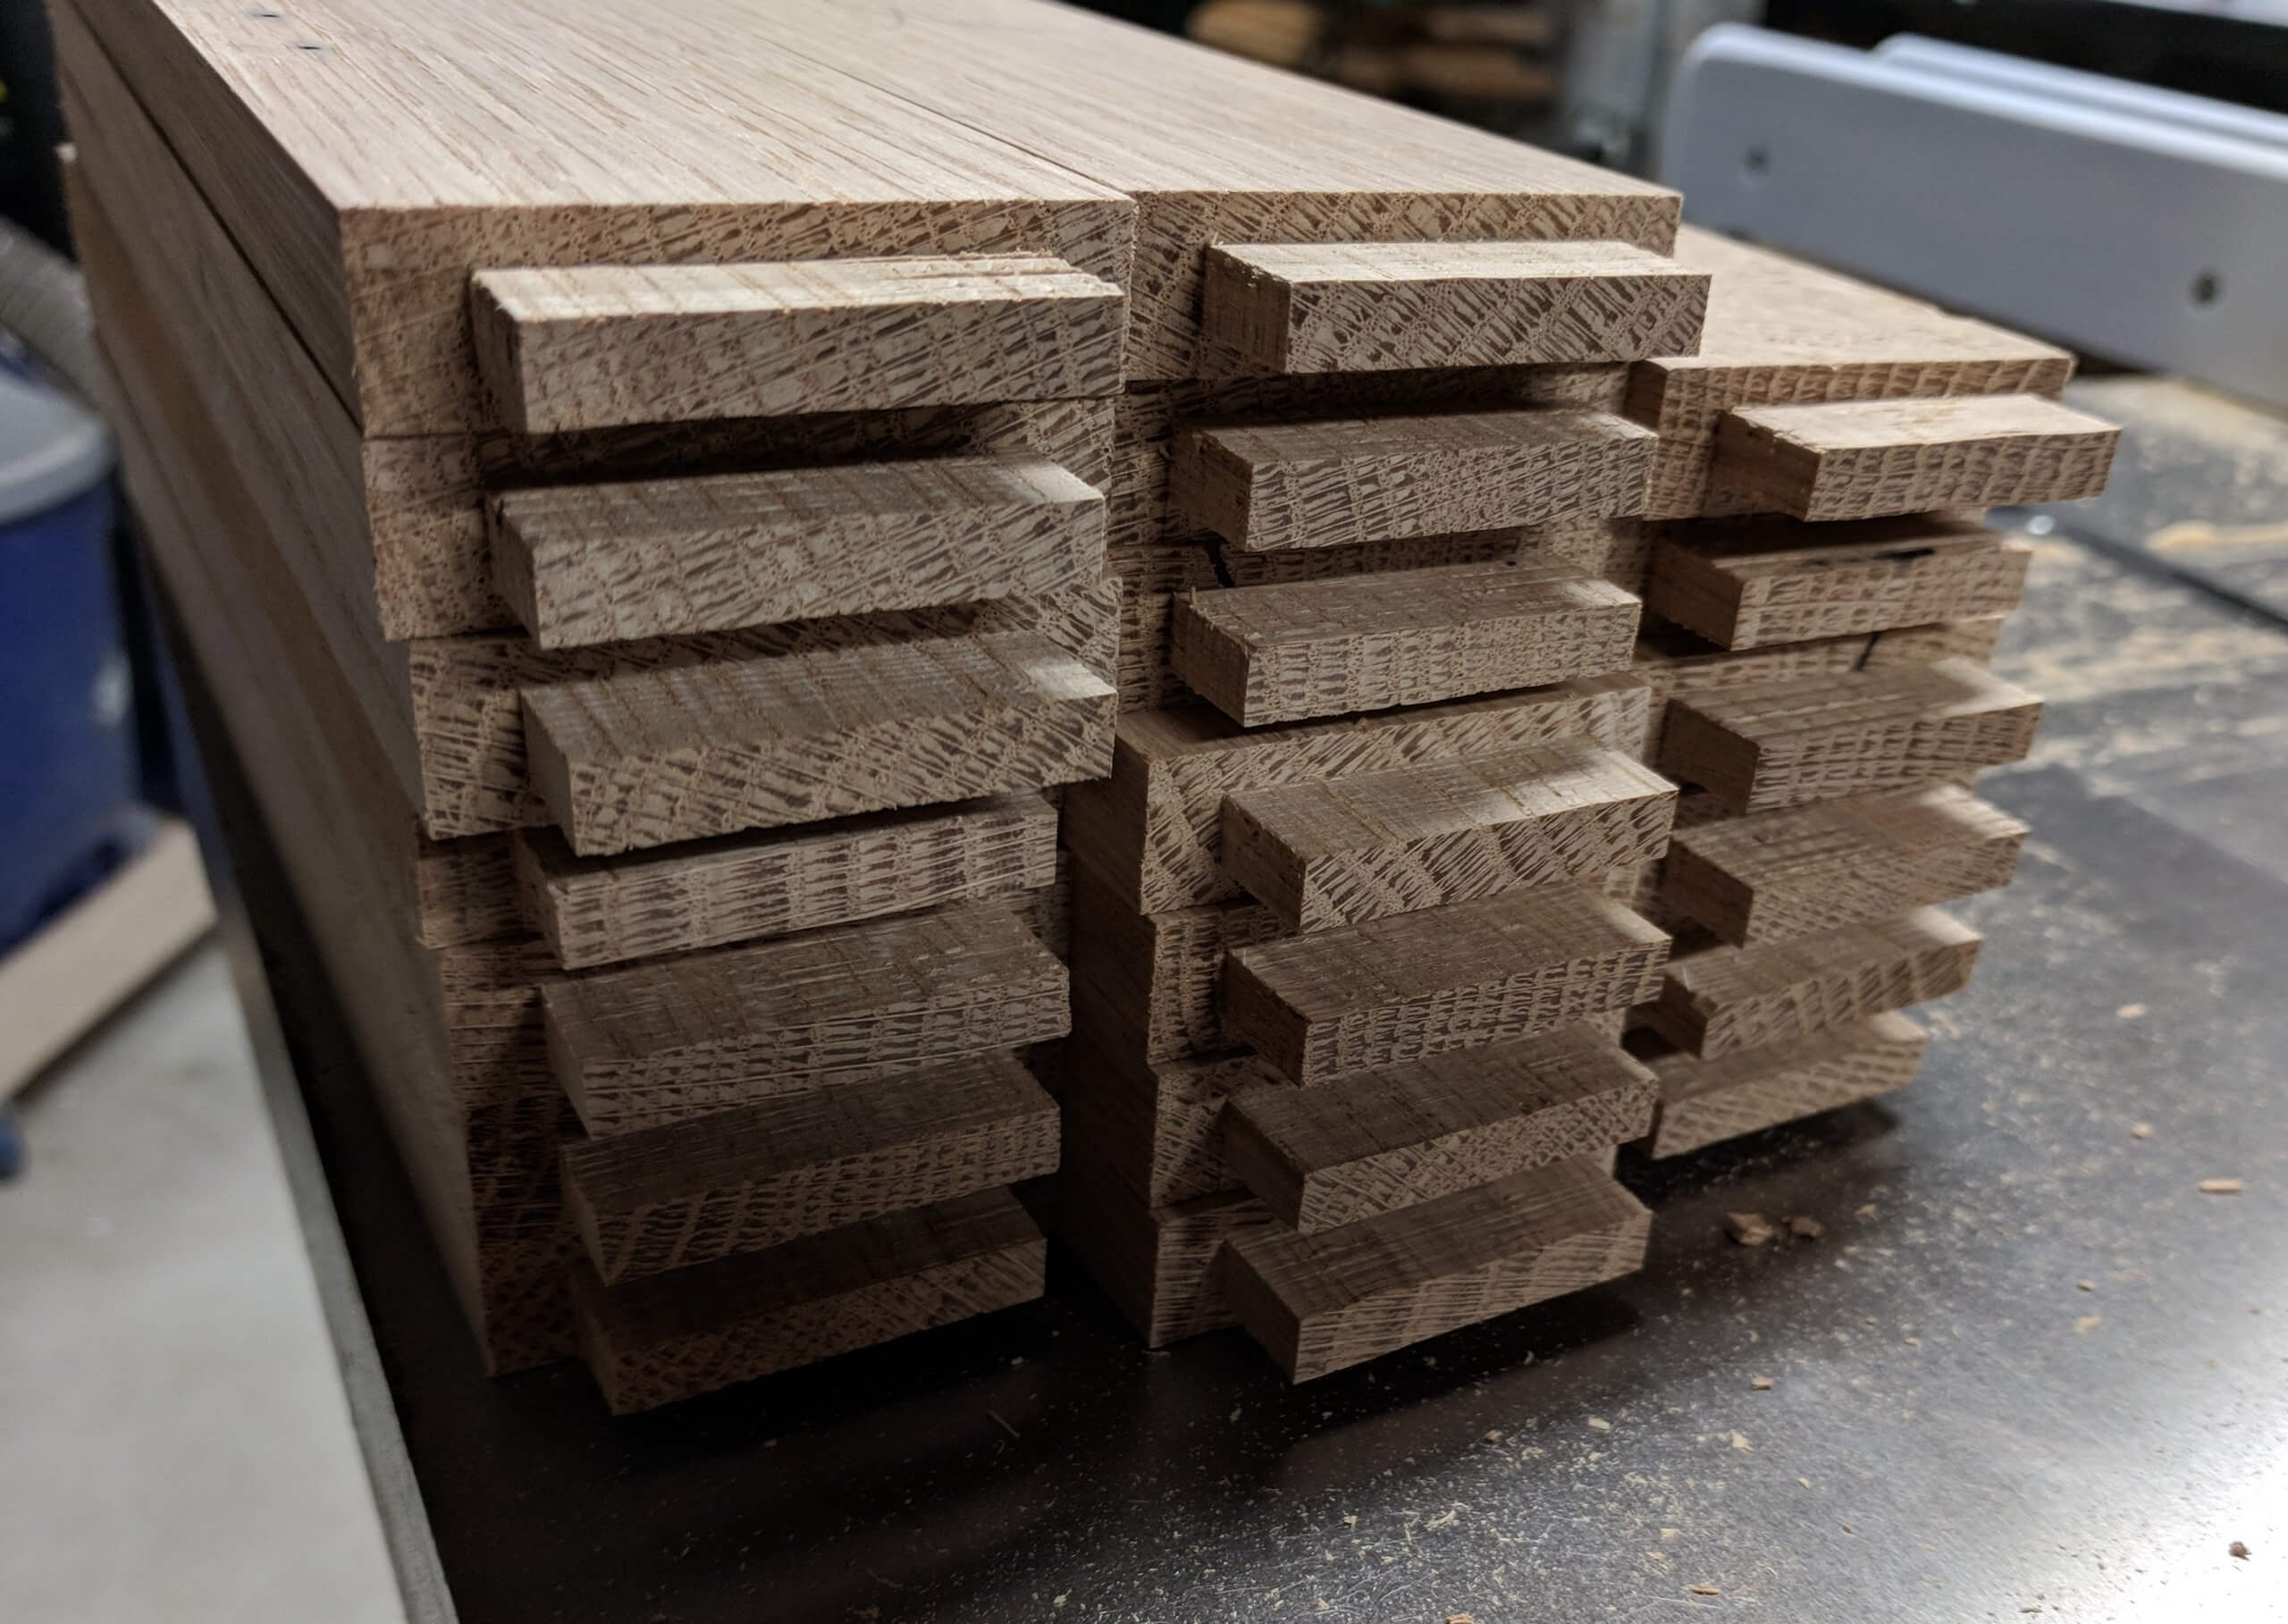
The first step was sorting through the rough lumber for grain that looked good and manifested the classic ray flecks or “tigers eye” pattern in quarter-sawn white oak. The side rails would need to be 80 1/2″ long to accommodate the mattress, so finding longer boards was the priority.
I selected boards with a good pattern and did the typical prep. They went through the joiner to make a flat edge then a square edge, then the planner to get to equal thickness. When working with rough wood you don’t have to shoot for a particular thickness, just equal thickness. When ripping to width on the table saw I also rip 1/16″ wide so I can take that off at the joiner for a better finish.
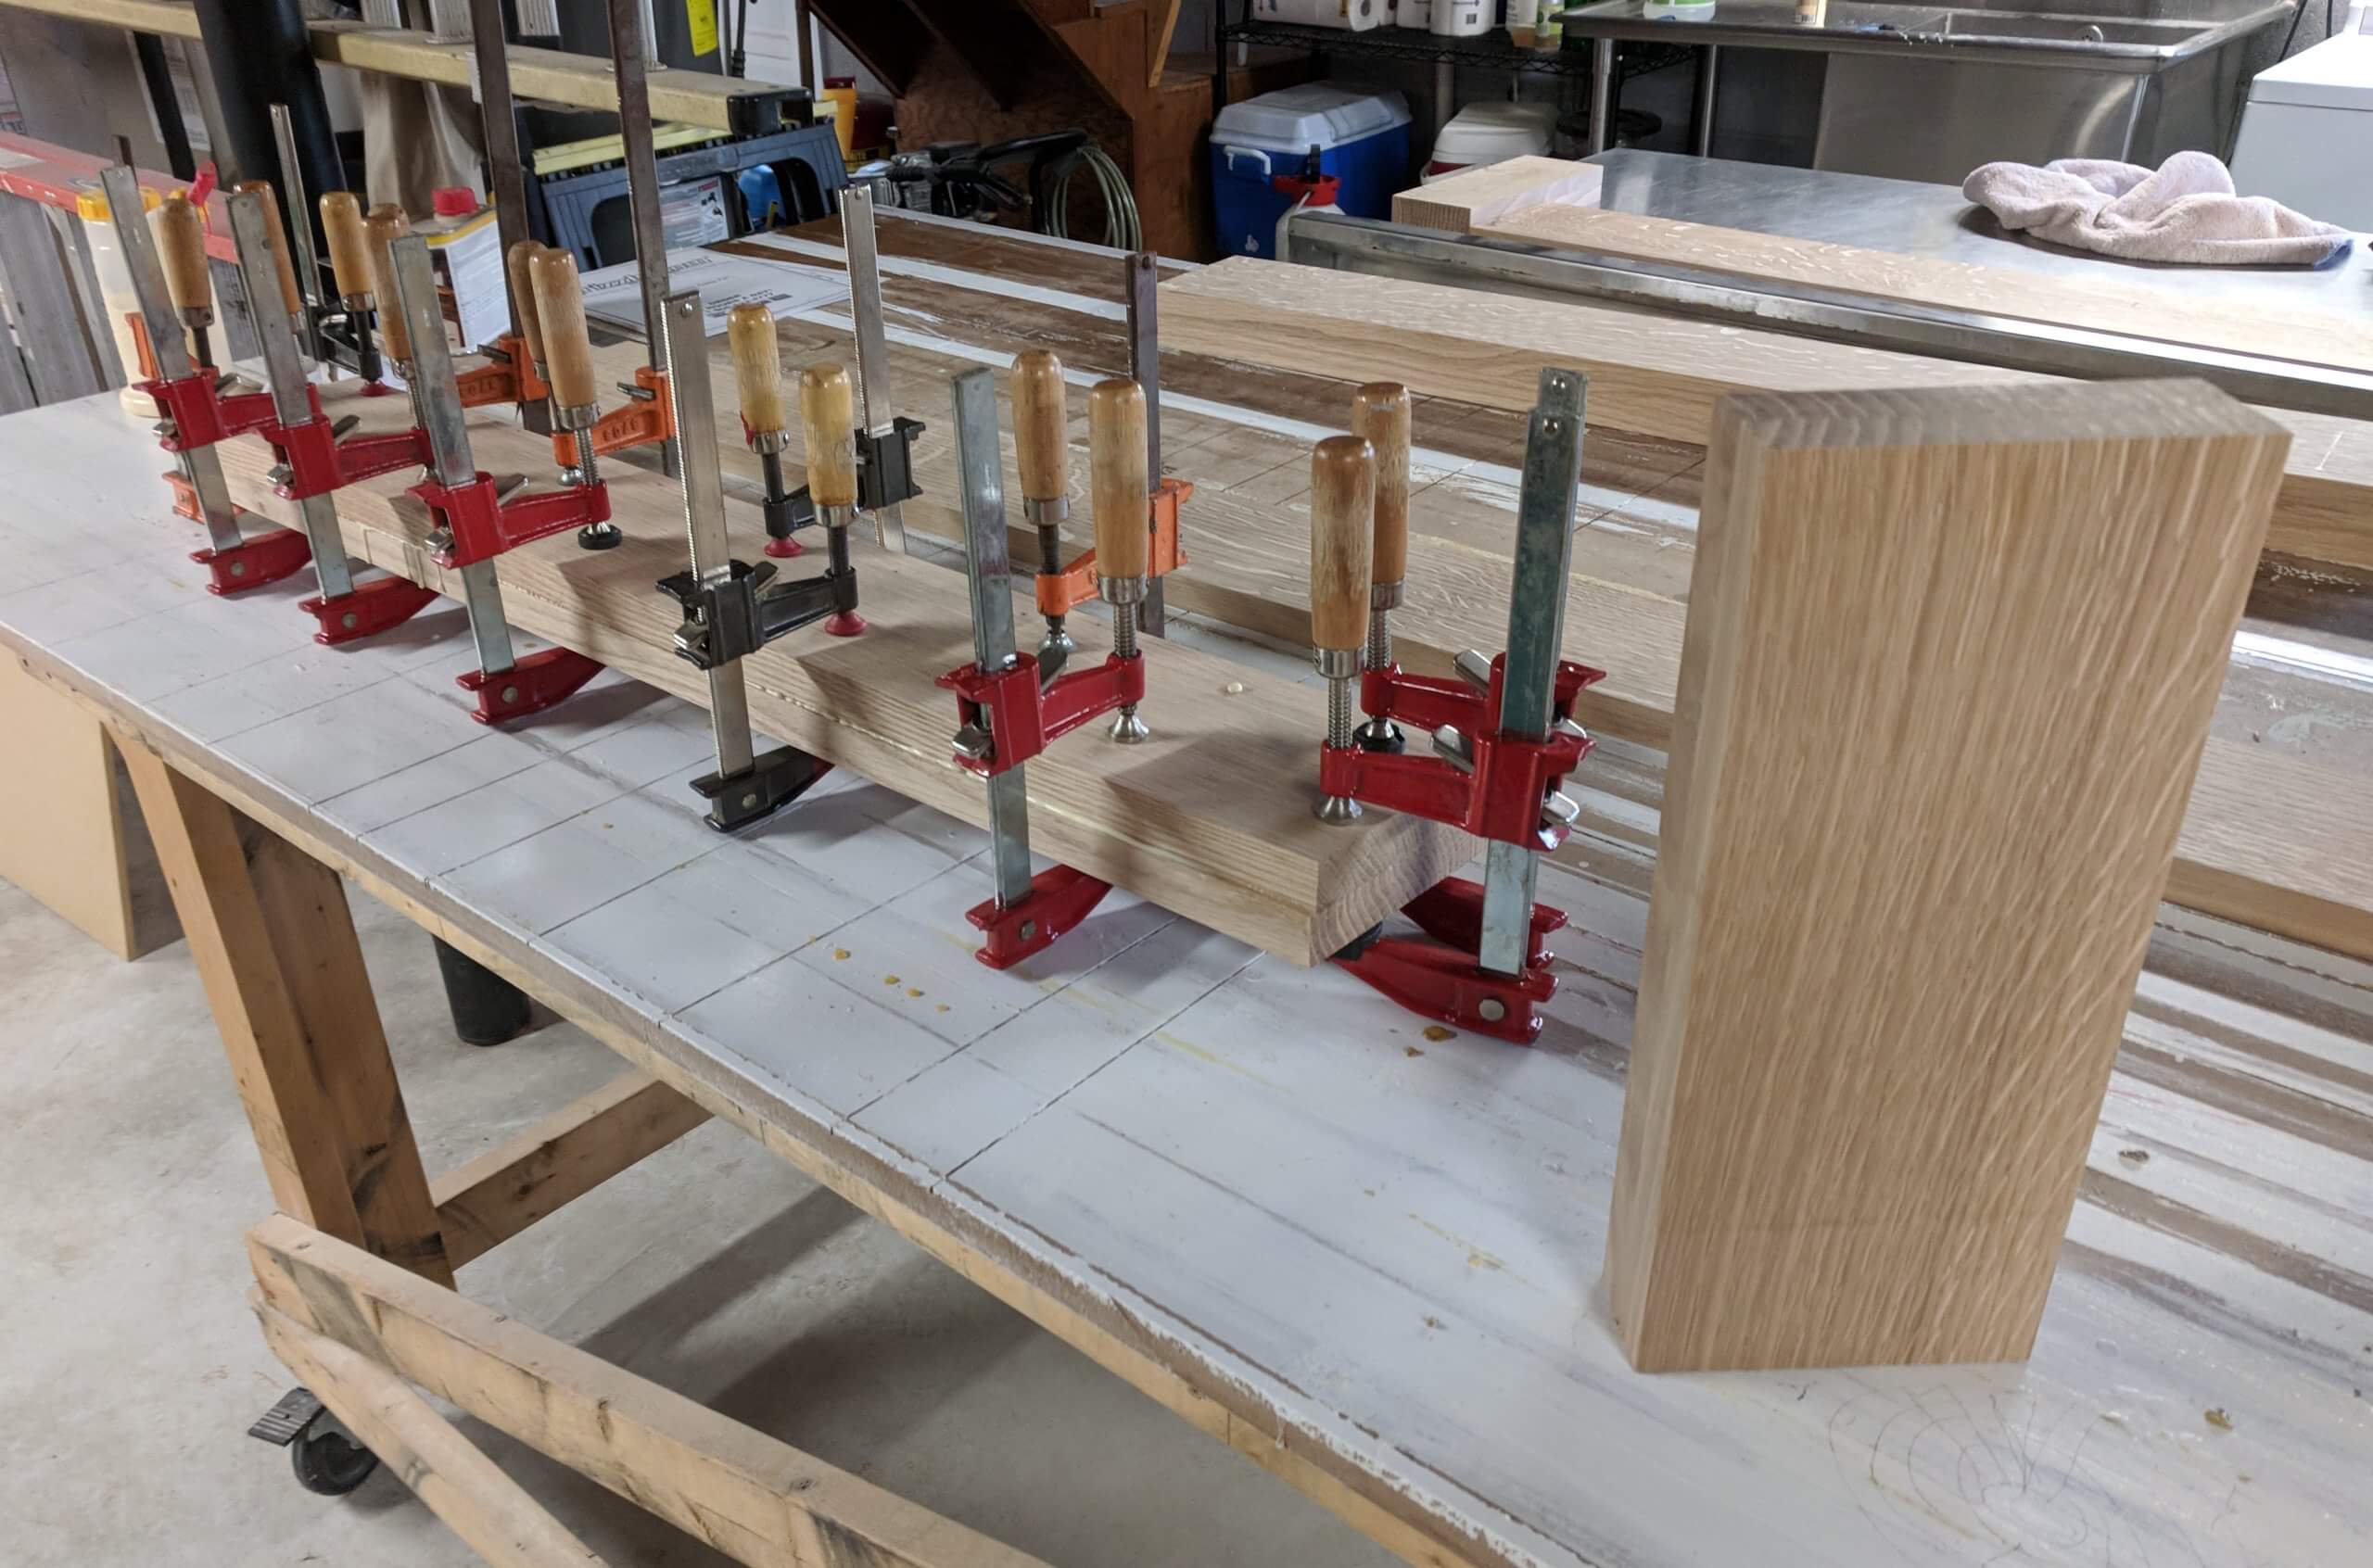
I only had four quarter (1″) stock, so to make any meaningful headboard/footboard would require gluing up a few boards to make a post of sorts. The width was more or less random based on how wide the smallest milled up, but I was shooting for 7″. The front legs were cut to 13 1/8″ and the back to 36″ but were an inch longer during the “workup” phase. They were glued with ample clamps making certain to keep the best face to the outside.
Once glued, they were treated as raw lumber again with a fresh pass through the joiner then the planner to get all parts to the same size. One end was cut square and the other was cut to finished length.
Layout and Mortises
The design calls for a single wide footboard stretcher and three smaller headboard stretchers as well as two 80 1/2″ side boards. The length of the stretchers could not be determined yet as the location of the sideboards in the posts had not been determined, but they could be cut at 60″ and trimmed to the finished size later. Lumber for the stretchers was sorted for the best show face. The width of the center rail in the headboard was somewhat important as I wanted the amount shown above the mattress to be the same as the top rail, but to extend down below the mattress so it would not turn into a pillow trap.
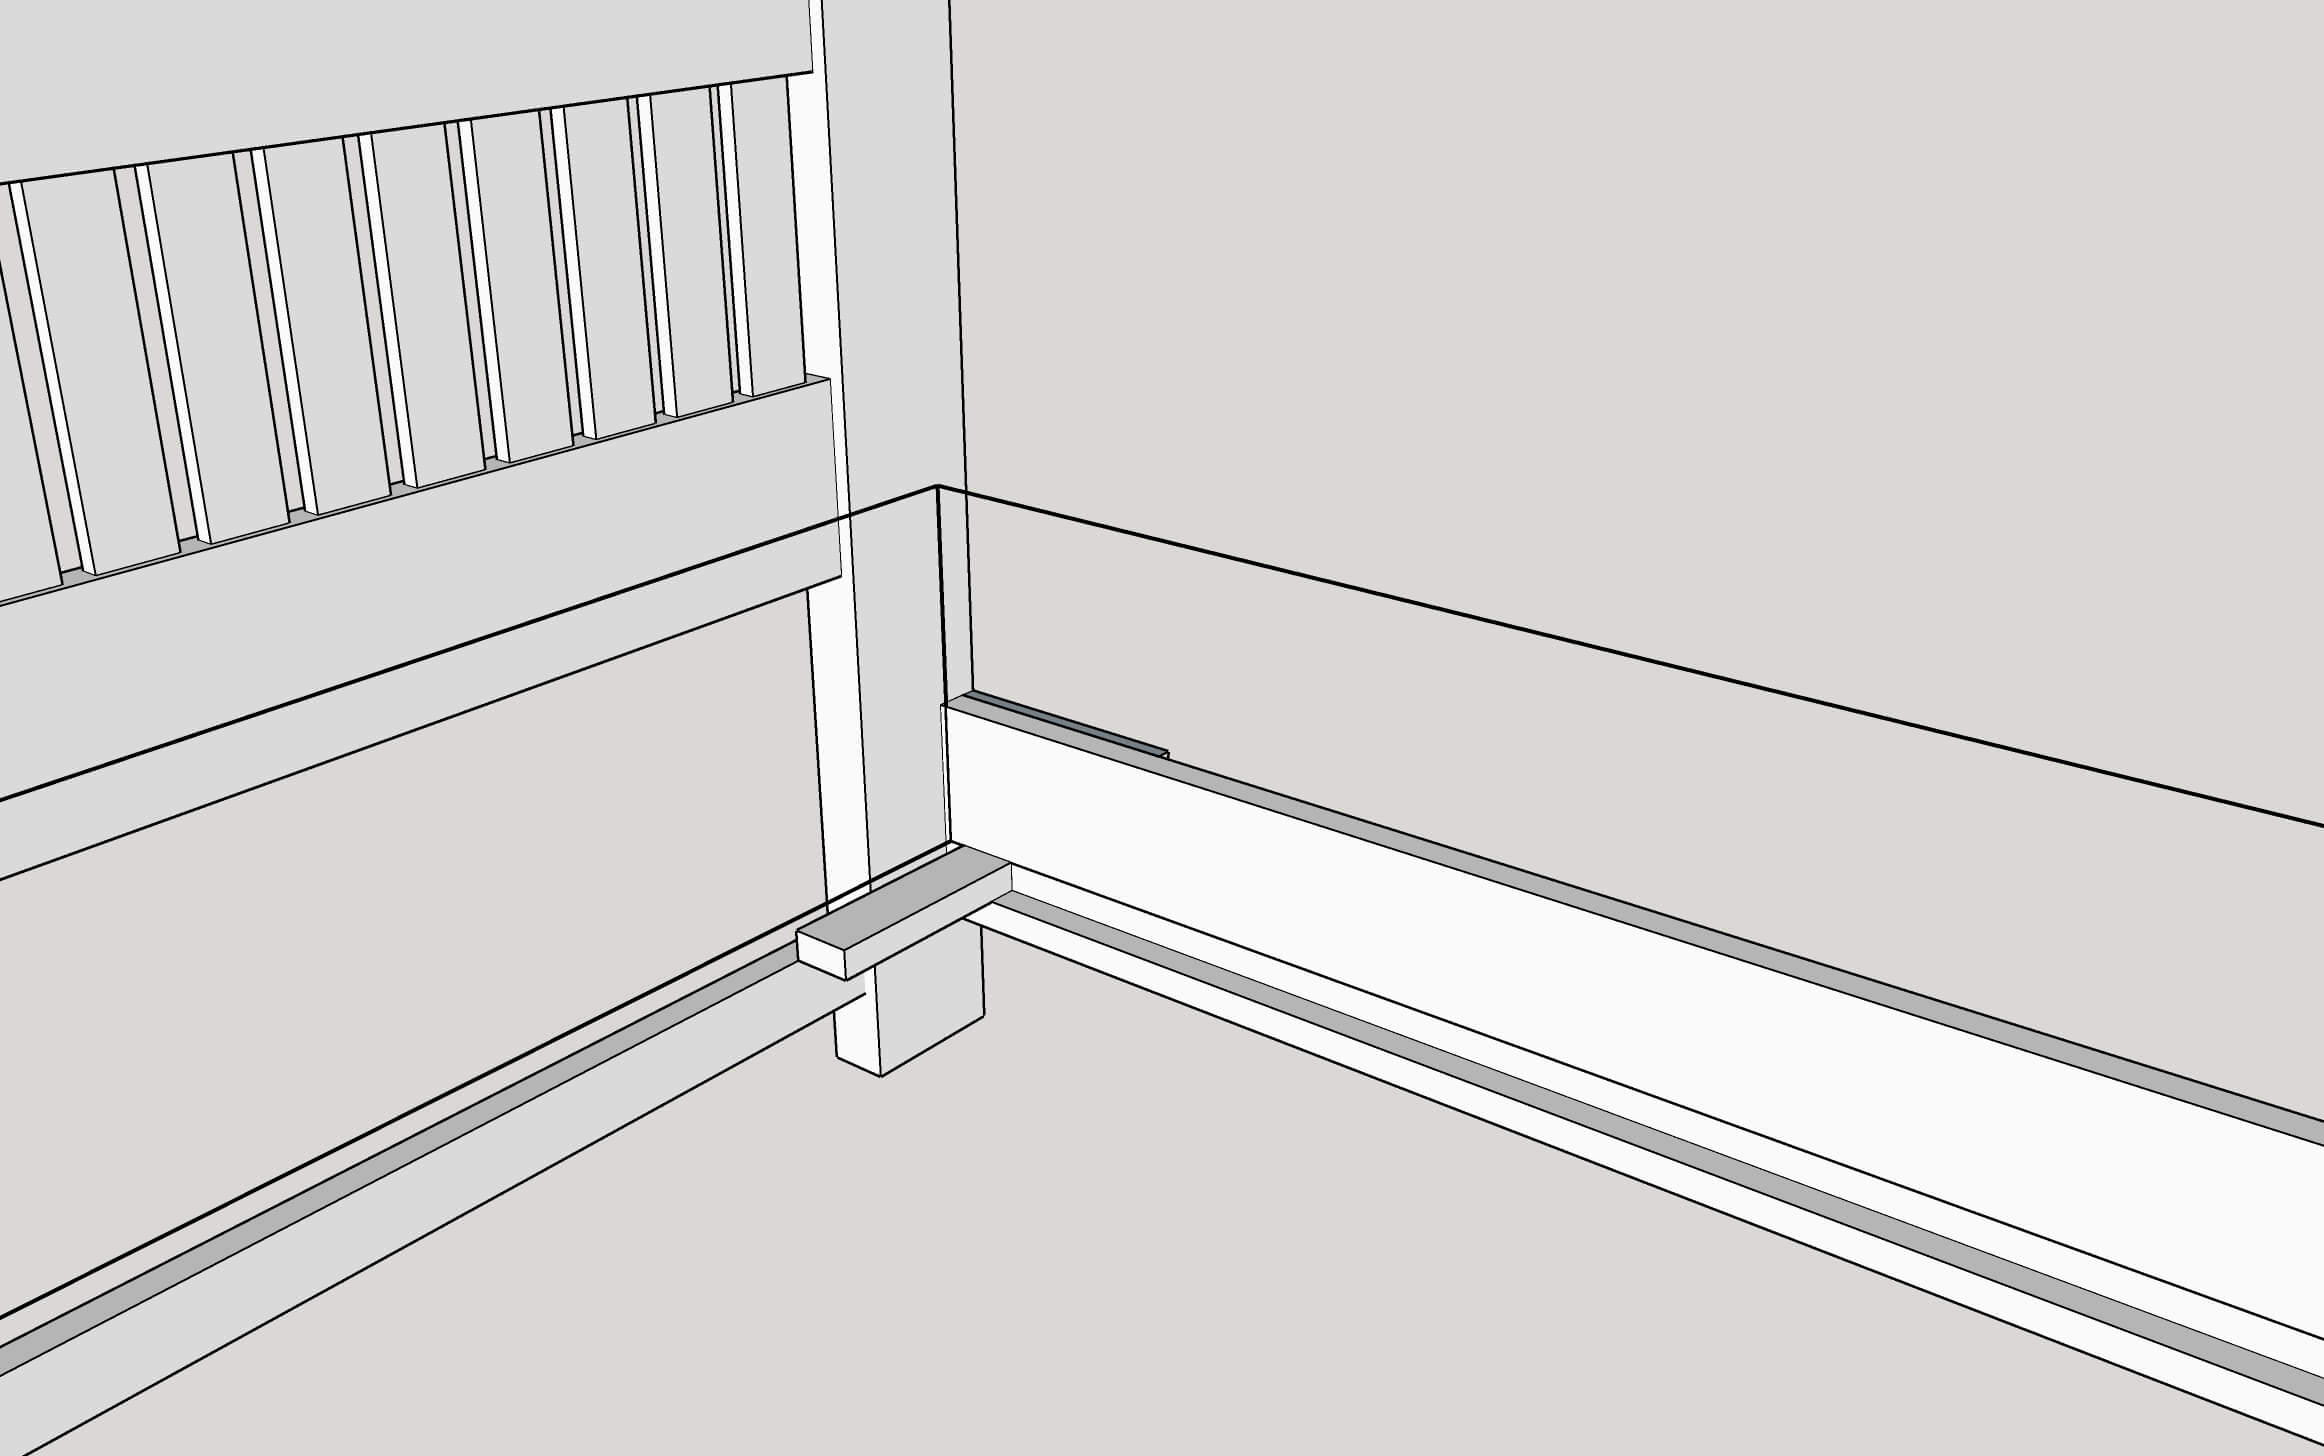
This was fairly easy to determine in SketchUp by drawing the mattress (mine was 12″) and placing it in the frame (the black lines in the image are the mattress dimensions). A top rail width of 4″ looked good and the bottom rail was then extended to a width of 6″ to give 2″ that fell below the mattress. The mattress model also indicated where on the posts the center rail should be to reach the desired spacing with the mattress I was using.
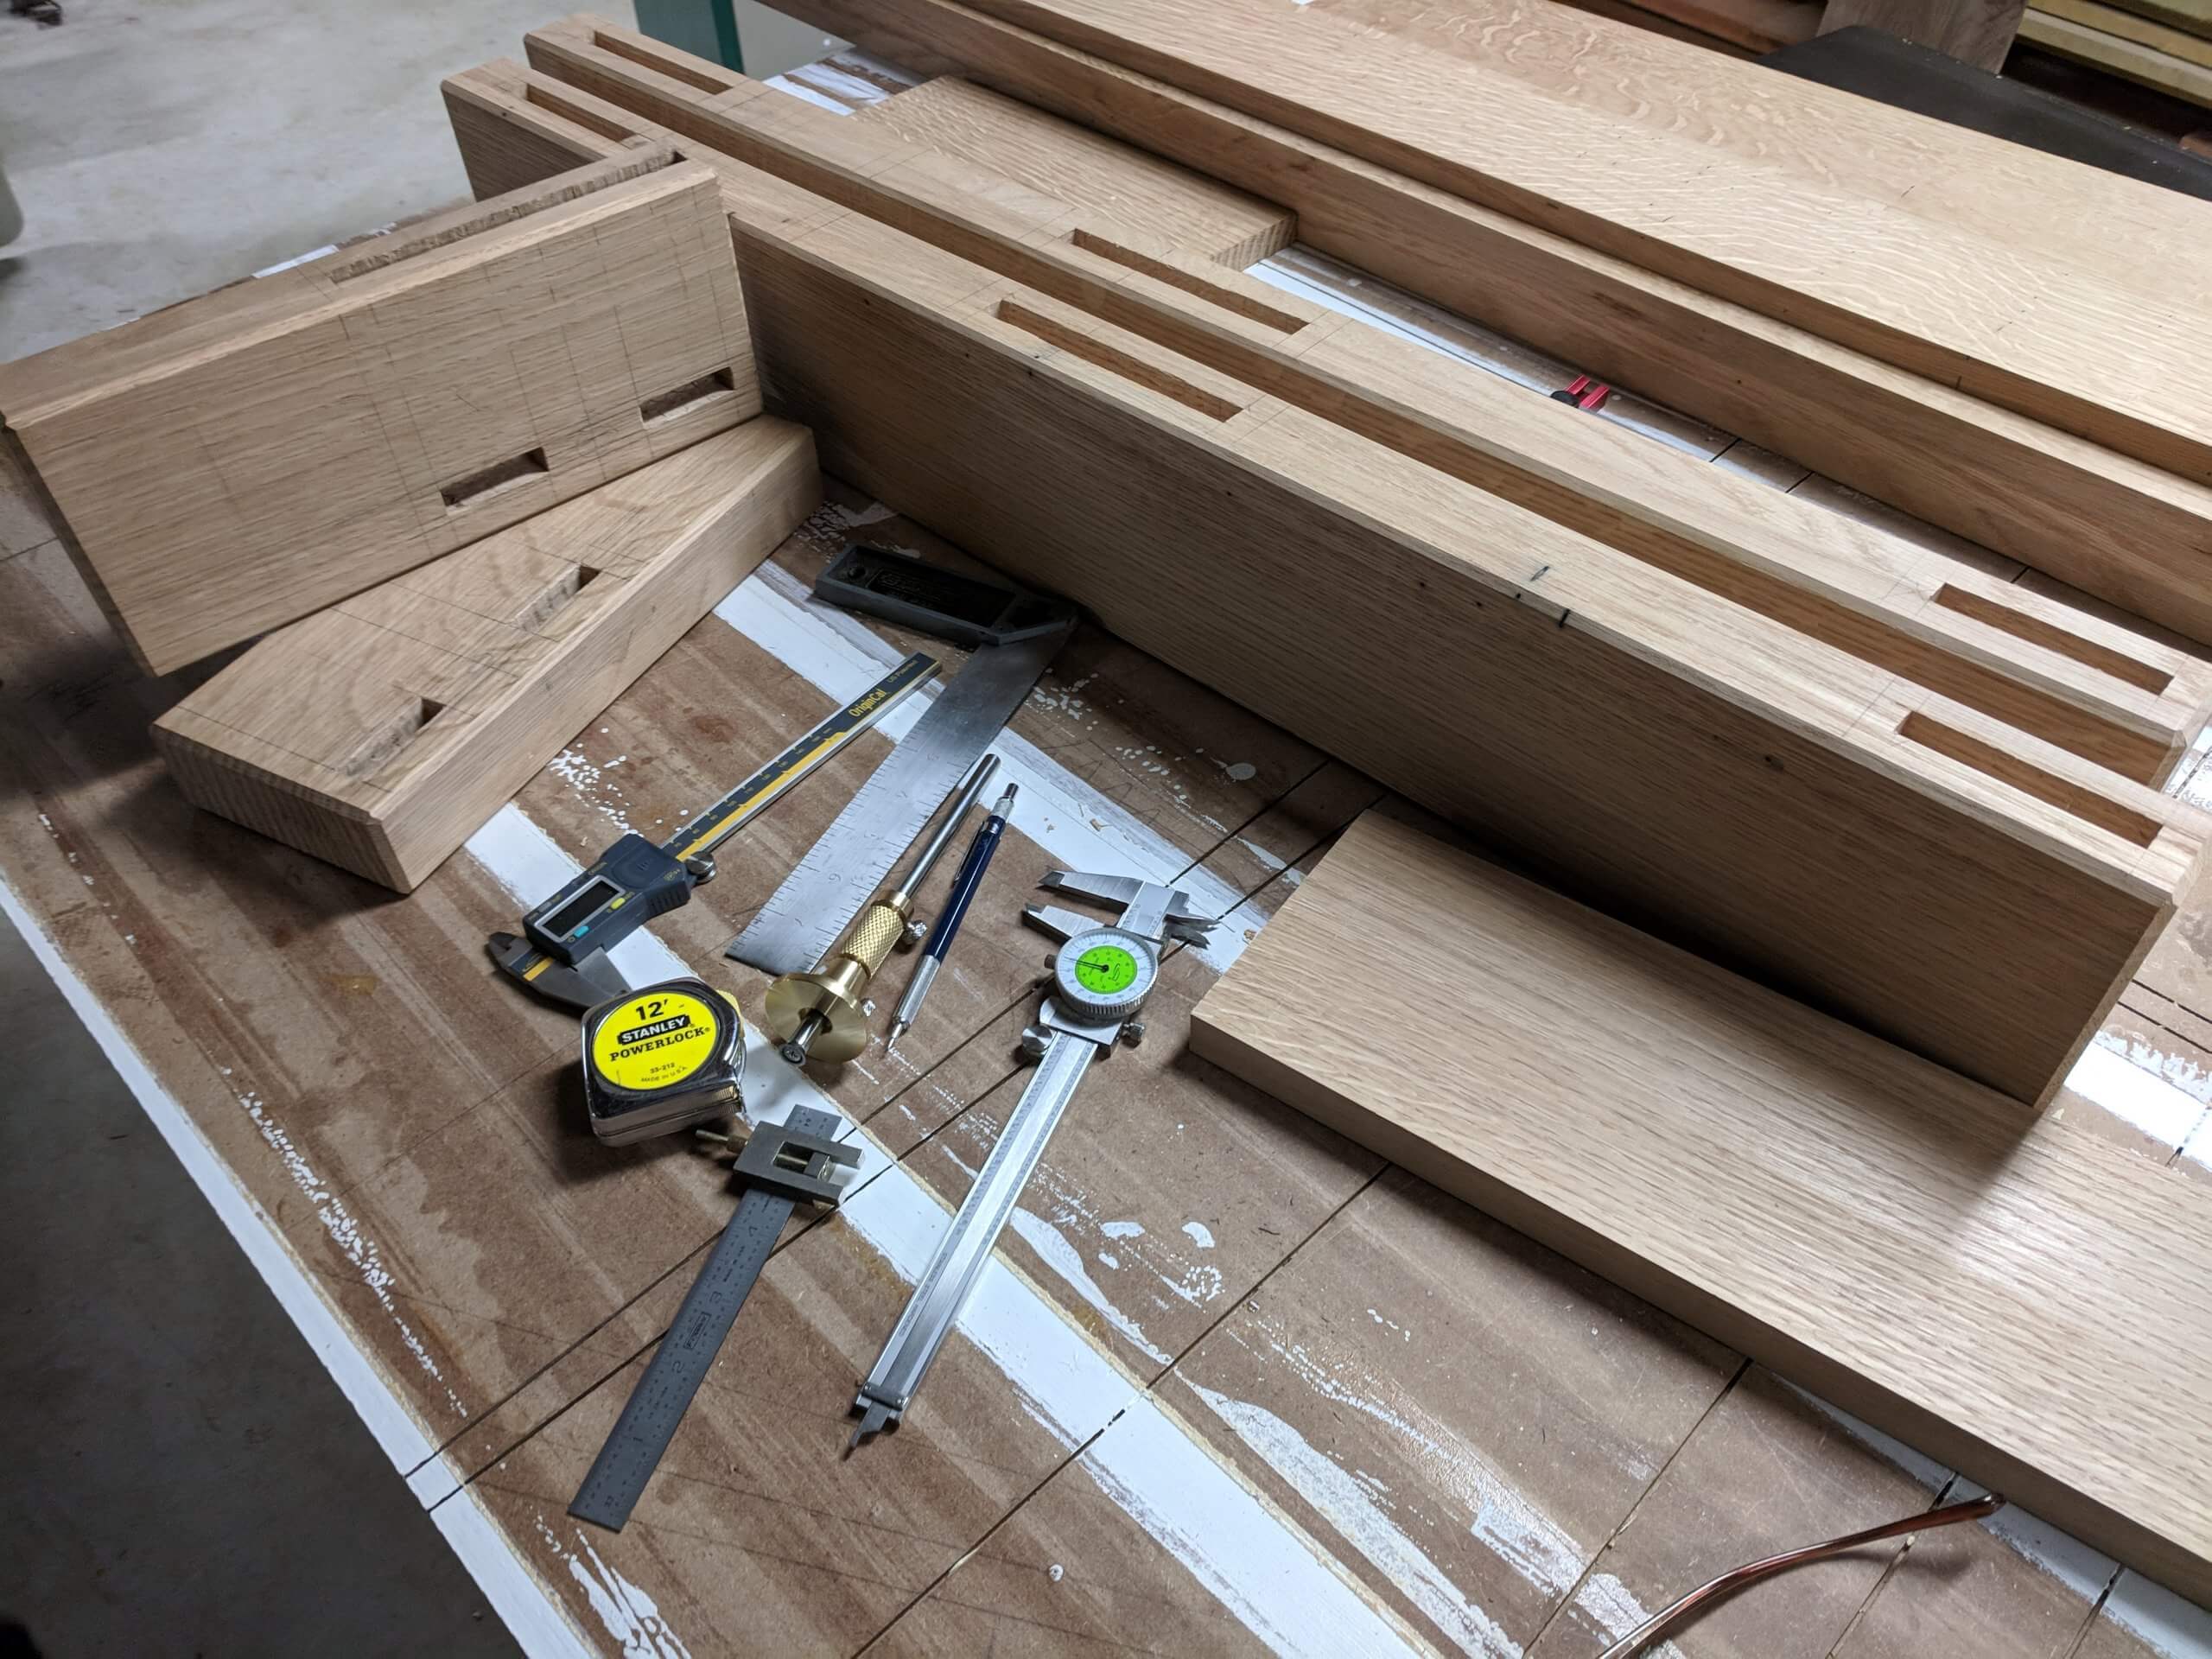
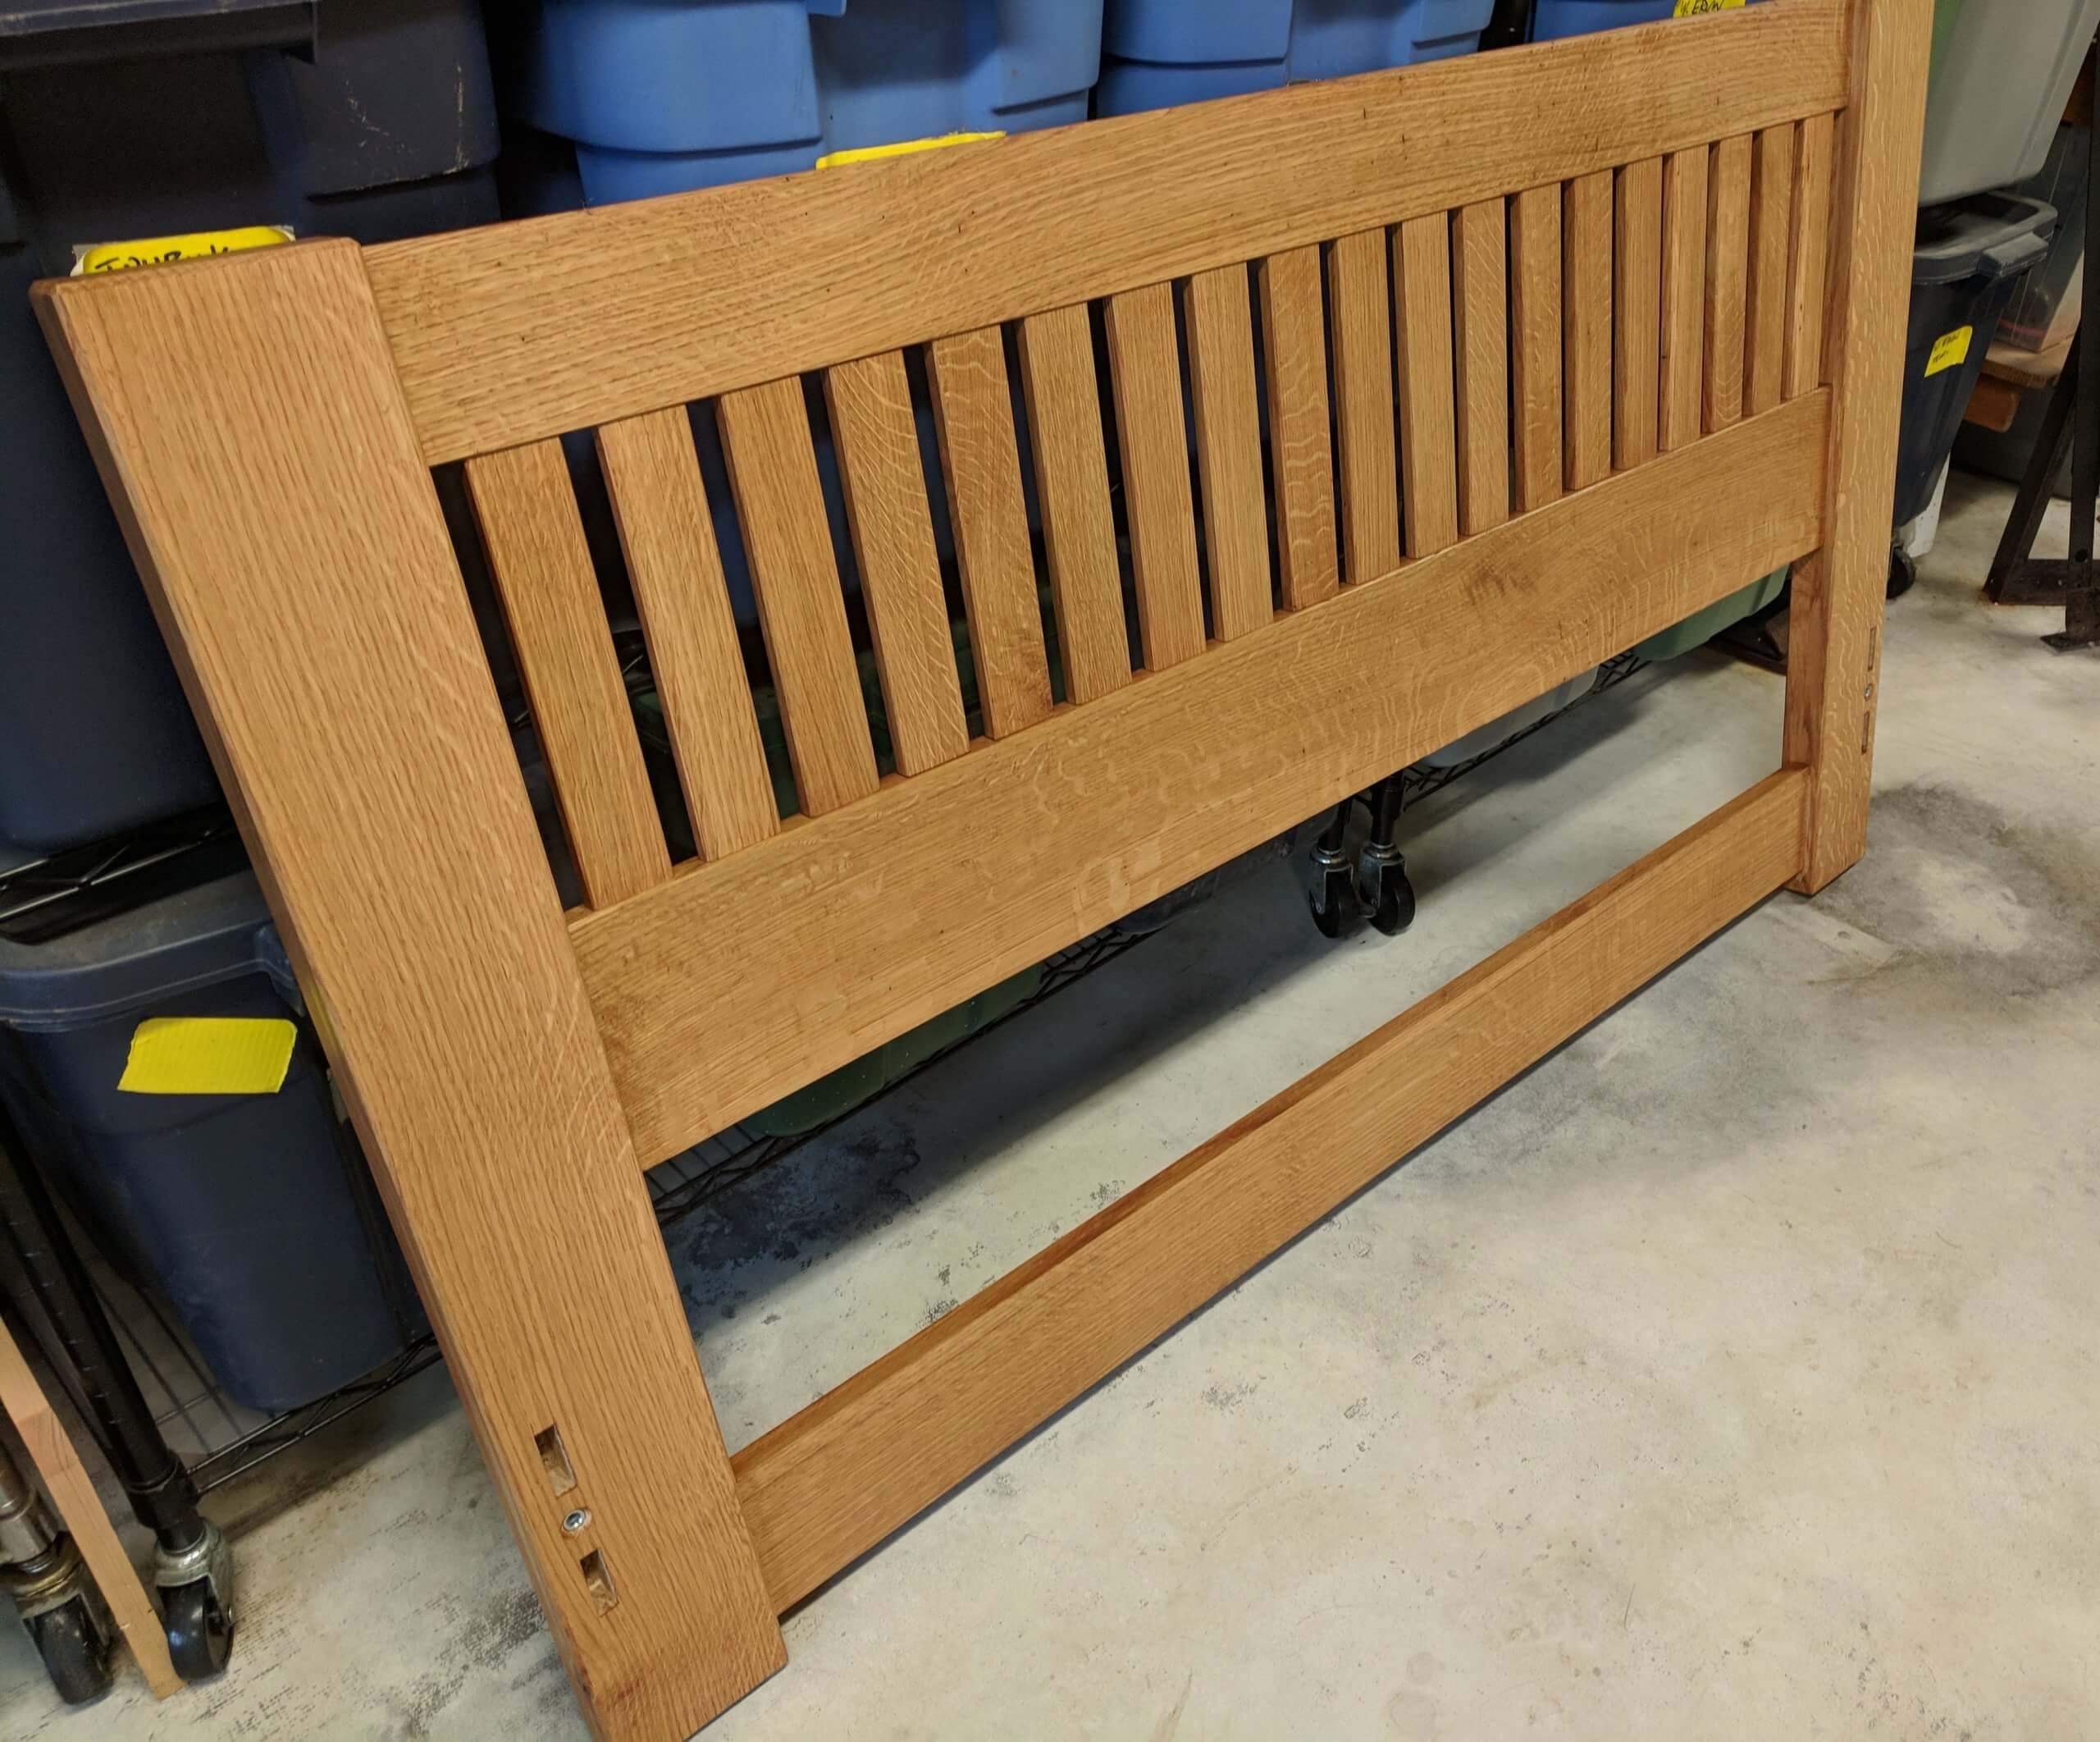
Once the width of the center rail was established and its location to optically look the same as the top rail once covered by the bed was figured out, mortises could be cut. The front posts received two stub mortises for the side rails and one large mortise for the main footboard rail. The back posts received two stub mortises for the side rails and three mortises for the three headboard rails. The lower rail in the headboard was added for rigidity and a mount point for a center rail if desired.
I find that in doing mortises and tenons you can pick one to be easy, then size the other to fit it. Often it is the mortise size that is picked so it matches a given chisel size. In this case I used a 1/2″ chisel to make the mortises and would cut the faces of the tenons accordingly.
With the mortises cut, the posts could be finished. This included a chamfer on all edges, especially the bottom to prevent splintering when moving and final planning for a smooth finish without sanding. Quarter-sawn oak has some swirling grain and many areas needed work with a card scraper to overcome tear out.
With the mortises cut, the distance between the two side rails and the edge of the post could be measured. Since I wanted a finished width of 60 1/2″ the headboard and footboard rails could be finished cut at 60 1/2″ – (2 X the post offset). Put another way, it was easy at this point to measure how long the rail should be so that the inside face of the side rails would be 60 1/2″ apart. You have to add 4″ to this calculation to allow for a 2″ tenon on each end.
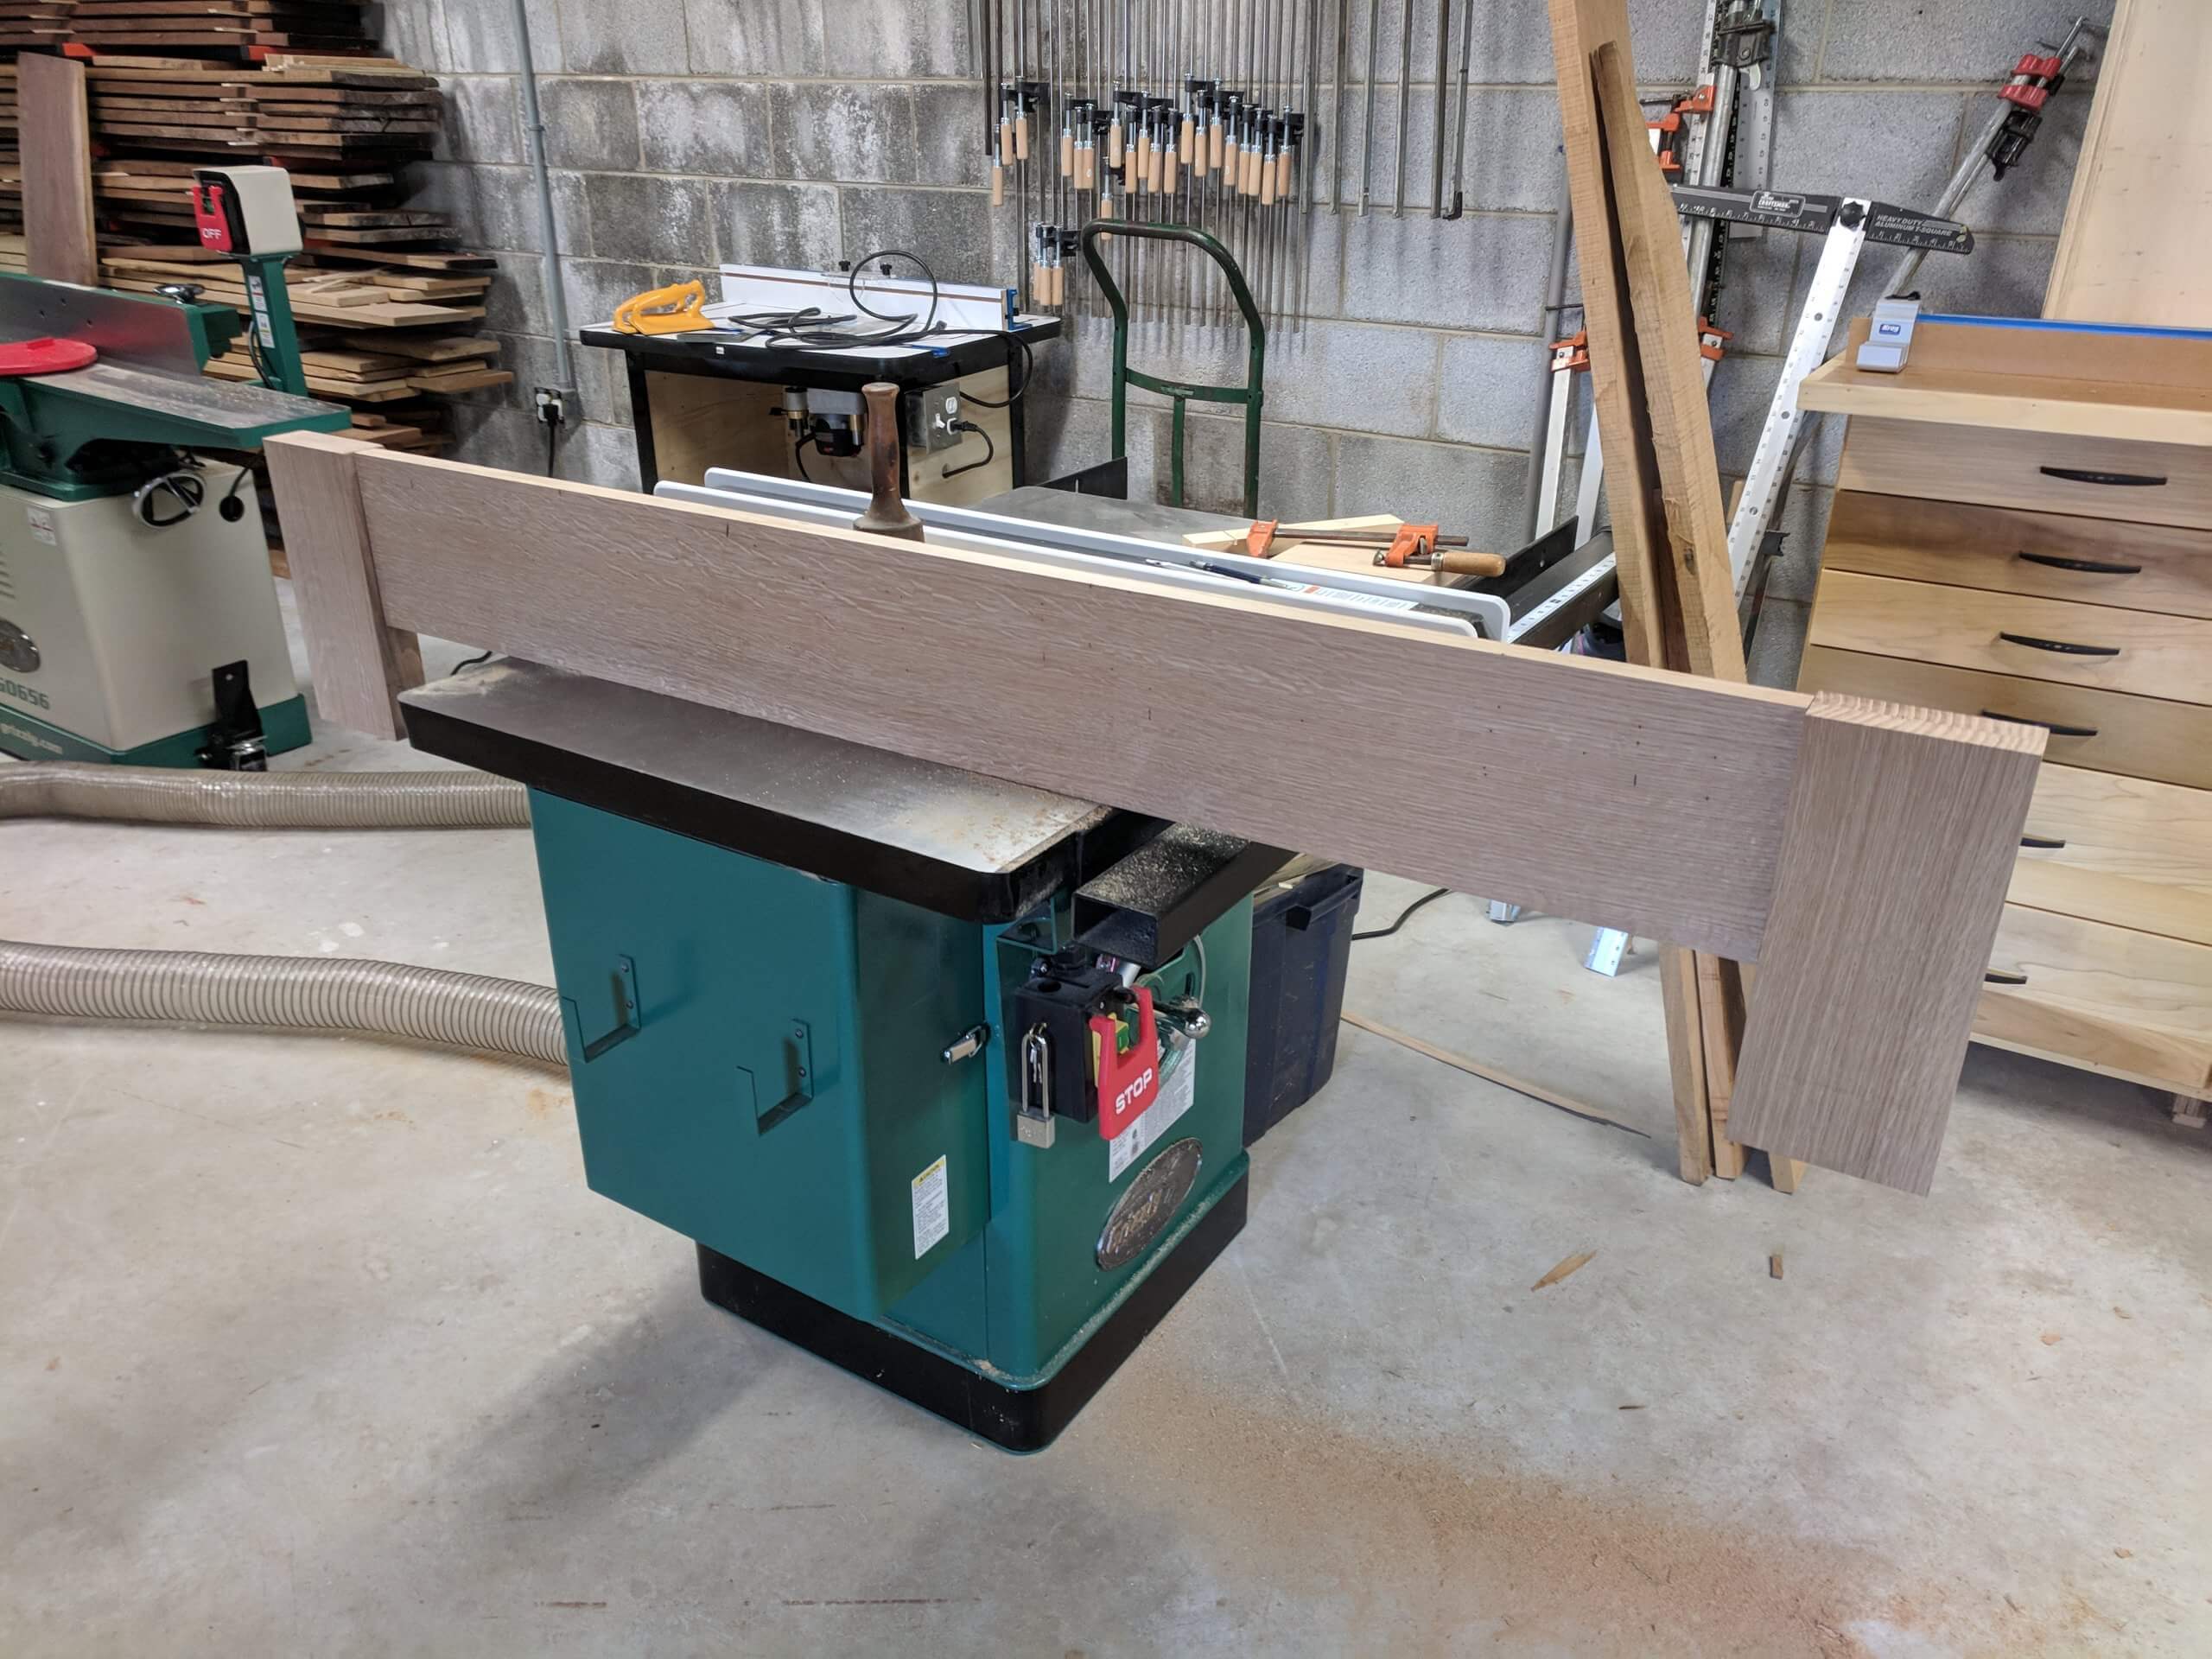
Rails
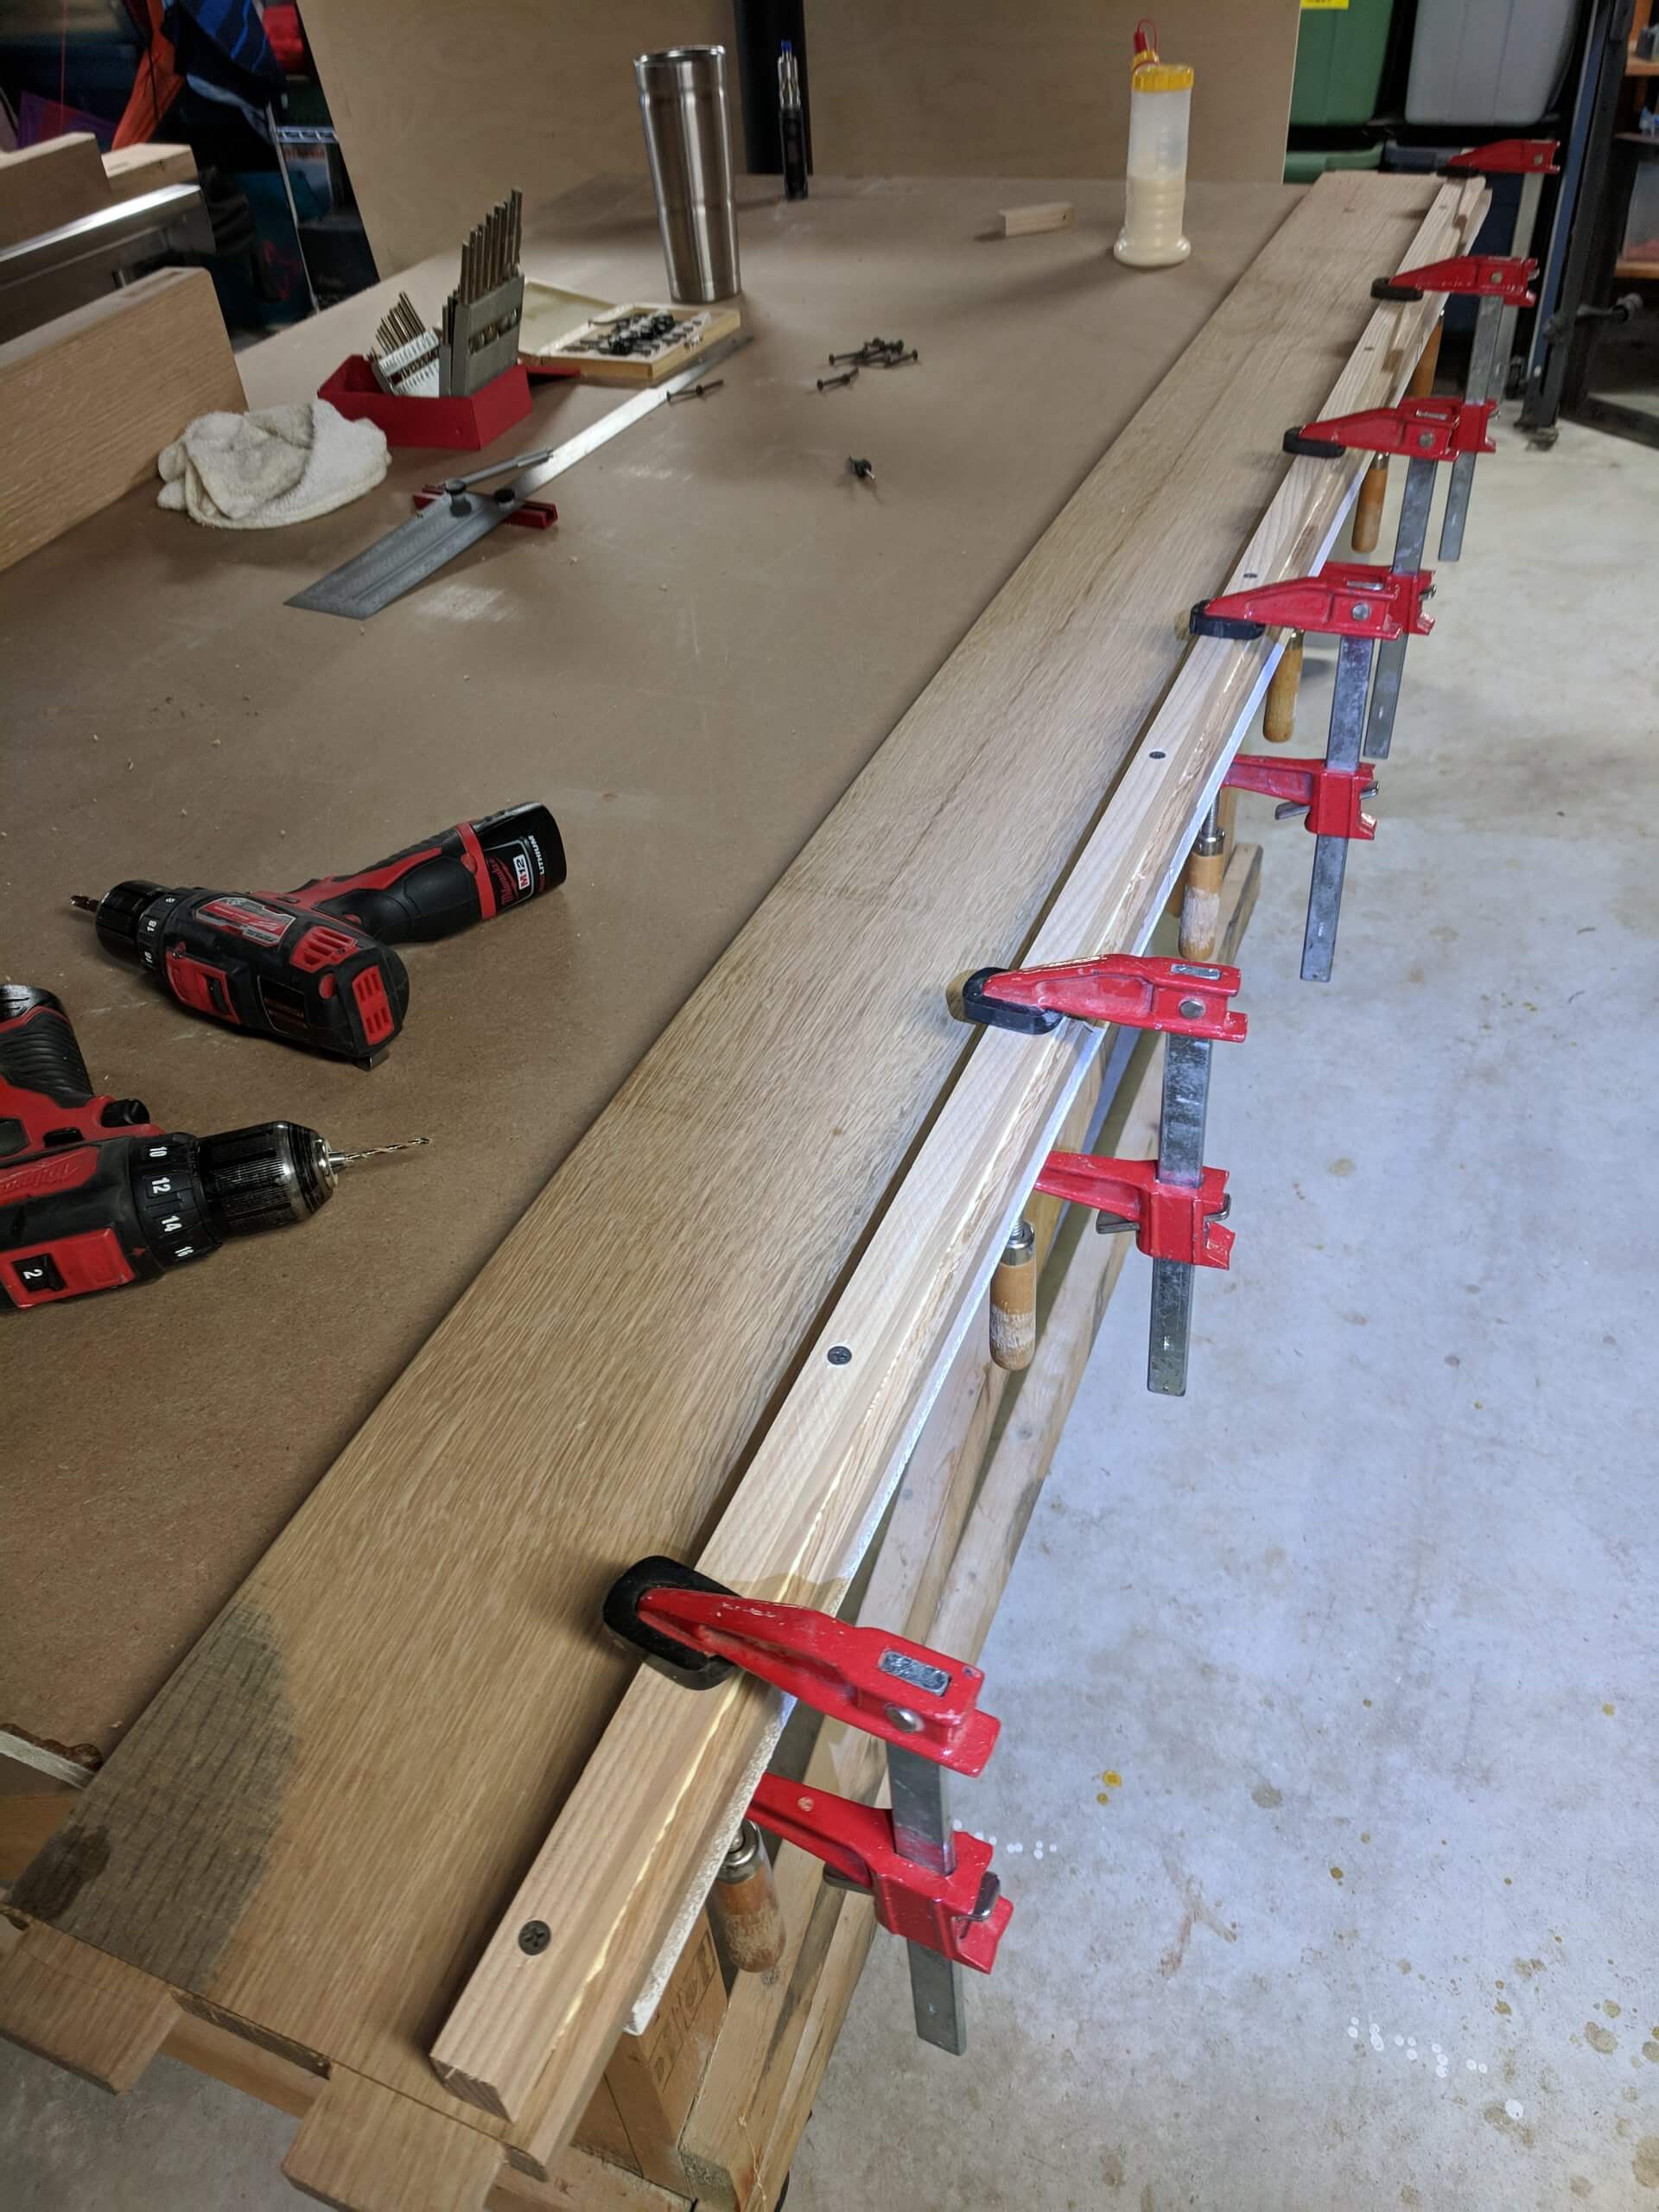
The rails for the headboard, footboard and frame were simply too long to cut tenons on the table saw and (in my opinion) too wide to cut them by hand. I used the simple “zero clearance” router guide method. A fence is mounted on a board wider than 1/2 of the router, then the bit you will use to cut the tenons is used to trim the board to exactly the width between the base of the router (pressing on the fence) to the inside radius of the bit. The cut board then ends up exactly where the bit will cut.
This is then clamped to the work piece and the depth of the cut dialed in. The depth is determined by 1/2 X (width of board – width of mortise). So my boards were .82″ and the mortise was 1/2″, so the side clearance for the cheek of the tenon was set to 1/2(.82 – .5) or .205″. You then add the thickness of the jig’s board to the depth. Since I milled the rails to keep as much thickness as possible I was content to let them end up on a random size and just use a dial caliper to take measurements and layout the cuts.
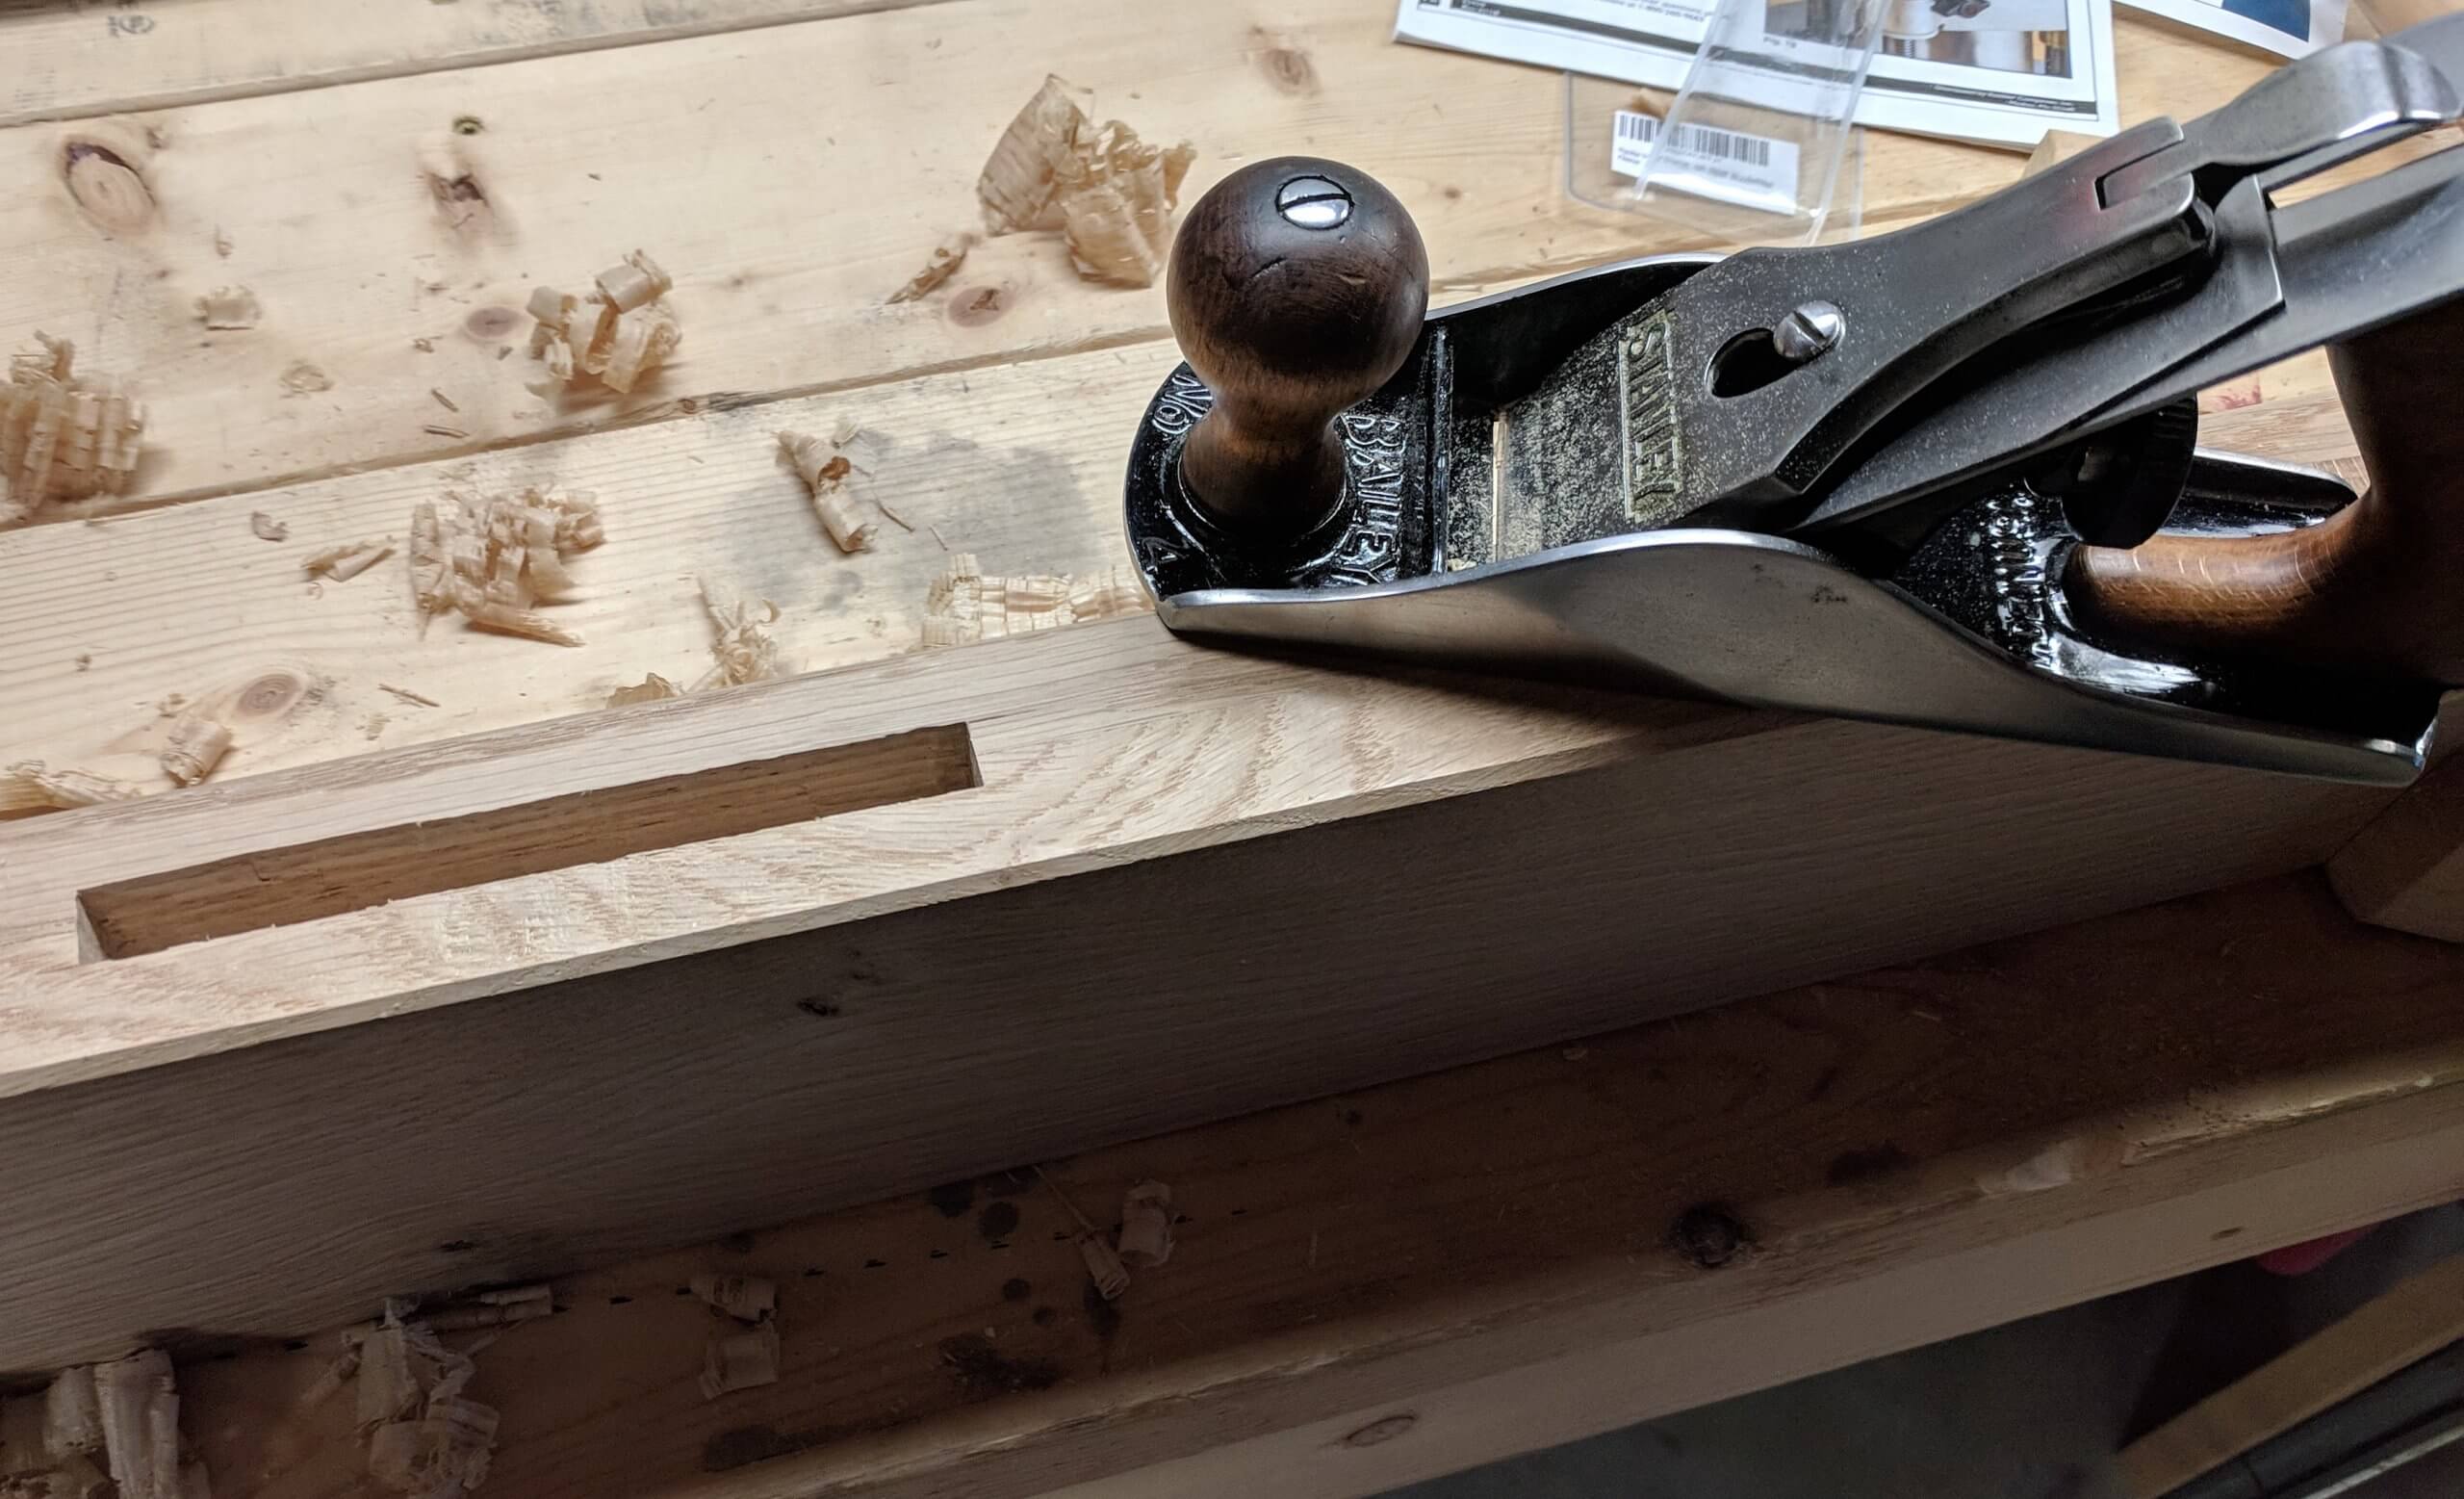
After cutting each face of the tenon, the edge was cut using a hand saw. They were test fit into the mortises and adjusted with a hand plane.
One problem with sawmill lumber is that the longer the finished board you are seeking is, the thinner it often gets as jointing out even a modest curve in a long board can take away a good bit of thickness. 1″ stock can yield thicker pieces that are short, but often lose a good be if milled flat over a long distance.
The tenons in the side rails were cut in two to create two stub tenons. This will allow room for the bolt assembly to be installed that will hold the rail to the post but at the same time allow the bed to be disassembled. I cut the rip cut with a handsaw and then used a chisel for the cross grain cut.
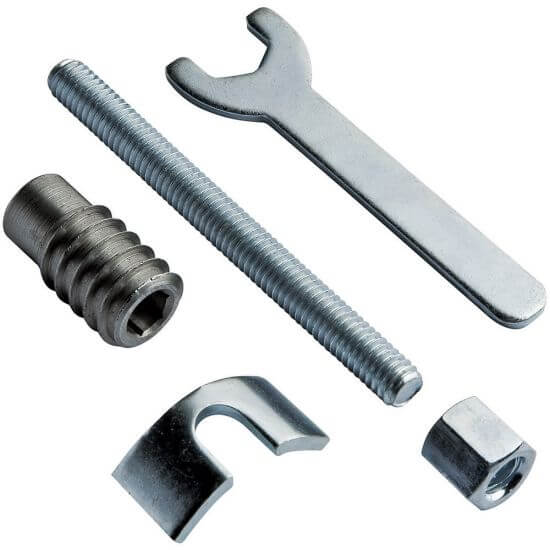
There are several ways to make a bed rail removable. I wanted one that was solid, squeak free and robust. I used the knock-down assembly hardware from Rockler. The instructions for the bed rail bolts are pretty clear, but I did not use the dowels that come with the kit, using the stub tenons instead.
An ash runner was installed on each side rail to allow the slats to have a place to rest. Going back to the SketchUp model, the base of the mattress needed to rest at a specific height to get it to align with the middle headboard rail. To set that height, the ash rails were installed at that height plus the thickness of the slats that are to be used. I used simple 2X4s for slats, so my rails were installed 1 1/2″ below the targeted bottom position of the mattress.
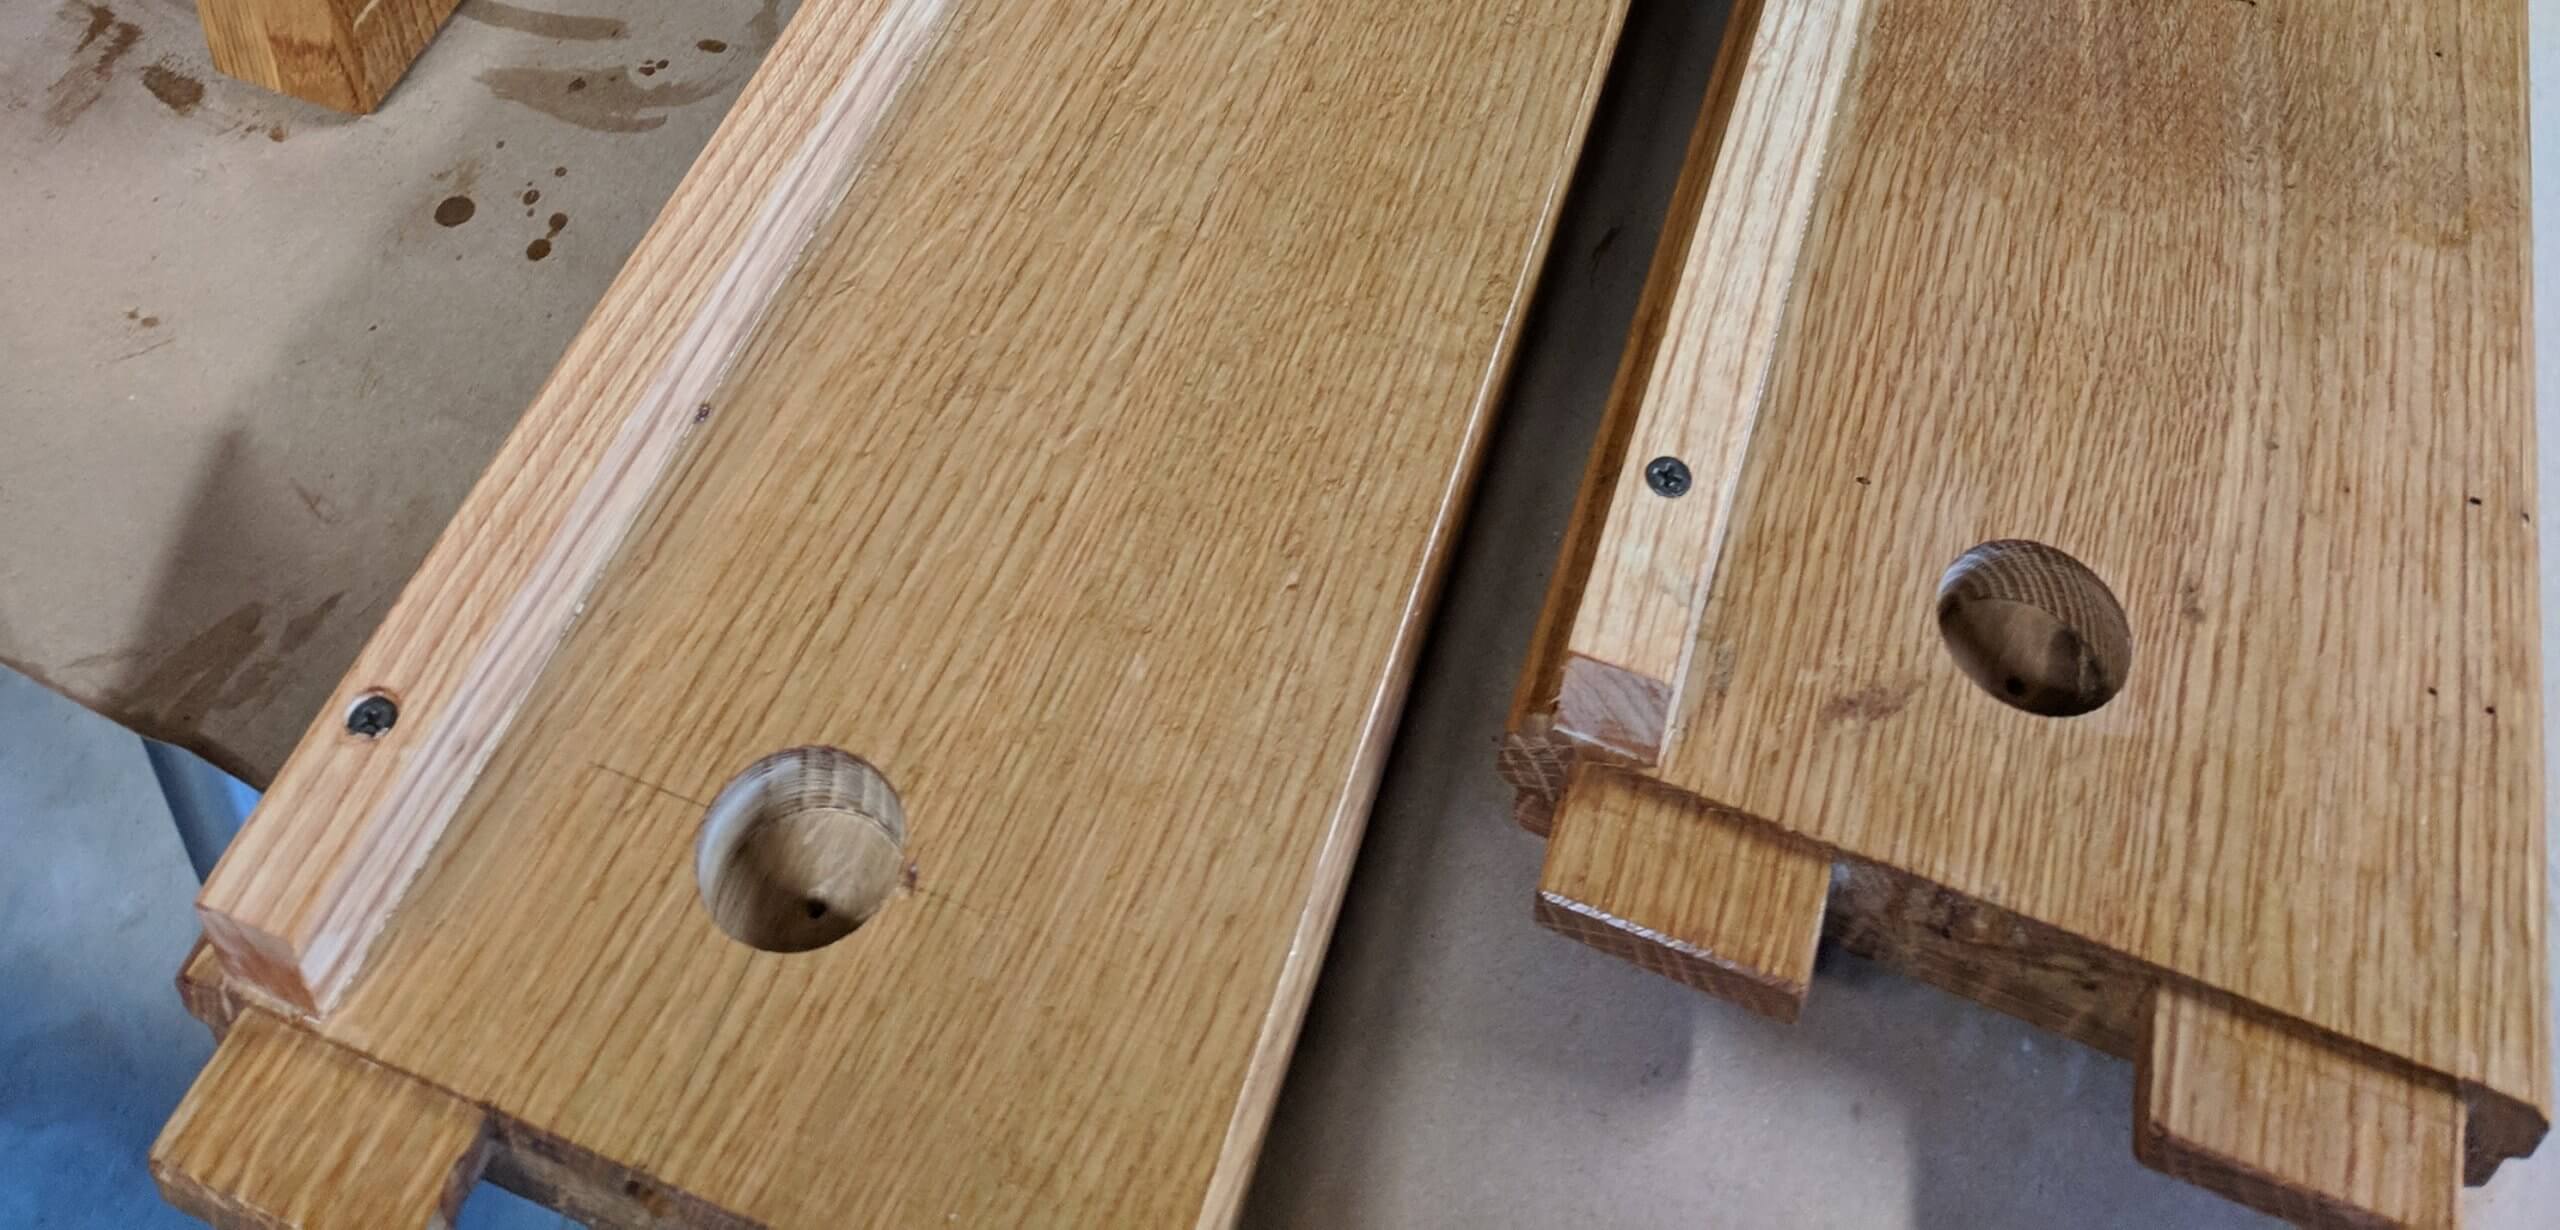
The ends of the rails were drilled for the Rockler hardware with a 1 3/8″ forsner bit and hole was drilled in the edge on center to pass the connecting bolt through. I cut these after finishing, but it was a mistake to wait.
Here was the first real issue with the bed. The hardware needs a 1″ thick rail if the bolt is centered so you have room to turn the nut. I could get a 7/8″ hole, but it was not enough to place the bolt into the hole and thread it. The points of the bolt would bind on the fat bottom hole. Ultimately I decided to add a facia piece to the rail to give it some artificial depth in order to get the hole to the correct depth. I milled it thin enough that it worked with the offset of the posts and gave it a somewhat style consistent look. I could have drilled the hole into the edge off center to give room to turn the nut but I had already mounted the opposite bolt centered in the posts.

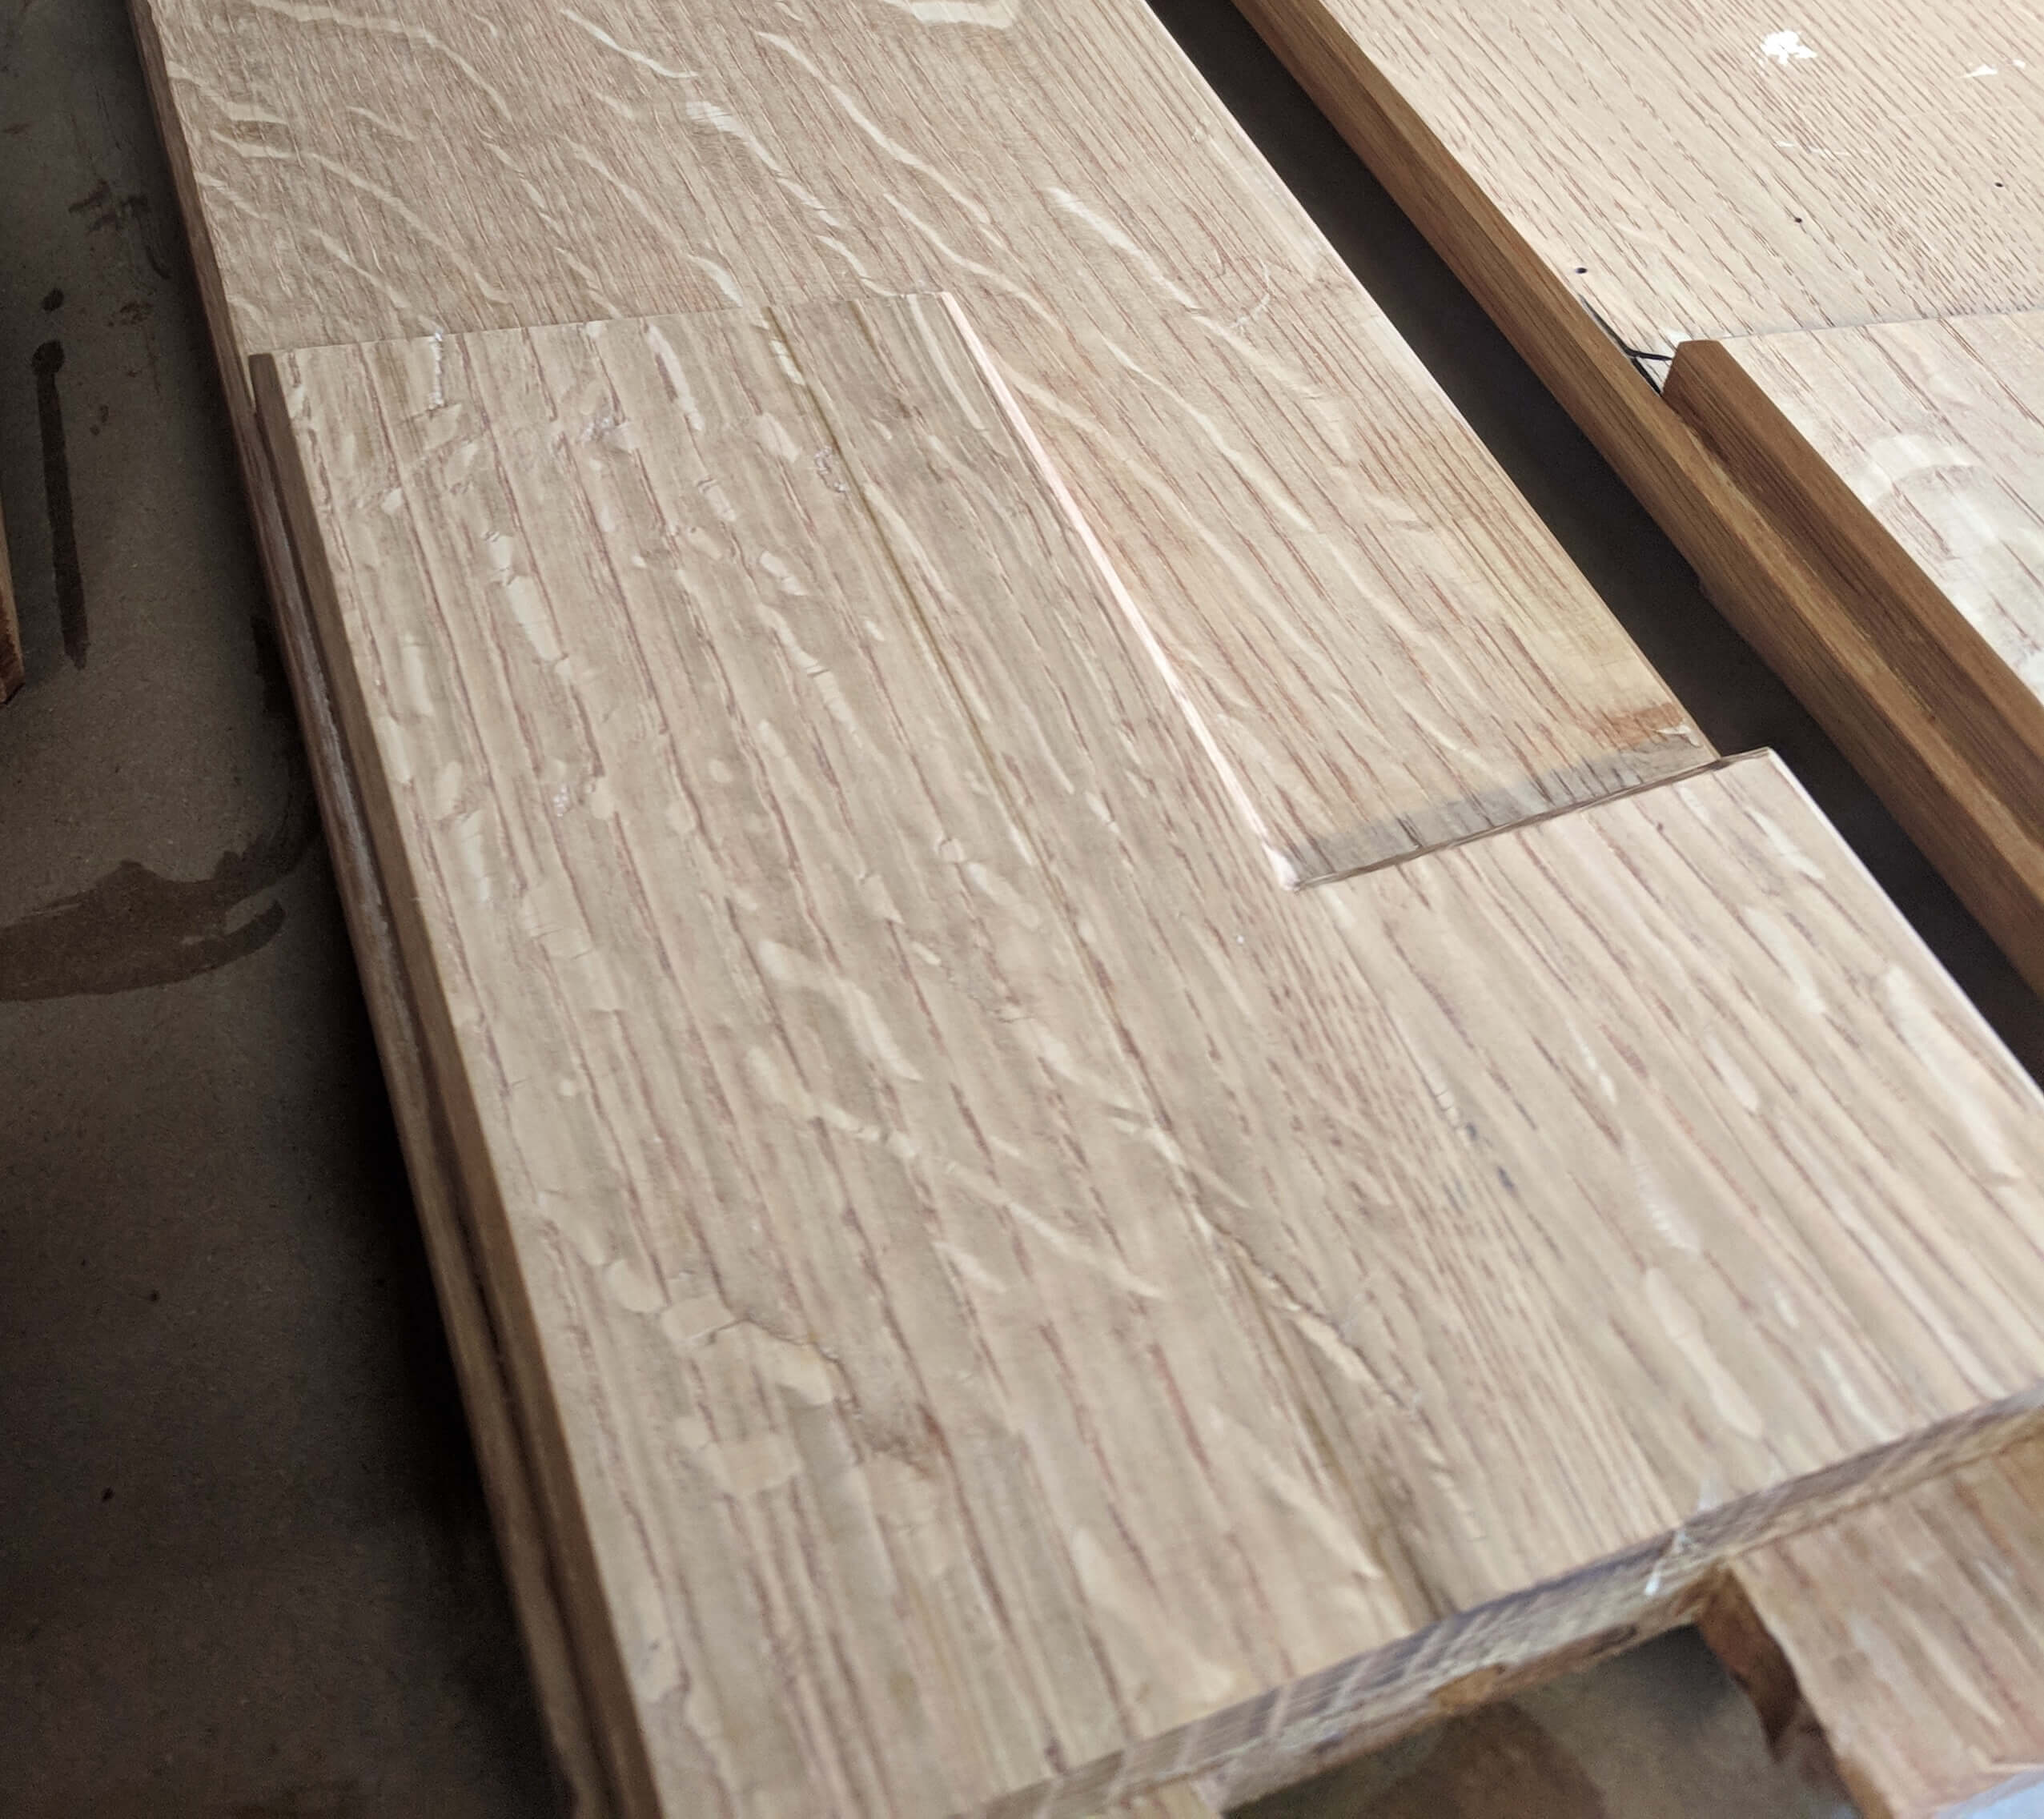
I didn’t get a good detail image of the threaded nut installation into the headboard and footboard, but it is pretty clear in this image. A 17/32″ hole is drilled into the post and the bolt is inserted with an allen wrench. I drilled my hole deeper than the length of the bolt so I could chamfer the edge of the hole, ensuring a flush fit with the bed rail.
Once the hardware was installed into the post and the holes in the rails made you could test fit the rails. I had to fine tune the tenons to get a tight but usable joint.
Head and Foot Board
Mortises for the headboard rails were cut with a router table. A 1/4″ bit was used and a “start” and “stop” line was marked on the router table. The locations of the mortises were drown up the side of the rail so you could see them while working at the router table. The rail was lowered onto the bit just shy of the left hand mark, then carefully moved to the right (wrong direction resulting in a climb cut, so you had to hold it firmly and go slow) just to touch the edge marked as the starting point then the piece was moved to the left to the end mark of the mortise lined up with the stop mark on the router table. I used a spiral up-cut bit.
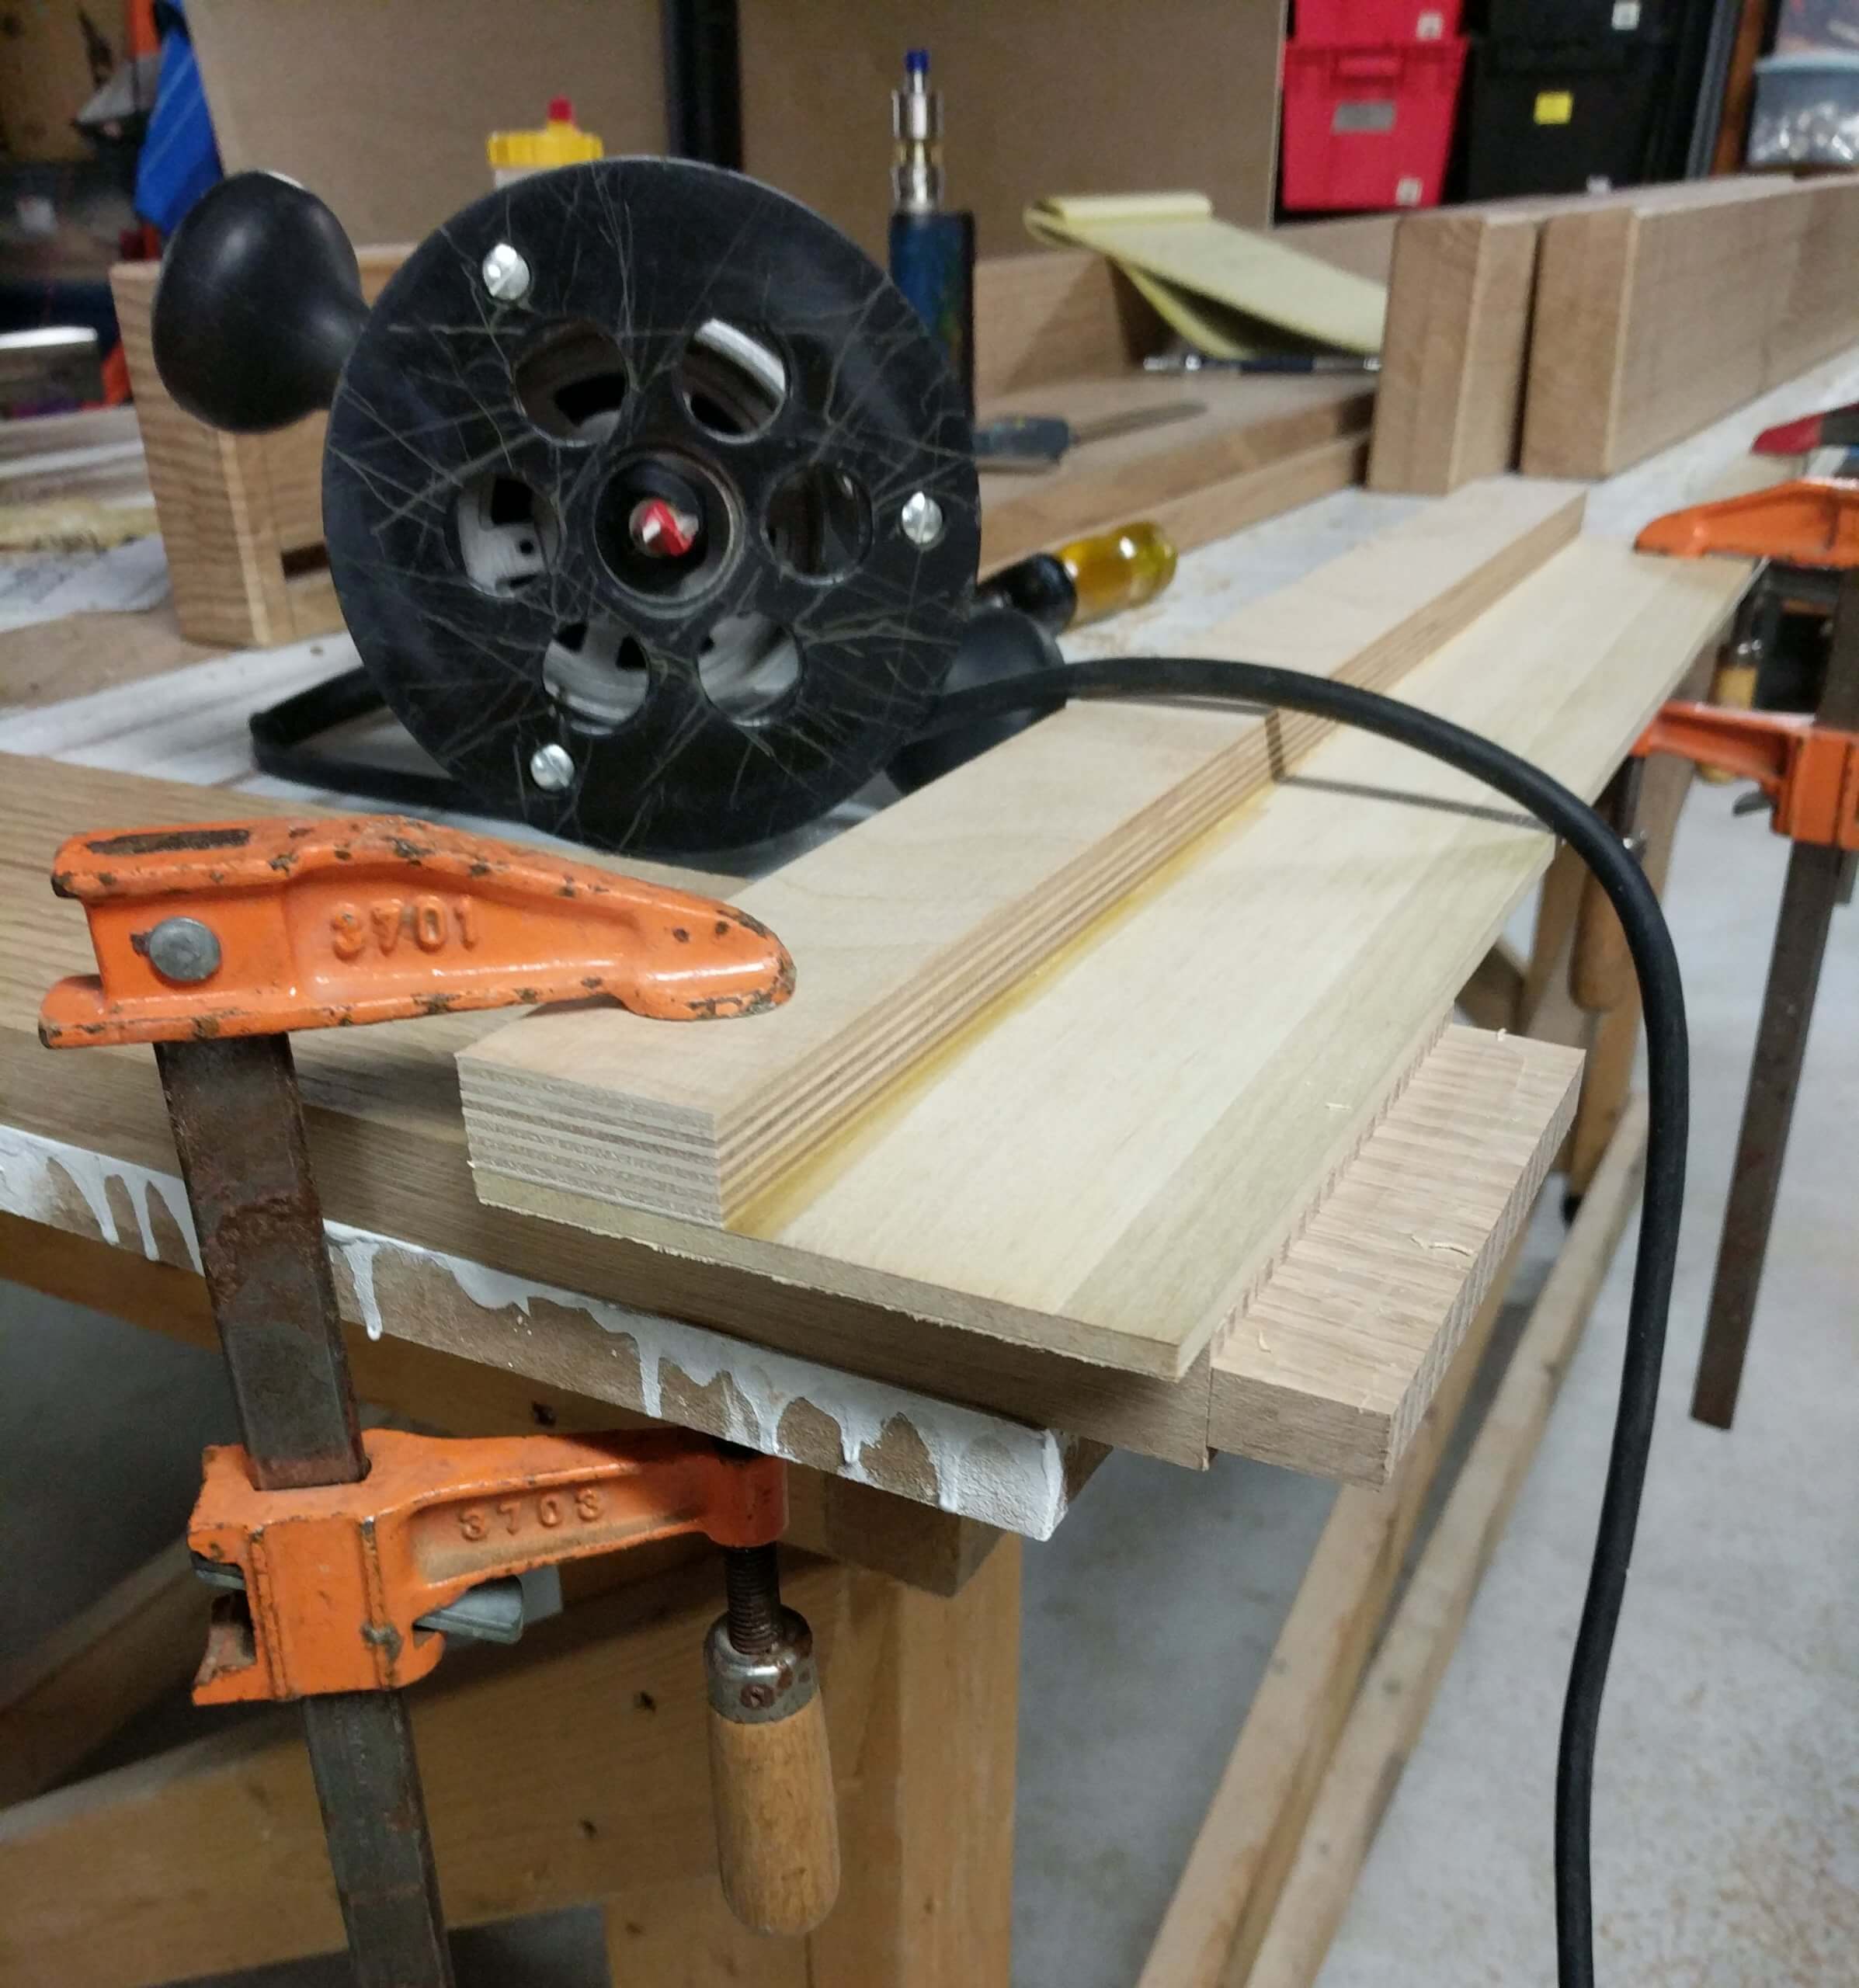
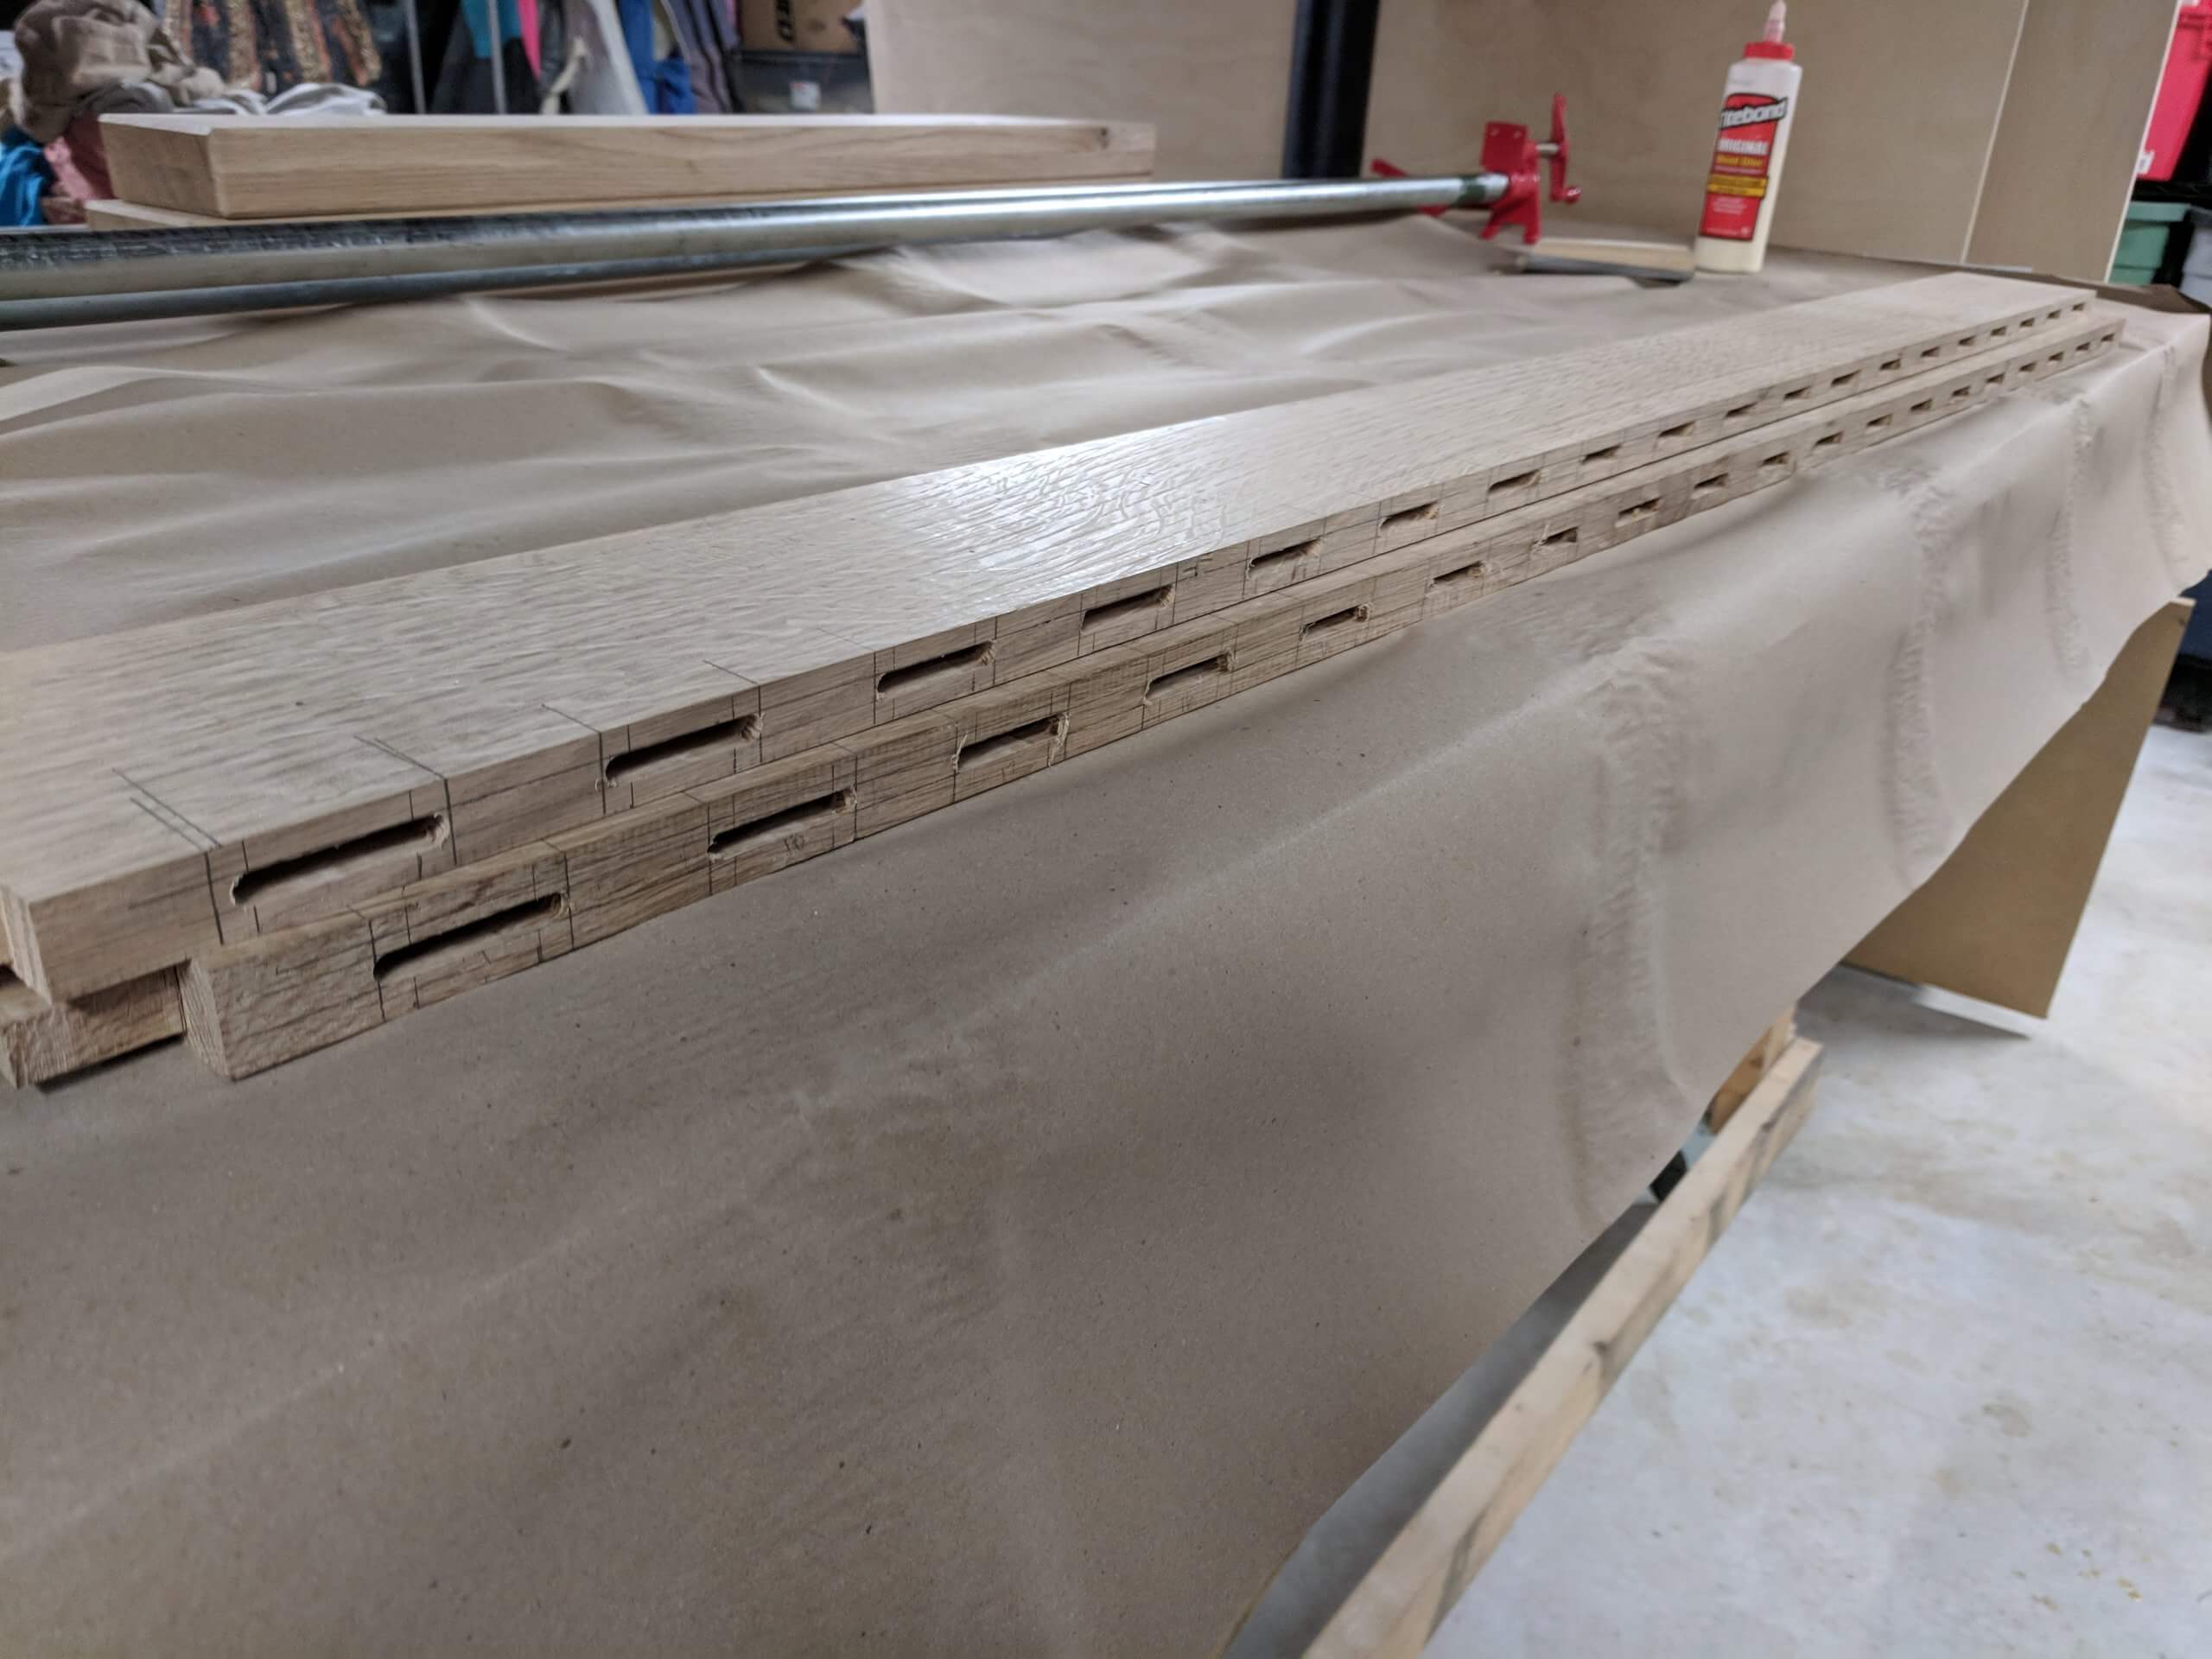
I waited until this point to make the slats for the headboard as I wanted to measure the space between the rails. Had I made them based on the plans vs the real life piece, they could have been too long and put pressure on the rail tenons or too short and had a small gap. I milled them all to 1/2″ thick then cut them all to 2″ longer than the space between the two rails (leaving room for two 1″ tenons). The tenons were cut on the table saw. This allowed a very exact shoulder cut that would sit flush on the bed rail. I used a carving knife to round over the corners of the tenons to fit into the round holes left by the router table.
With all the parts cut and milled, glue-up started with the footboard. Just three pieces. It was simple and the only thing to check was the squareness of the joint.
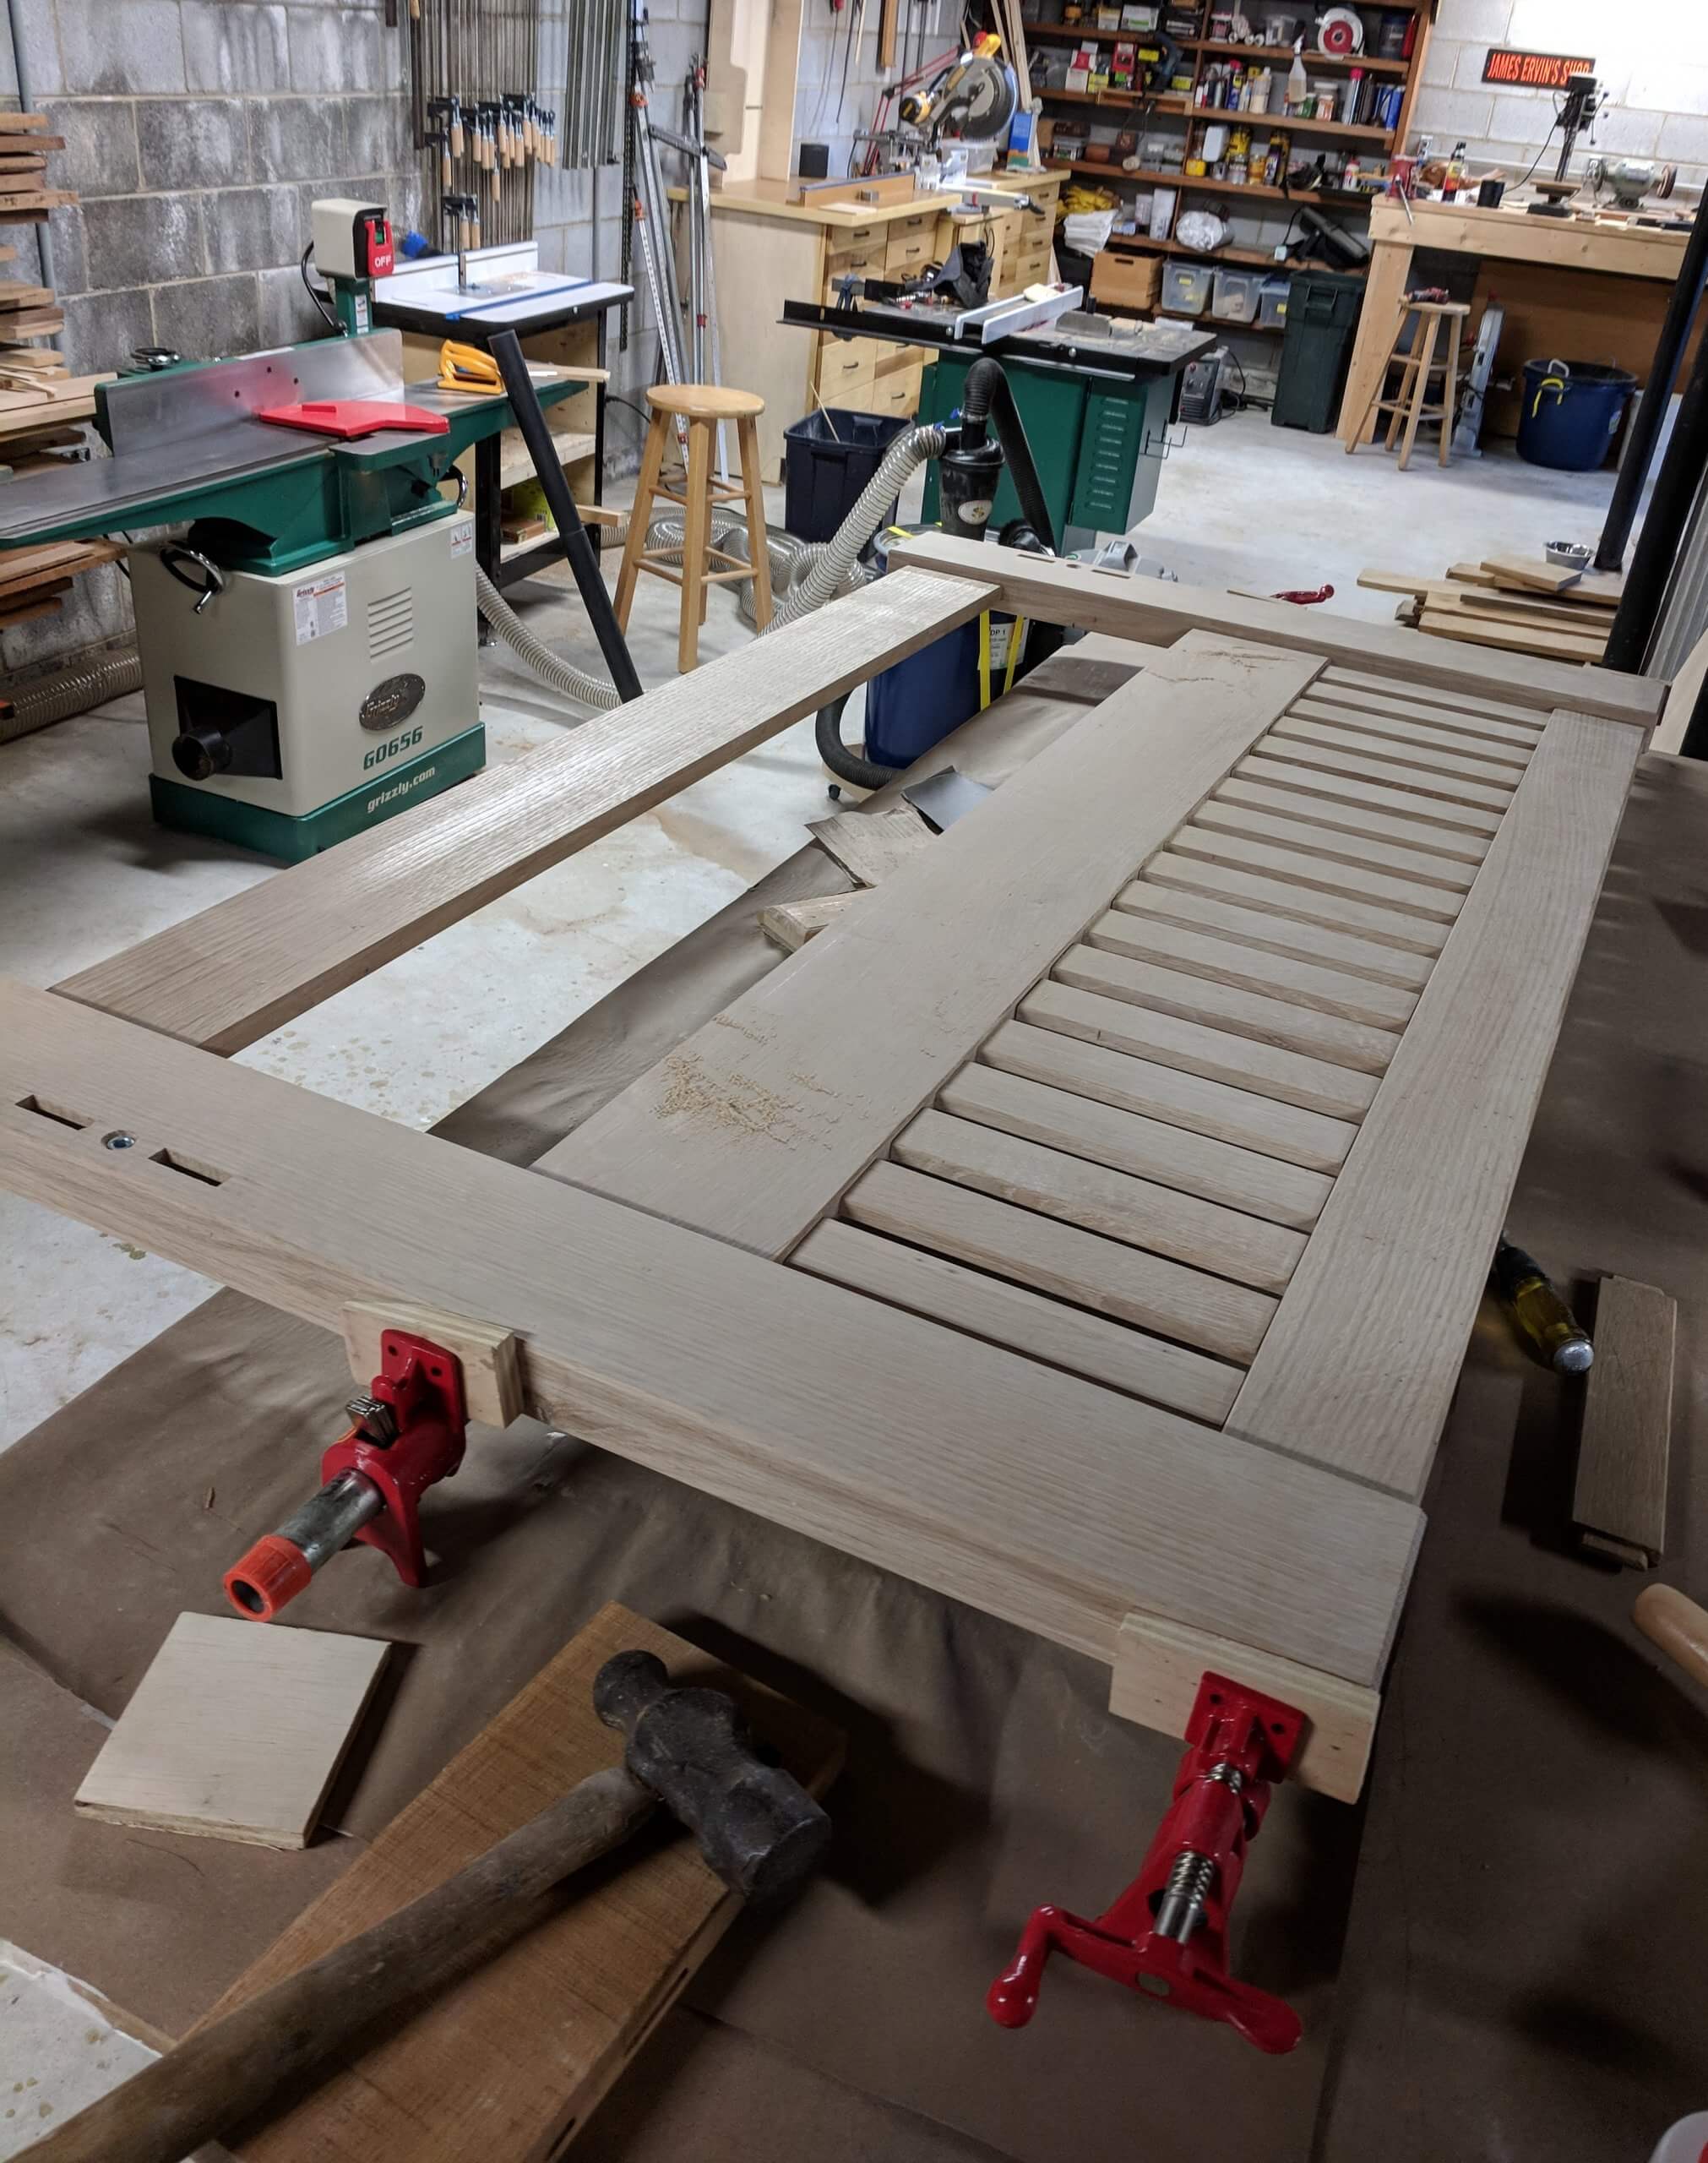
The headboard glue up was a bit more complex. I assembled the top and middle rail with the slats, though I did not use any glue. They are not structural and the lack of glue will allow them to move over time as the joint is long grain to short grain.
Glue was applied to the tenons of the rails then one side was inserted into the post, followed by the other. A good dry fit test is essential here as small angular issues of one tenon vs another will make it hard to bring the assembly together square without any gaps. As insurance I shaved 1/16″ of an inch off of the inner edges of the rail tenons to make certain that the rails were firmly pressed onto the shoulders of the slat tenons to avoid gaps.
After the clamps pictured were installed, clamps pulling the rails together were installed.and the entire headboard was checked for squareness.
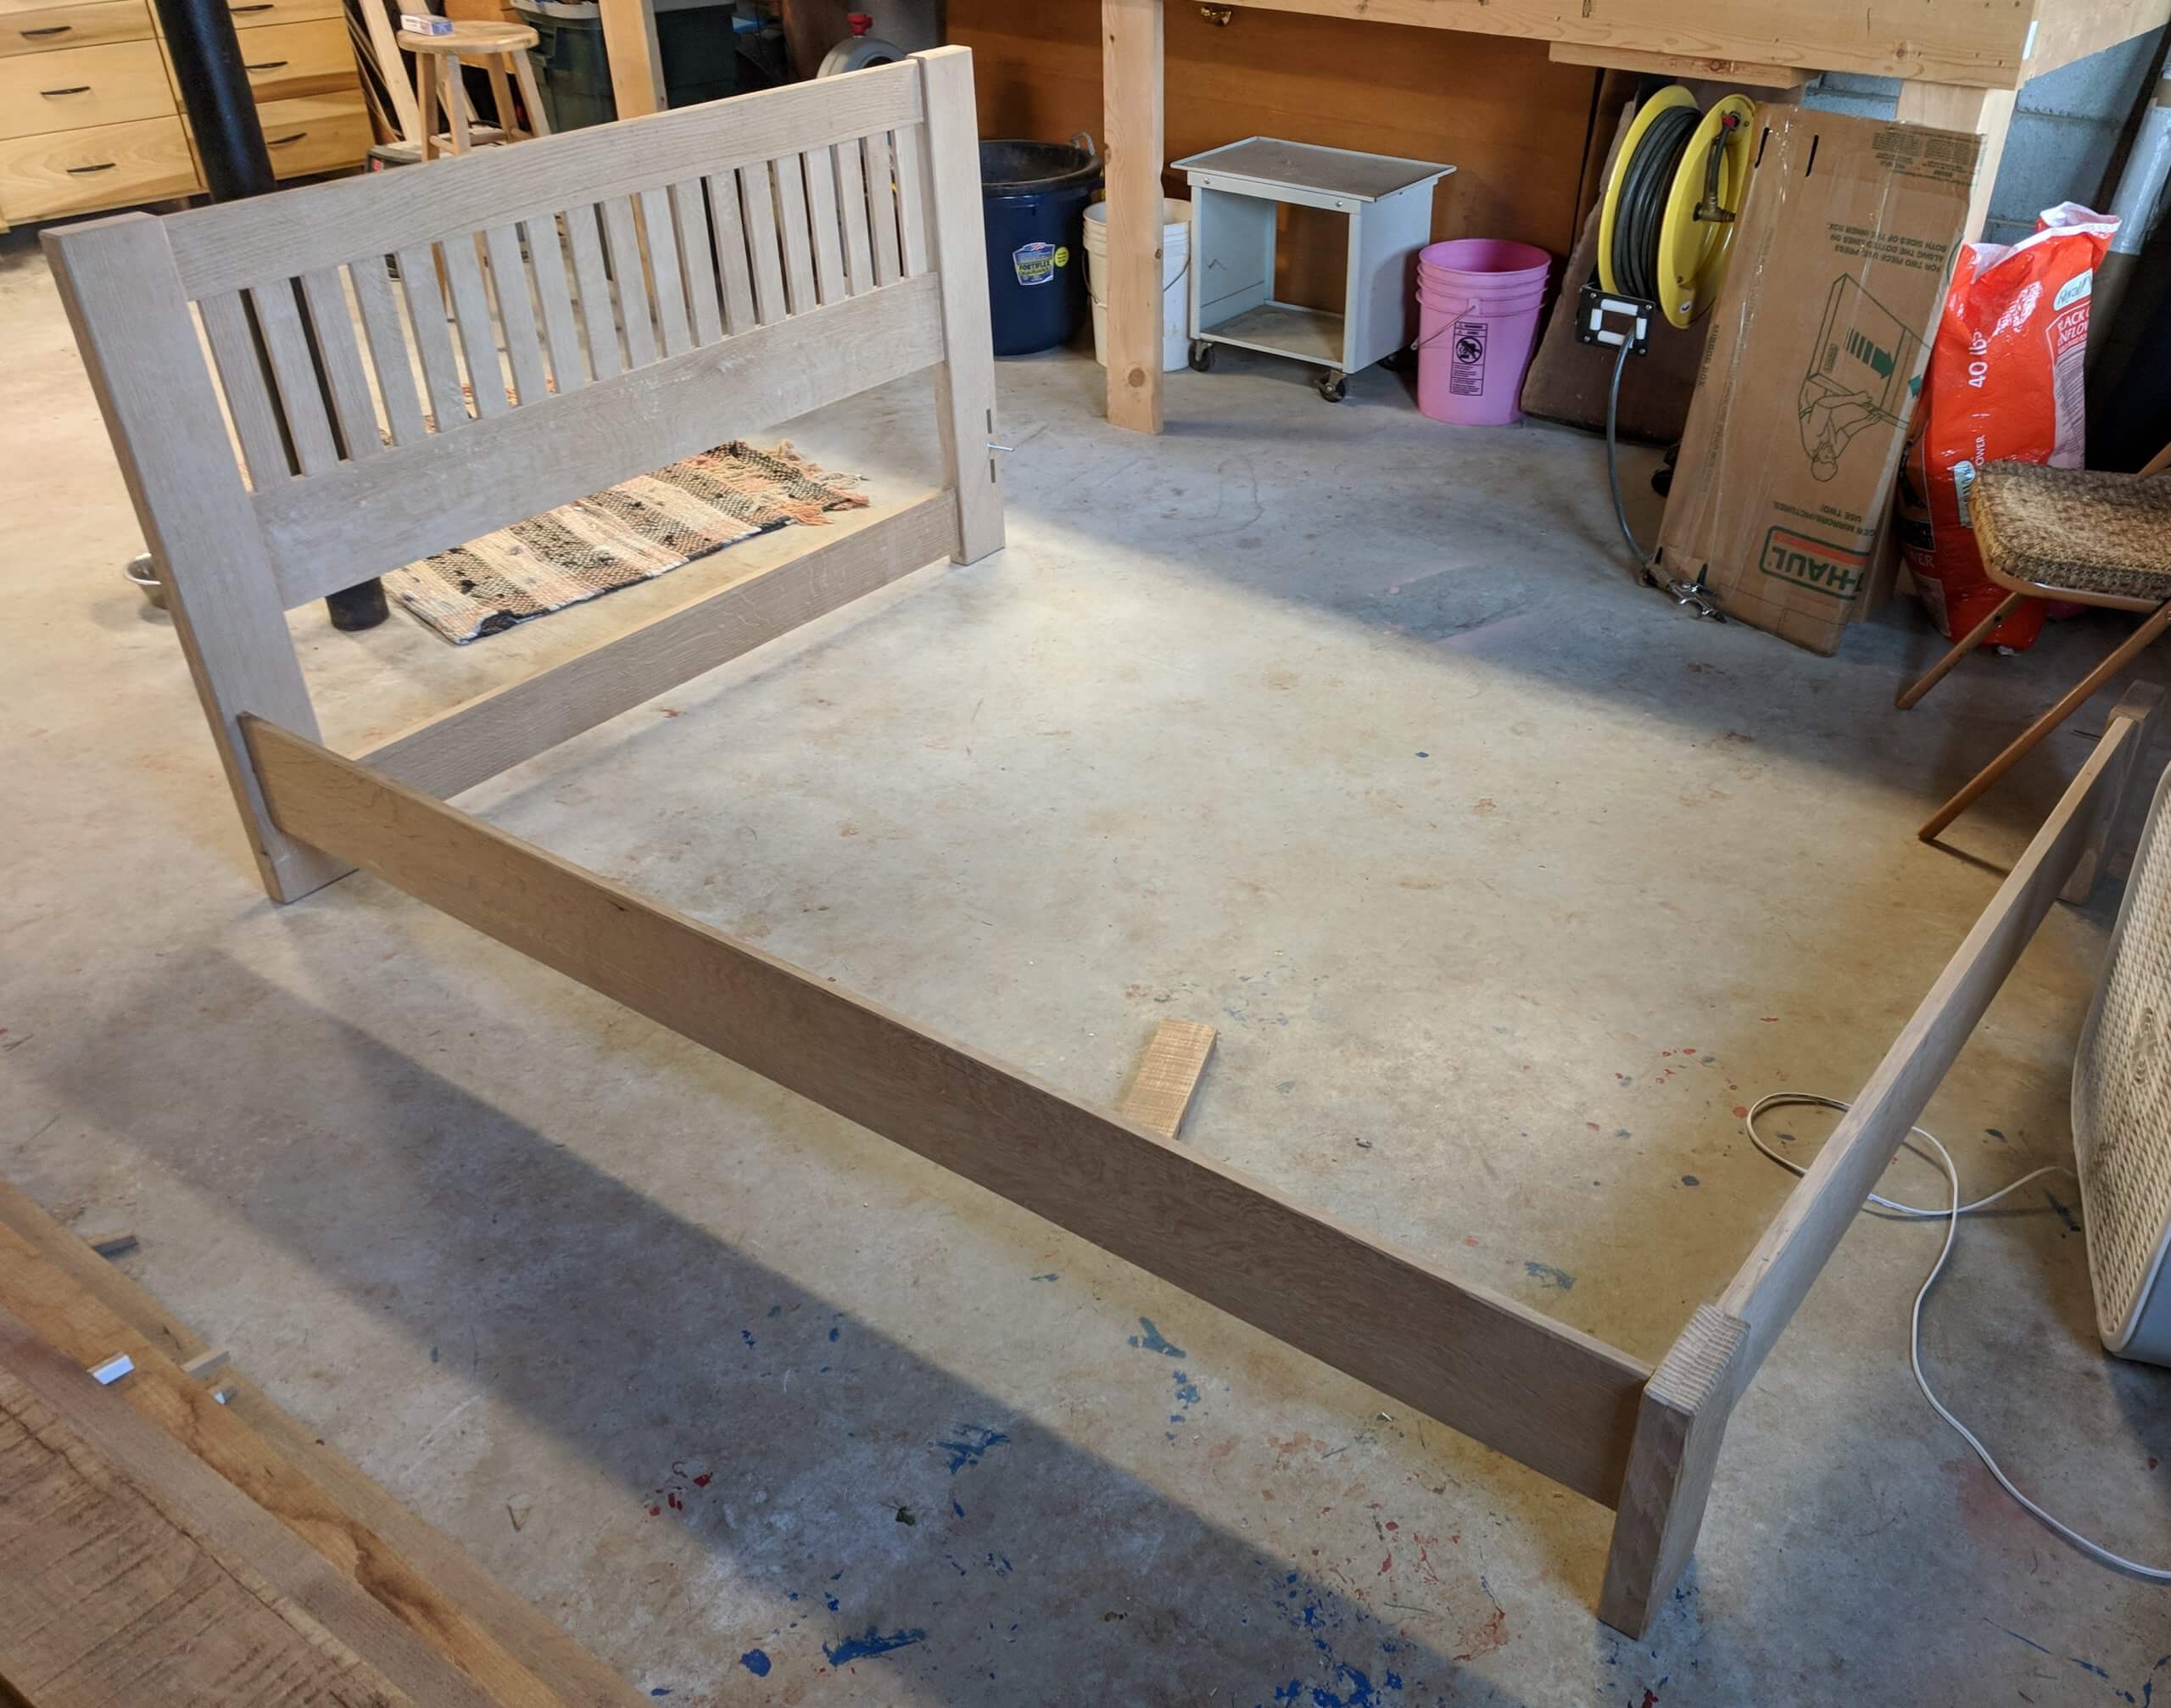
After glue-up a final dry fit of the entire frame was done before finishing. At this point the two stub tenons in the rails were tweaked to fit easily into the posts.
Finishing
Finish consisted of a coat of Minwax pecan stain (don’t let the word pecan throw you, it makes a great color on white oak). This was followed by three coats of Osmo hard wax oil, rubbing with #0000 steel wool before the final coat.
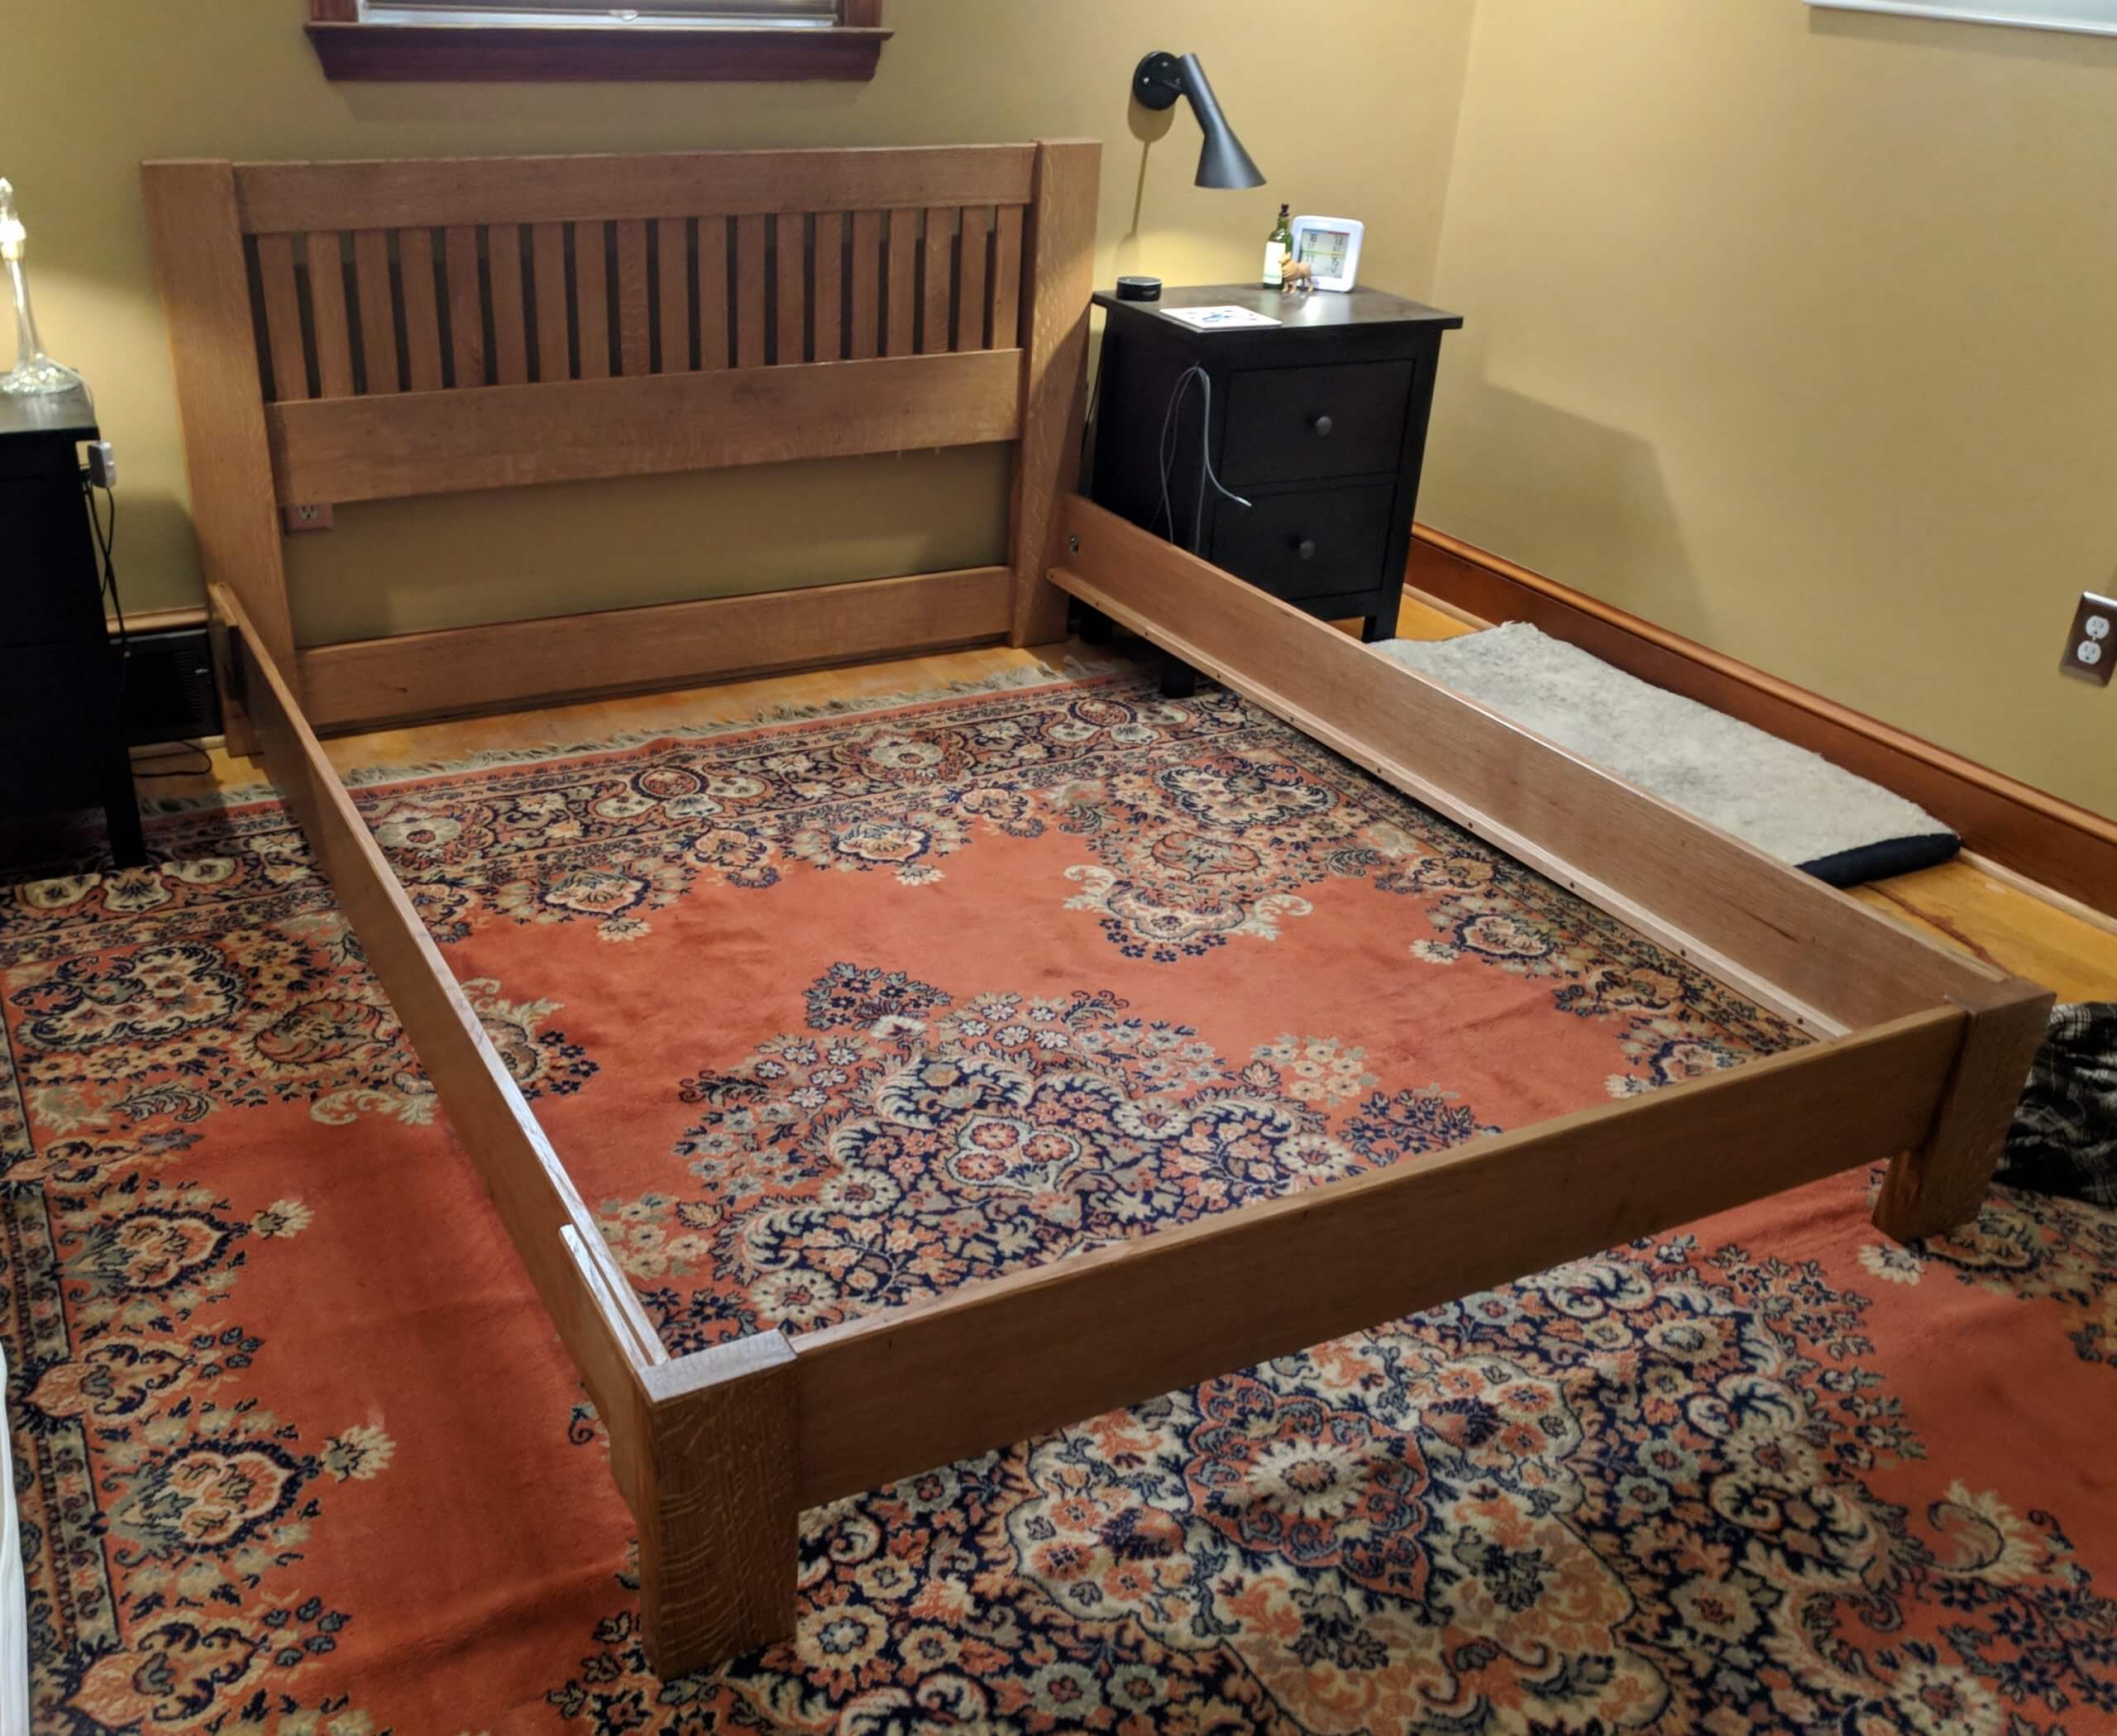
I carried the parts out of the shop and into the house and did the finally assembly. The Rockler hardware worked better than expected and frame has been very solid. Not shown here are the slats. Ten 2X4s were cut to 60 1/2″ and laid out to provide support for the mattress.
Do you sell plans for projects like this mission style bed and its dresser and night stand. I’m not an inexperienced wood worker, but I’m not experience enough to build this without plans.
I do not sell plans, but I do provide Sketch-up models of the ones I have if you want to make something.