
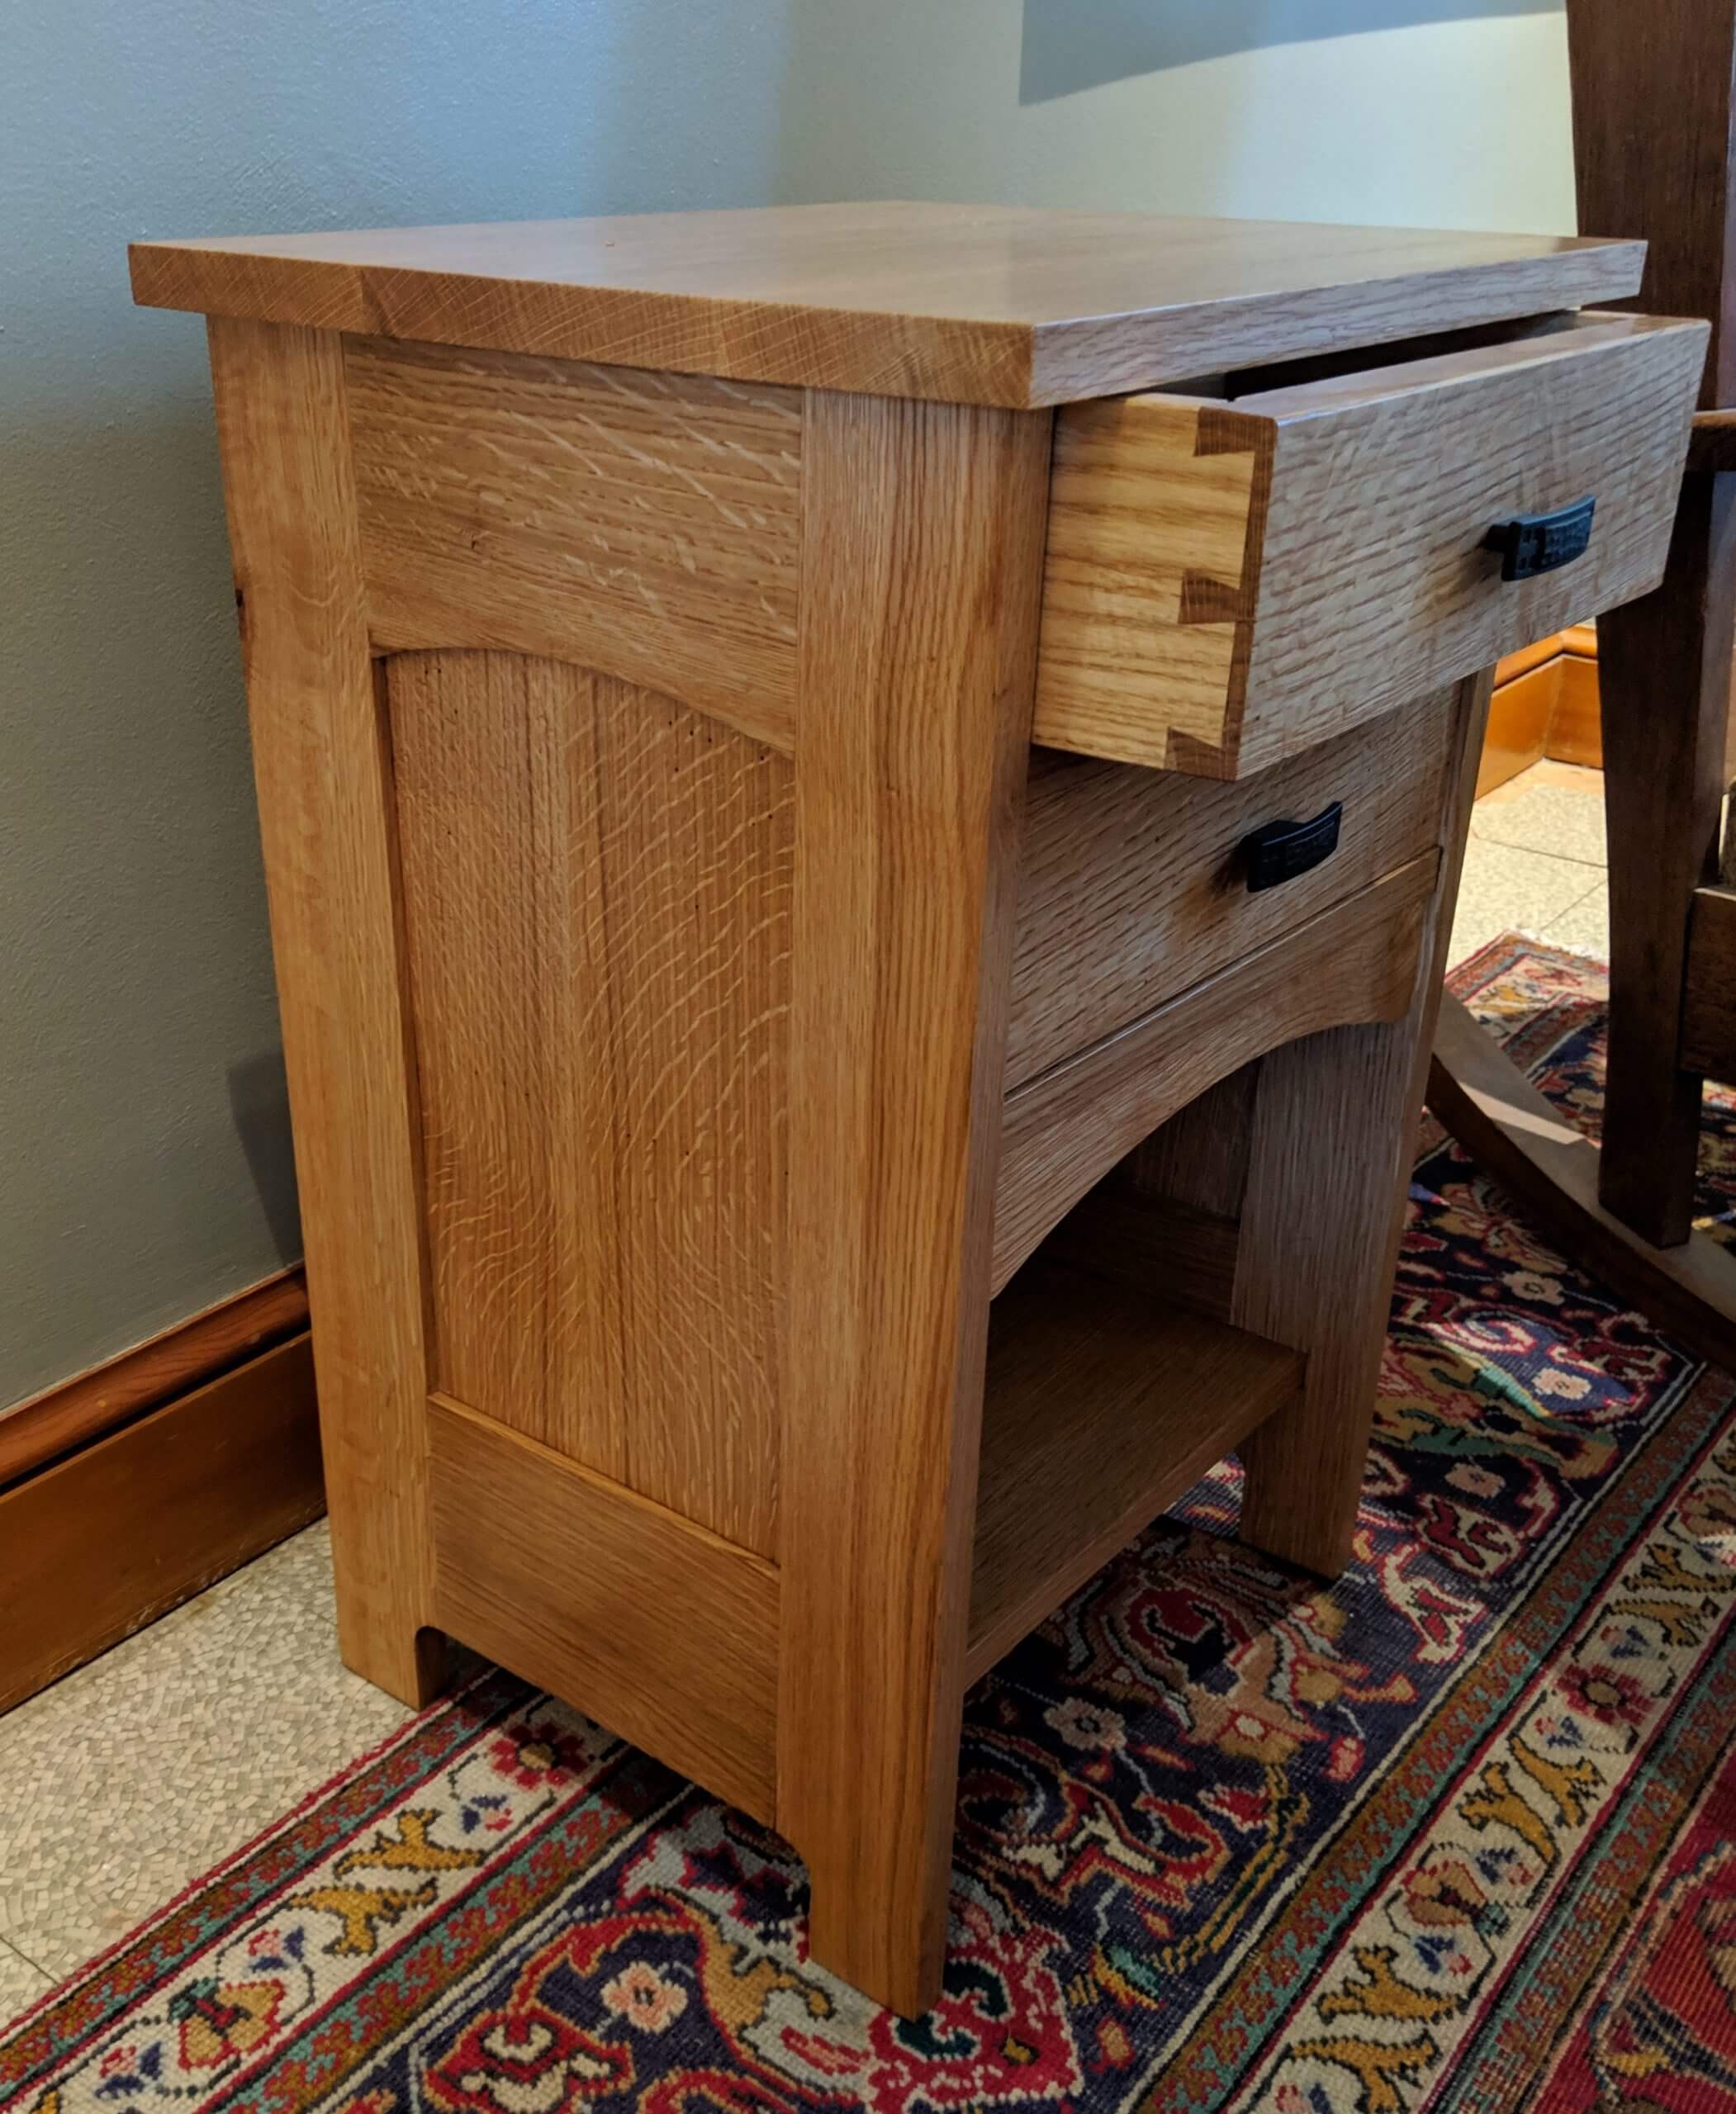
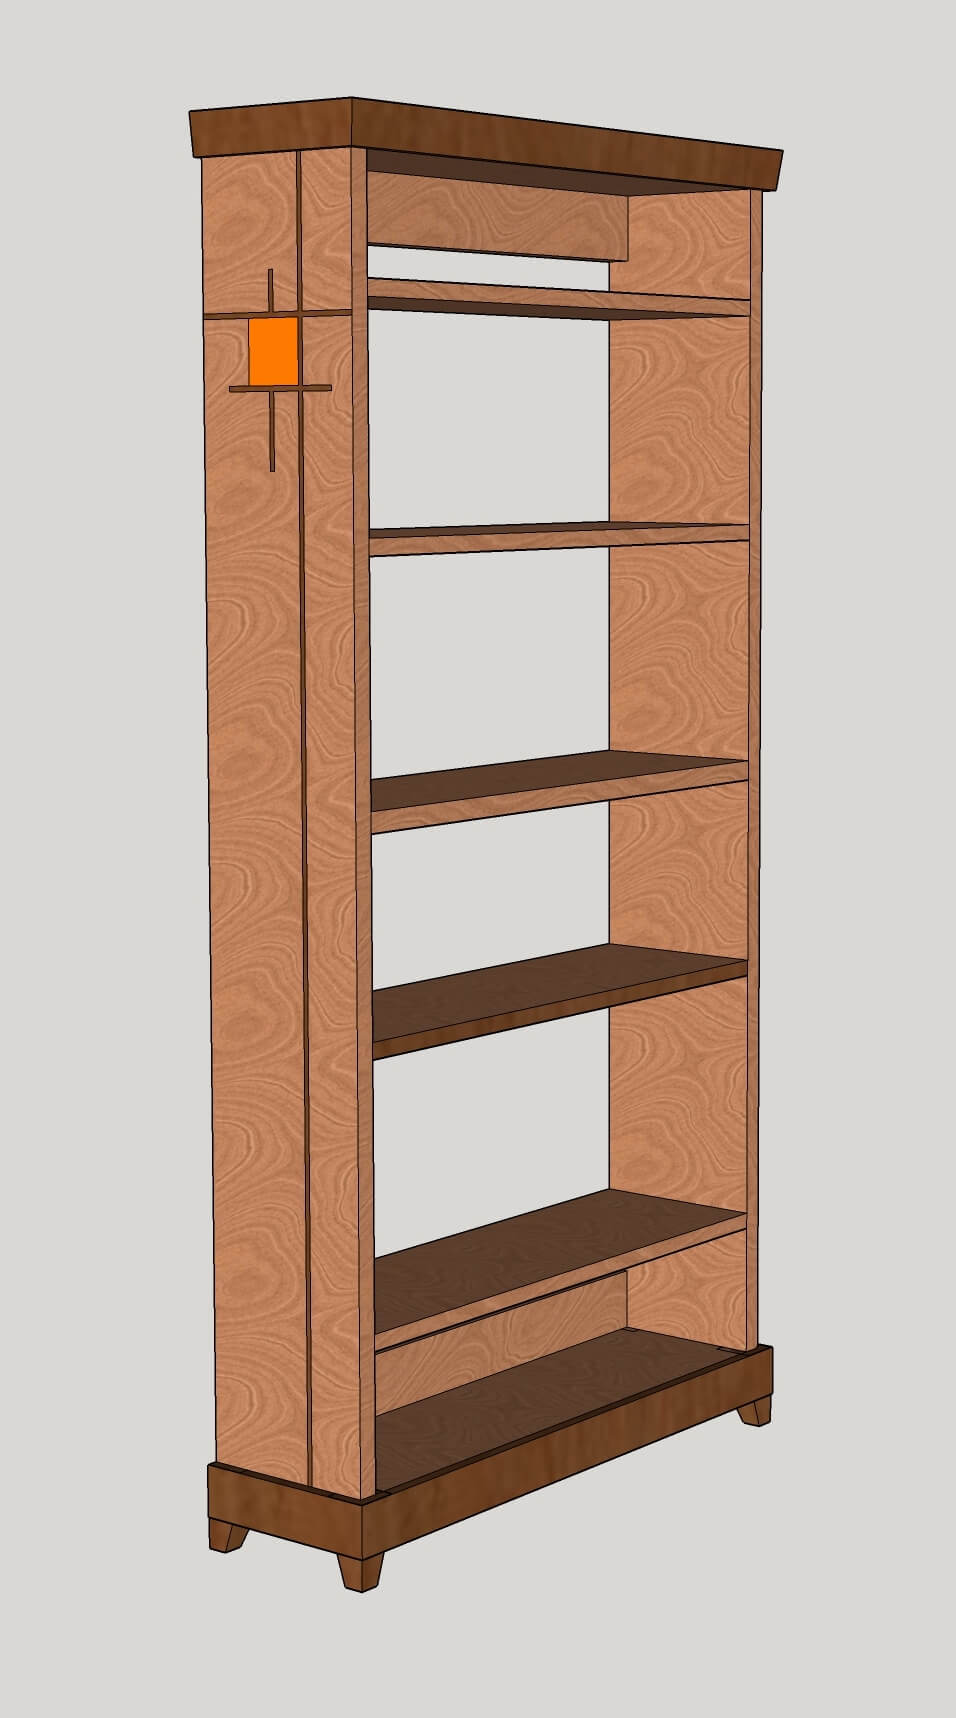
I recently built an Arts and Crafts inspired platform style bed. The next step is to make matching night stands.
This is rather long as there are many steps and I will try and include useful images as well as the steps used. Feel free to skip ahead.
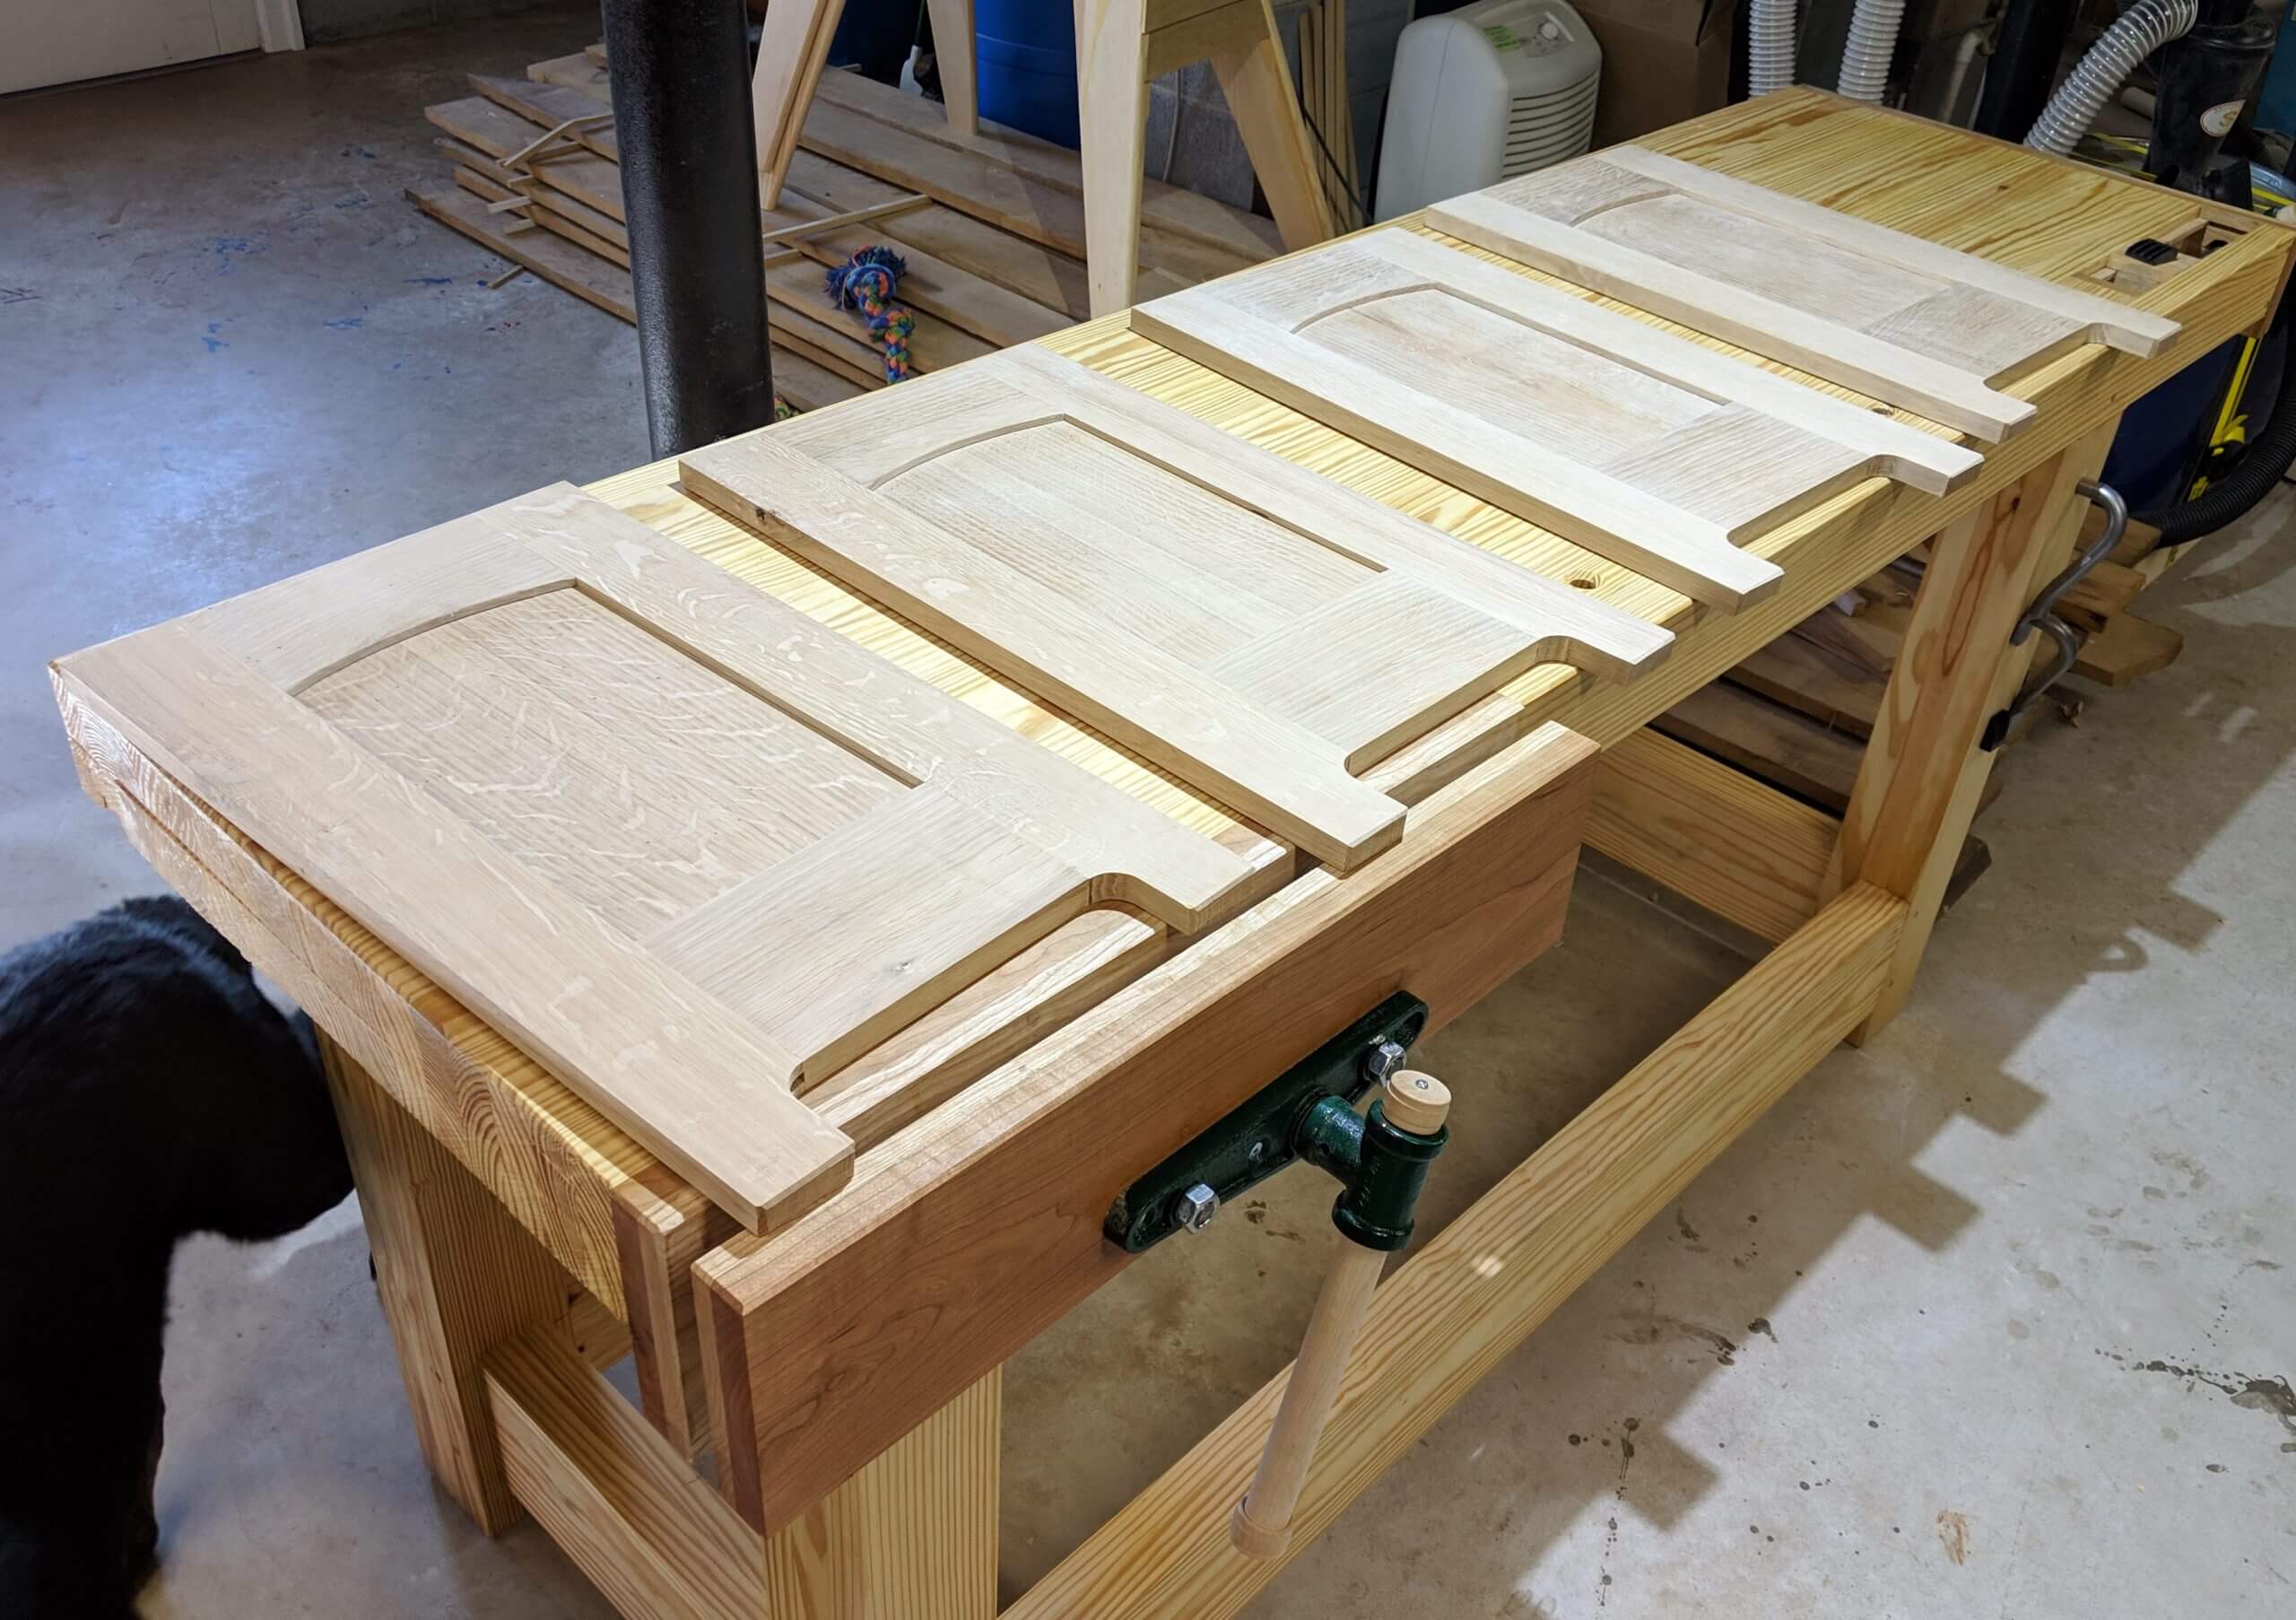
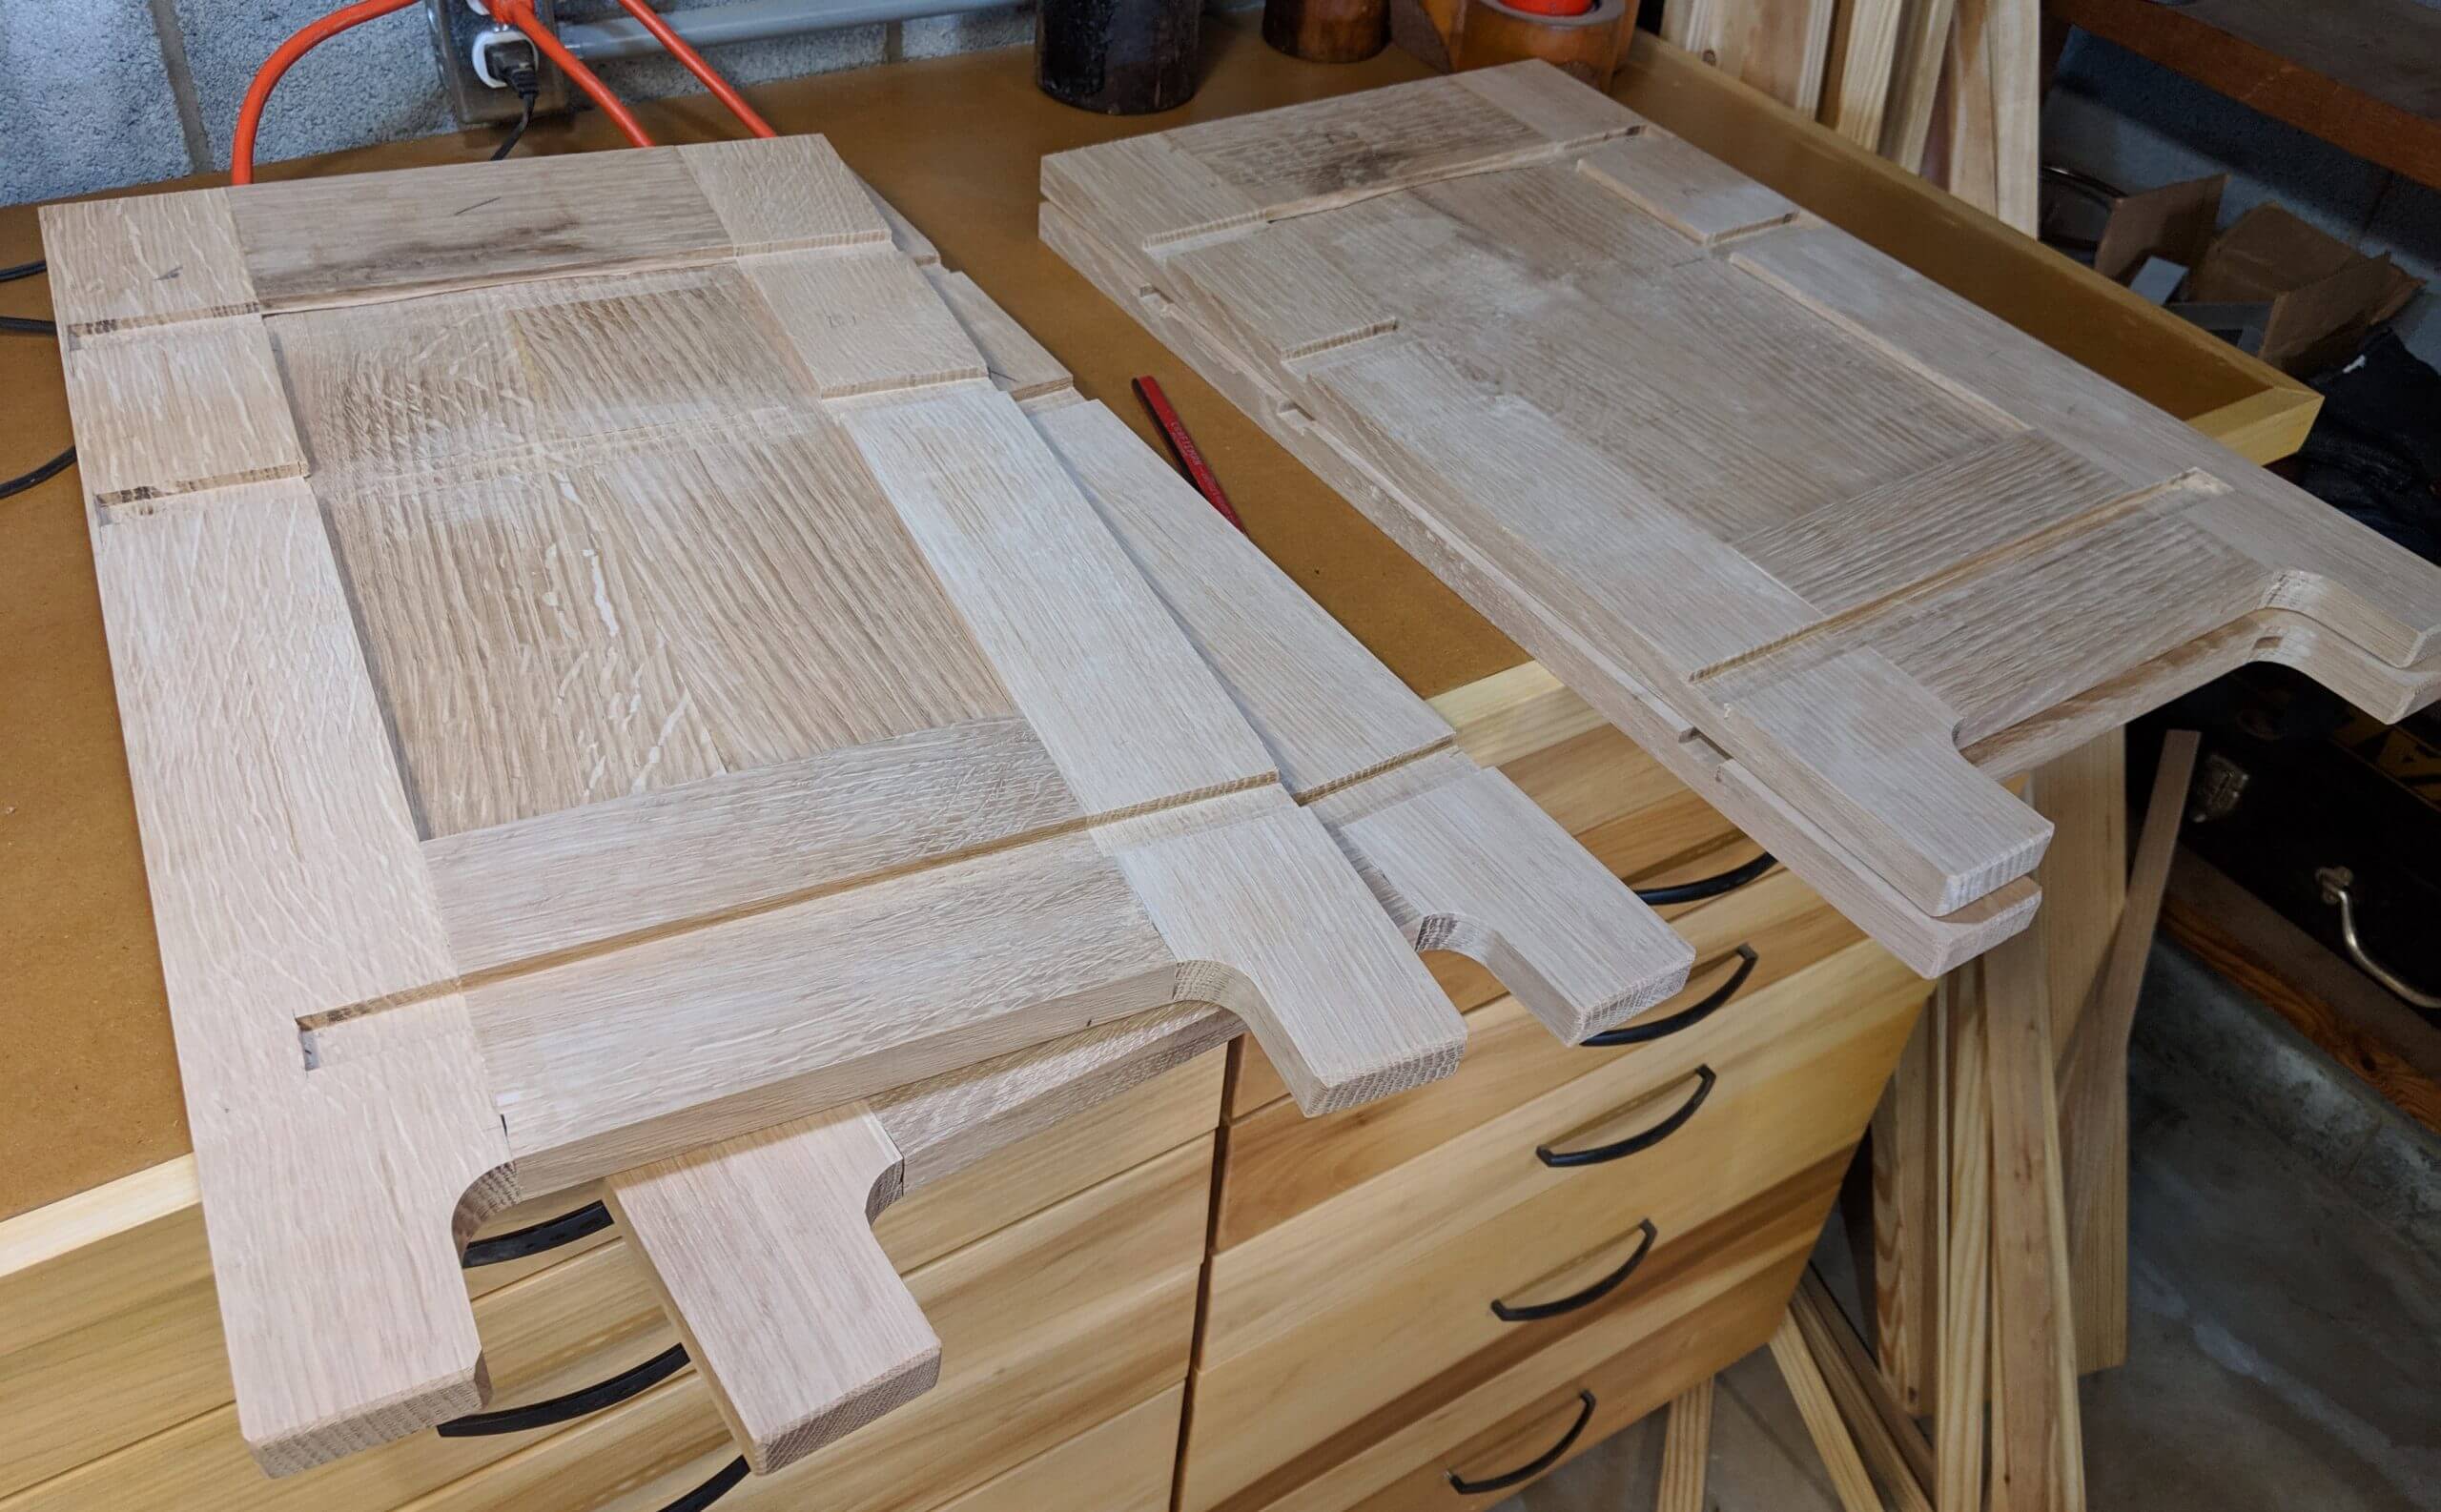
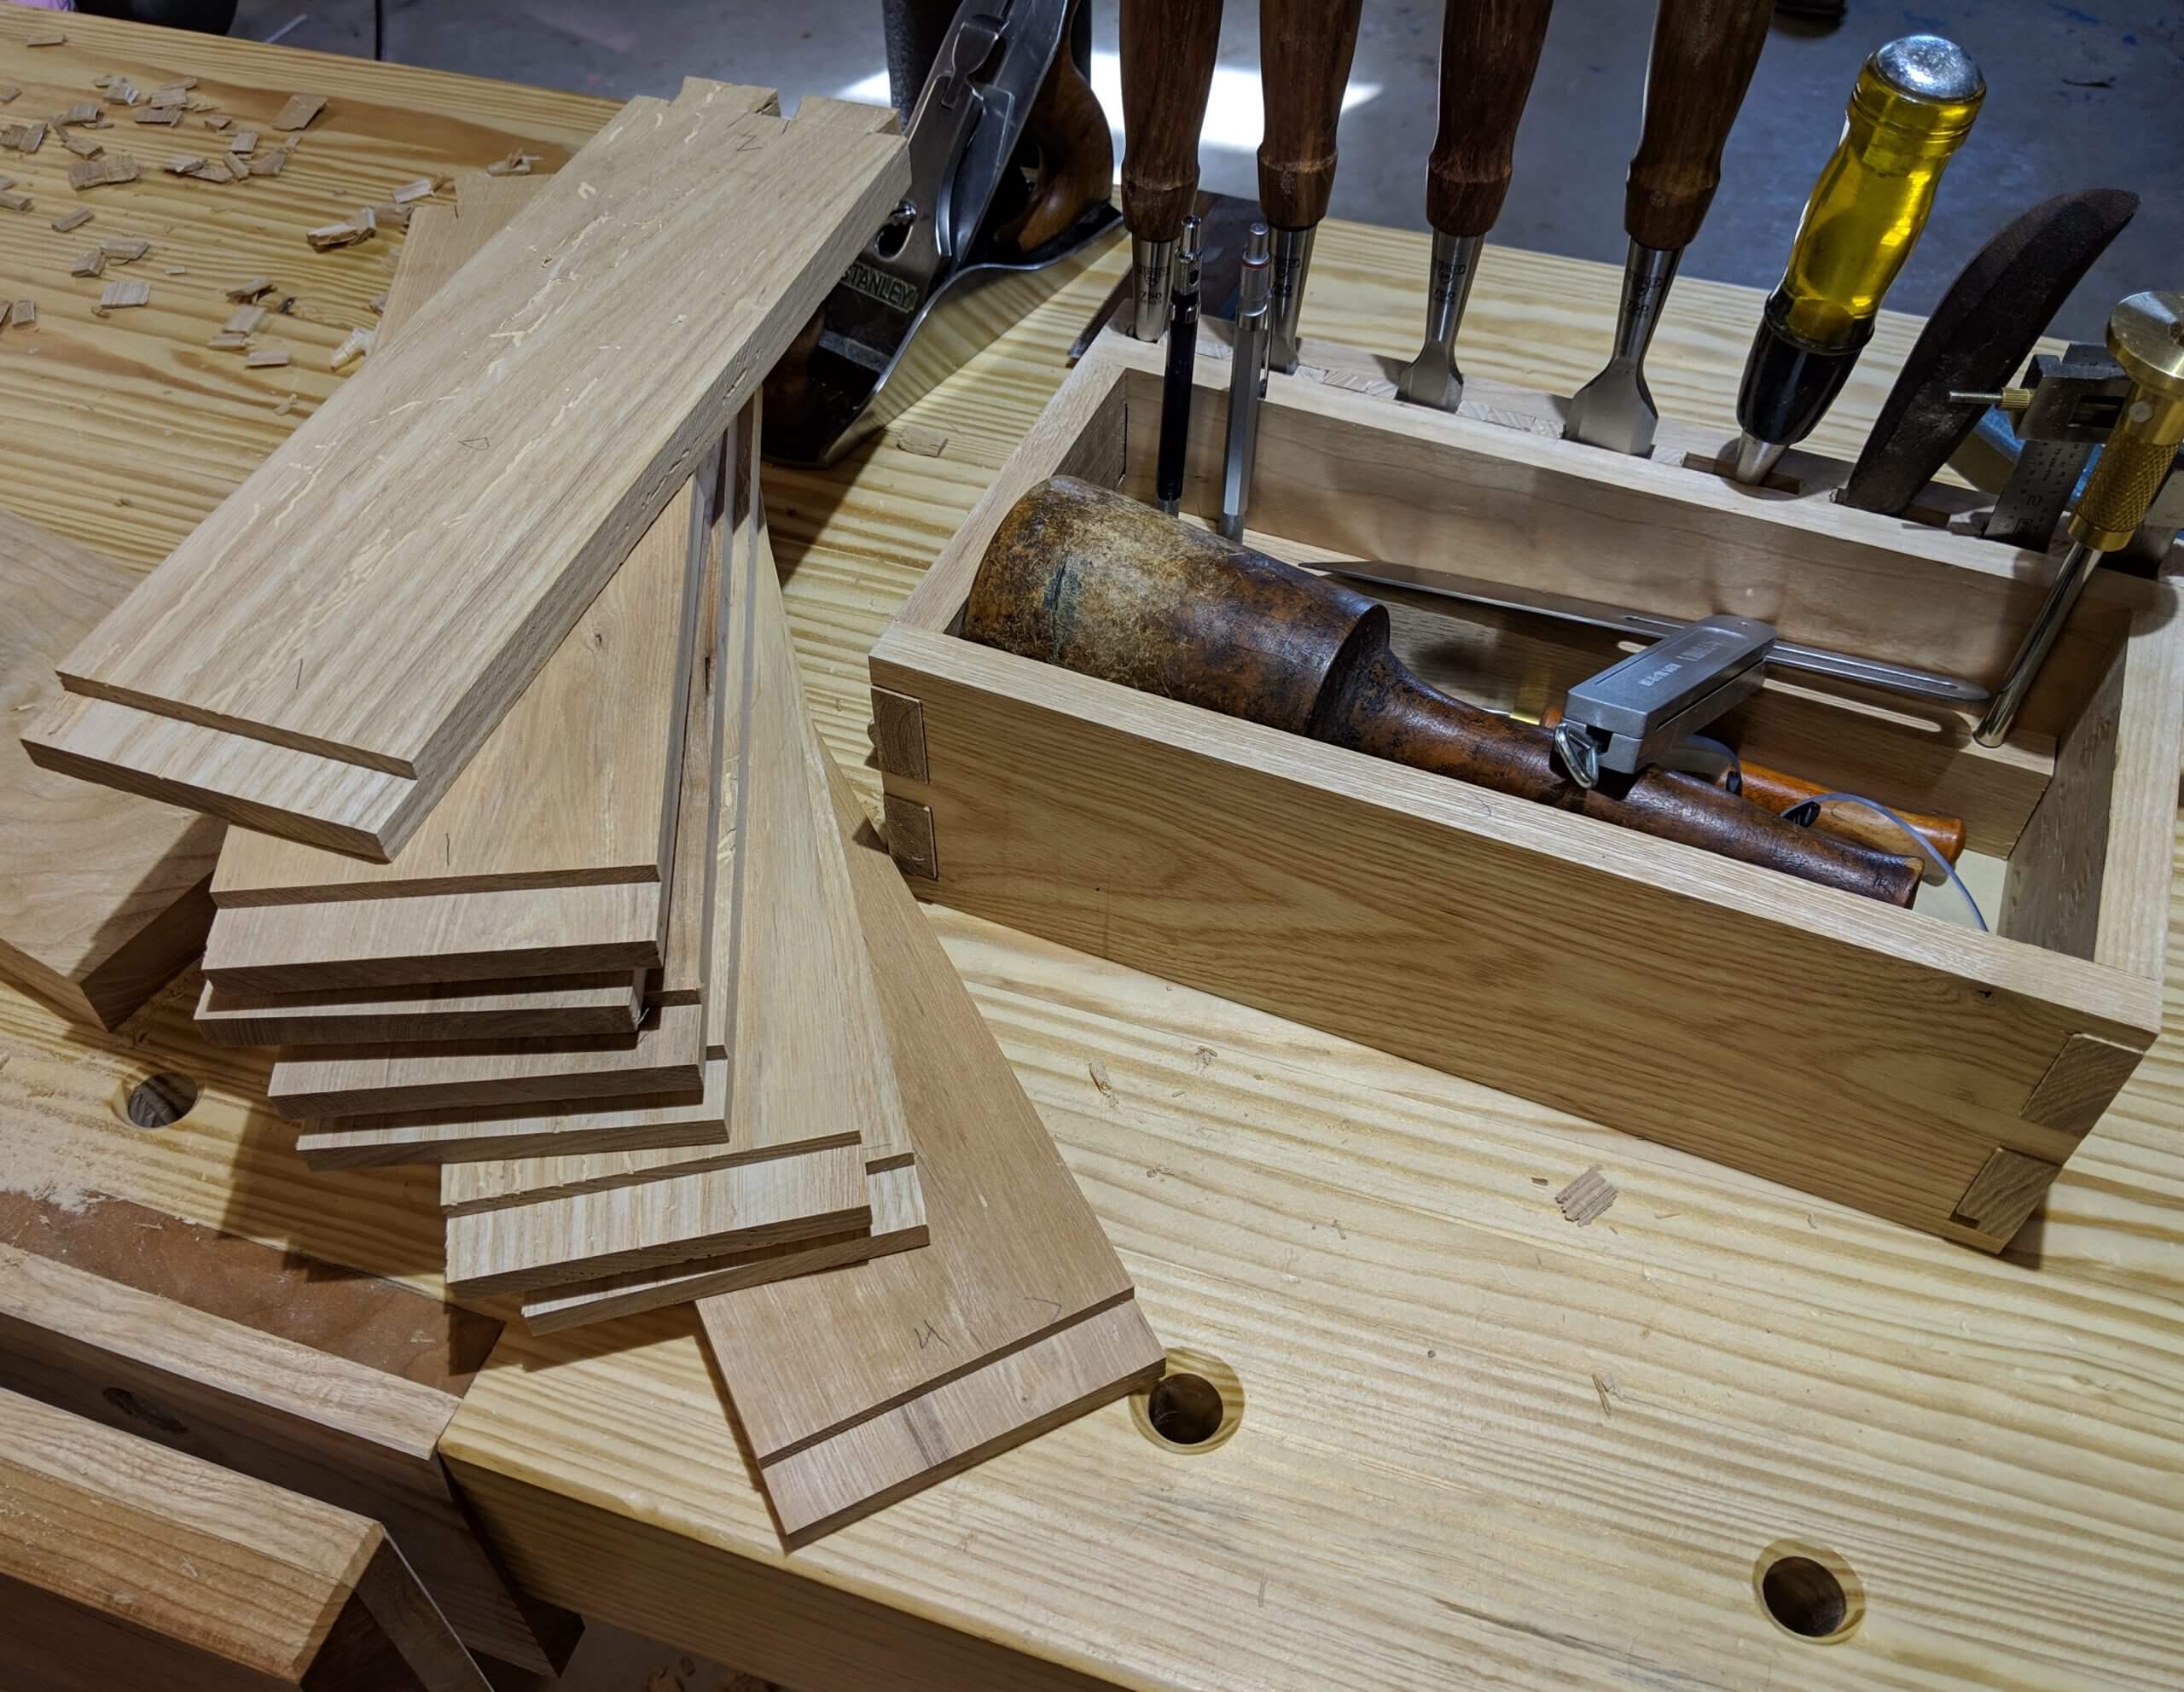
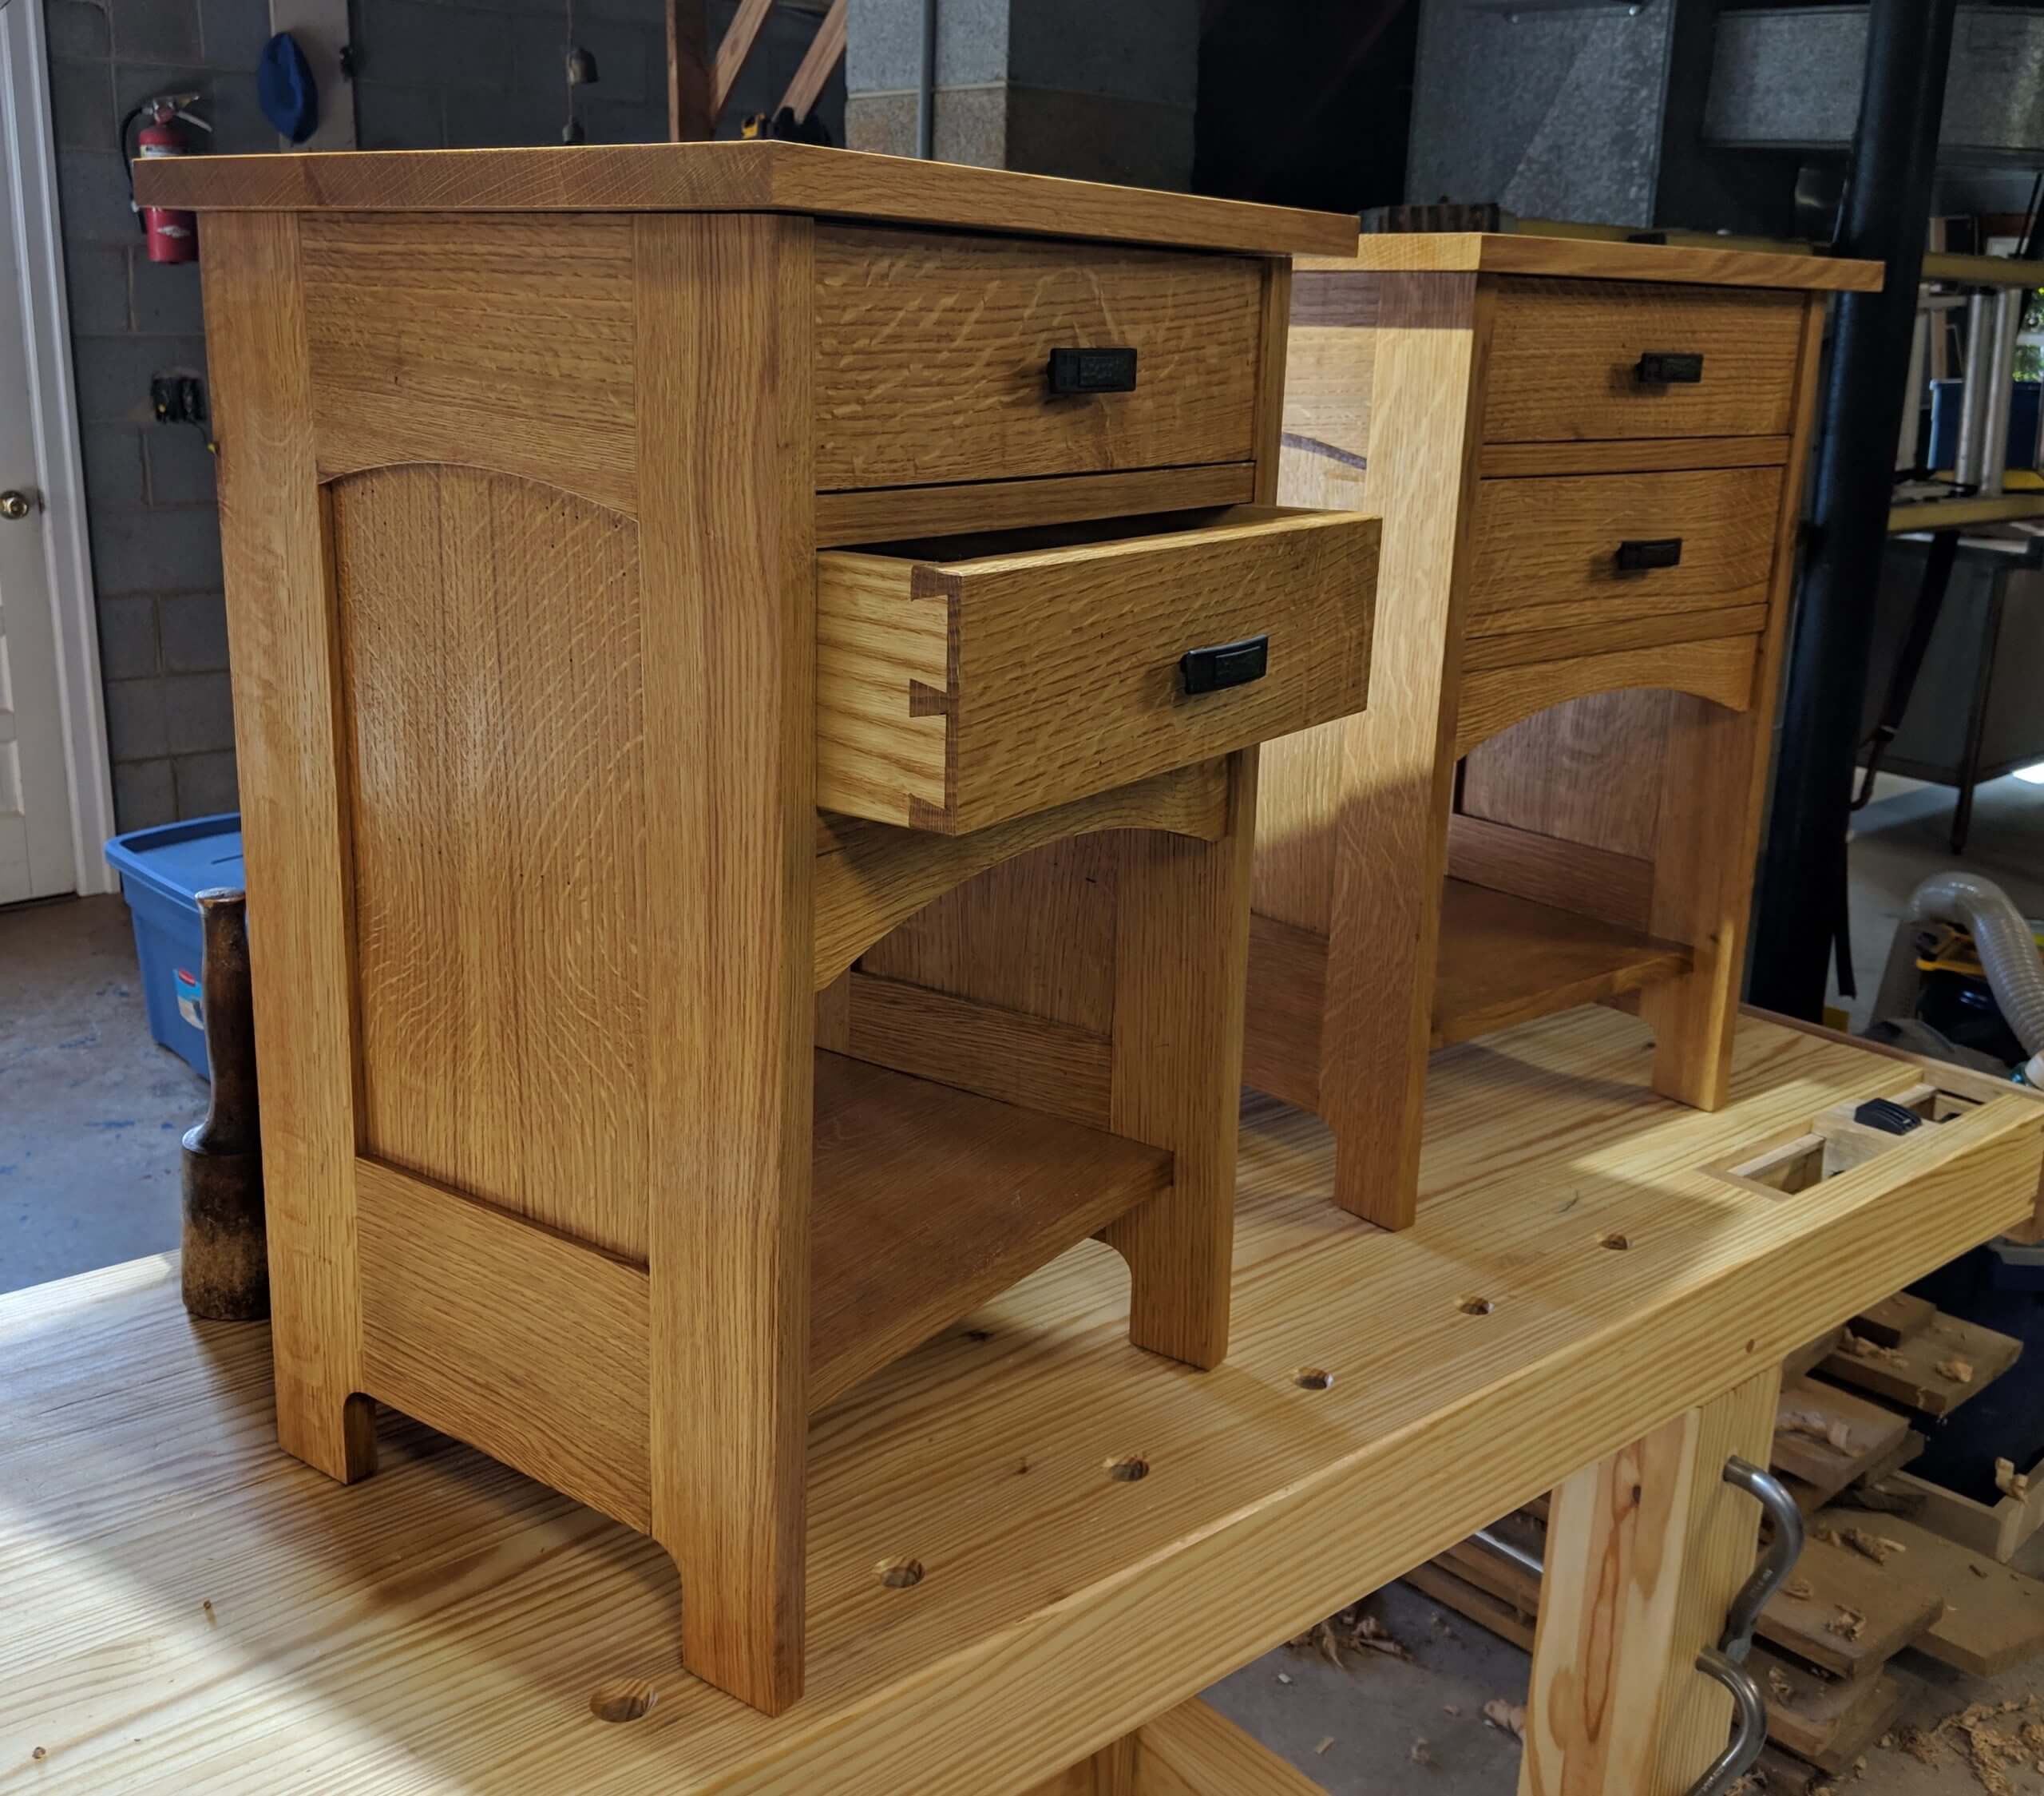
I am making a pair of these, so the images will often show more parts than needed for one table.
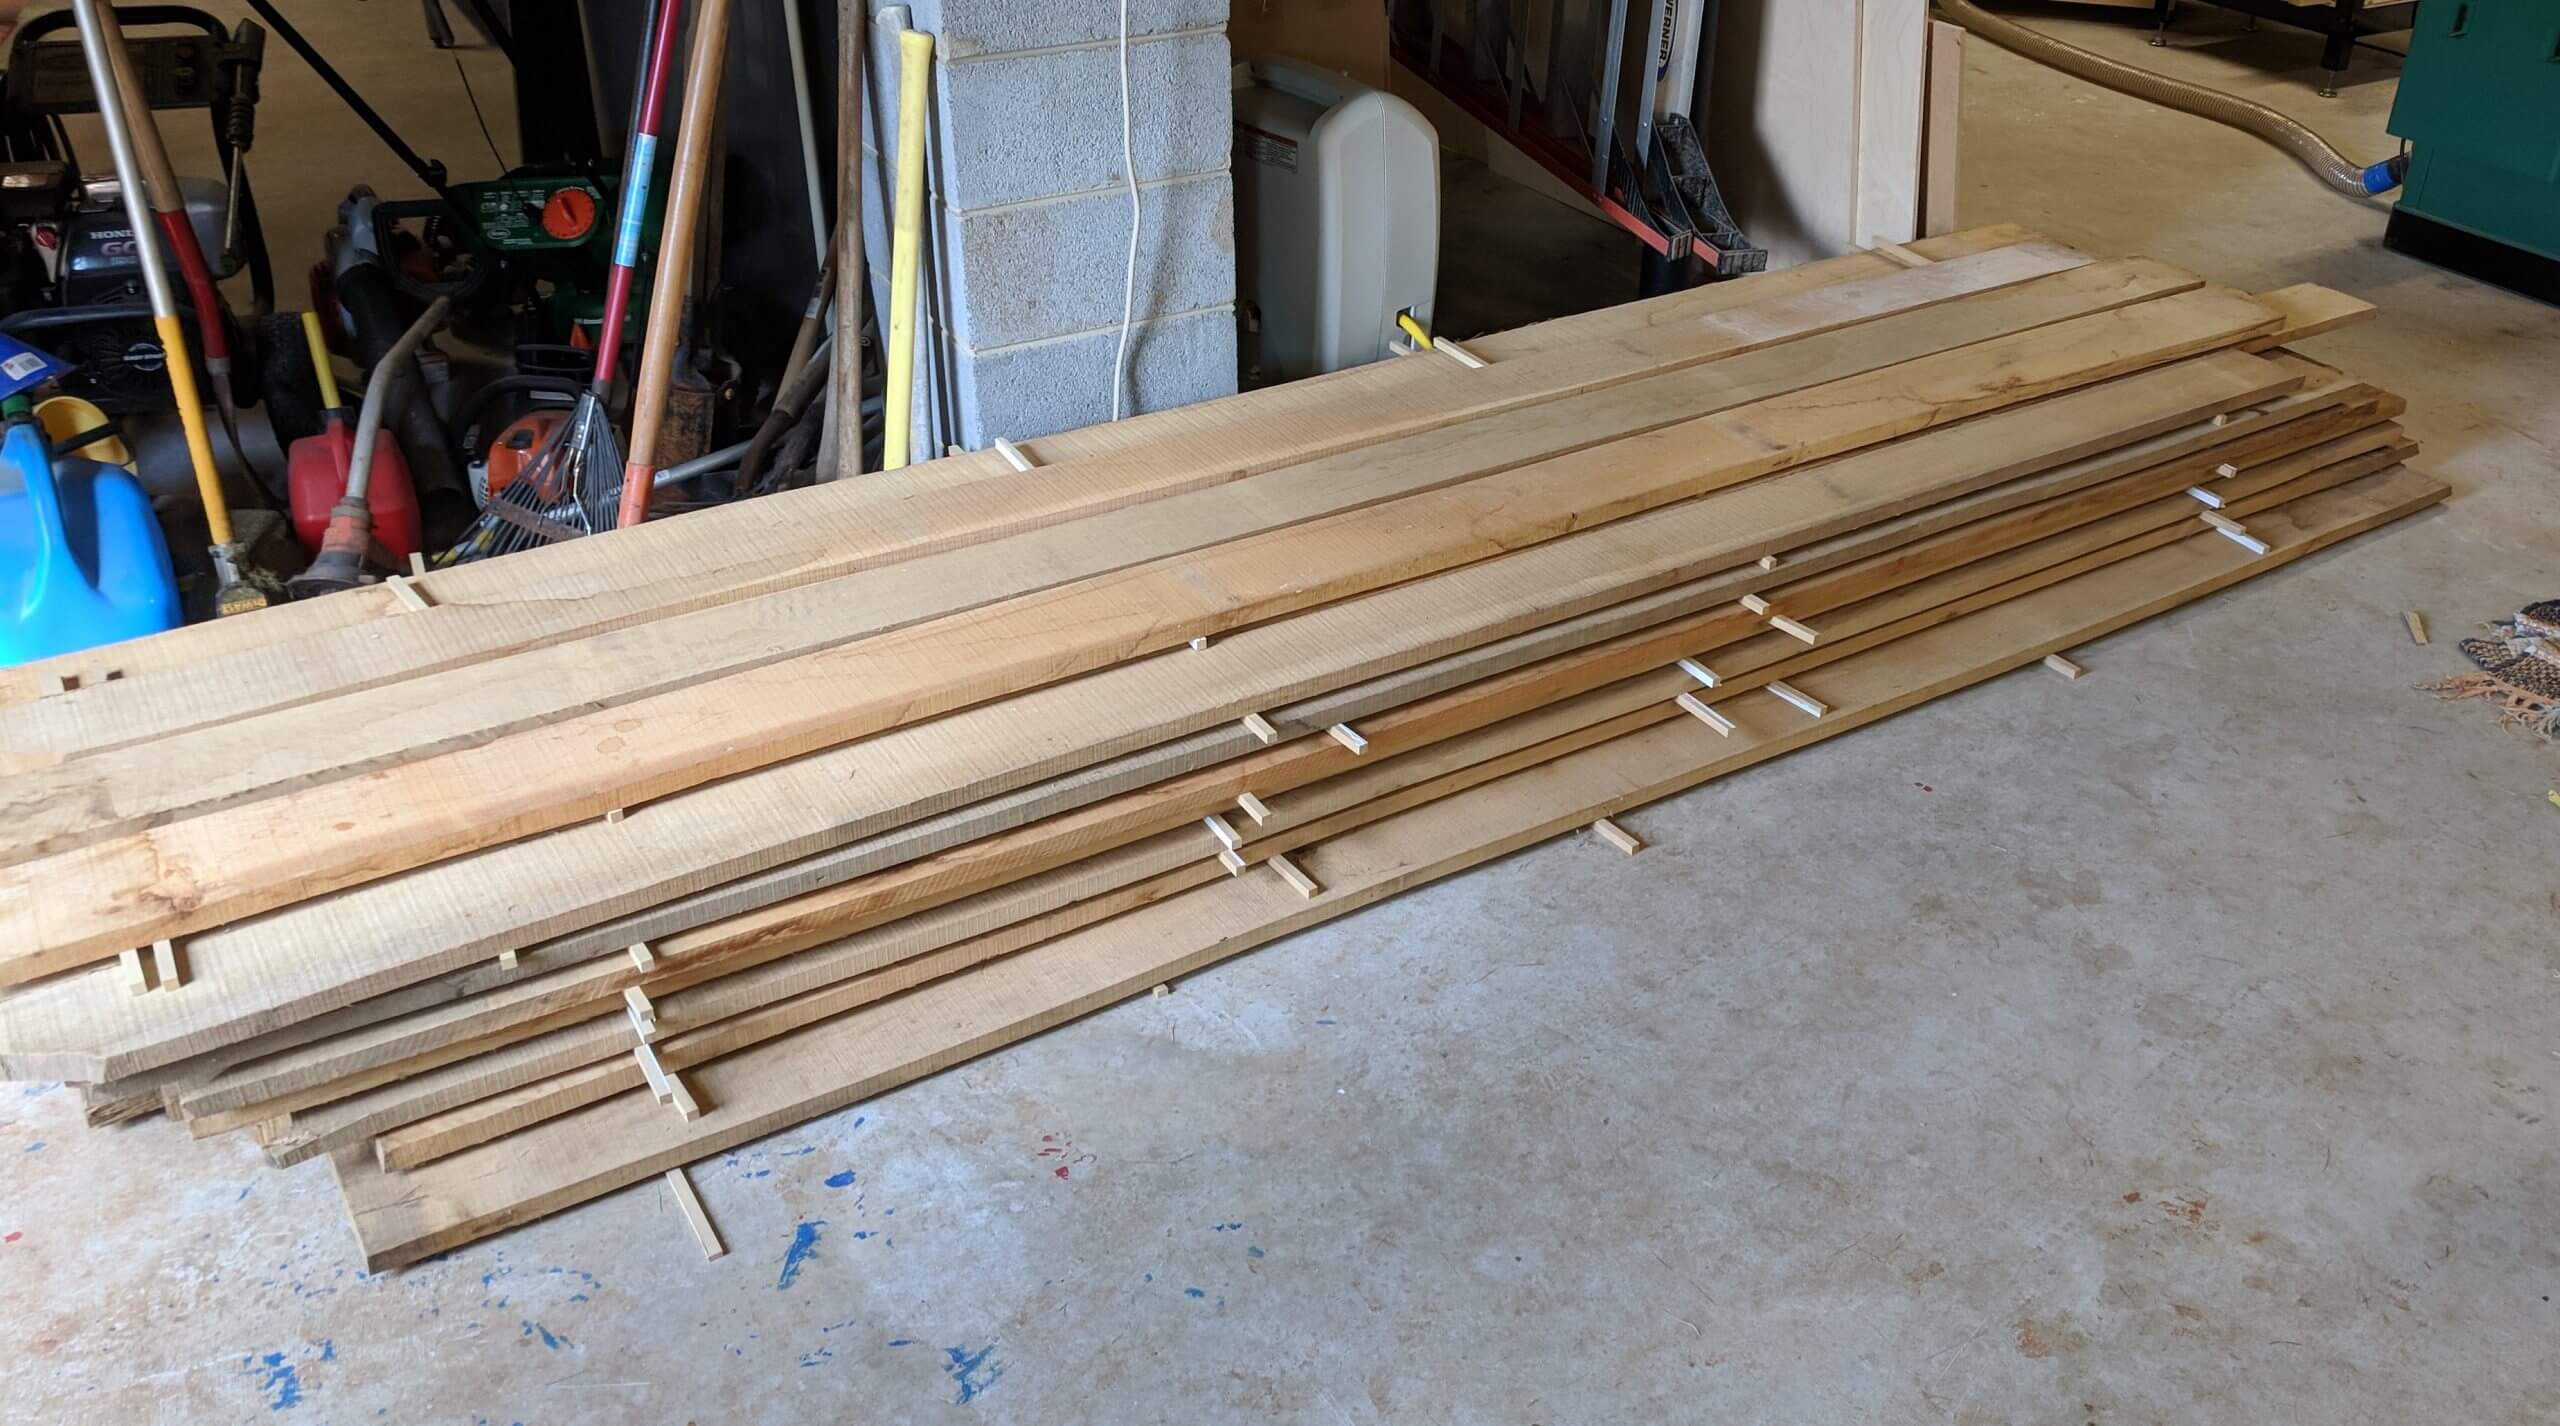
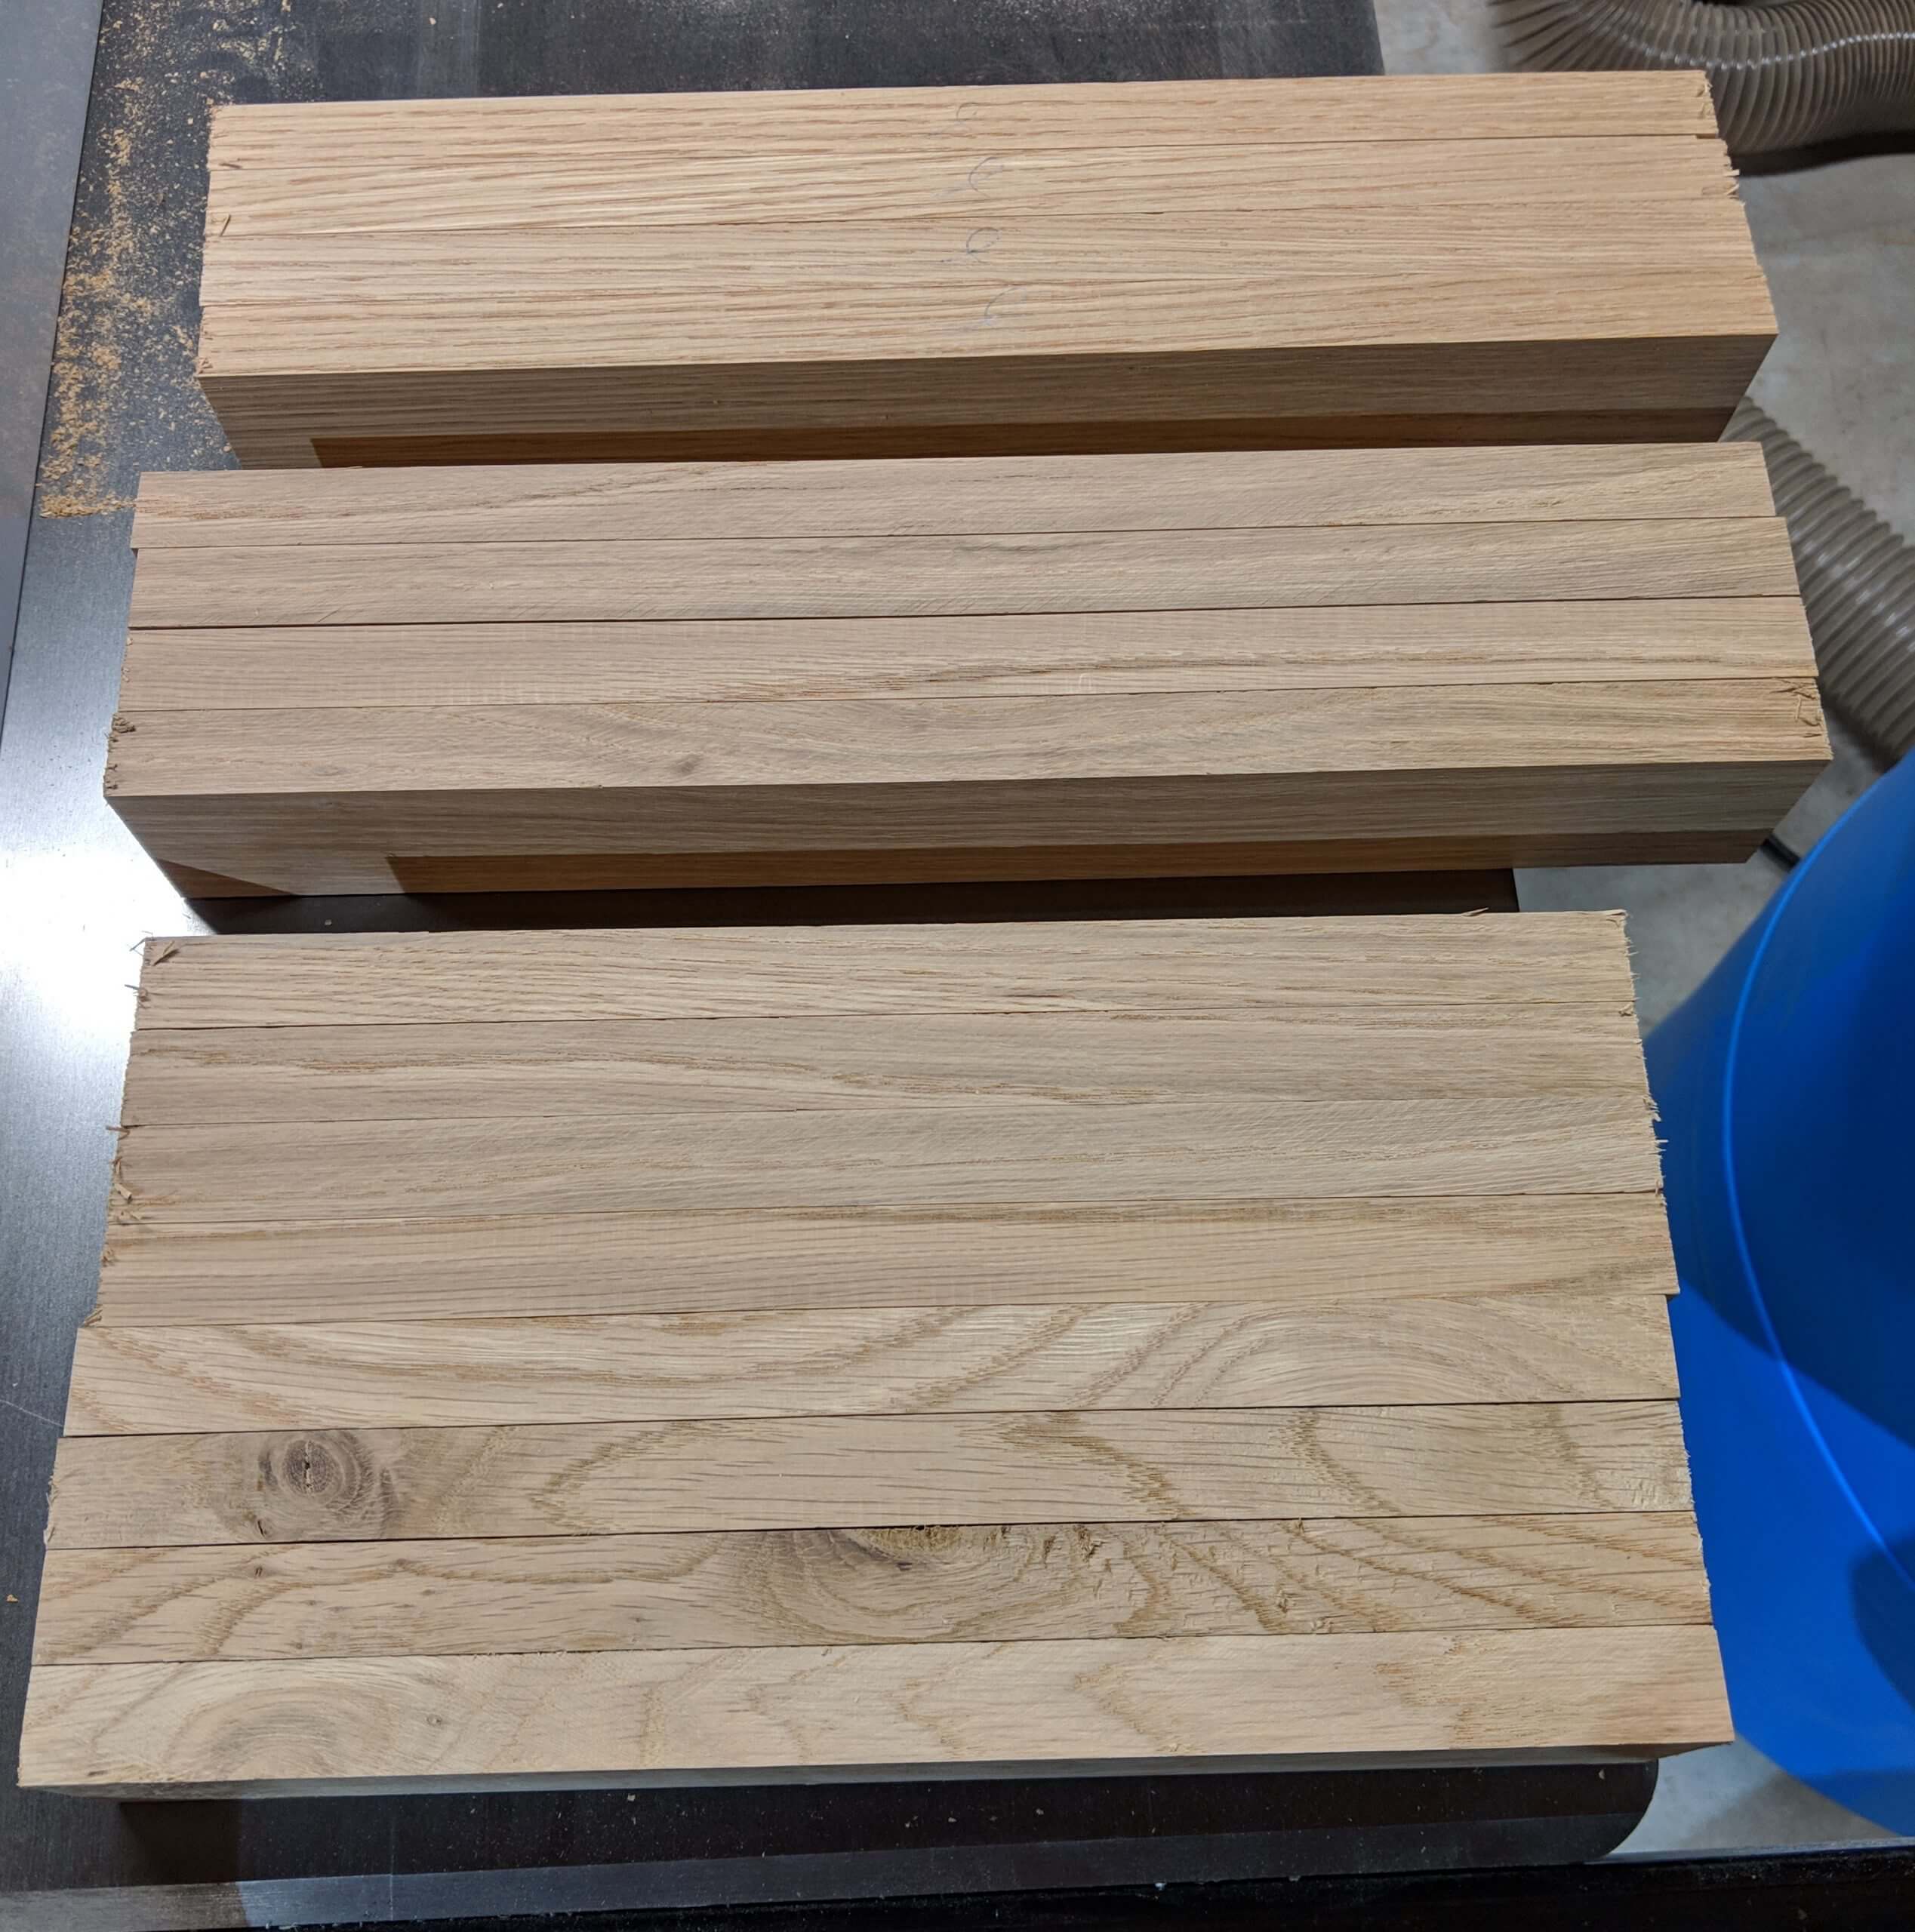
The first step with any such project is to source your wood. I have a nice stock of quartersawn white oak, though the design would look nice in cherry.
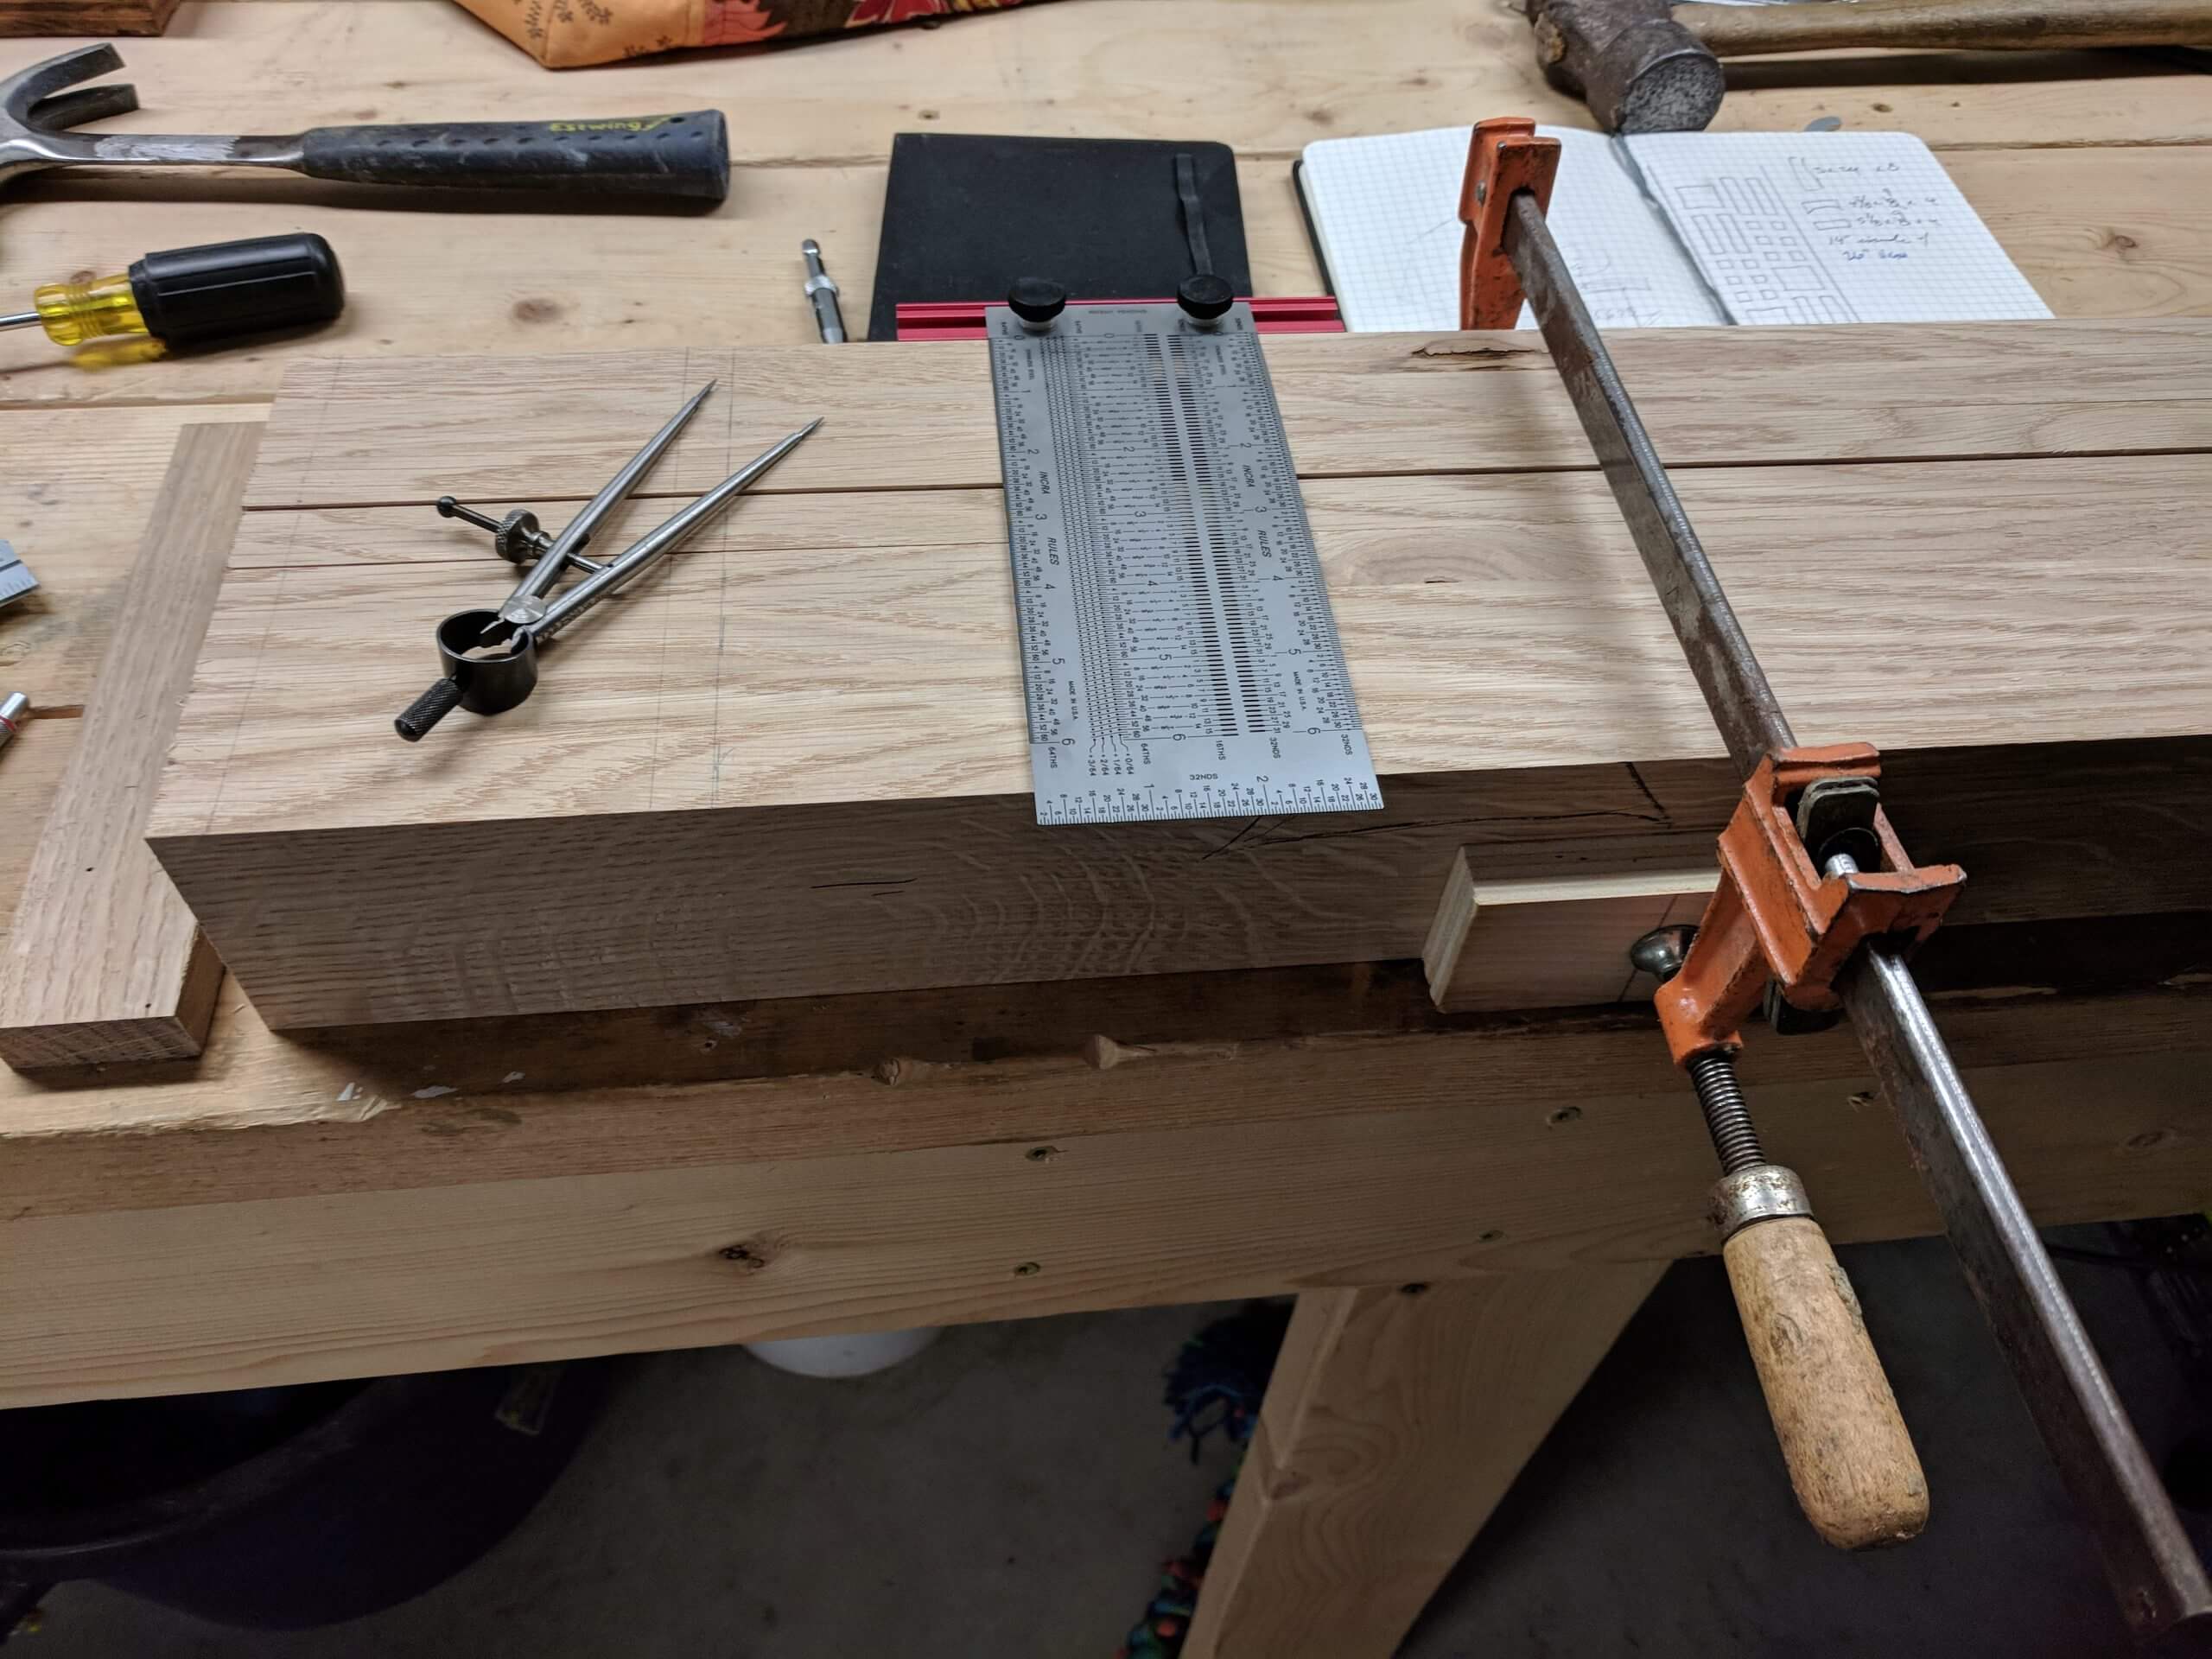
This is a clean simple piece. No dominos, no biscuits, no hardware other than to attach the top and no dowels. The joinery is all dados and dovetails. You need a table saw, band-saw, router (with table recommended), dovetail saw, chisels, hand planes, scrapers (or sandpaper), clamps, mortise gauge and measuring tools.
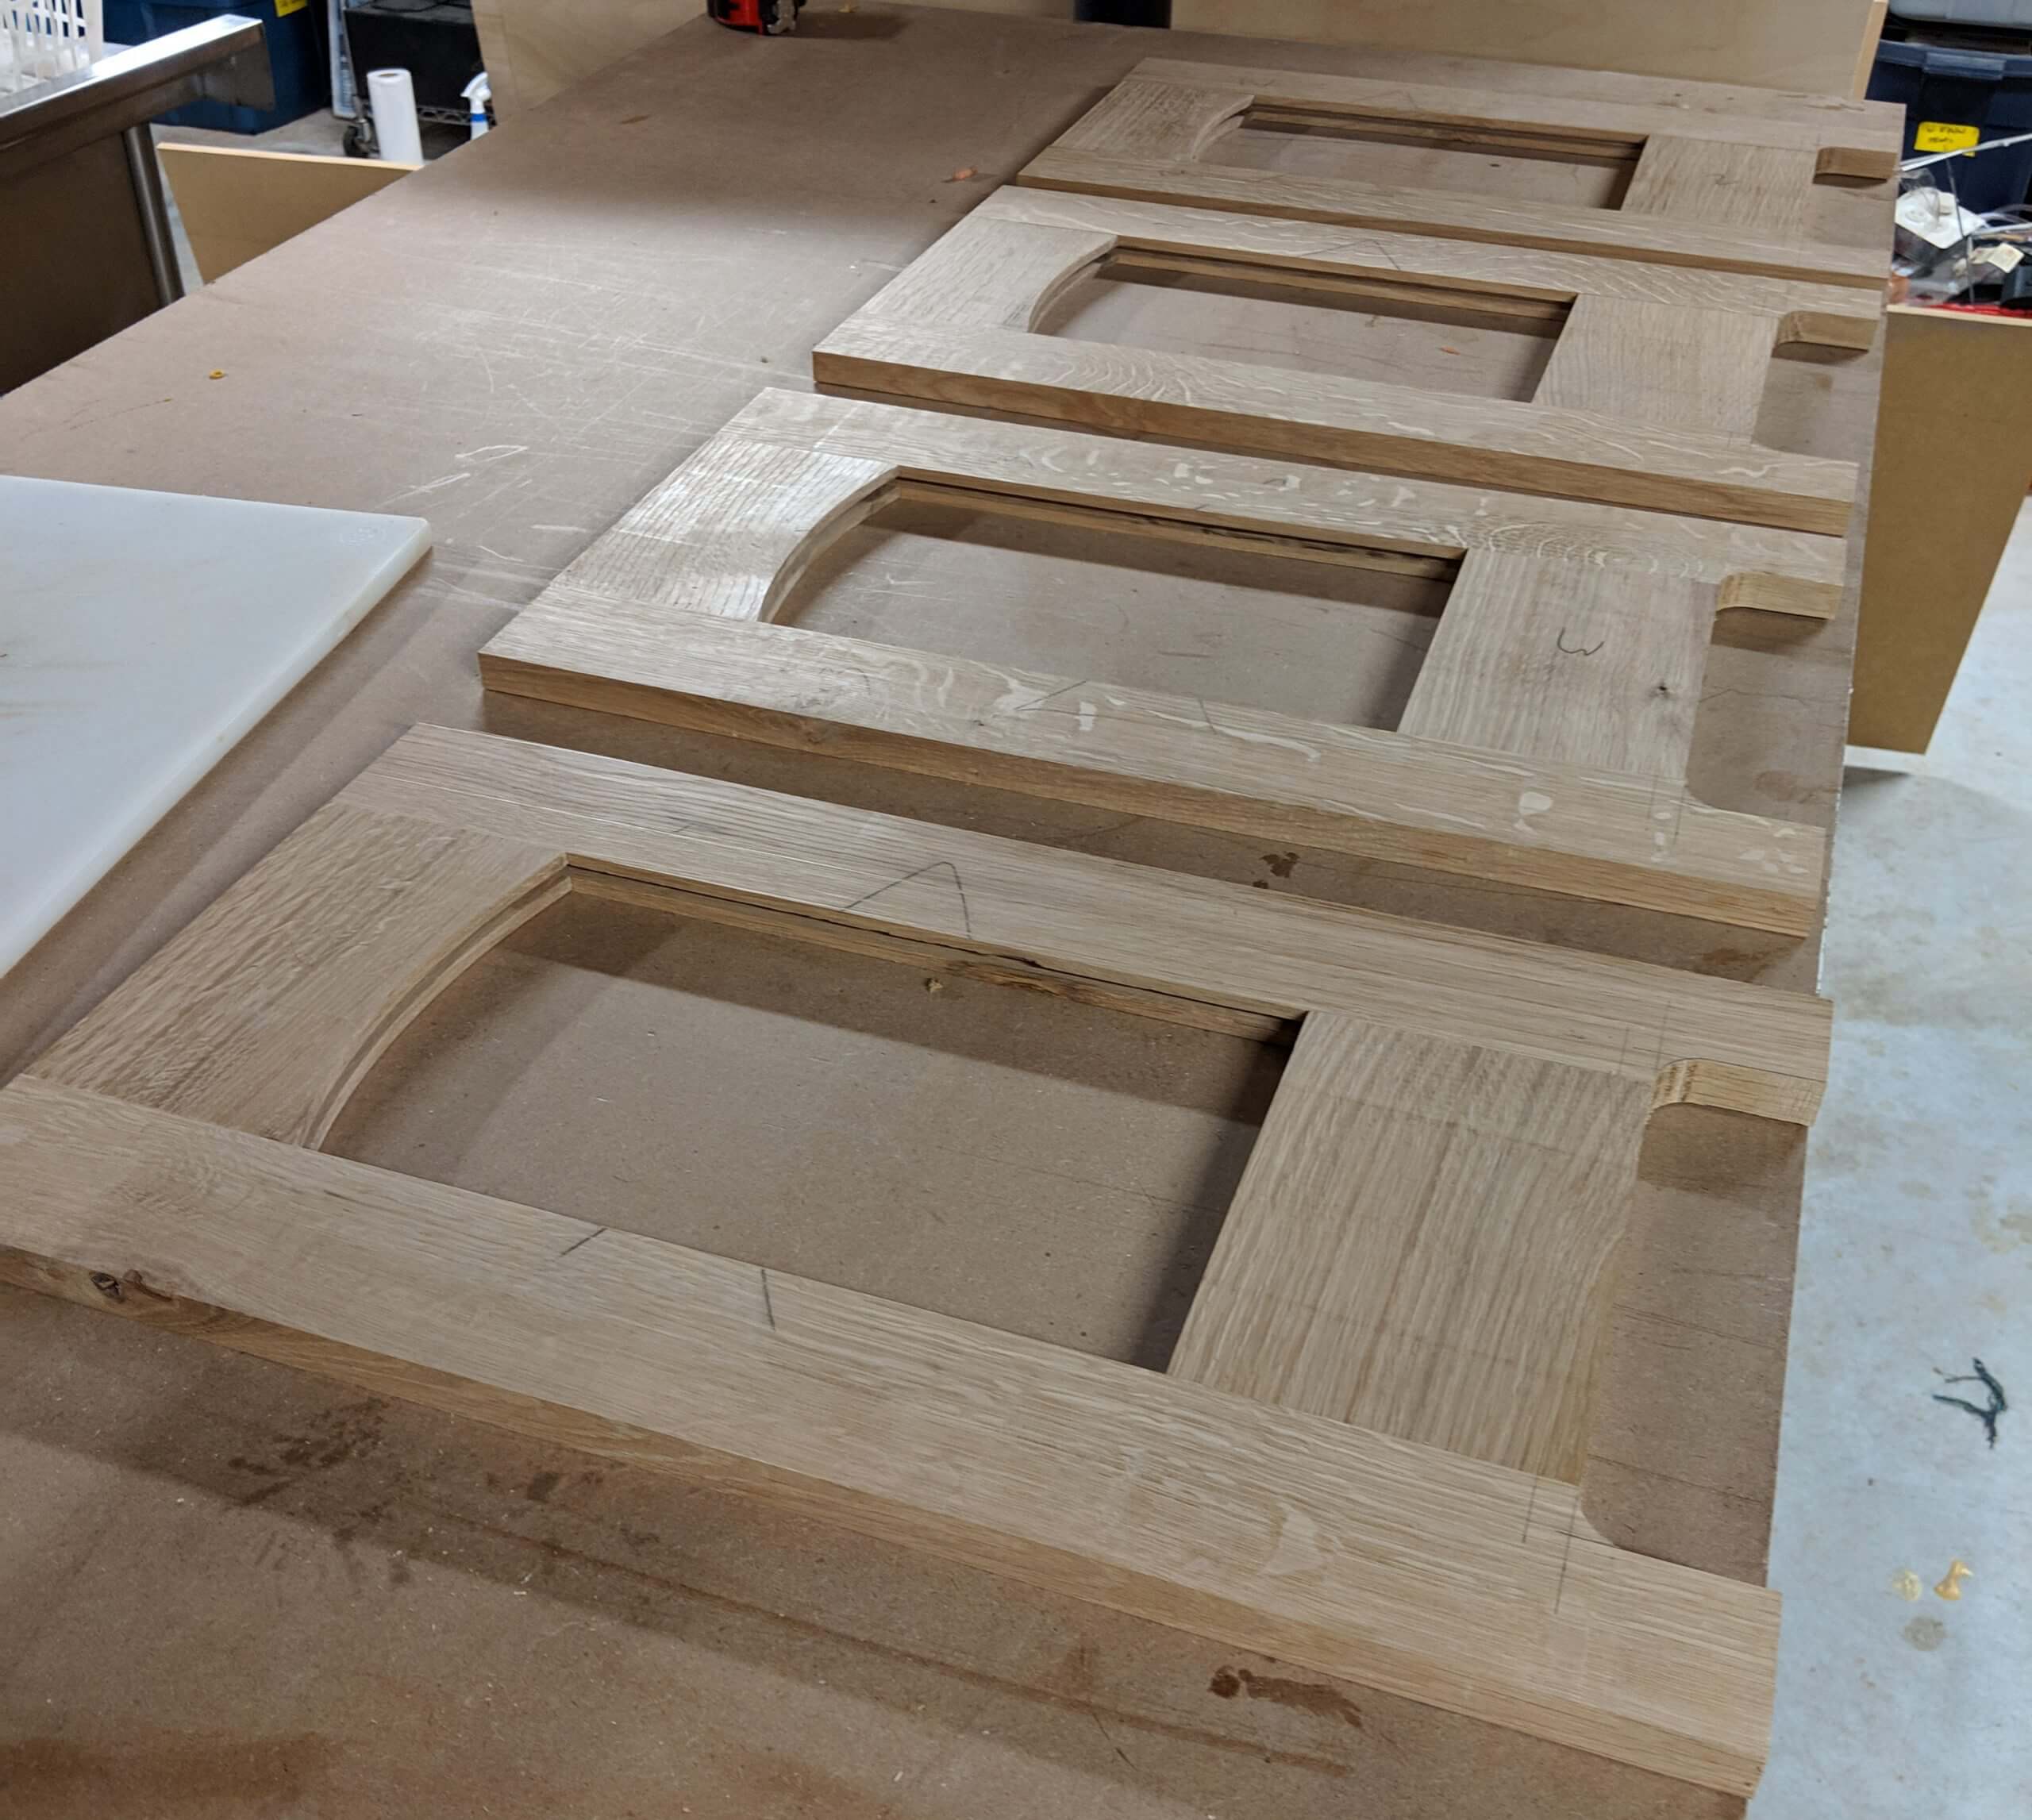
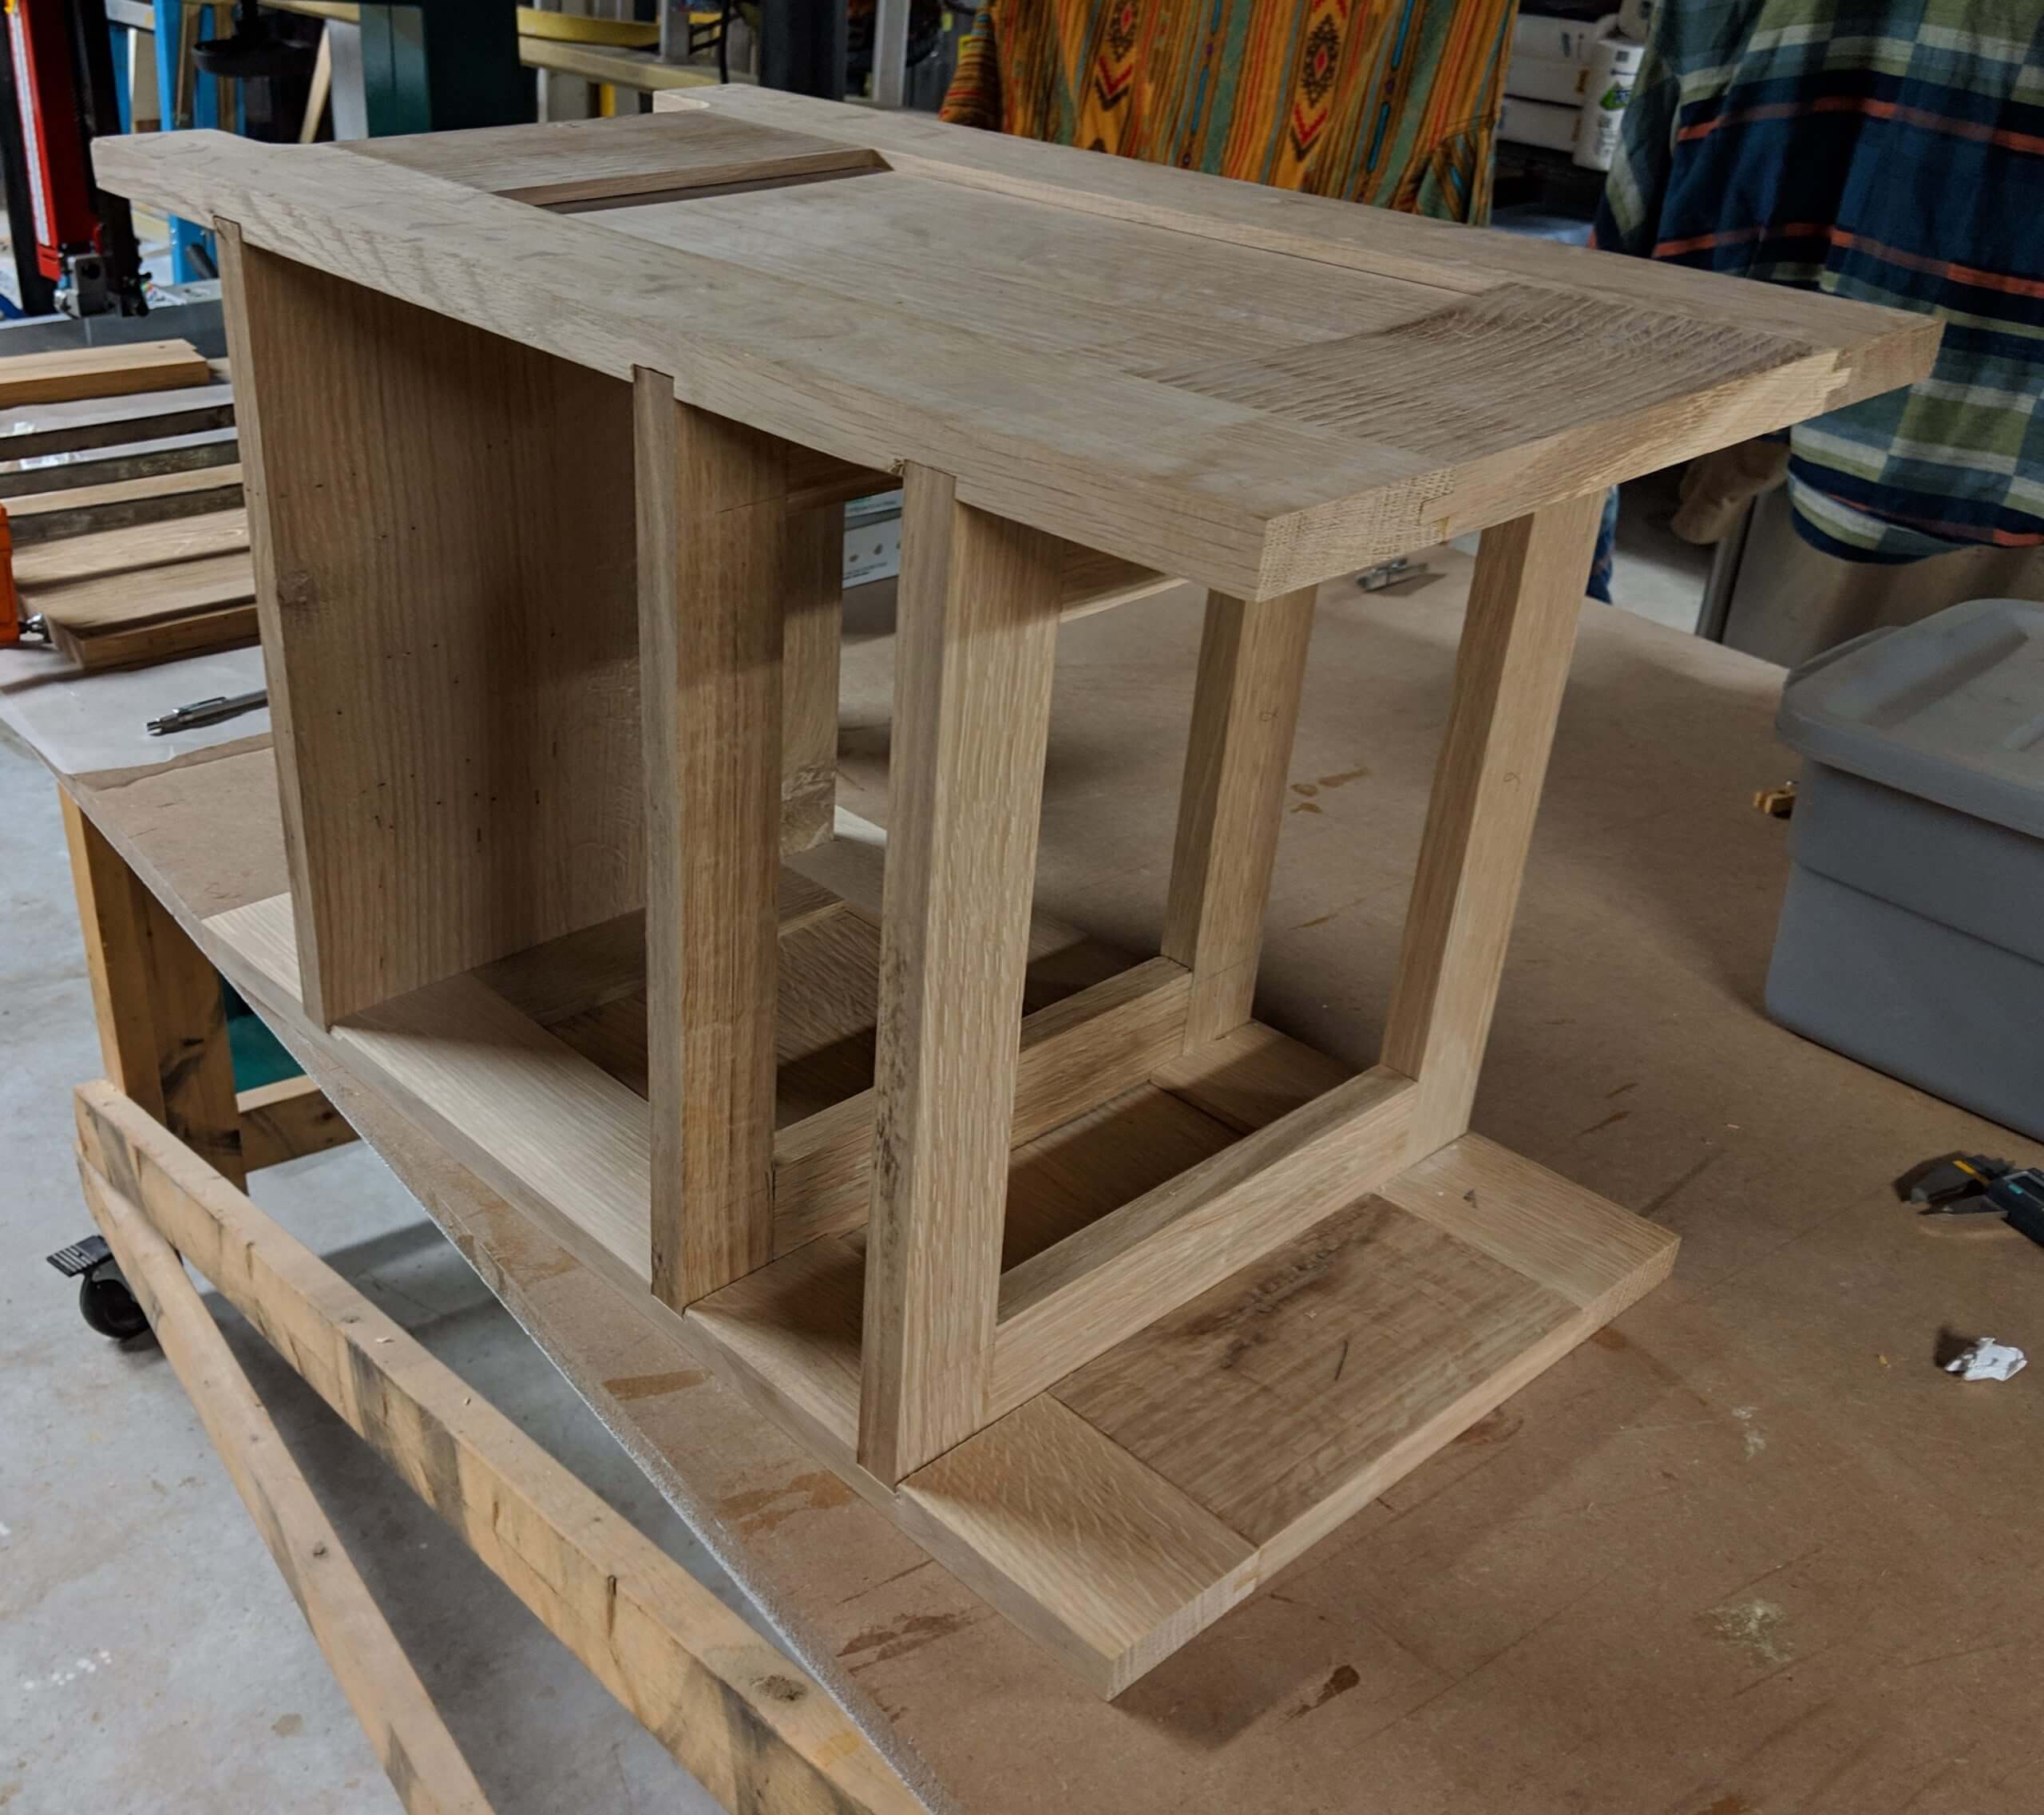
Side Panels
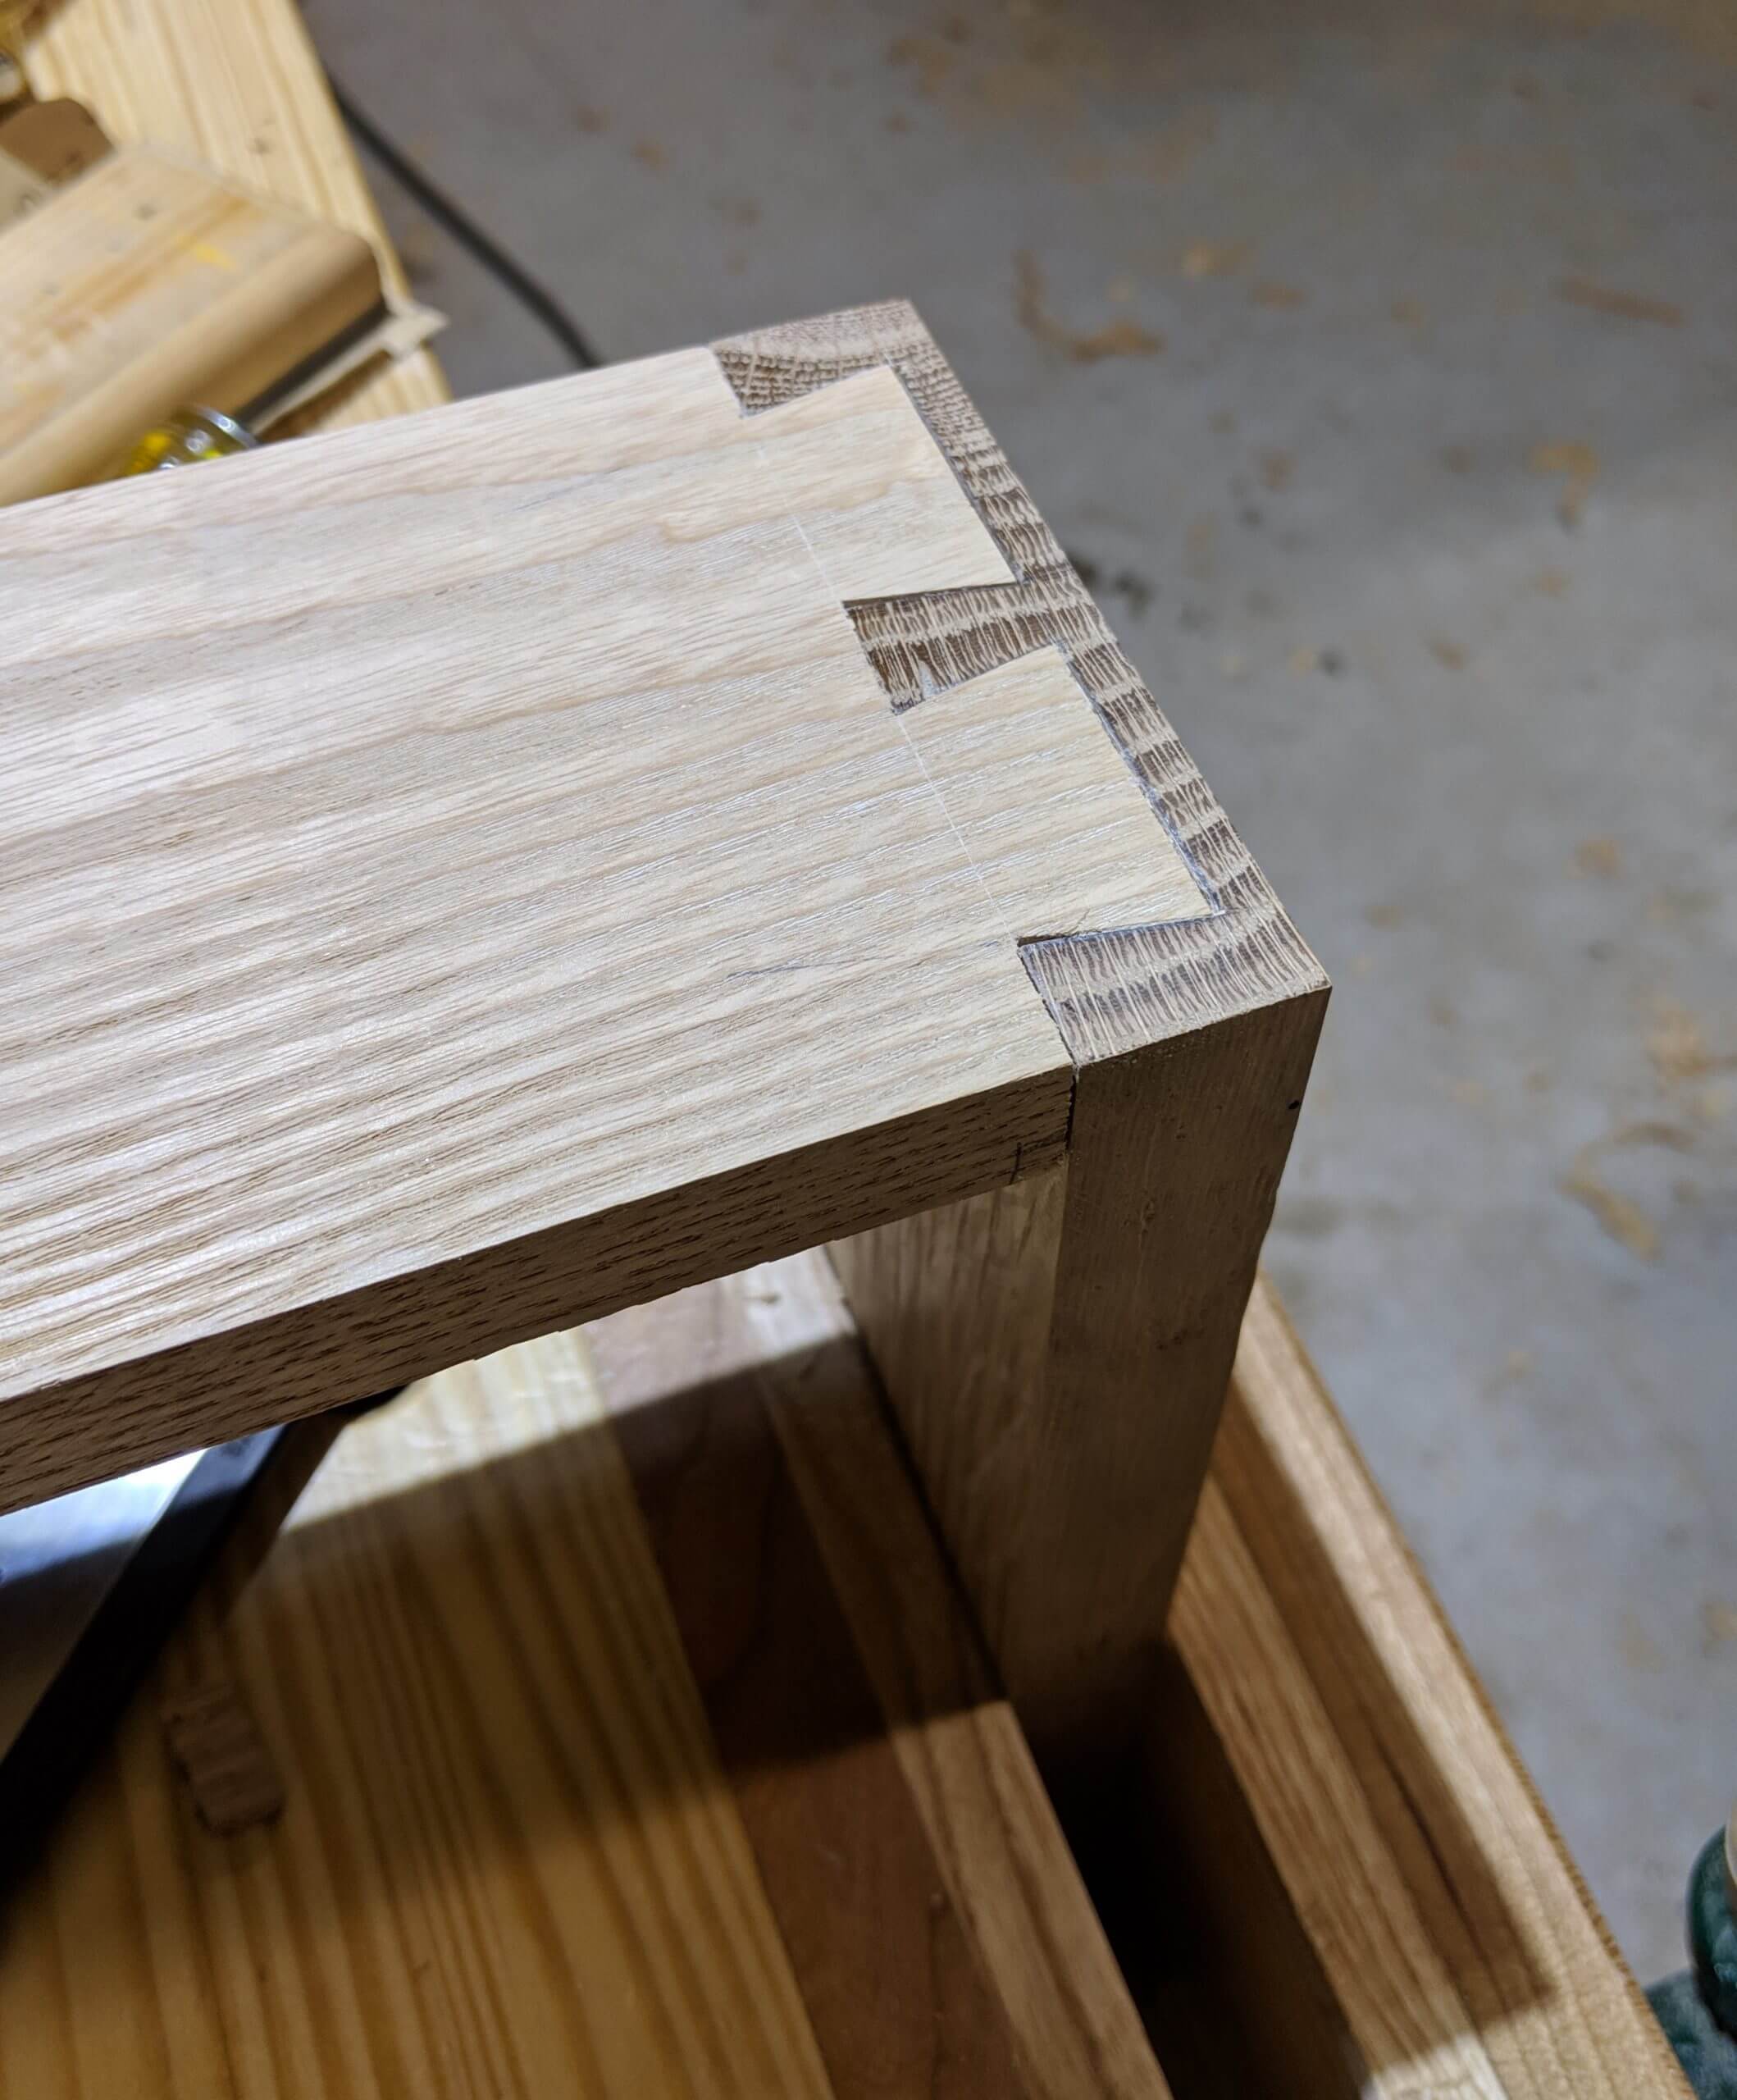
I sorted through the boards looking for figure that would be nice, then cut out roughly dimensioned stock for the side panel styles, rails and panels. The design features a simple style and rail panel on each side that becomes the core structure of the table.
I designed mine to be 24″ high, 16″ wide and 14″ deep. The side panels have 3″ stiles and the top rail is 5 1/4″ wide and the bottom is 5 1/8″ wide. You an adjust your design as needed as once made, they will dictate most other measurements. Typically you will size the table based on the height of your mattress.
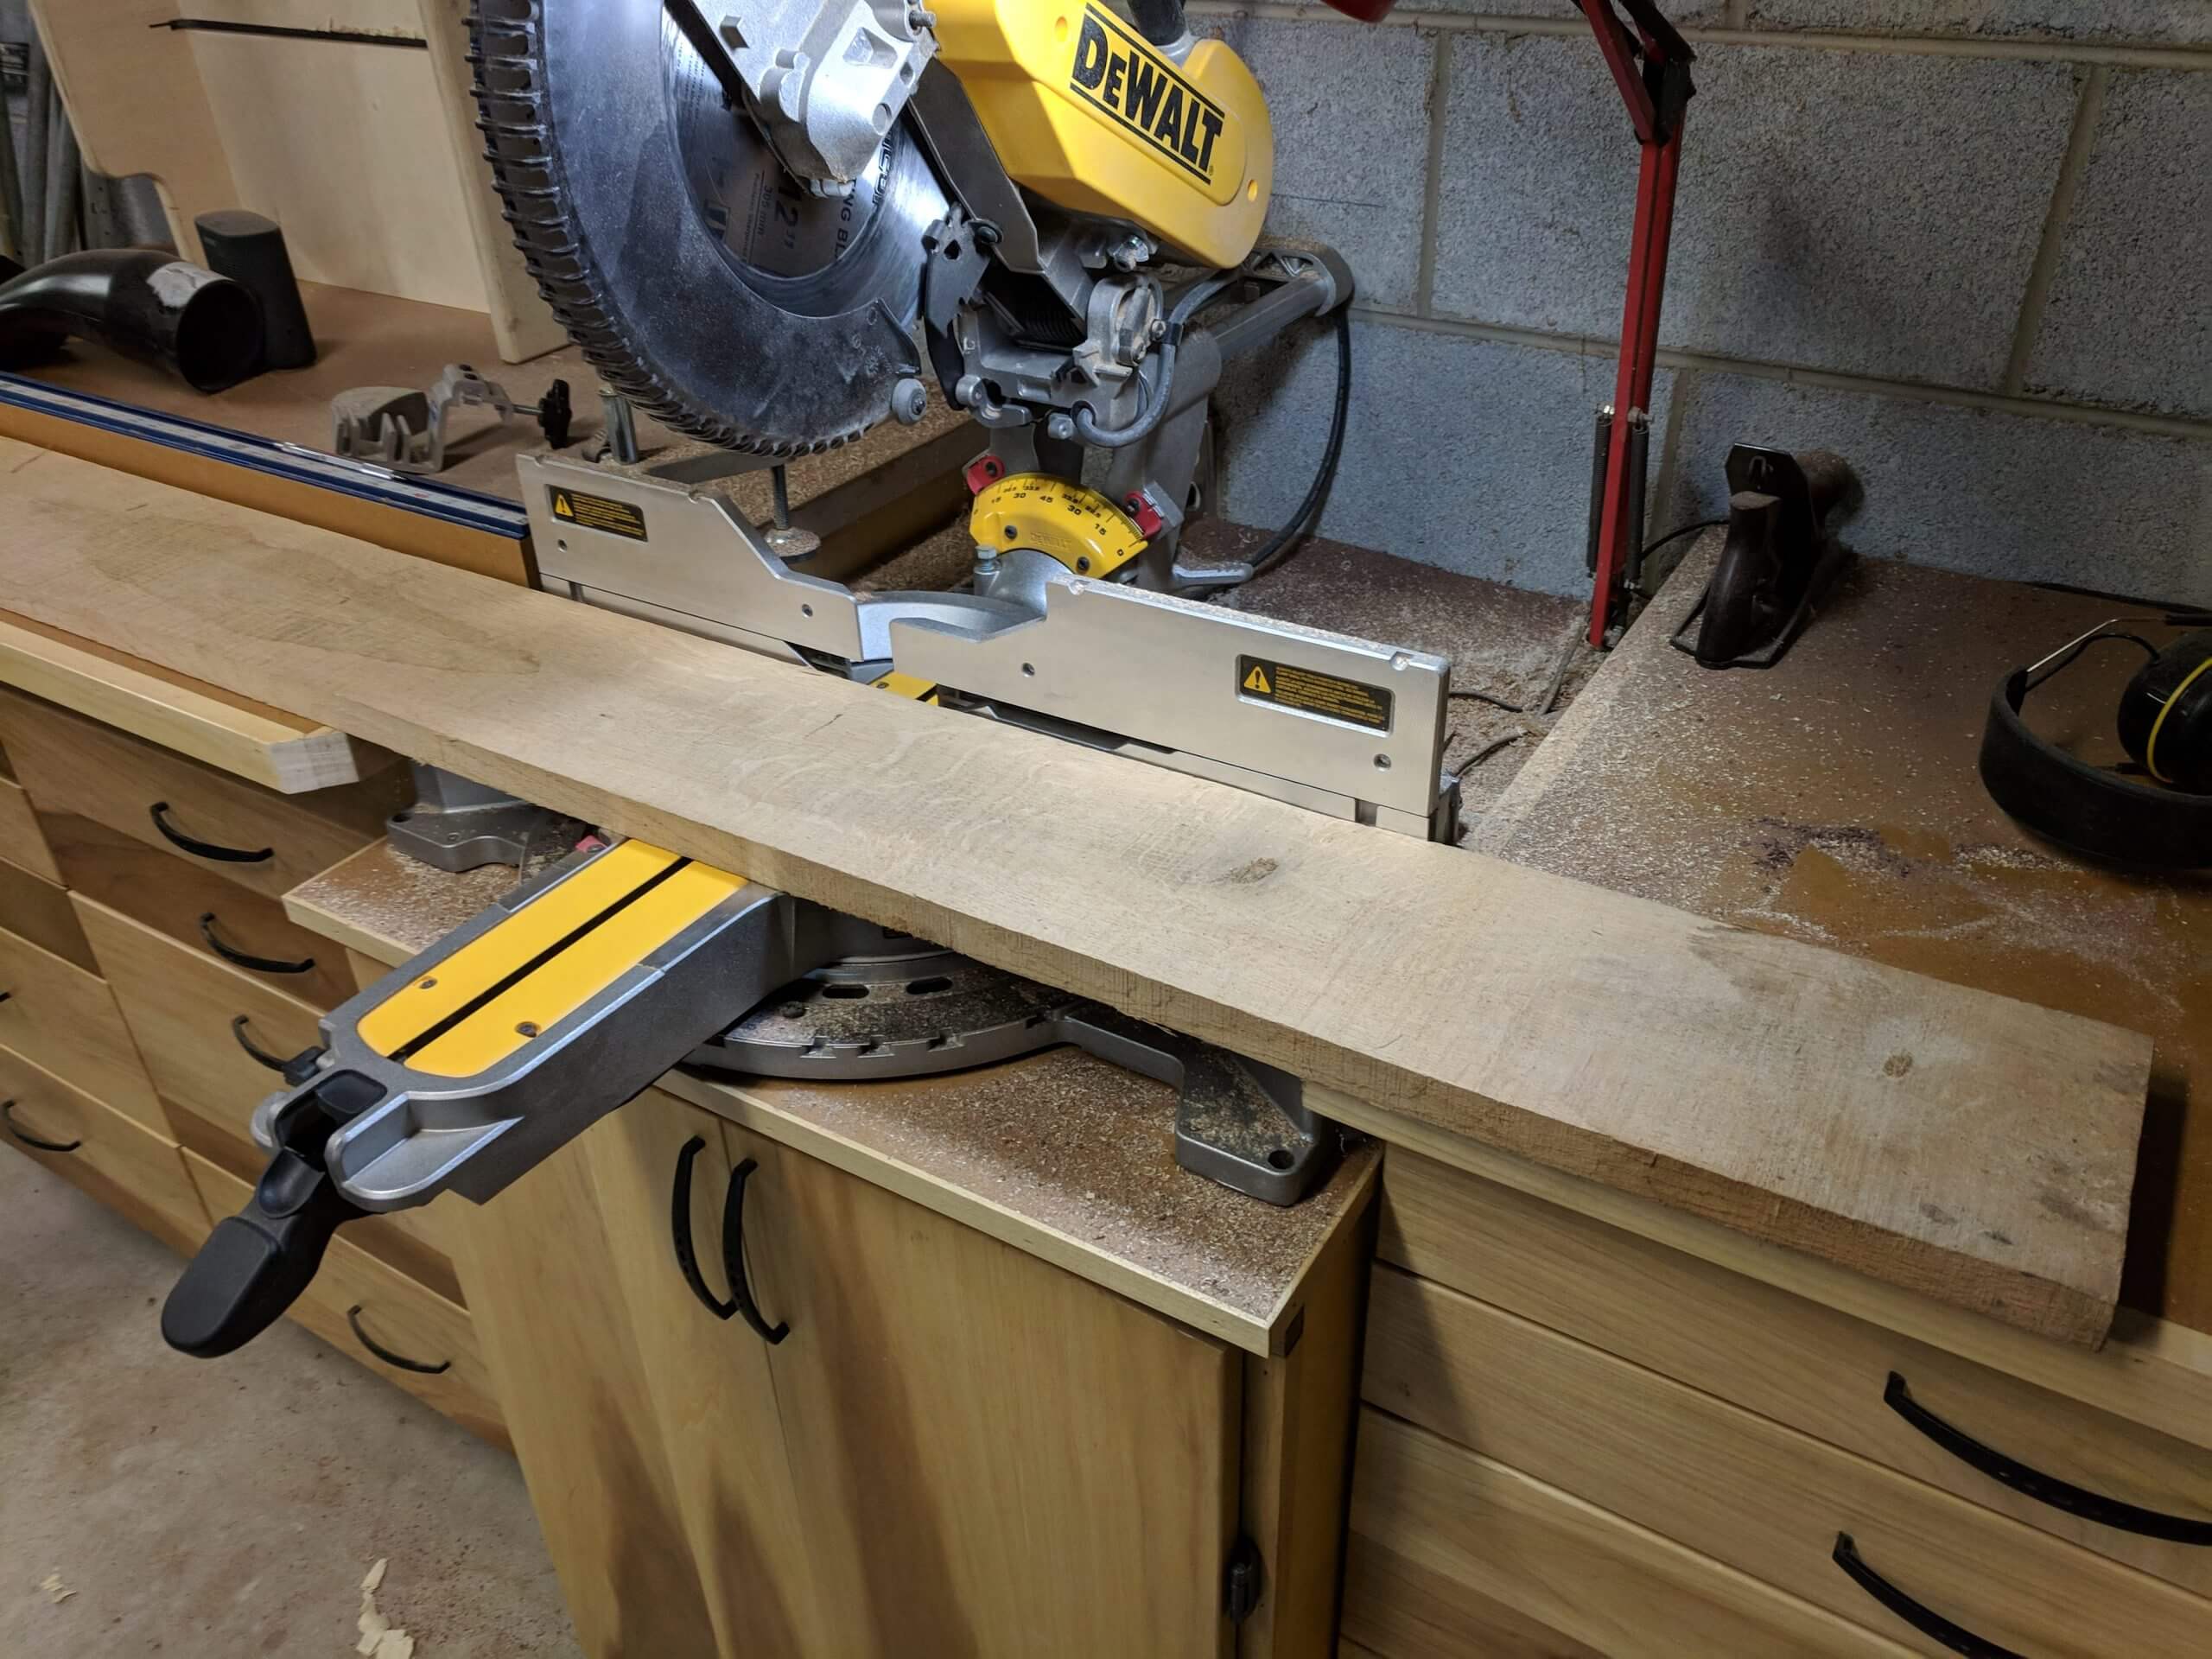
Some general things before we make chips, I rough cut timber at least 1″ longer than needed and the width is typically the width that the board came from the mill. Leaving things long and wide early one gives you flexibility to select better grain areas, clean up “oops” moments and not worry about square or true cuts early on. Take your time with rough lumber. If you need a 4″ wide part out of a 7″ wide board, pick the area you want for the best grain. Don’t just take 4″ off of either side, pick the “best” 4″ of wood inside the 7″.
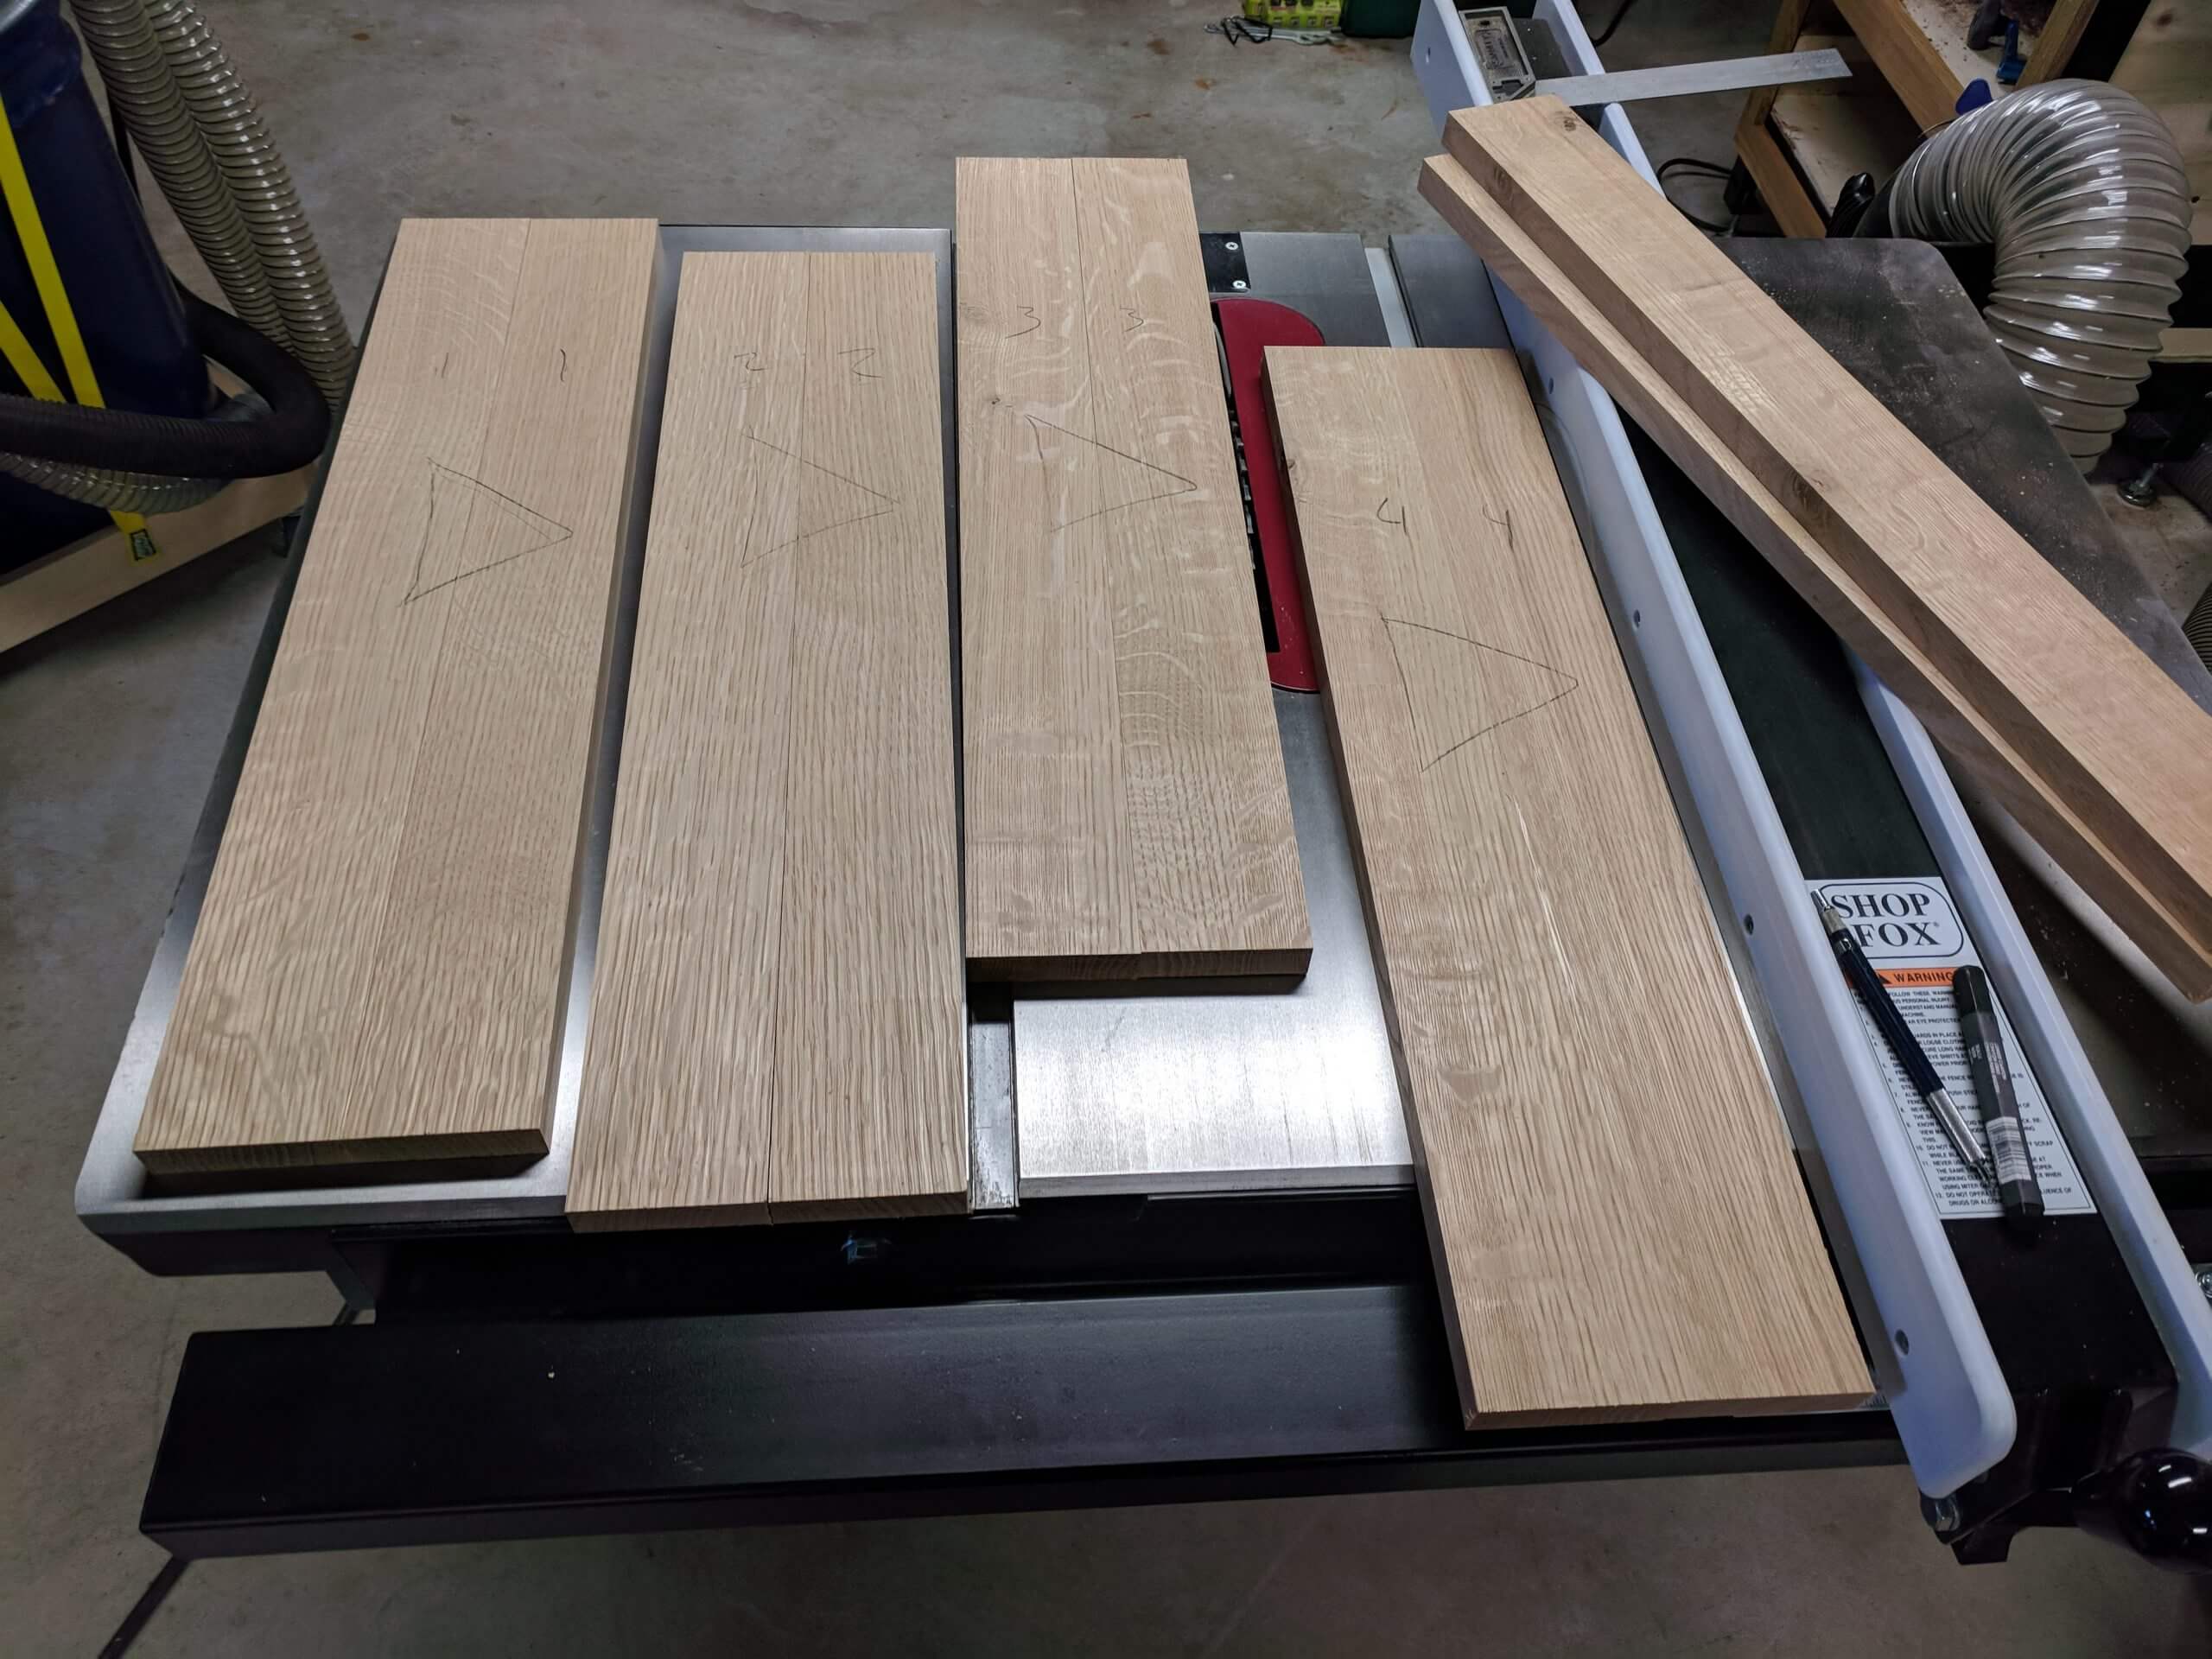
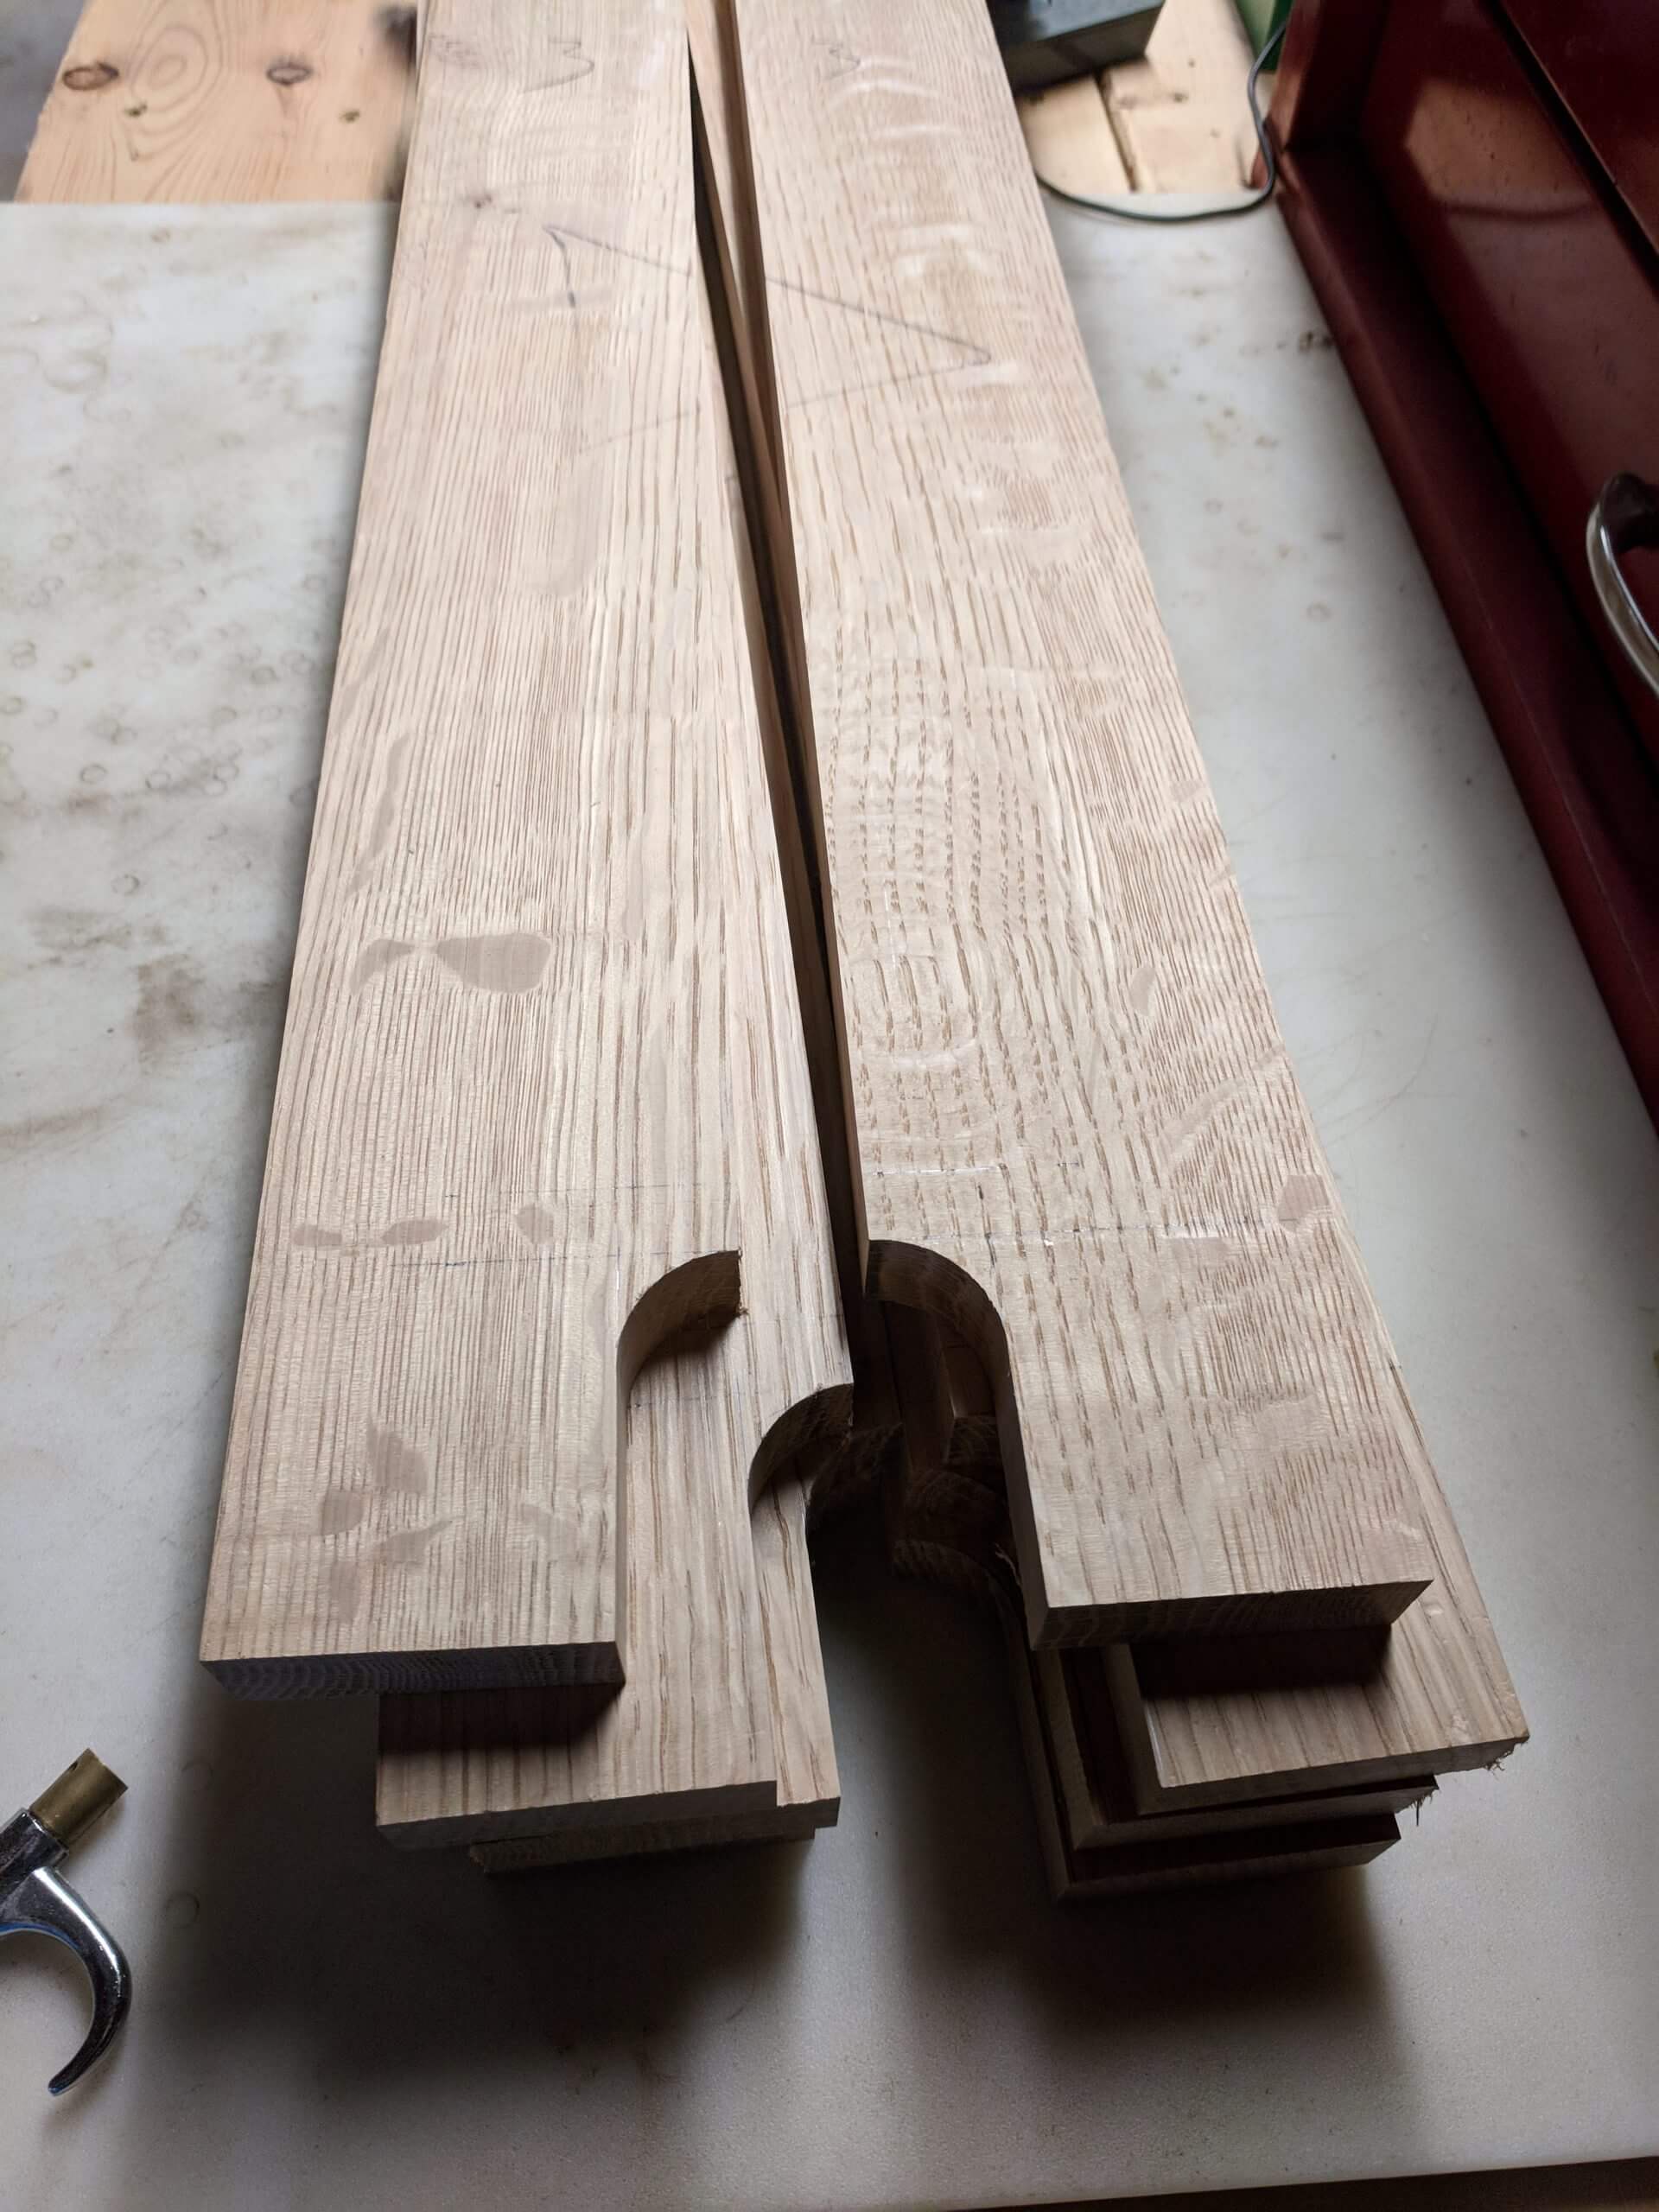
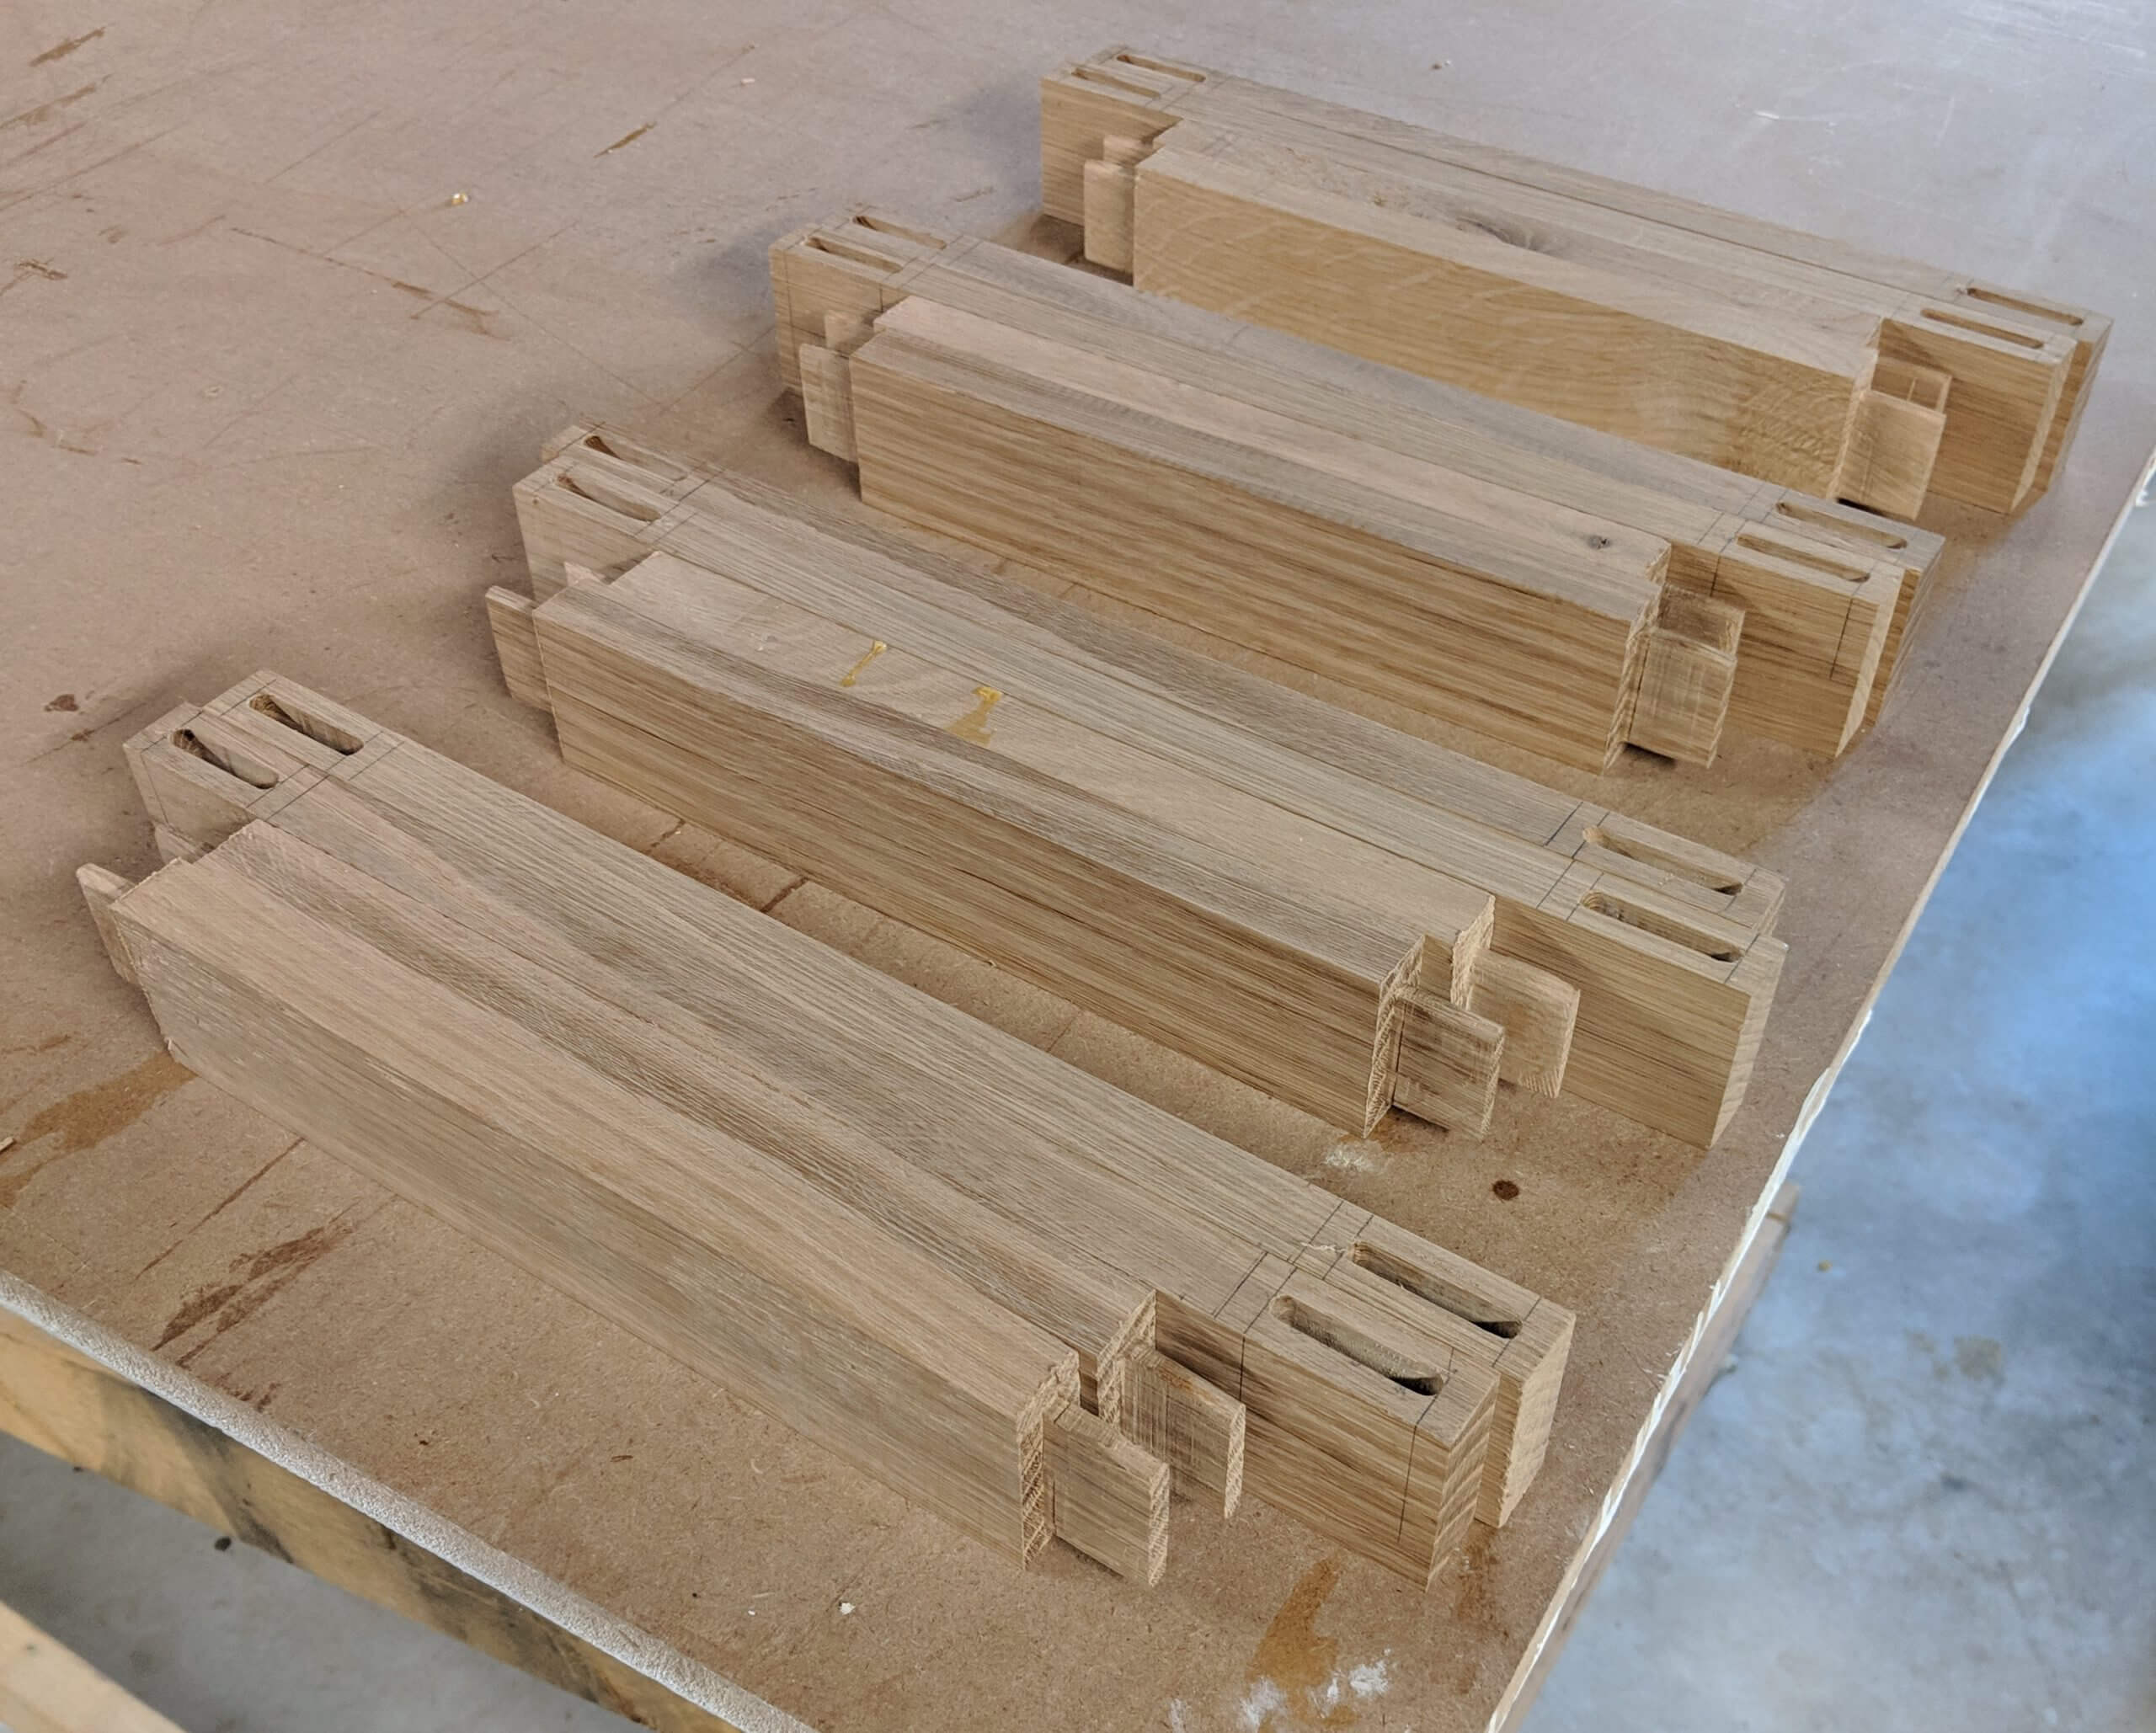
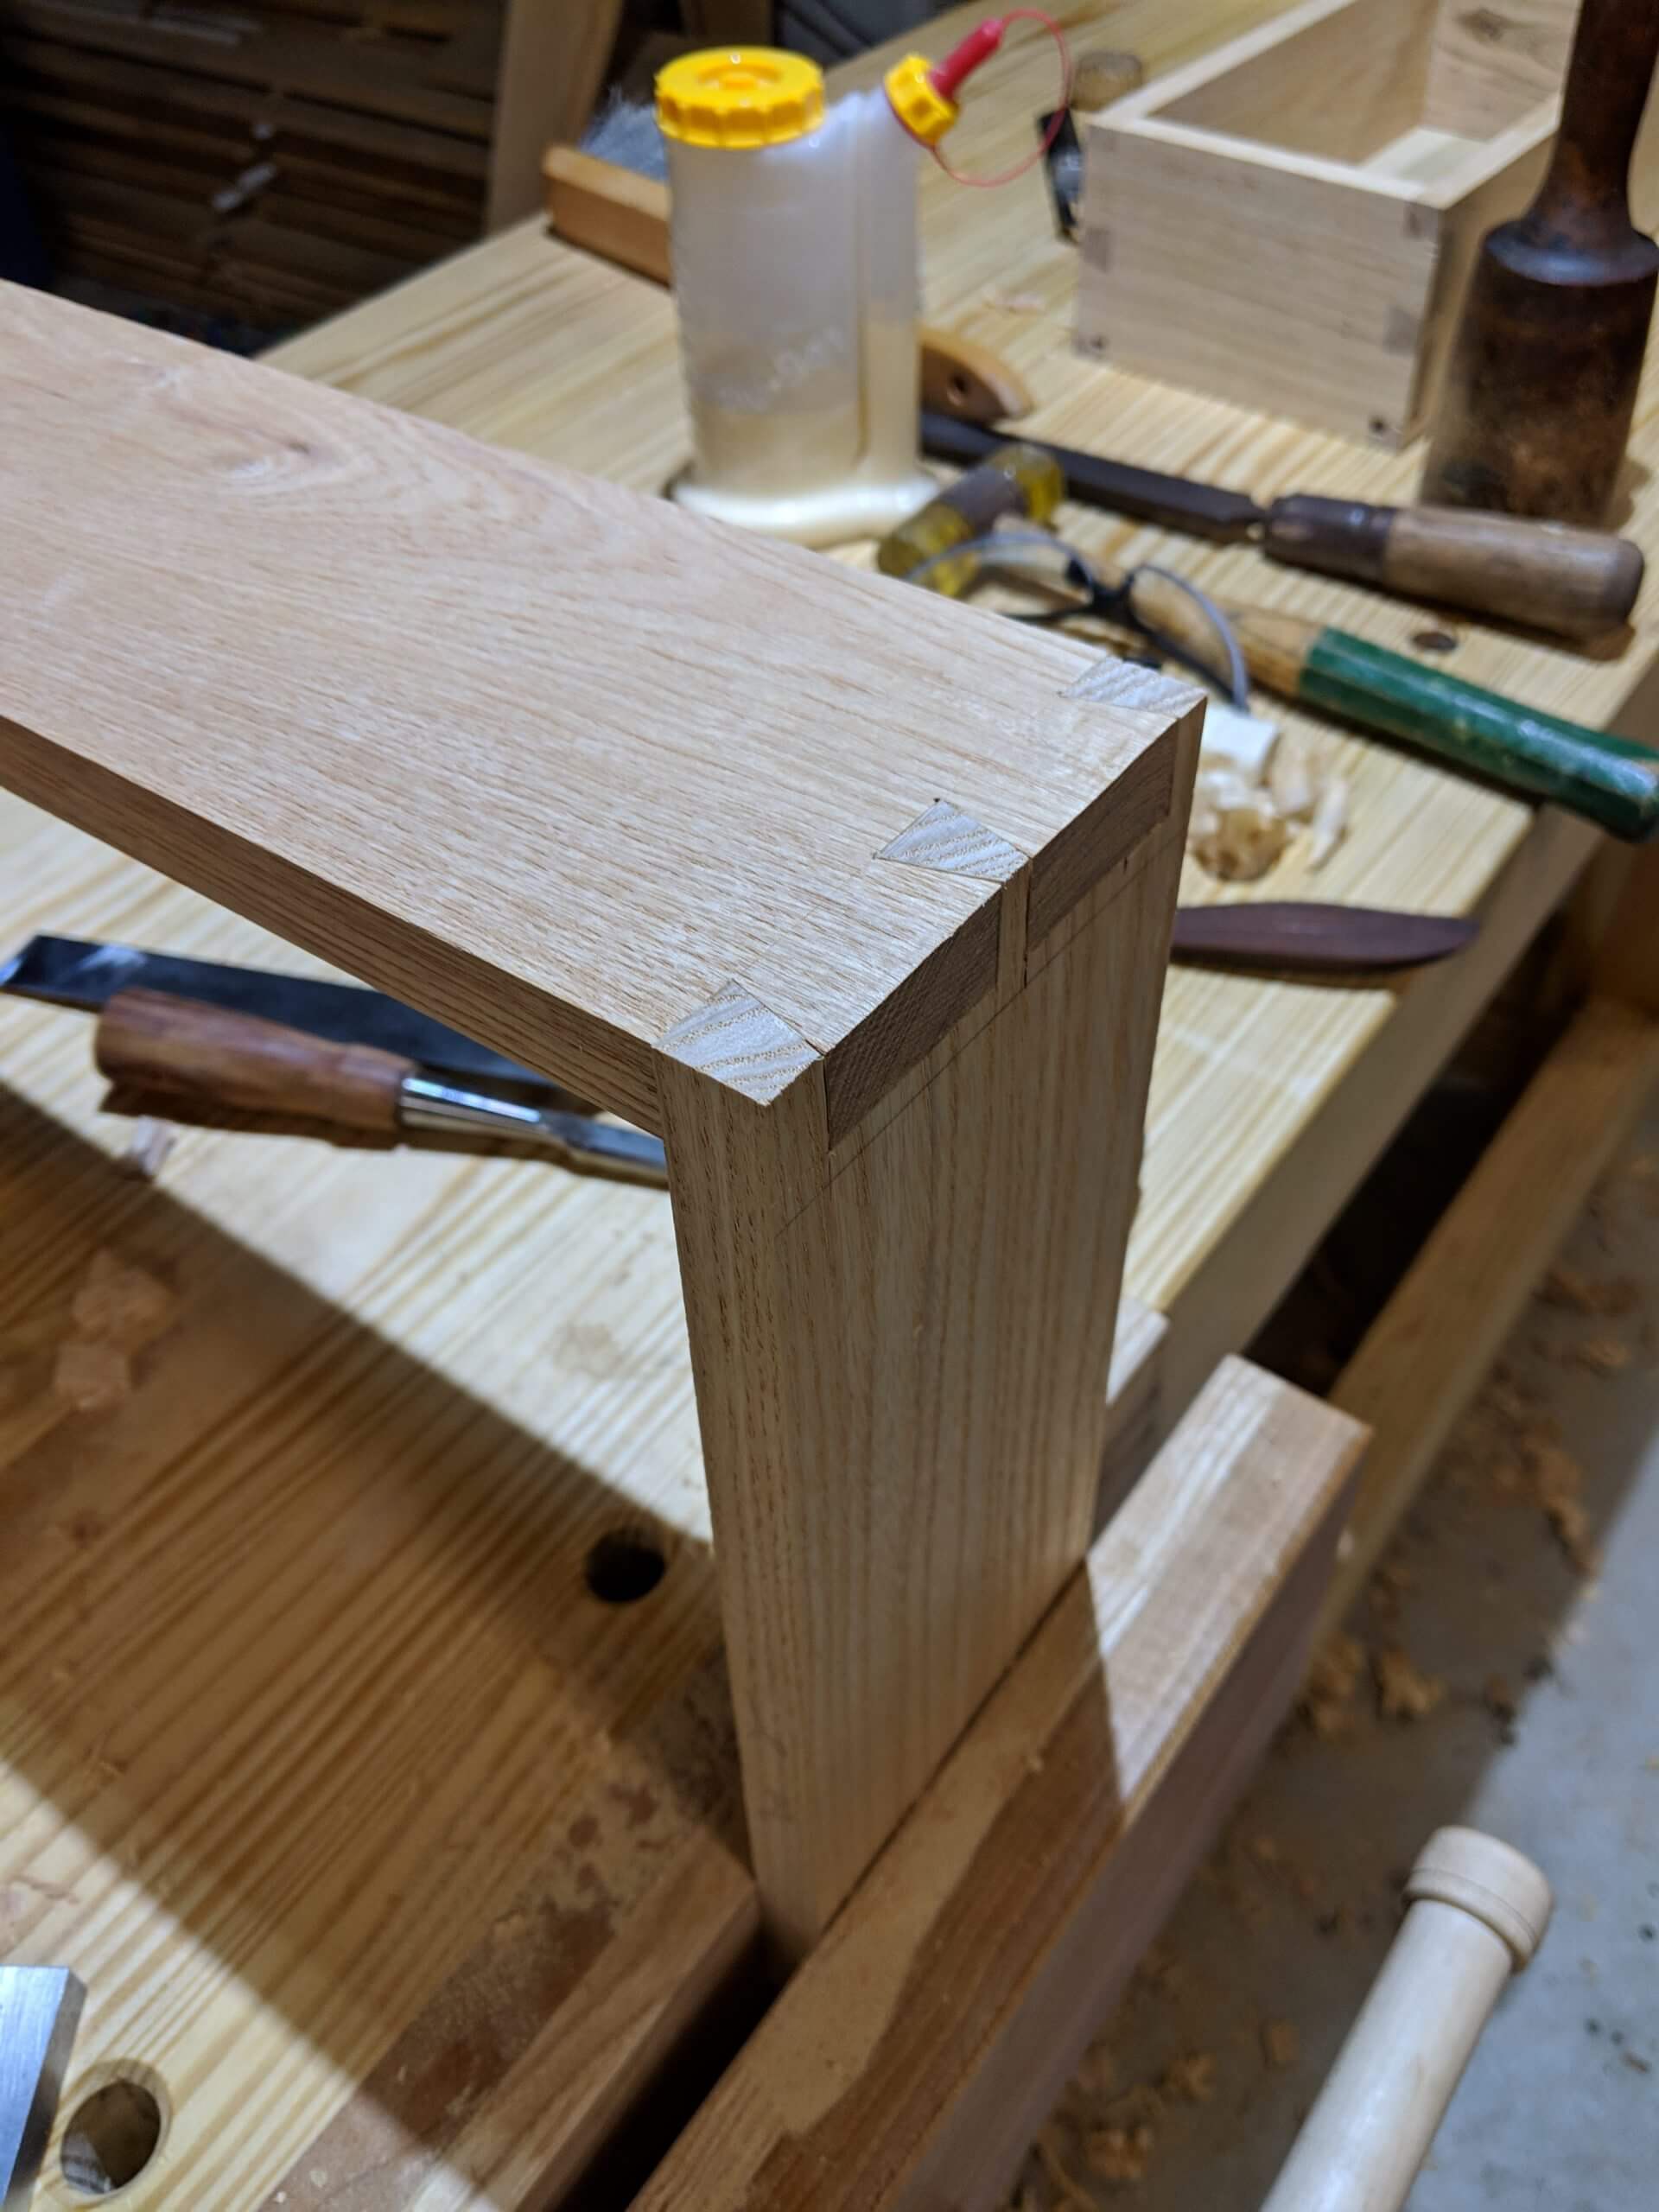
The stiles were milled to the thickest board that could be obtained from the 4/4 stock and that thickness was used as a target for the rails. The stiles were cut two each out of one board, so they could be grain matched. They were laid out, marked and grouped.
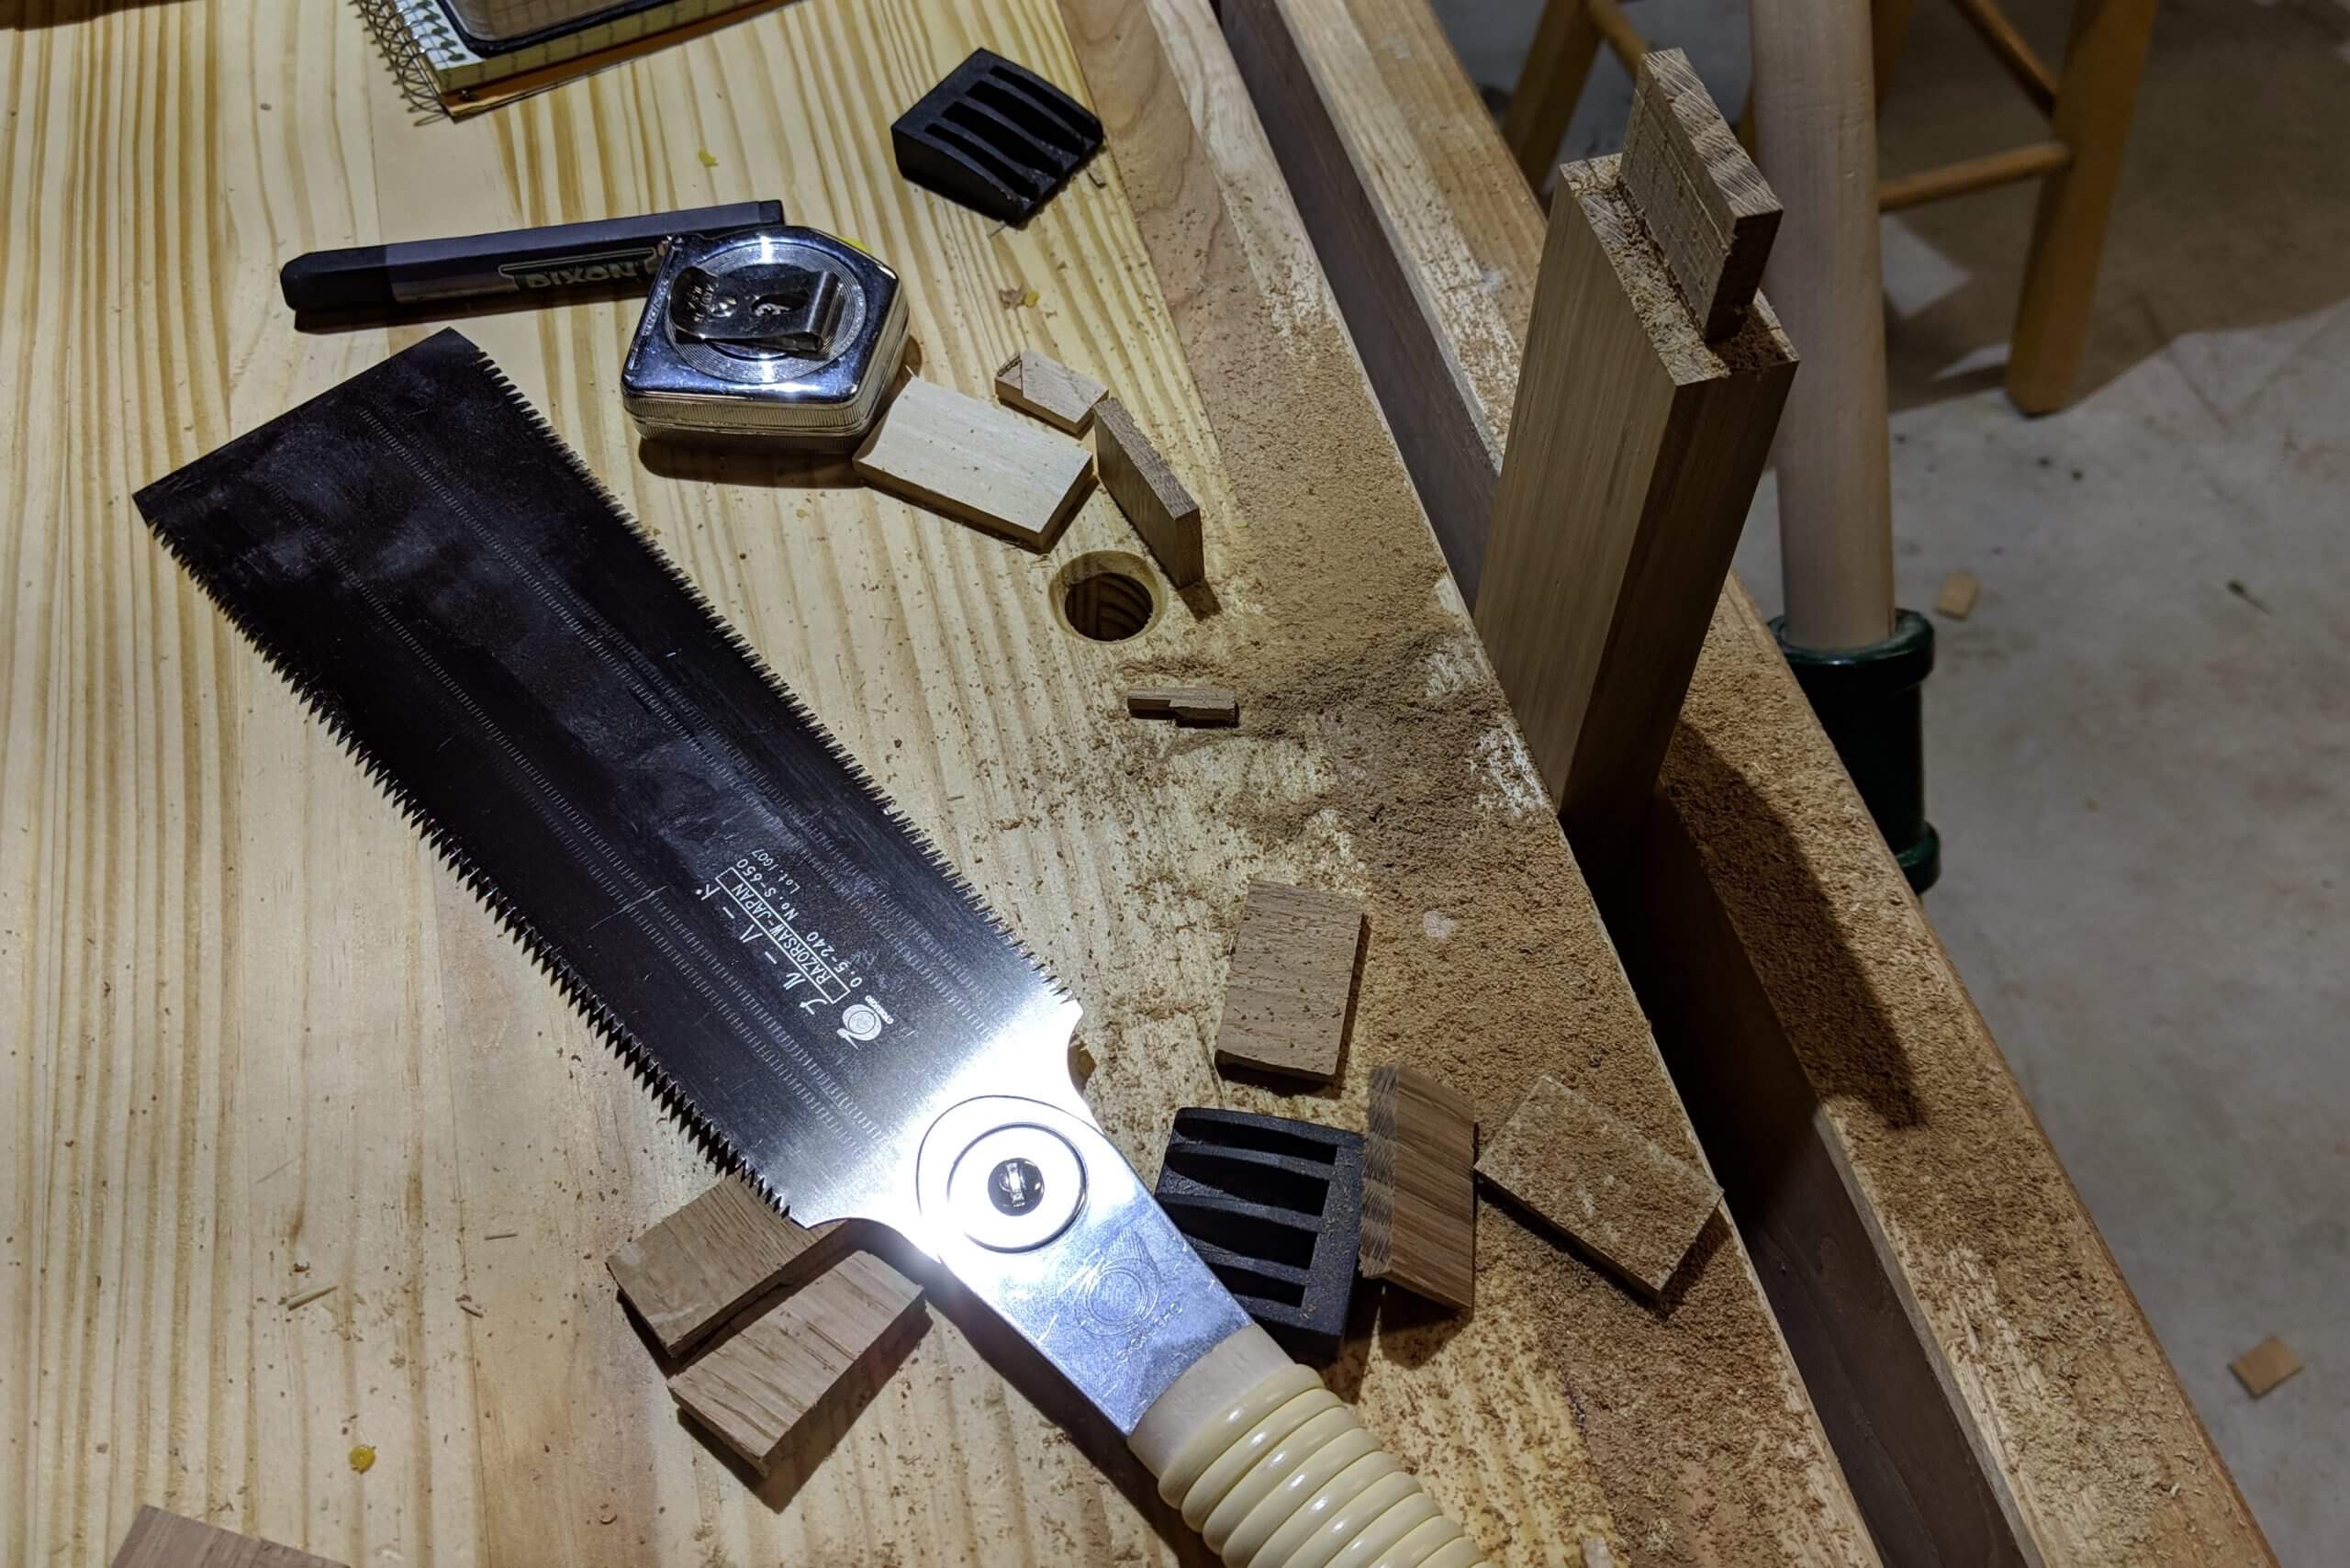
The stiles get a slot for the tenon of the rails and the center panel. The top exit of the slot is hidden by the top, but the bottom is visible, so it needs to be a stop dado and the stop location needs to be marked. Of the eight I made, I blew through one and it isn’t really visible on the bottom so you could do a through slot all the way.
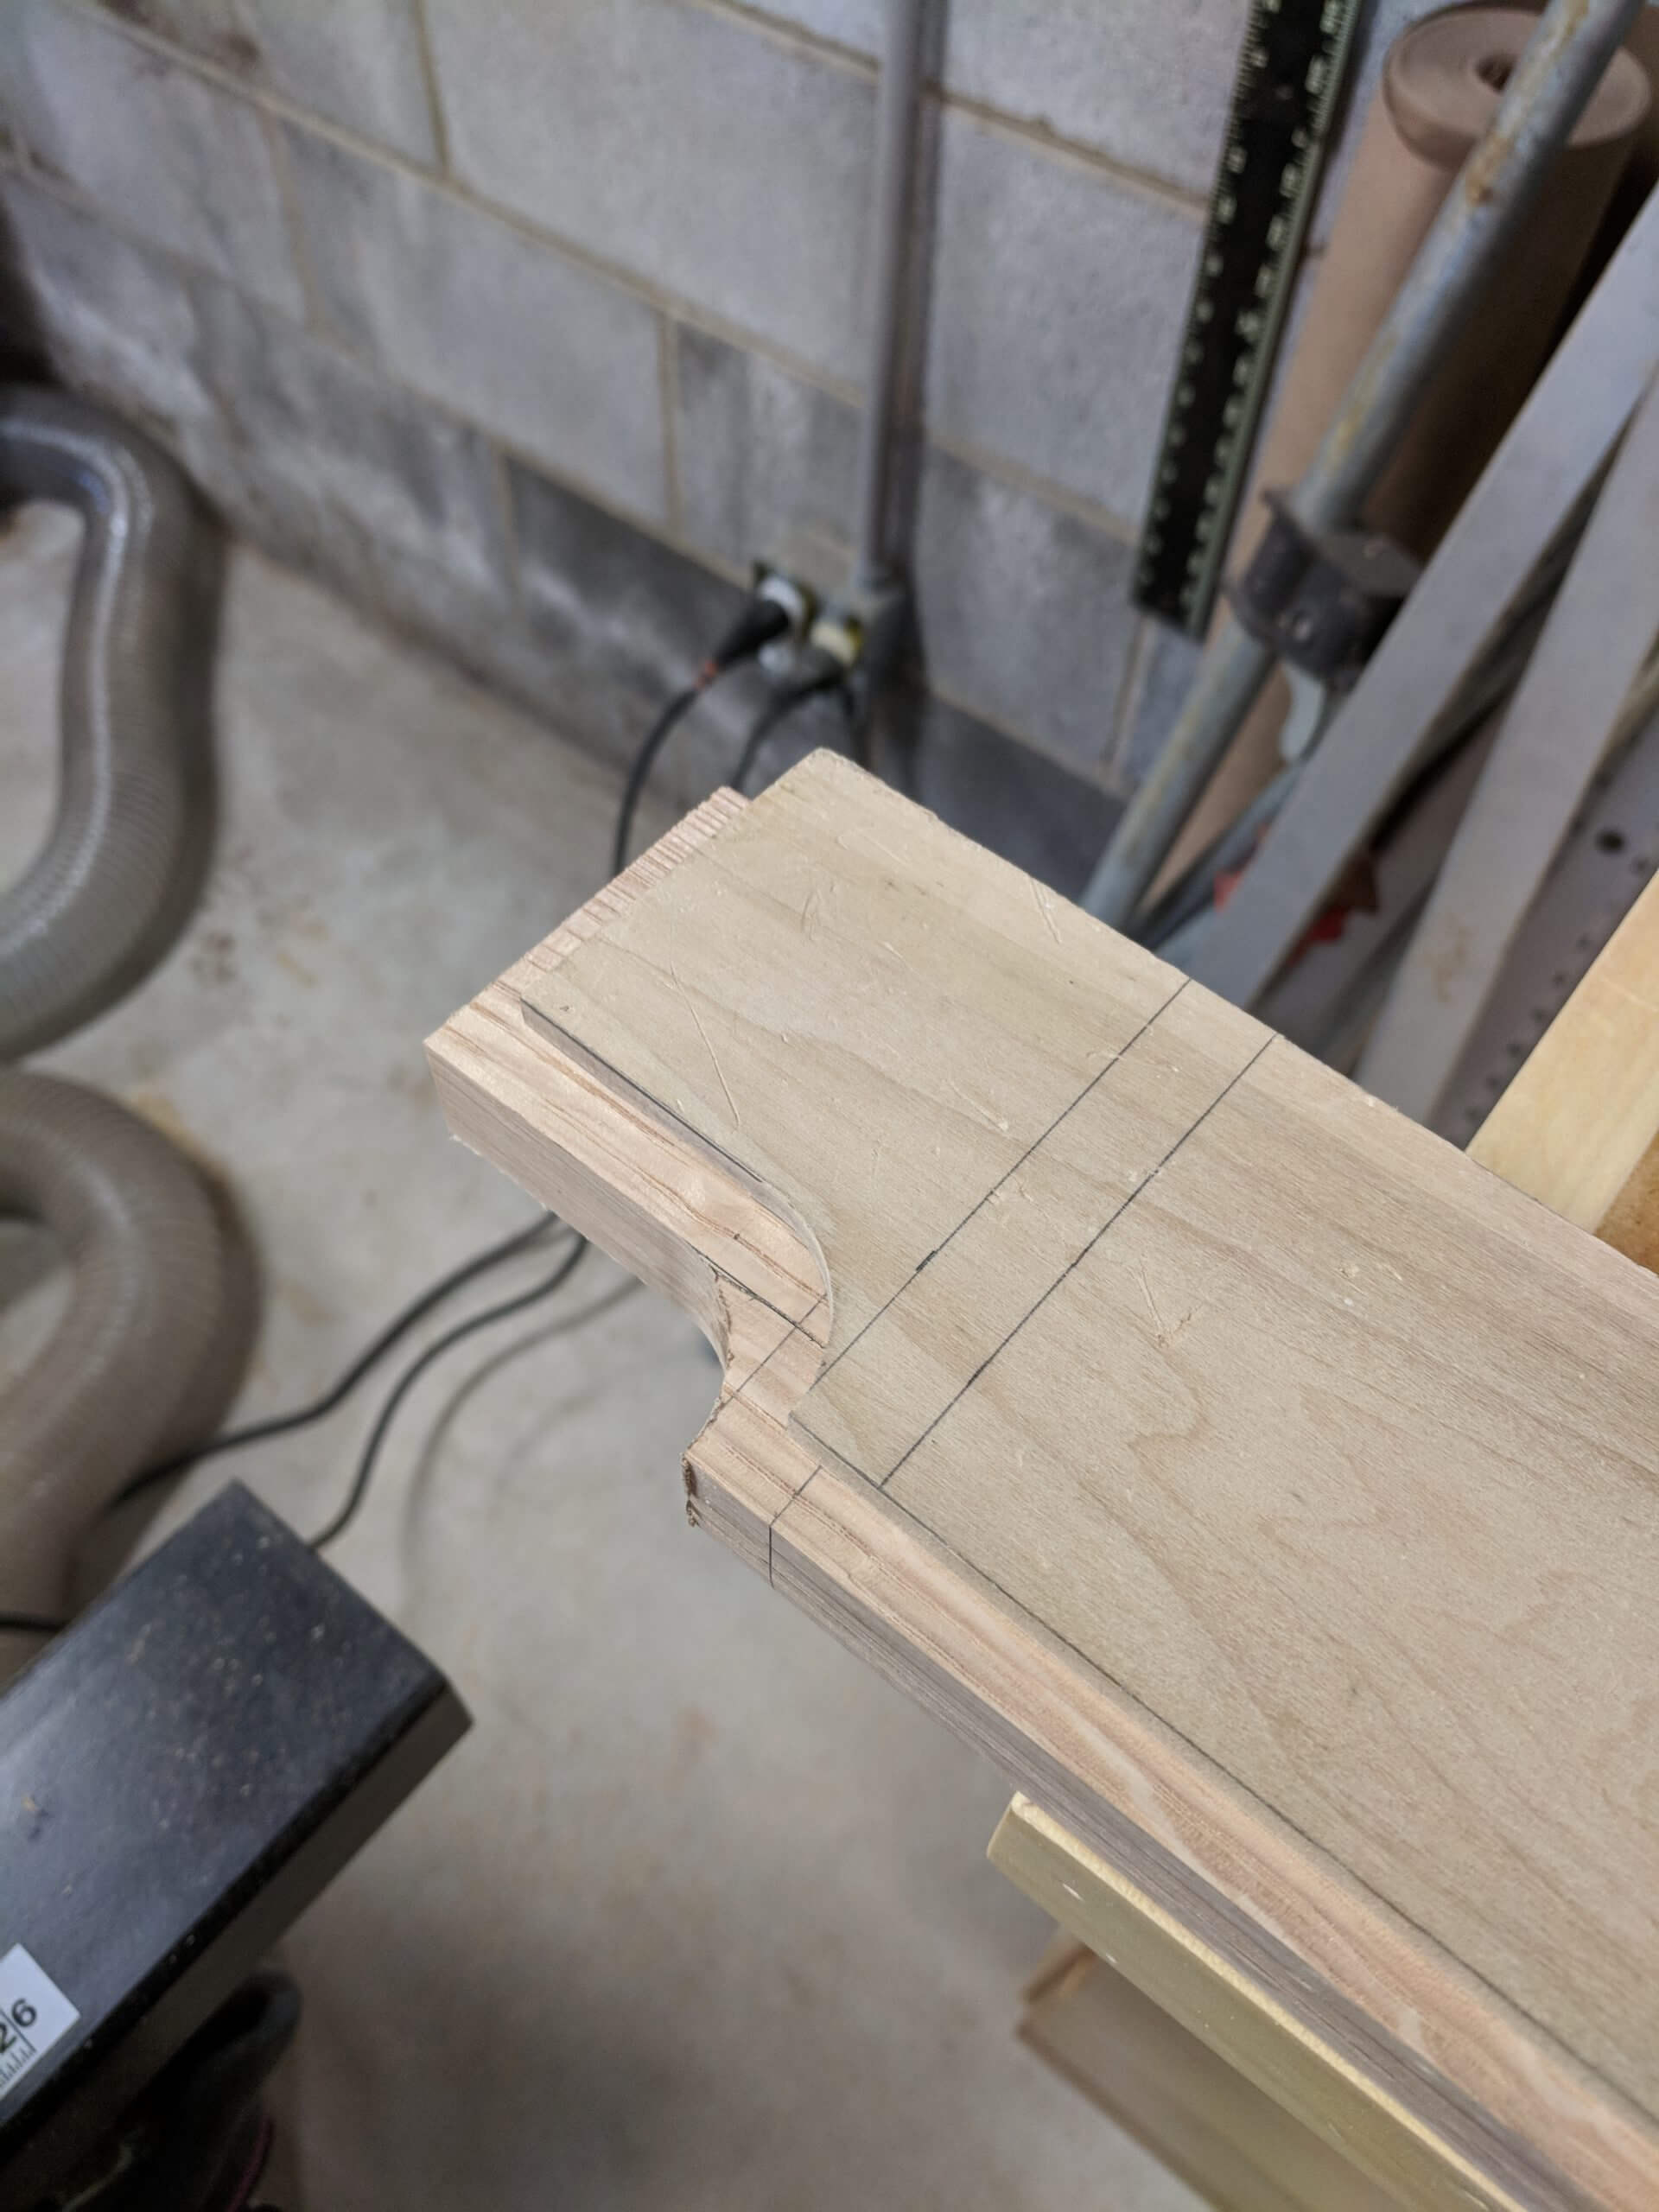
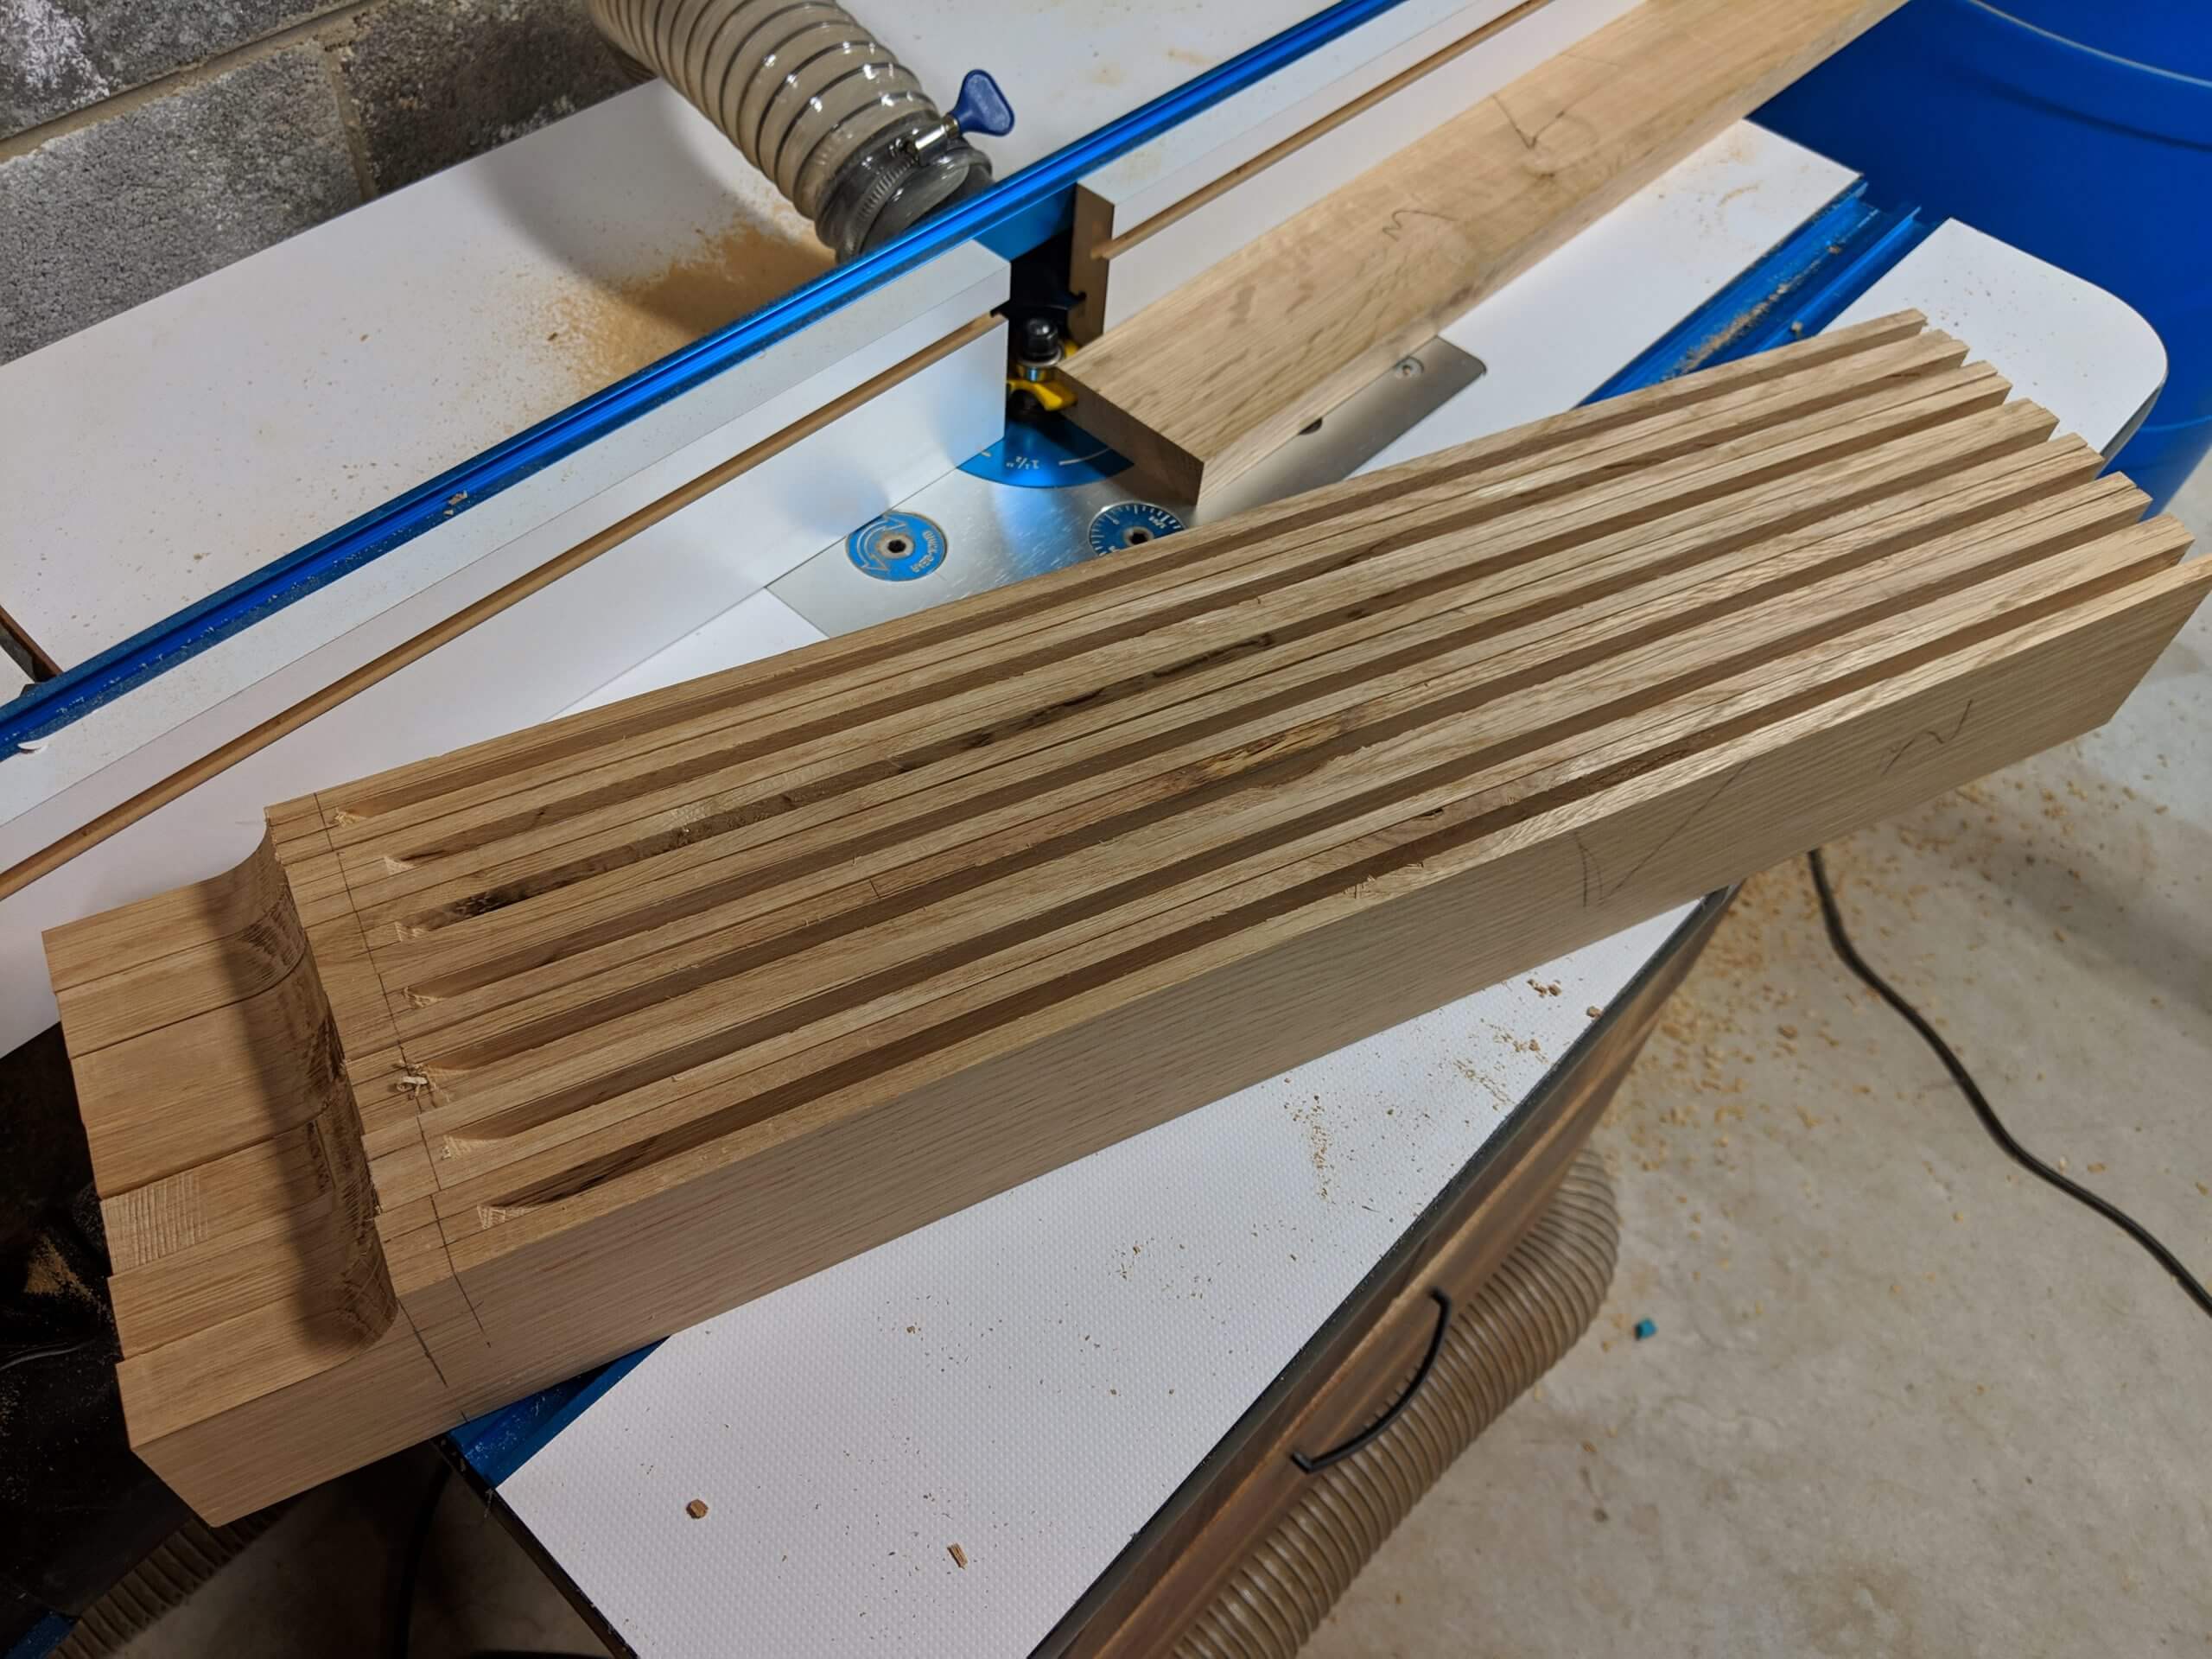
There is a curve at the the end of the stile forming a foot or short leg and that needs to be marked as well.
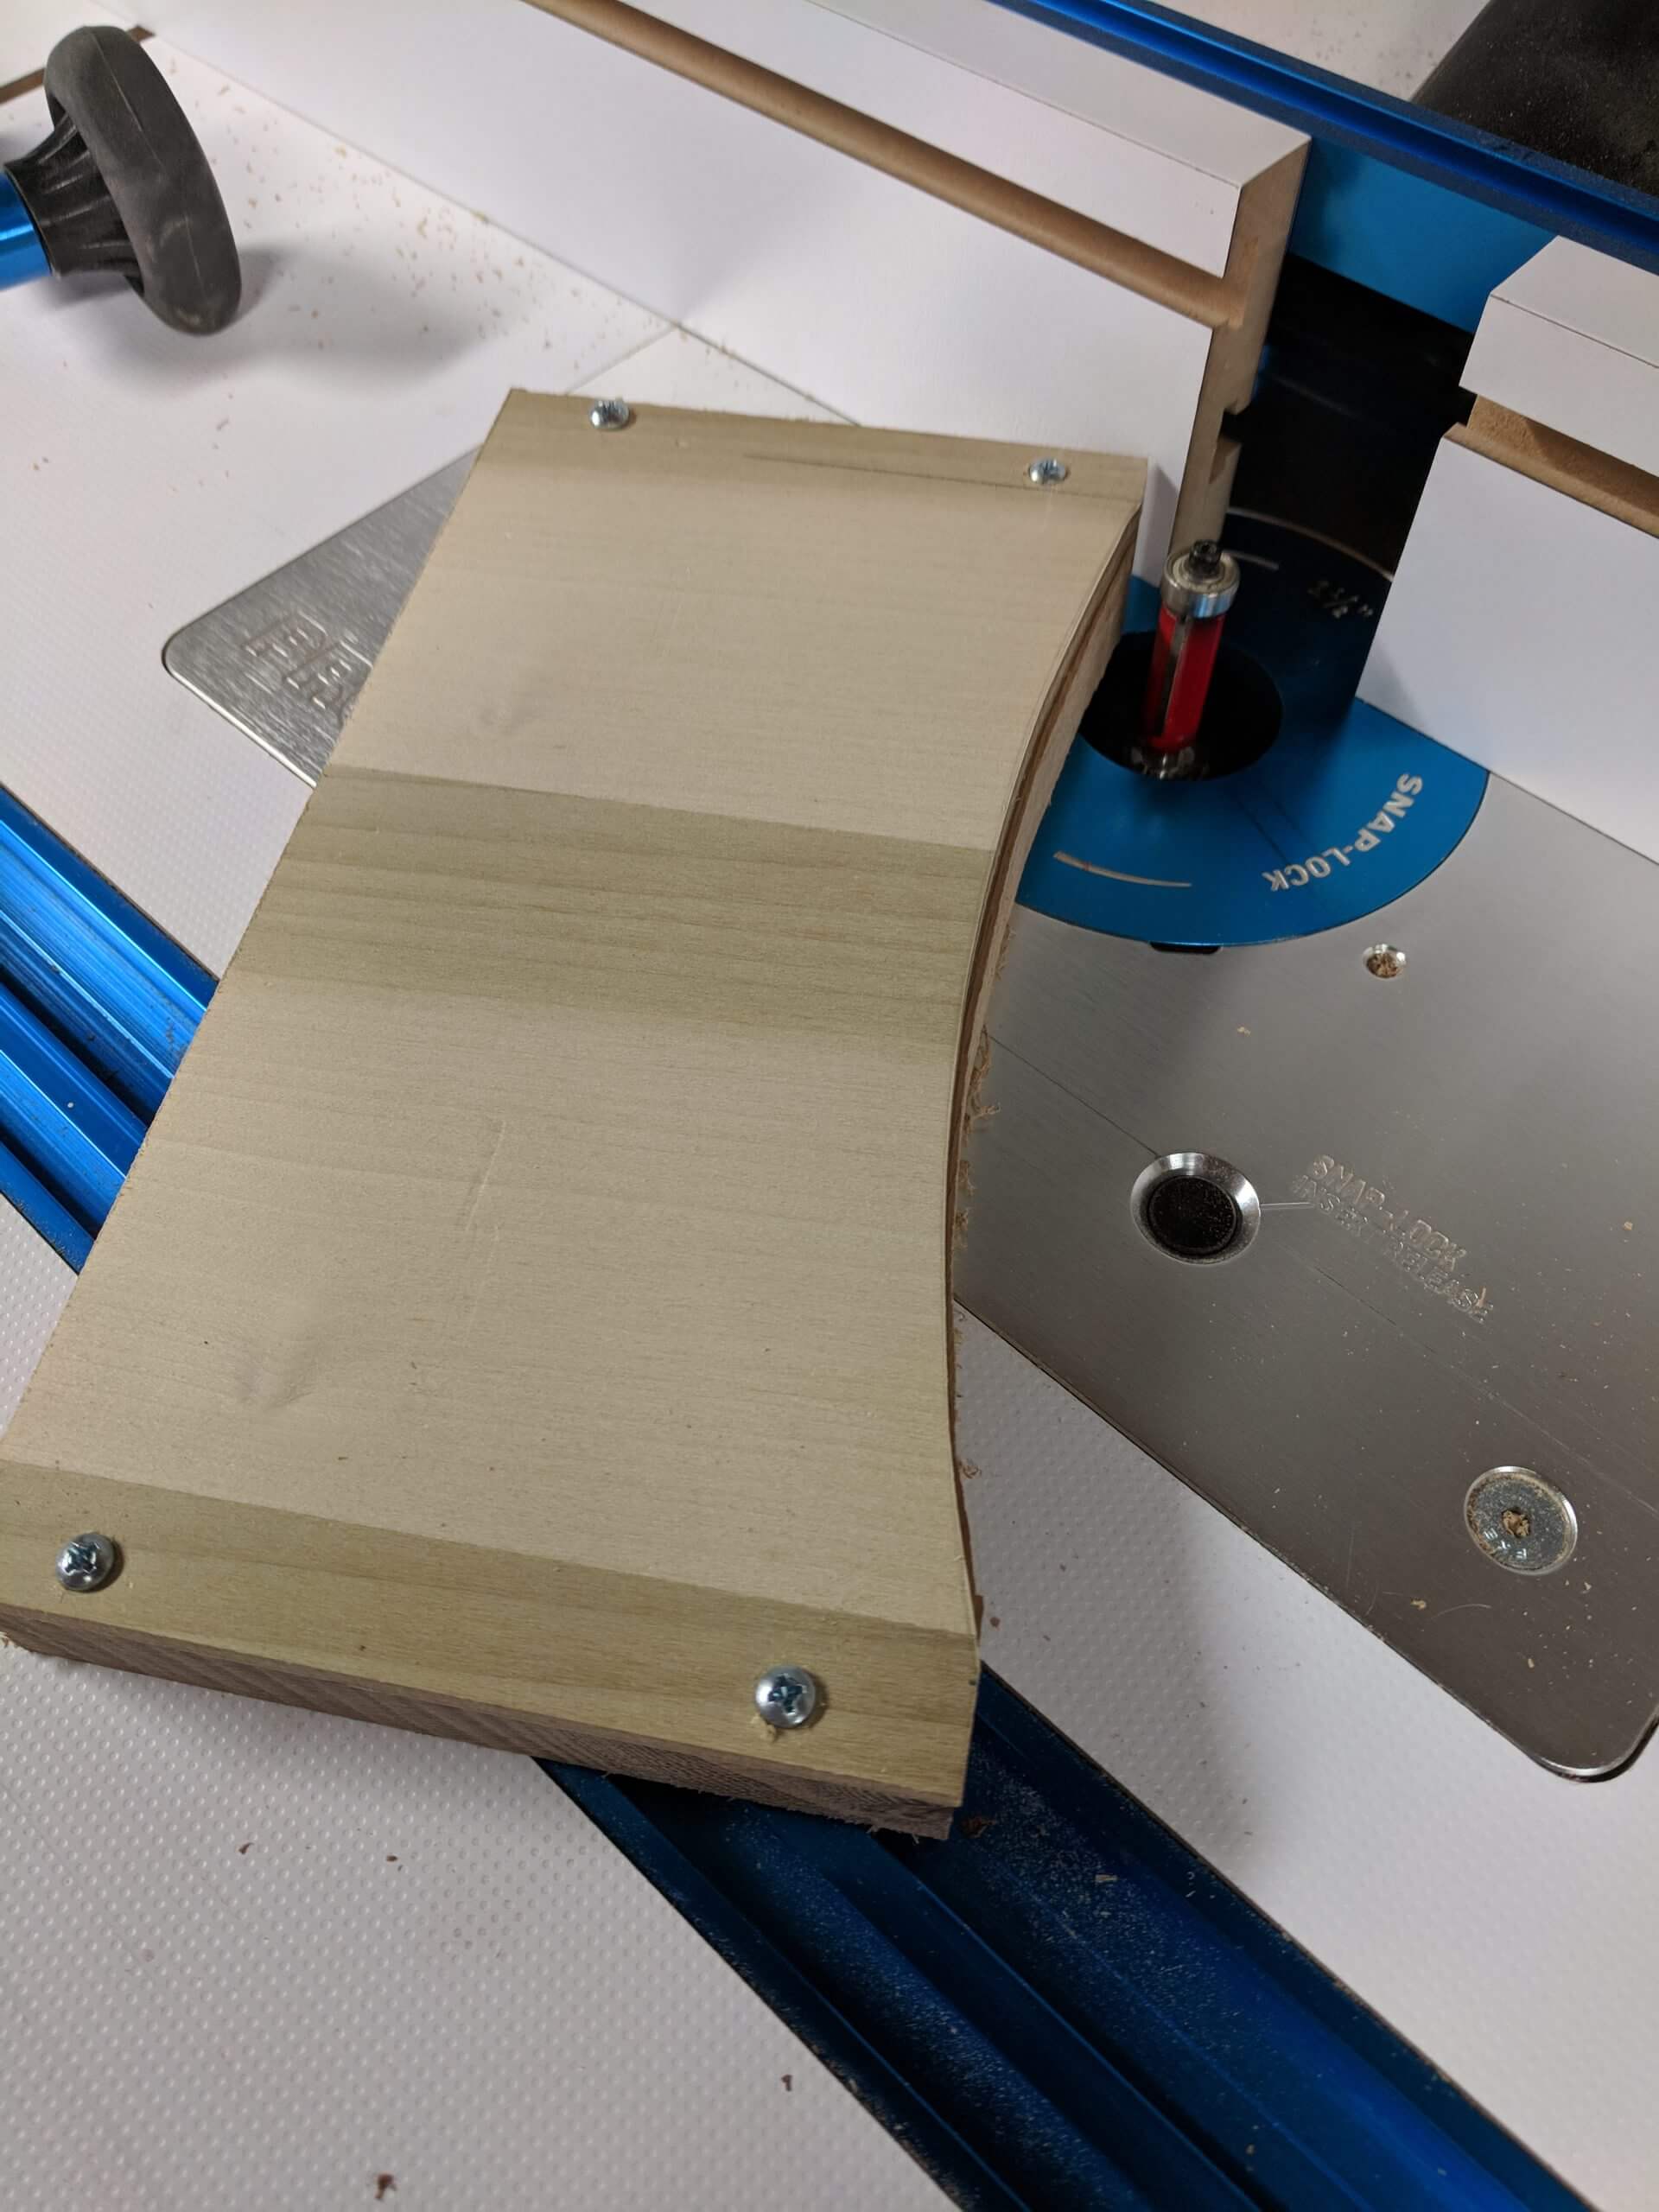
The curve is made by making a template, marking the stile then cutting the majority of the waste out with a band saw then cleaning it up with a router using a pattern bit.
I will skip the details on making a pattern or using a pattern bit as they are skills that most bring to the table, if not the usual magazines have some great tutorials.
The end result is a clean curve and matching parts.
The rails were milled the same way, cut to the target width and a length of 8″ plus 1″ for a 1/2″ tenon on each end. If you are making a deeper table, this is the time to increase the depth.
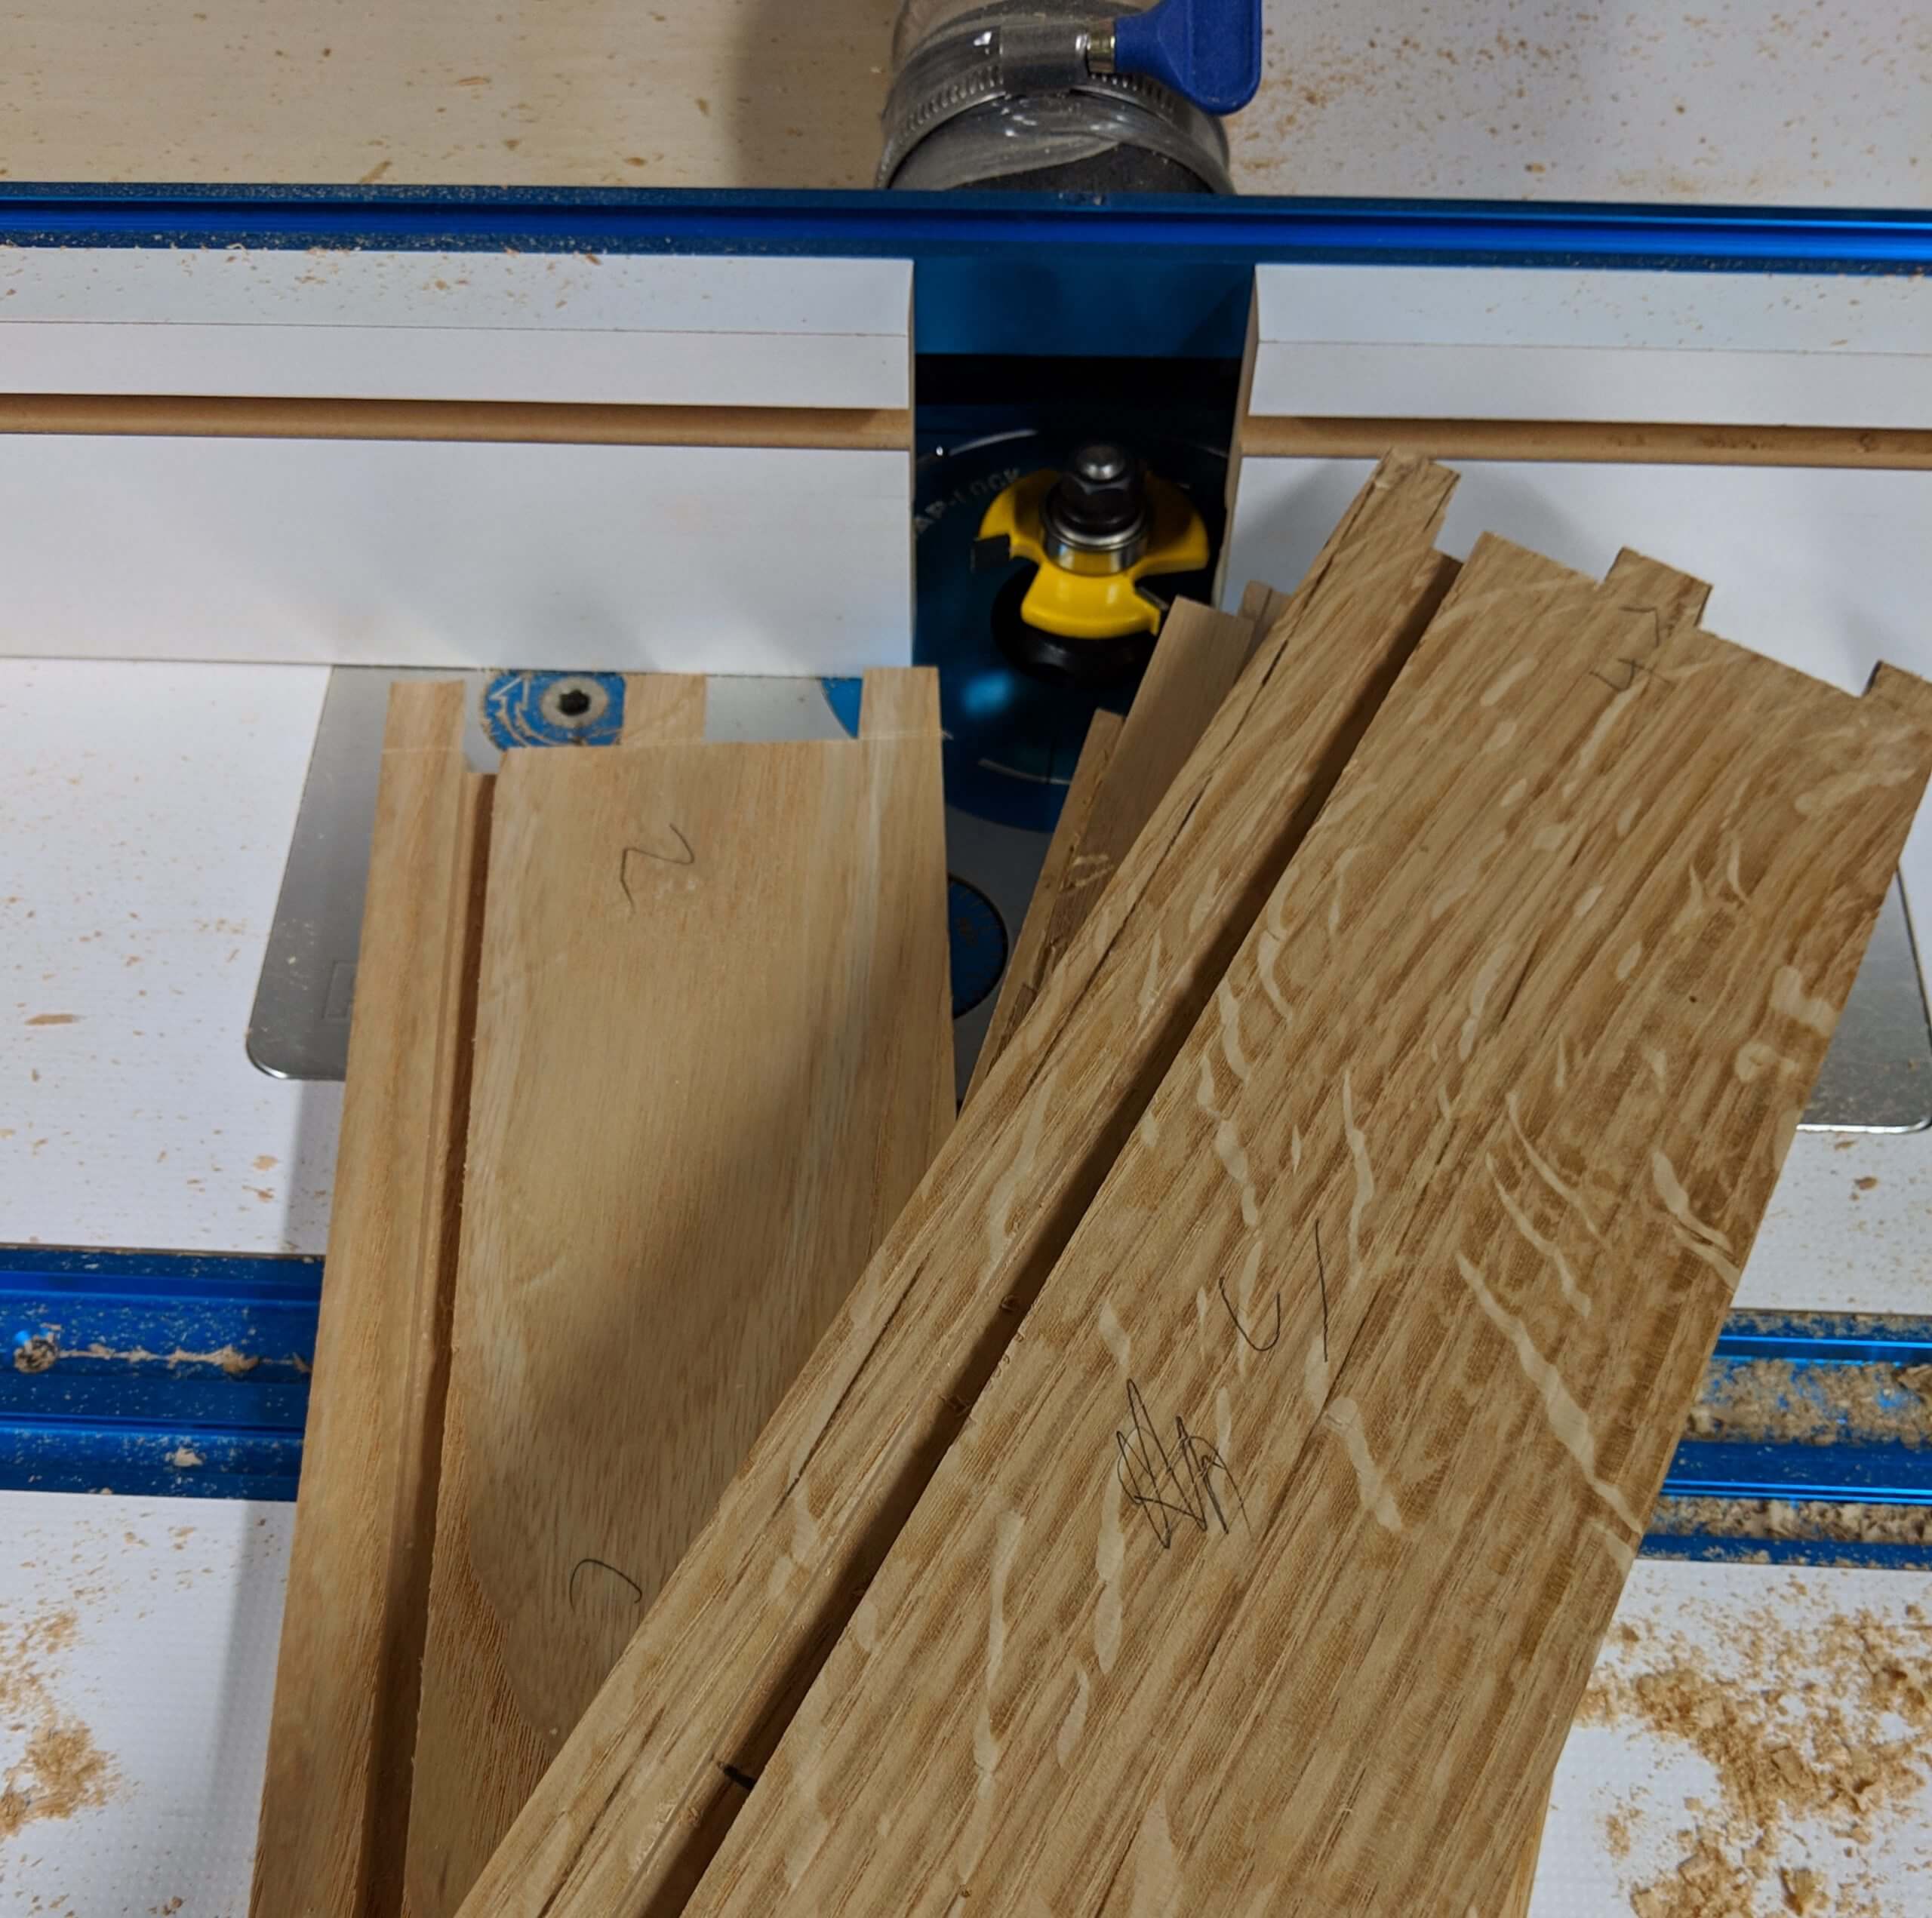
There is a decorative curve on the bottom of the top rail in keeping with the Arts and Crafts influence.
This curve is cut the same as the curve on the stile, using a router with a pattern bit. The template was made by making a top rail blank out of plywood then drawing a 13 1/2″ radius arc onto the bottom. I had the arc end 1/2″ in from the where the end of the rail would be after the 1/2″ tenon was cut into the rail.
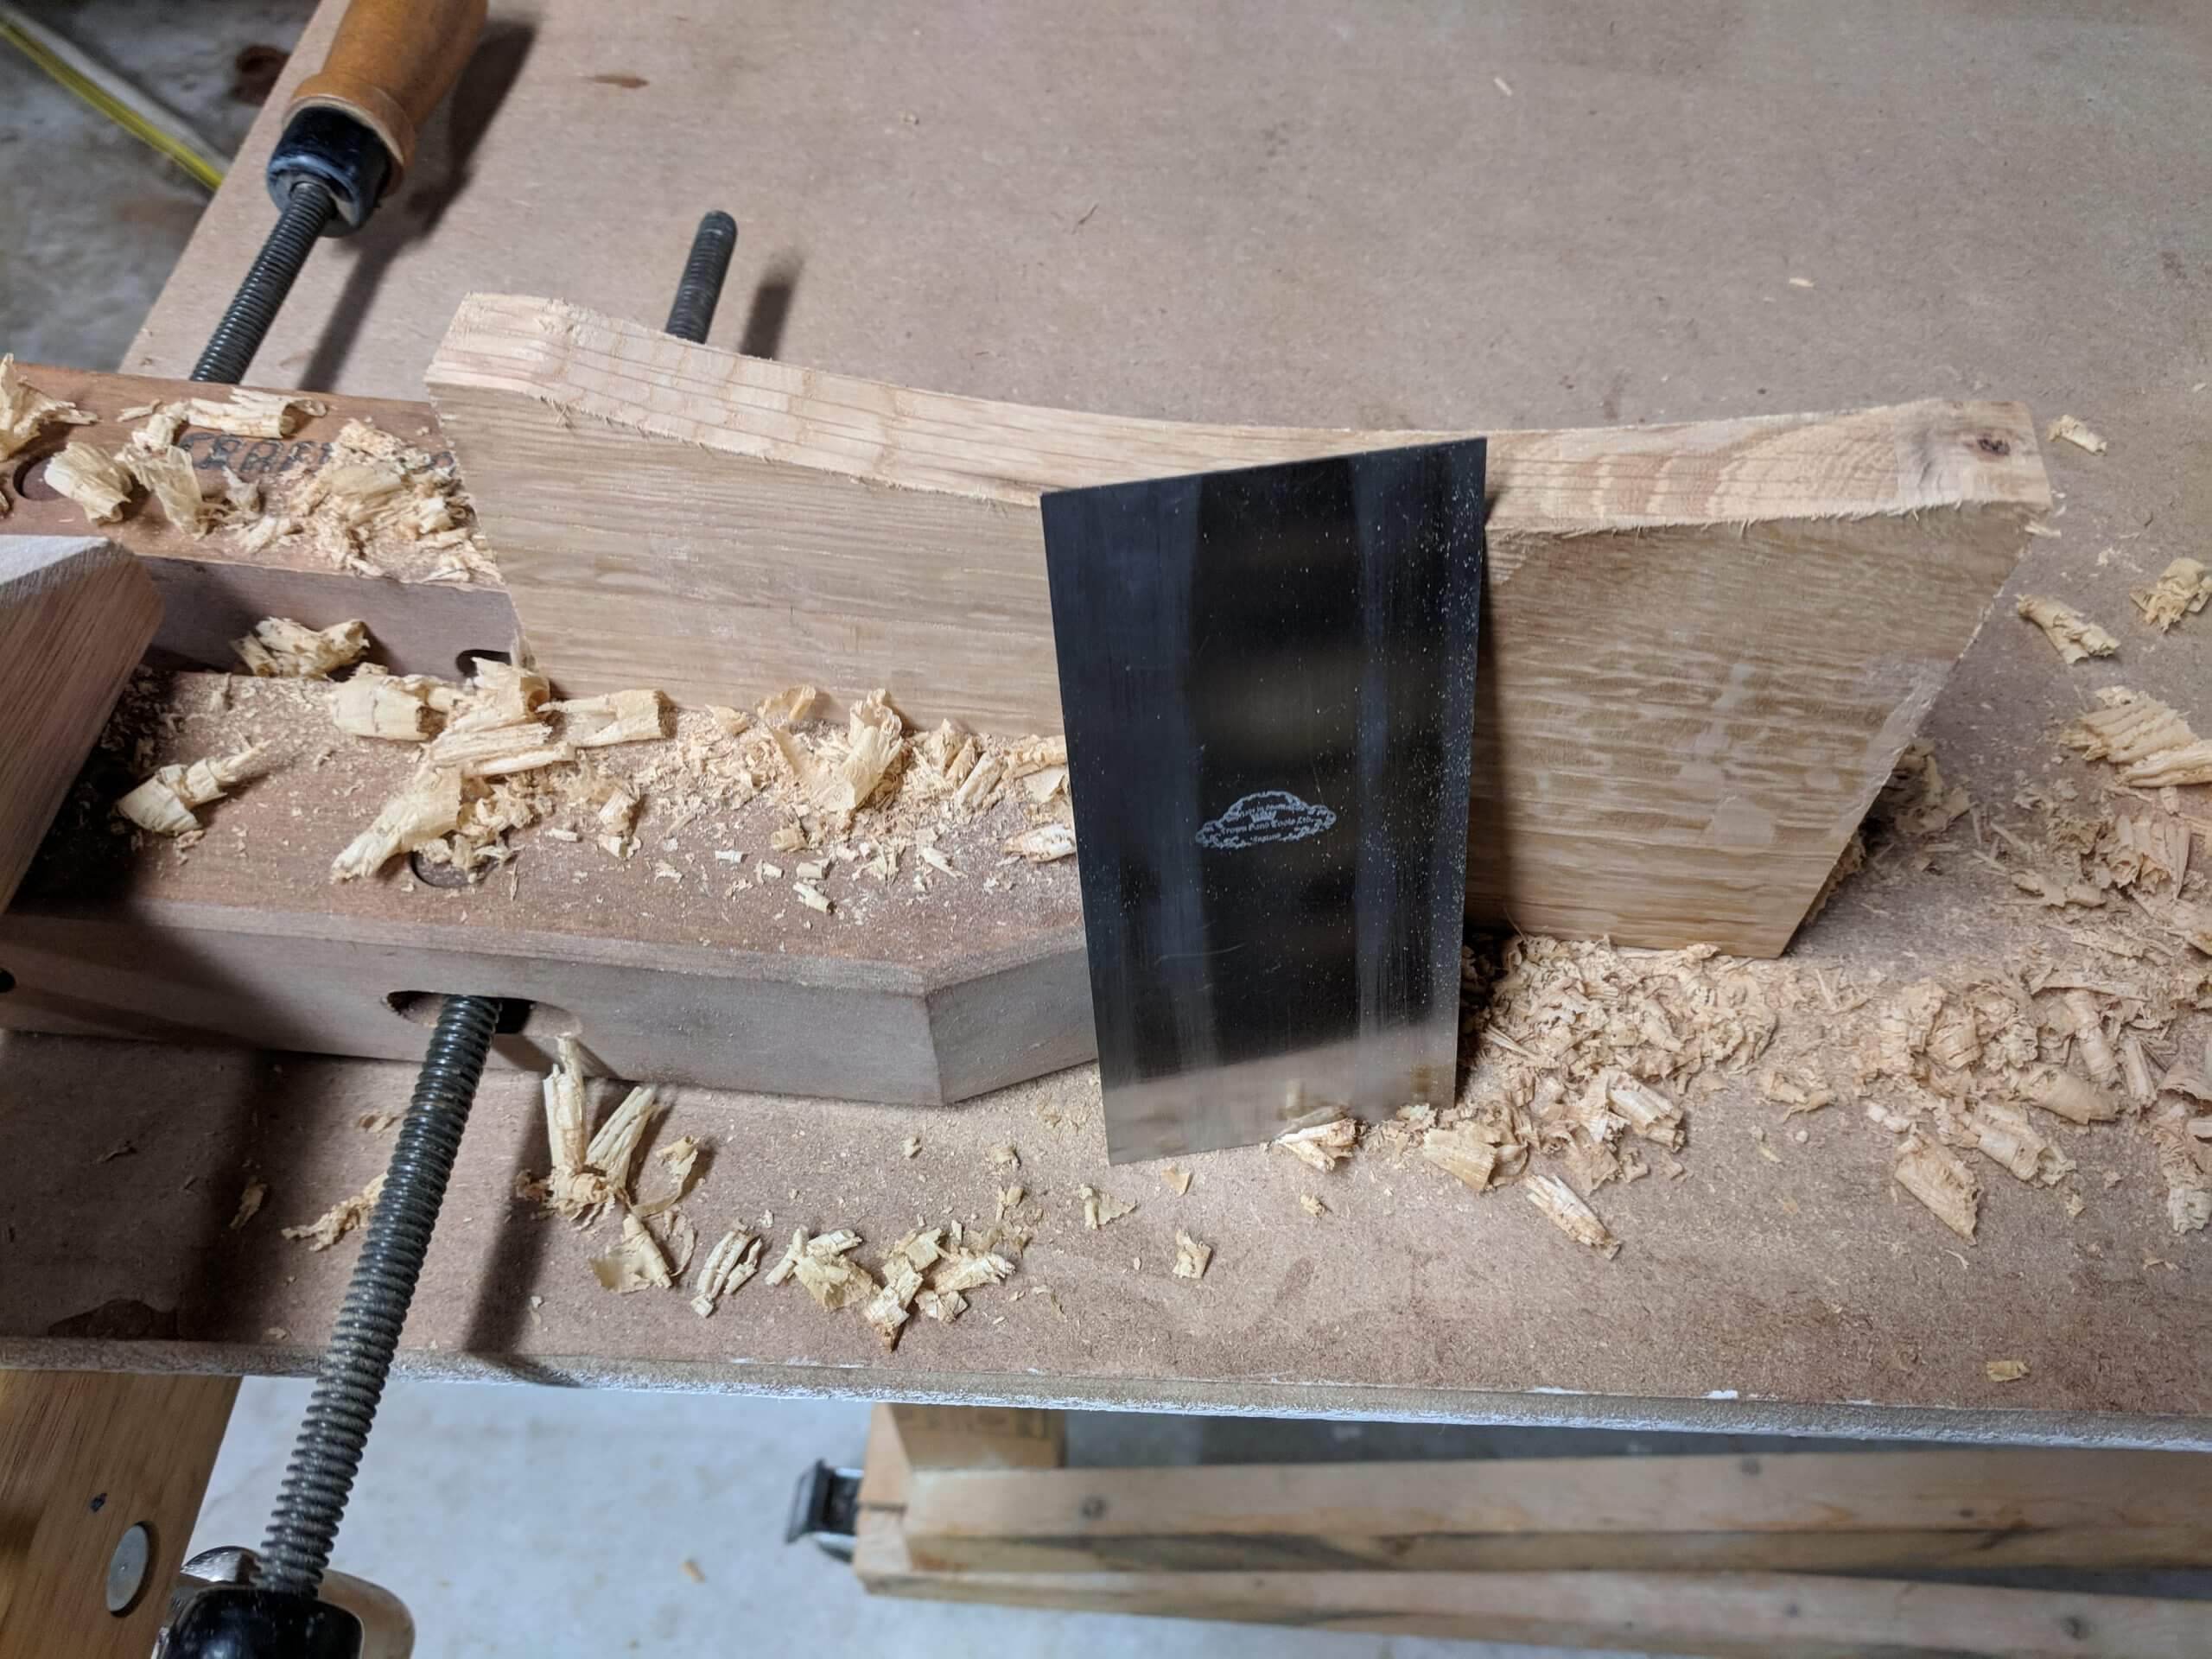
I smooth out all parts of the panel with card scrappers and a cabinet scrapper. Quarter sawn white oak has a significant risk for tear-out and even with the best efforts you will have rough spots to overcome. The cabinet scrapper is ideal as you can remove more material faster than card but safer than a standard plane.
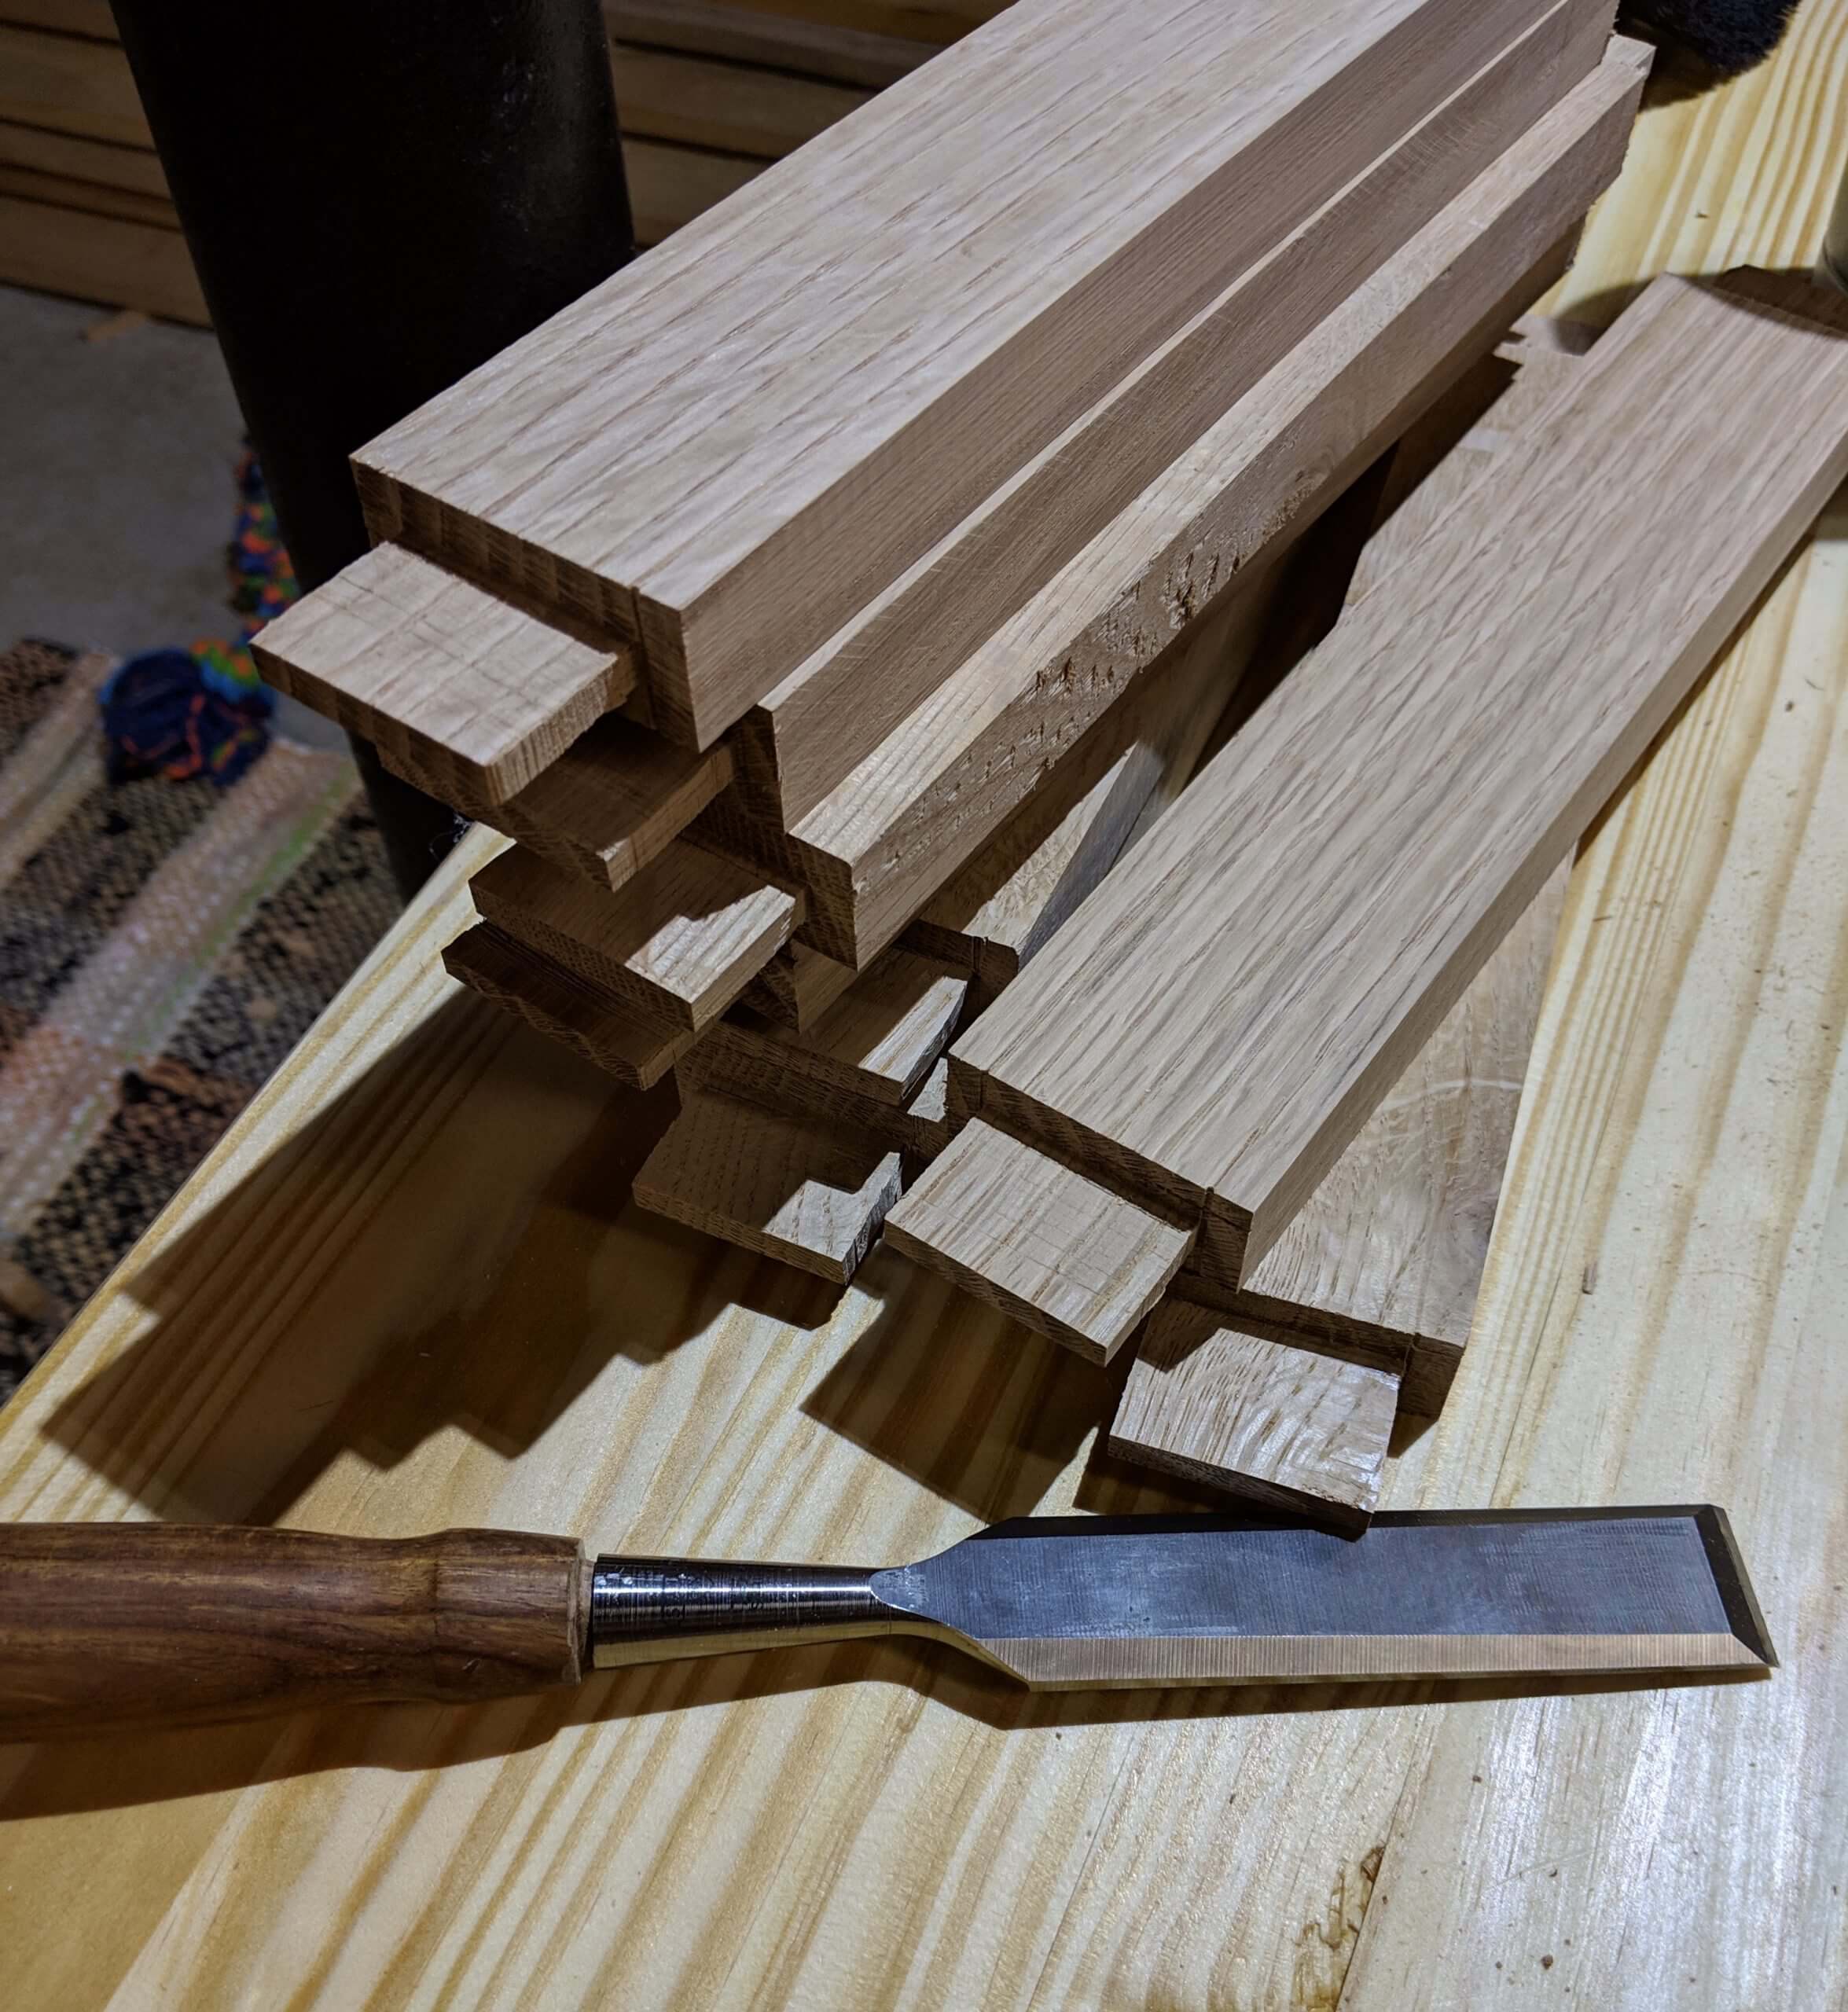
The table saw makes short work of the face and shoulder cuts of the tenons. The blade is 1/2″ up from the table and the fence is positioned so that the outer edge of the blade is (width of board – 1/4″)/2. Essentially you are measuring the board, removing the 1/4″ for the tenon you are cutting, them splitting the difference.
For the should cuts the figures are reversed, with the outer edge of the blade being 1/2″ from the fence and the height of the blade being (width of board – 1/4″)/2.
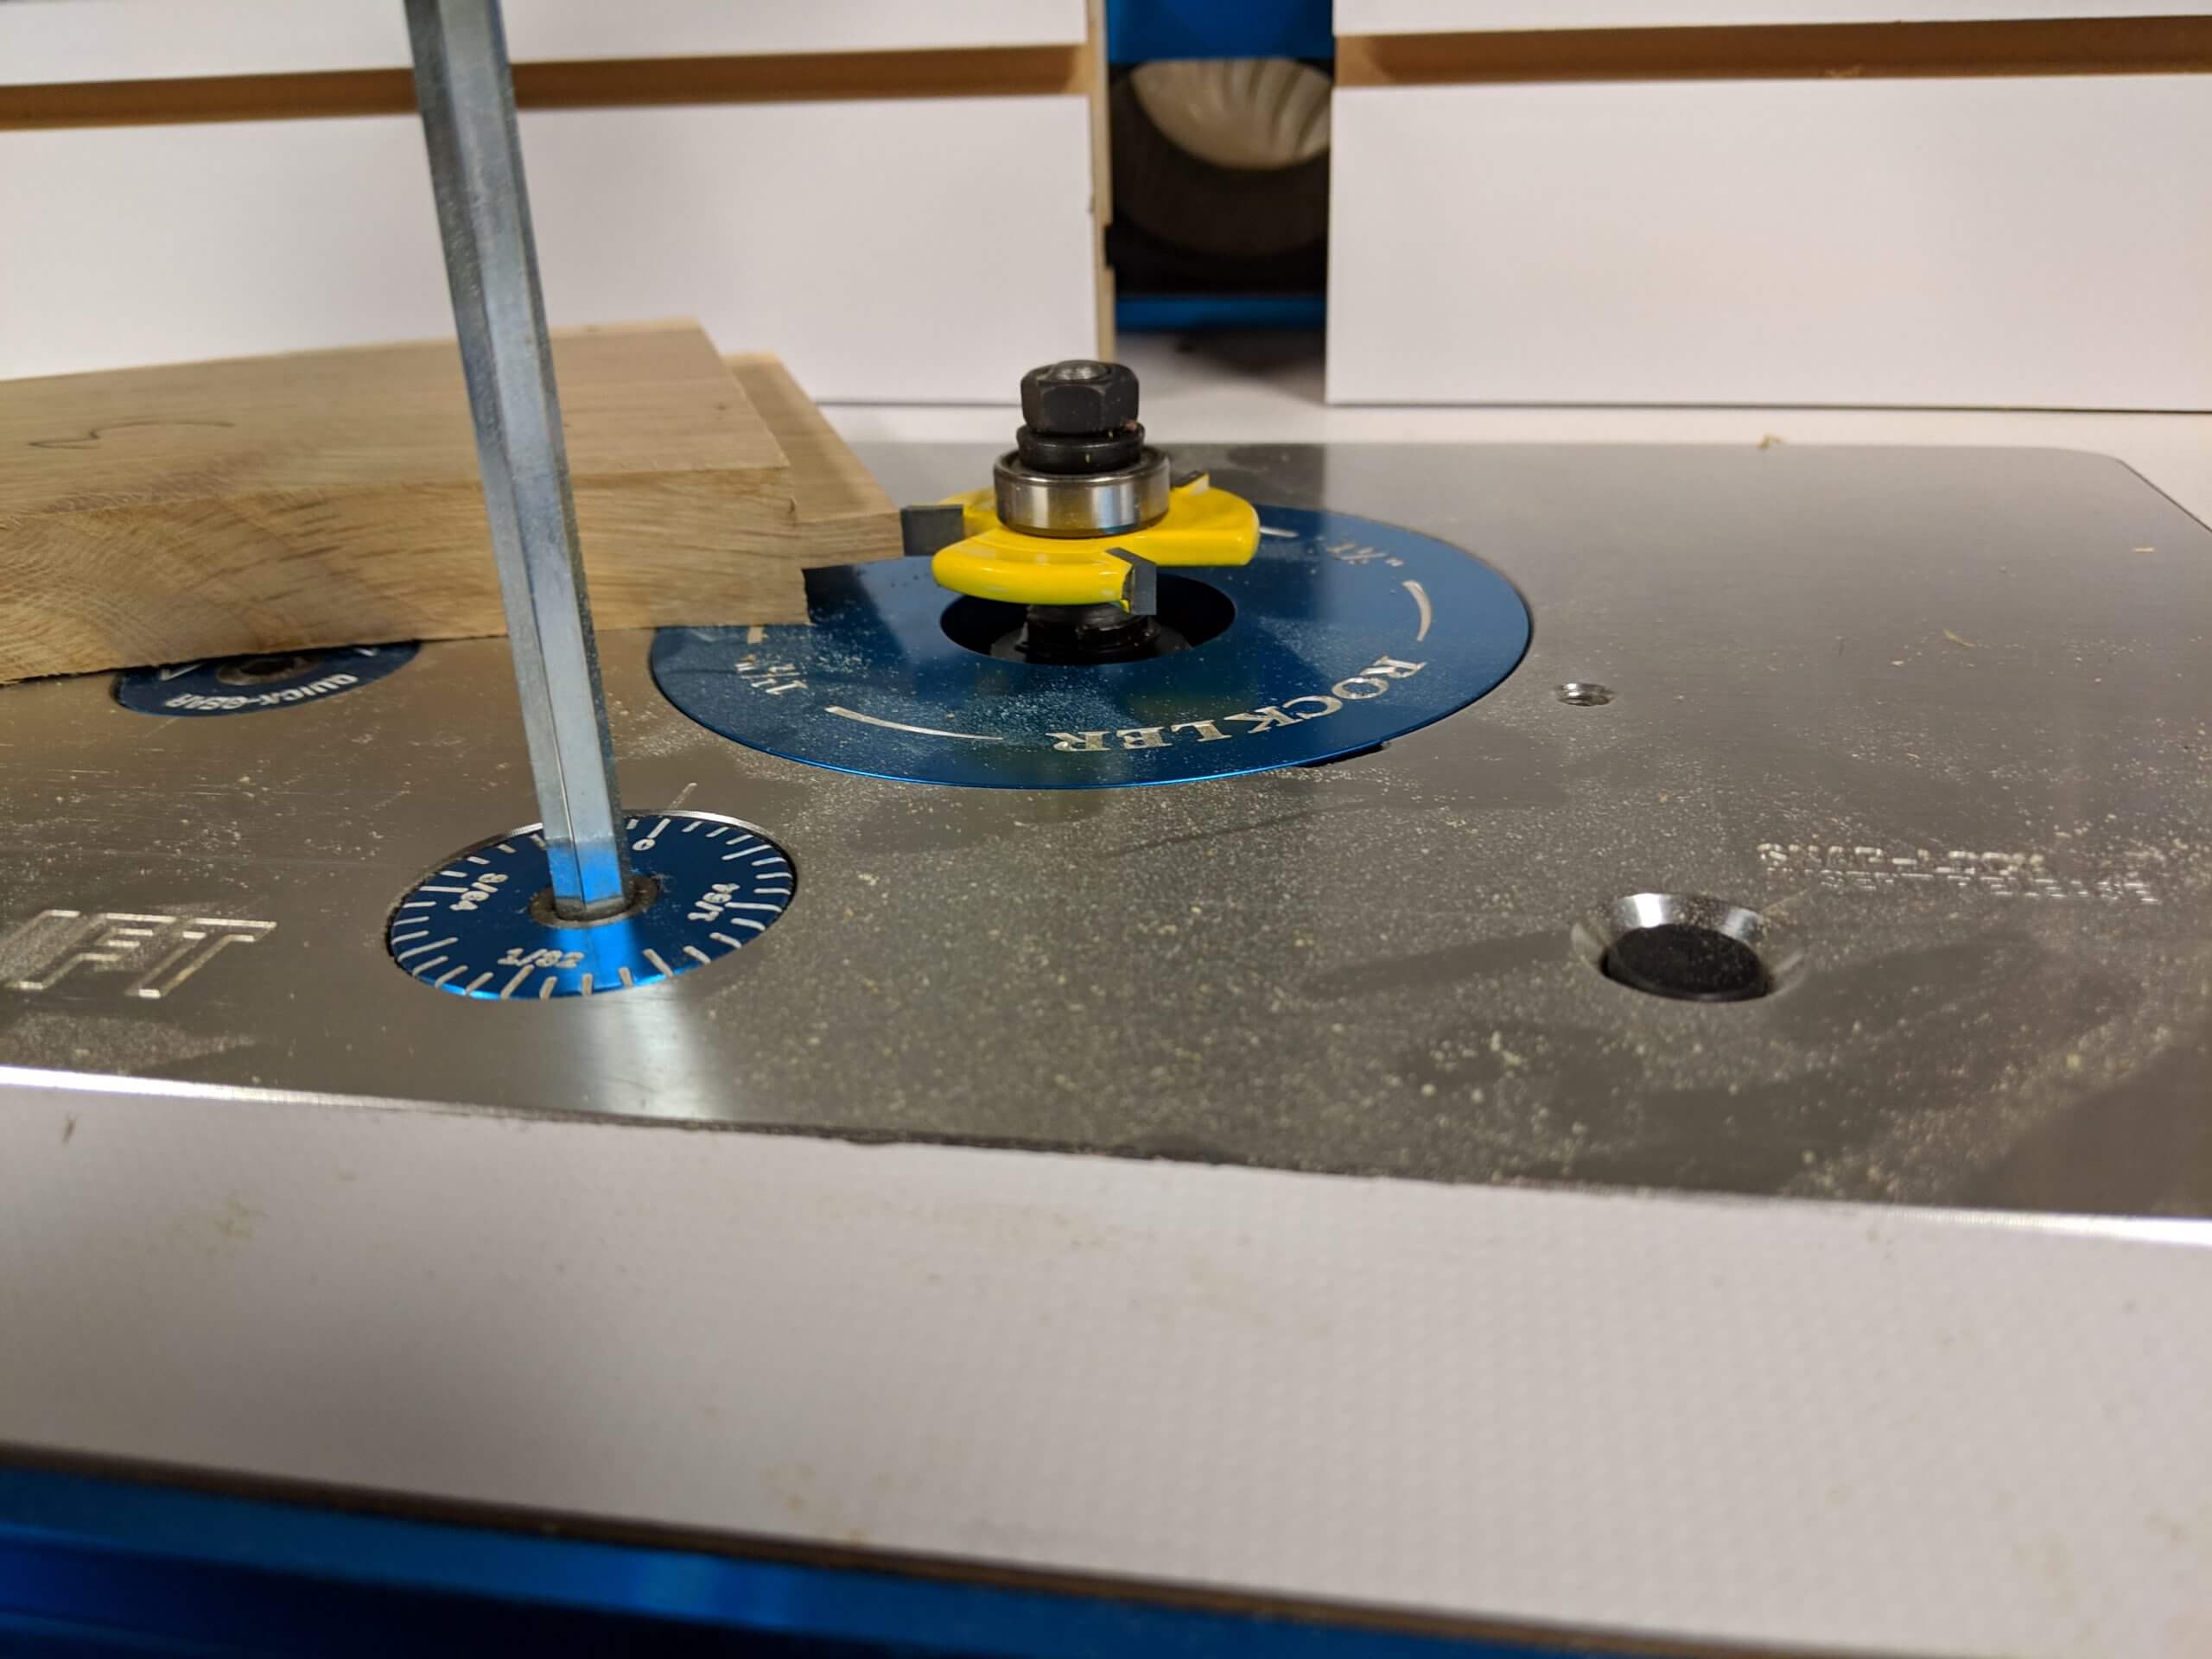
With a 1/4″ wide by 1/2″ deep slotting bit in the router, I adjust the hight to exactly match the tenon with the finish face down.
Face up or face down is not the issue rather than consistency. Even though you are trying to center the slot in the stock, you will still have one side a few or many thousands higher than the other.
If you mill one part with the finish side up and a joining part with the finish side down, the error will be compounded when you flip one part to mate it to the other. This will give you a lip that needs to be planed or sanded off.
While the slotting bit is in the router, run through the stiles, being careful not to run through the end that will show. I make a mark on the table that shows the extent of the cutter so I know when to stop the cut.
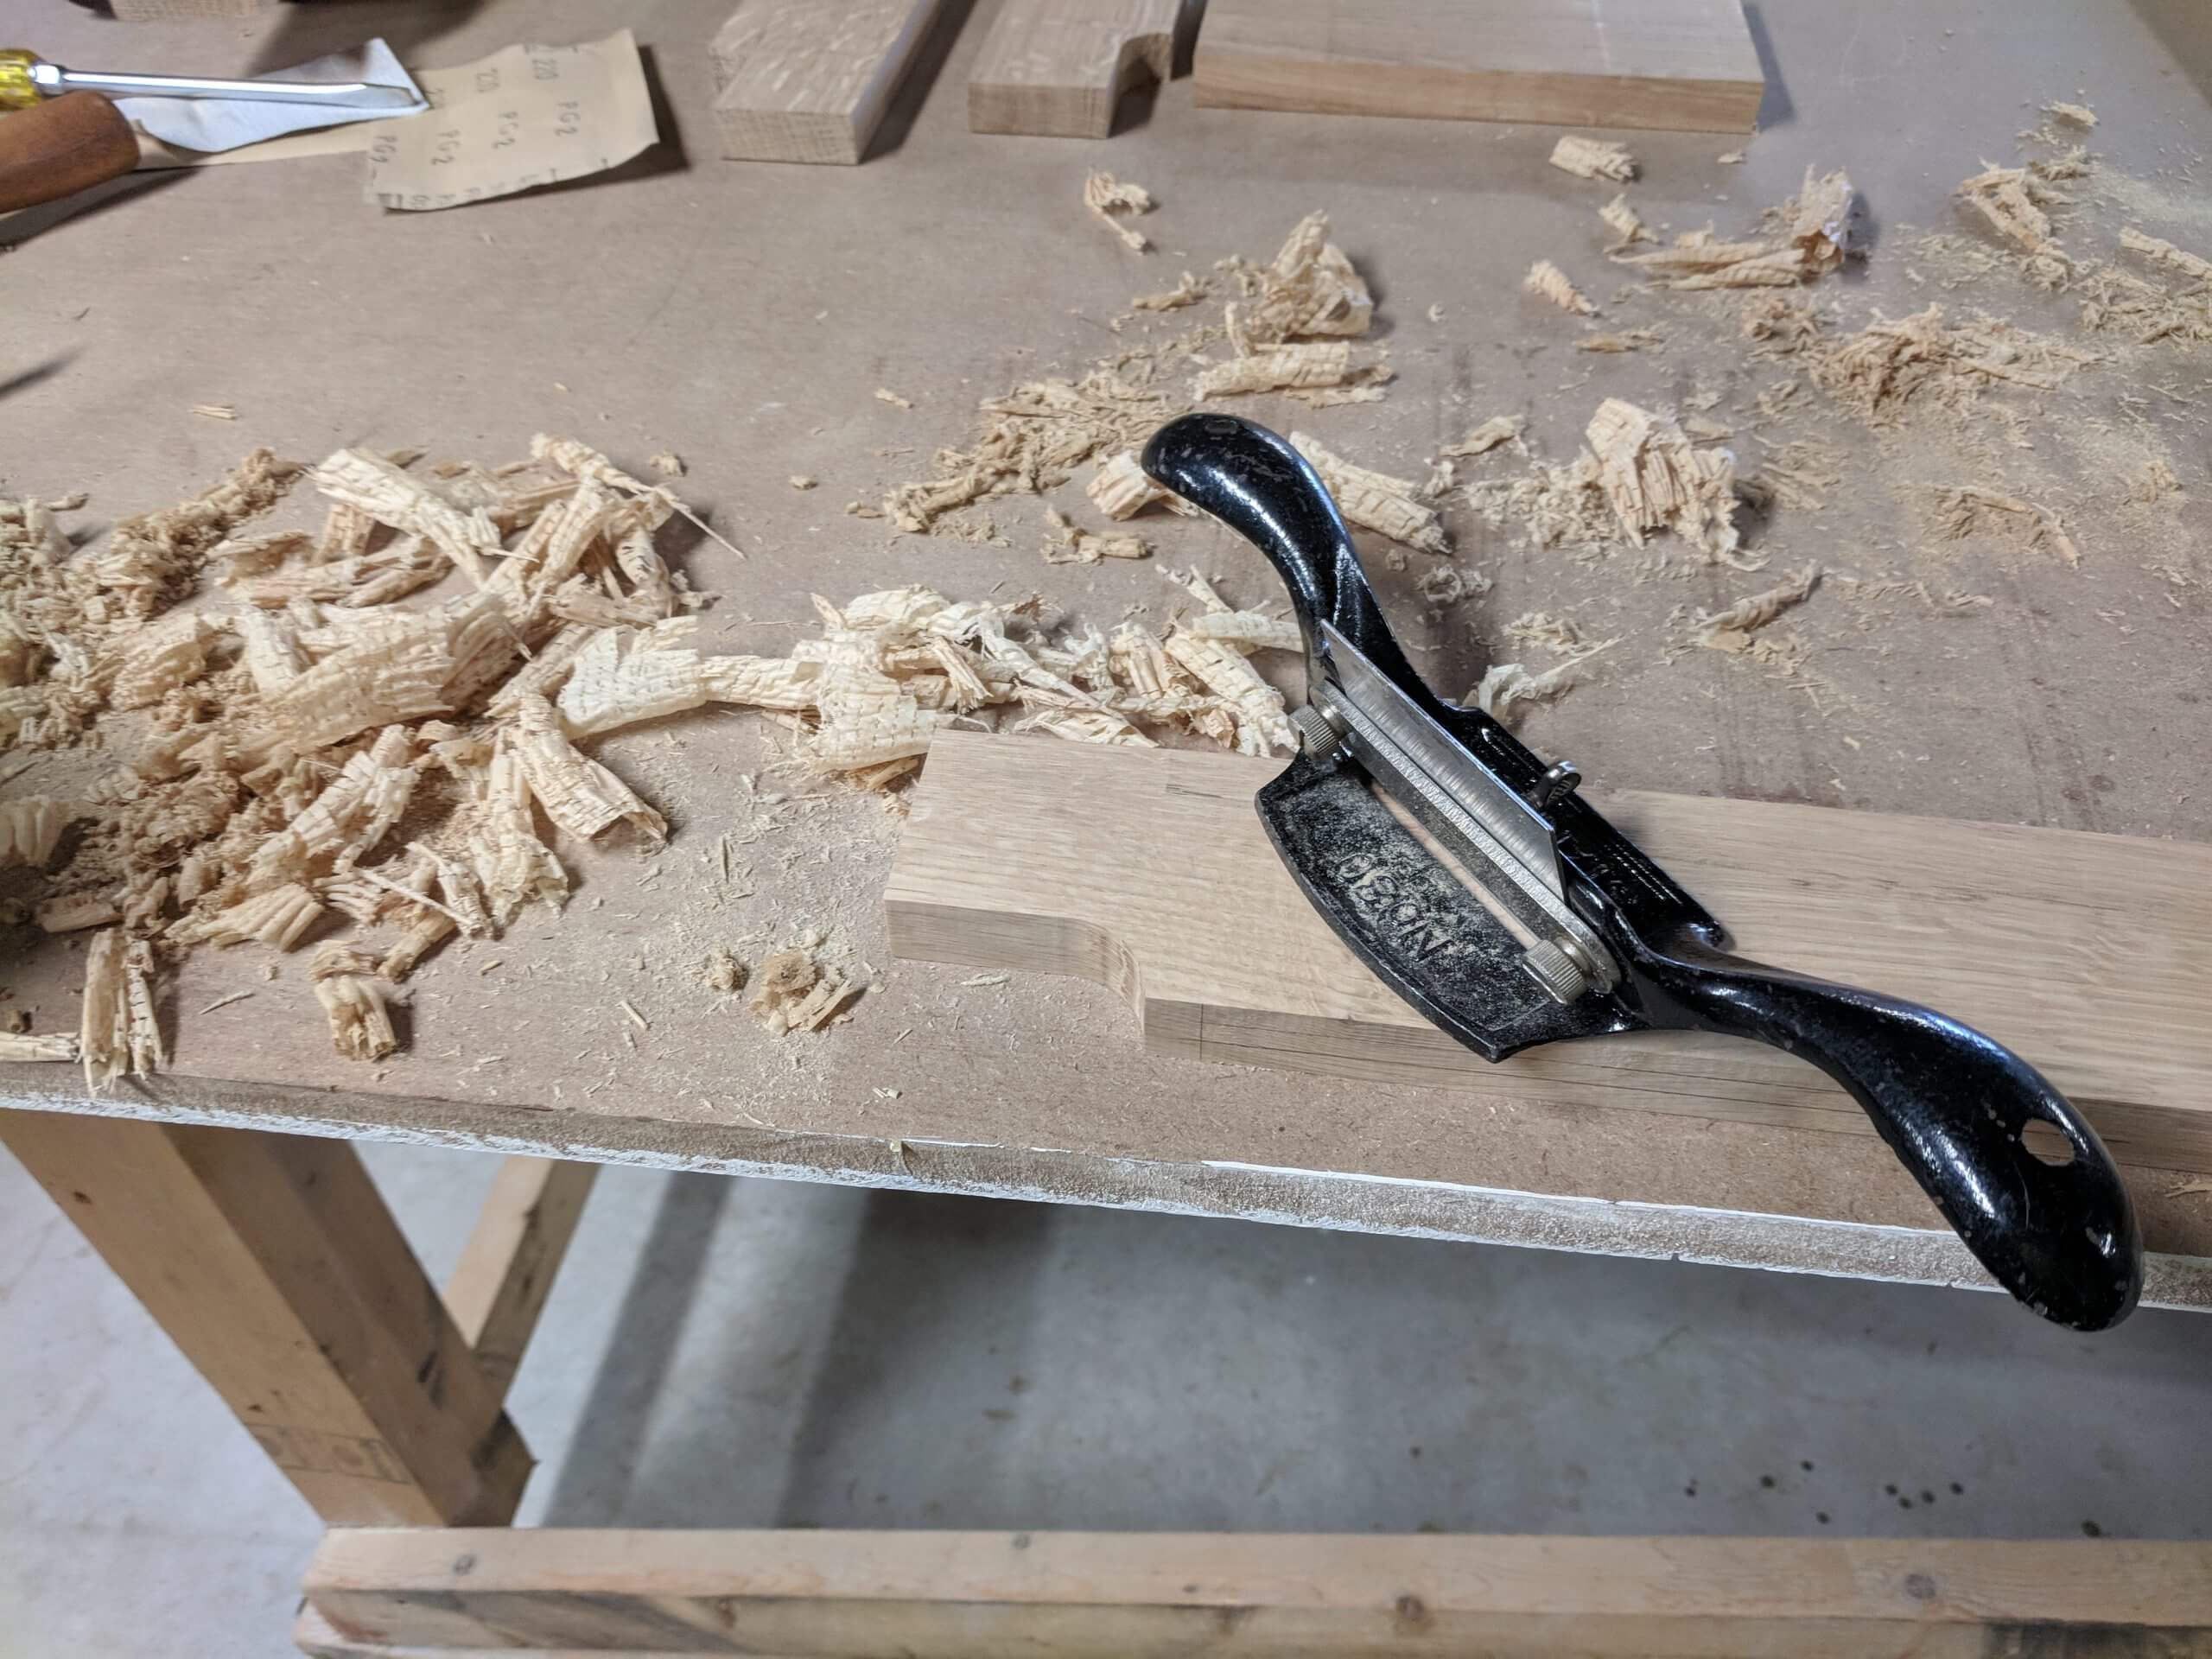
Tenons are fine tuned at the bench. I use a block plane and a file to adjust the fit. I also chamfer the end to make insertion easier. Trim the bottom of the tenons on the bottom rail so it will fit into the stile with the stopped channel.
With the tenons cut and tuned for each panel, dry fit them to verify a good fit. Adjust as needed for a solid clean joint line between the stile and rail.
With the tenons cut and tuned for each panel, dry fit them to verify a good fit. Adjust as needed for a solid clean joint line between the stile and rail.
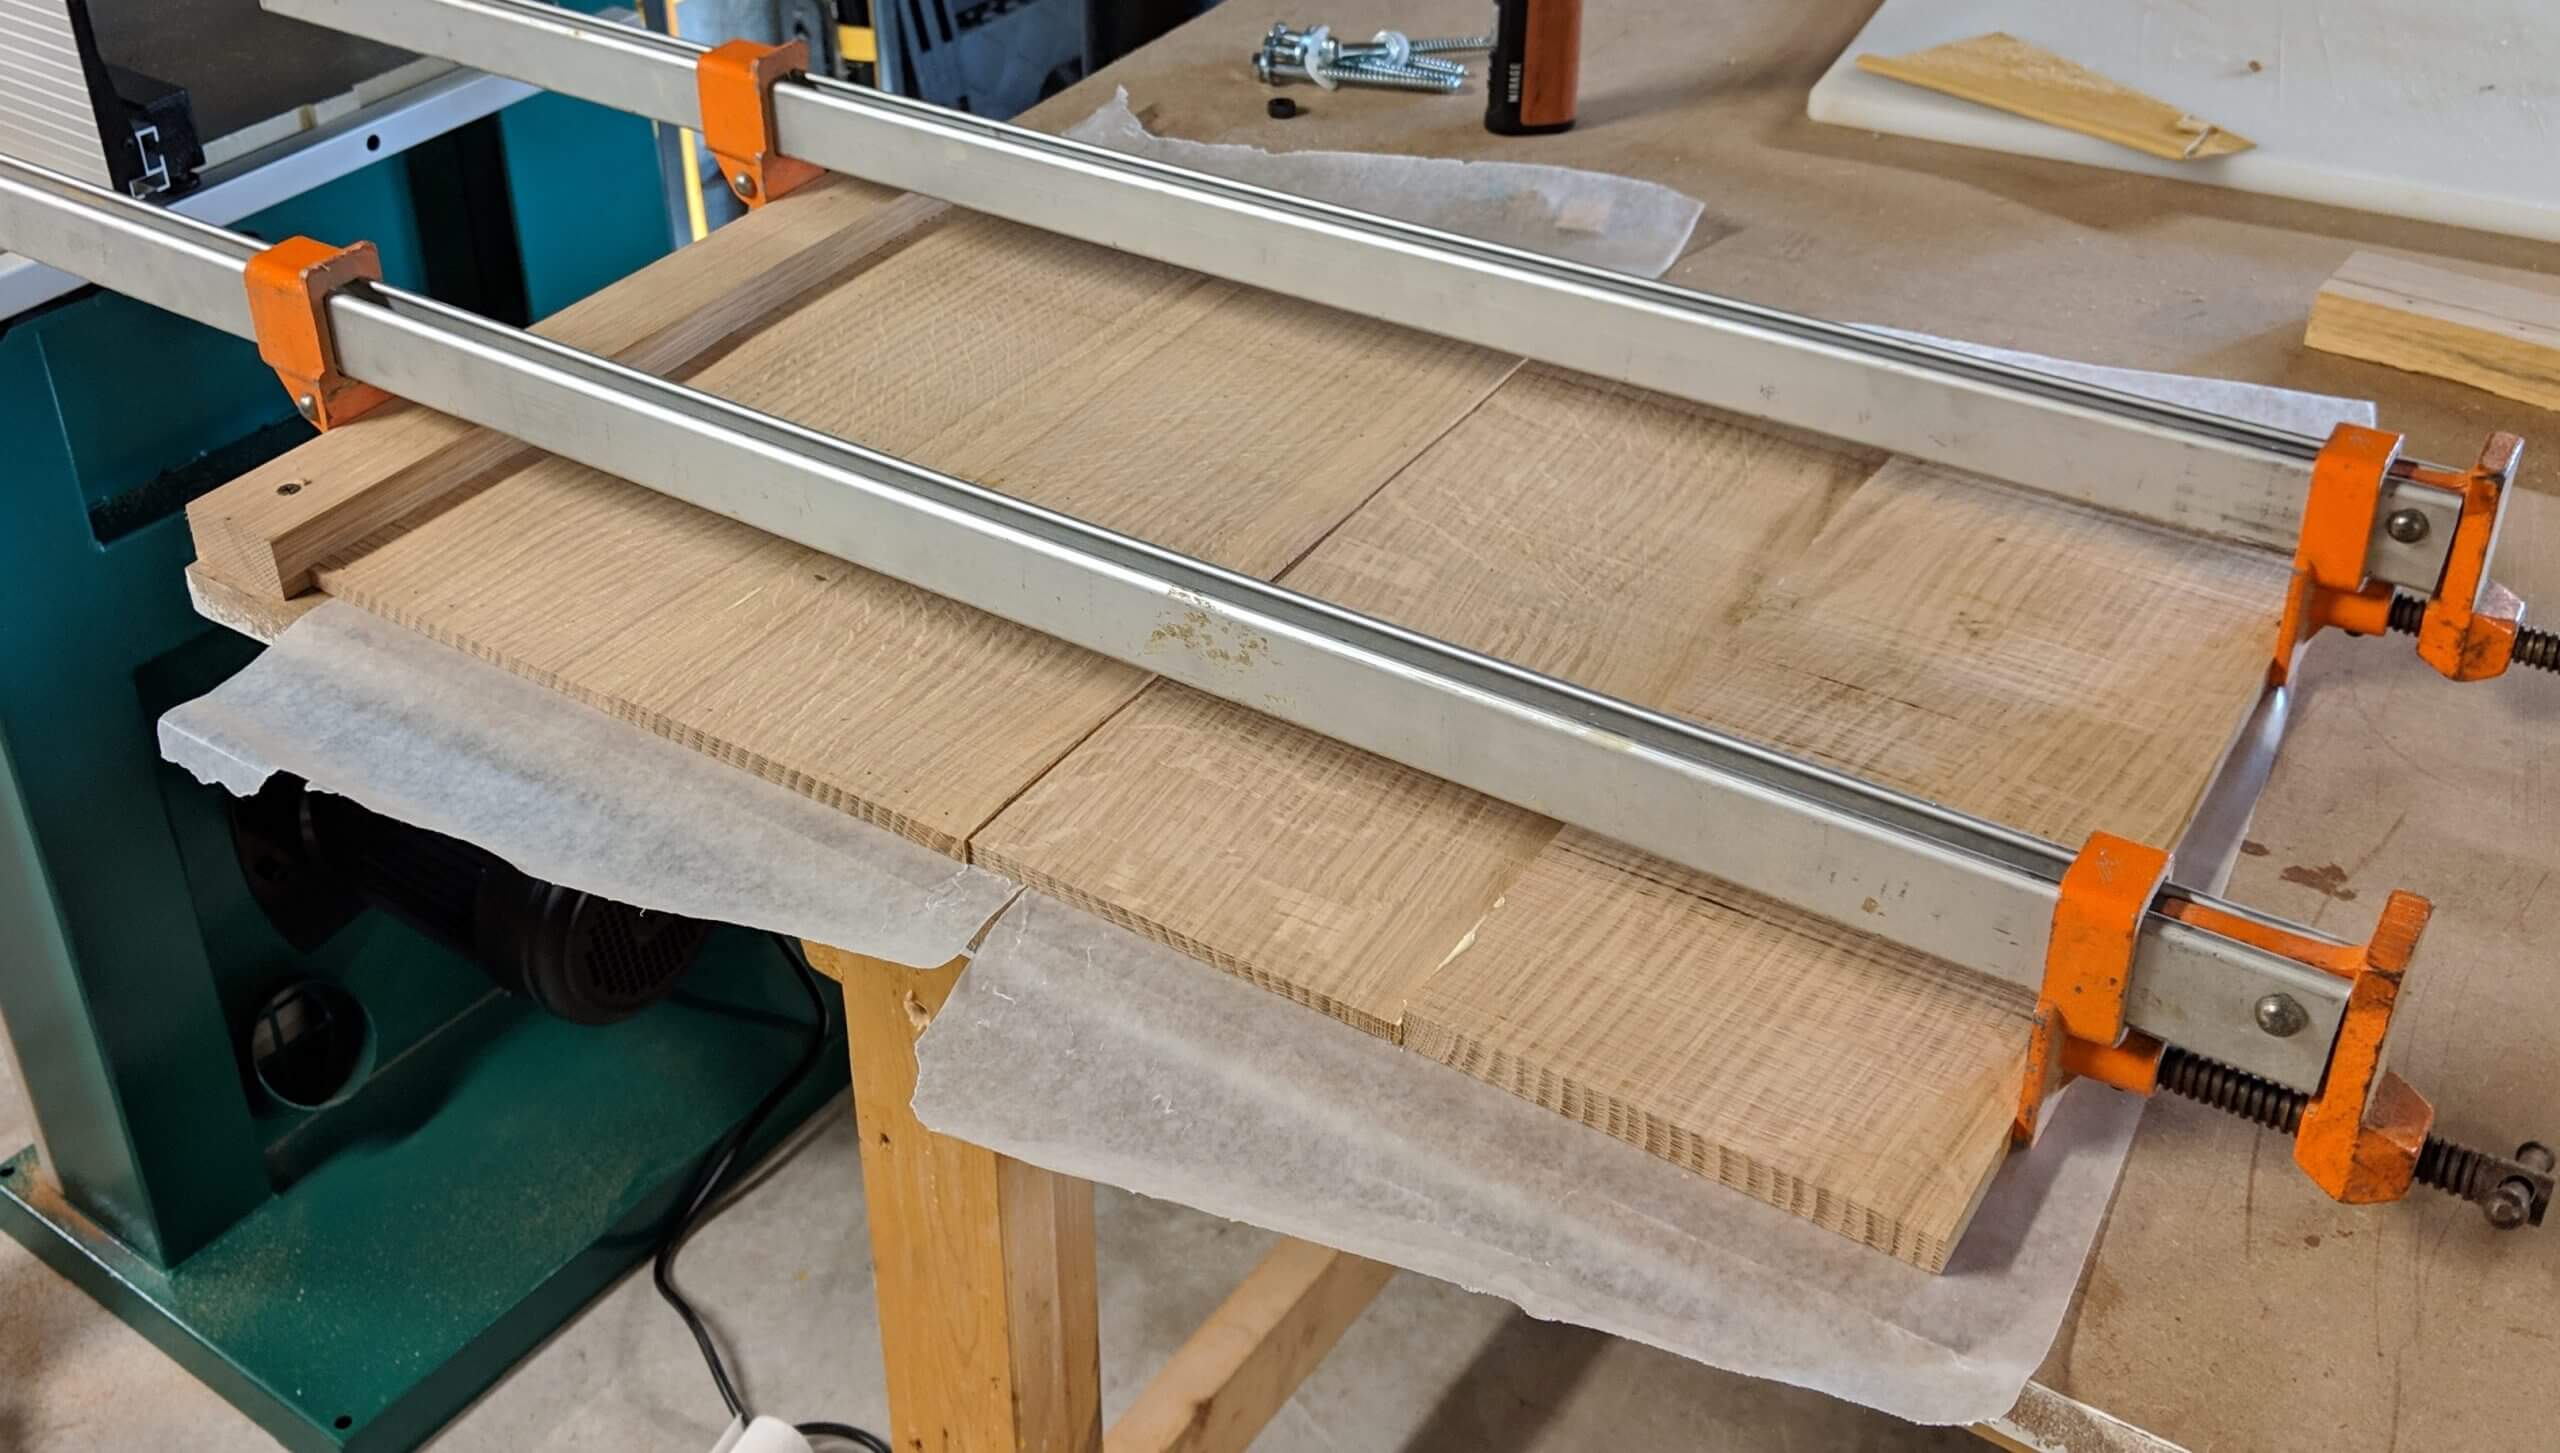
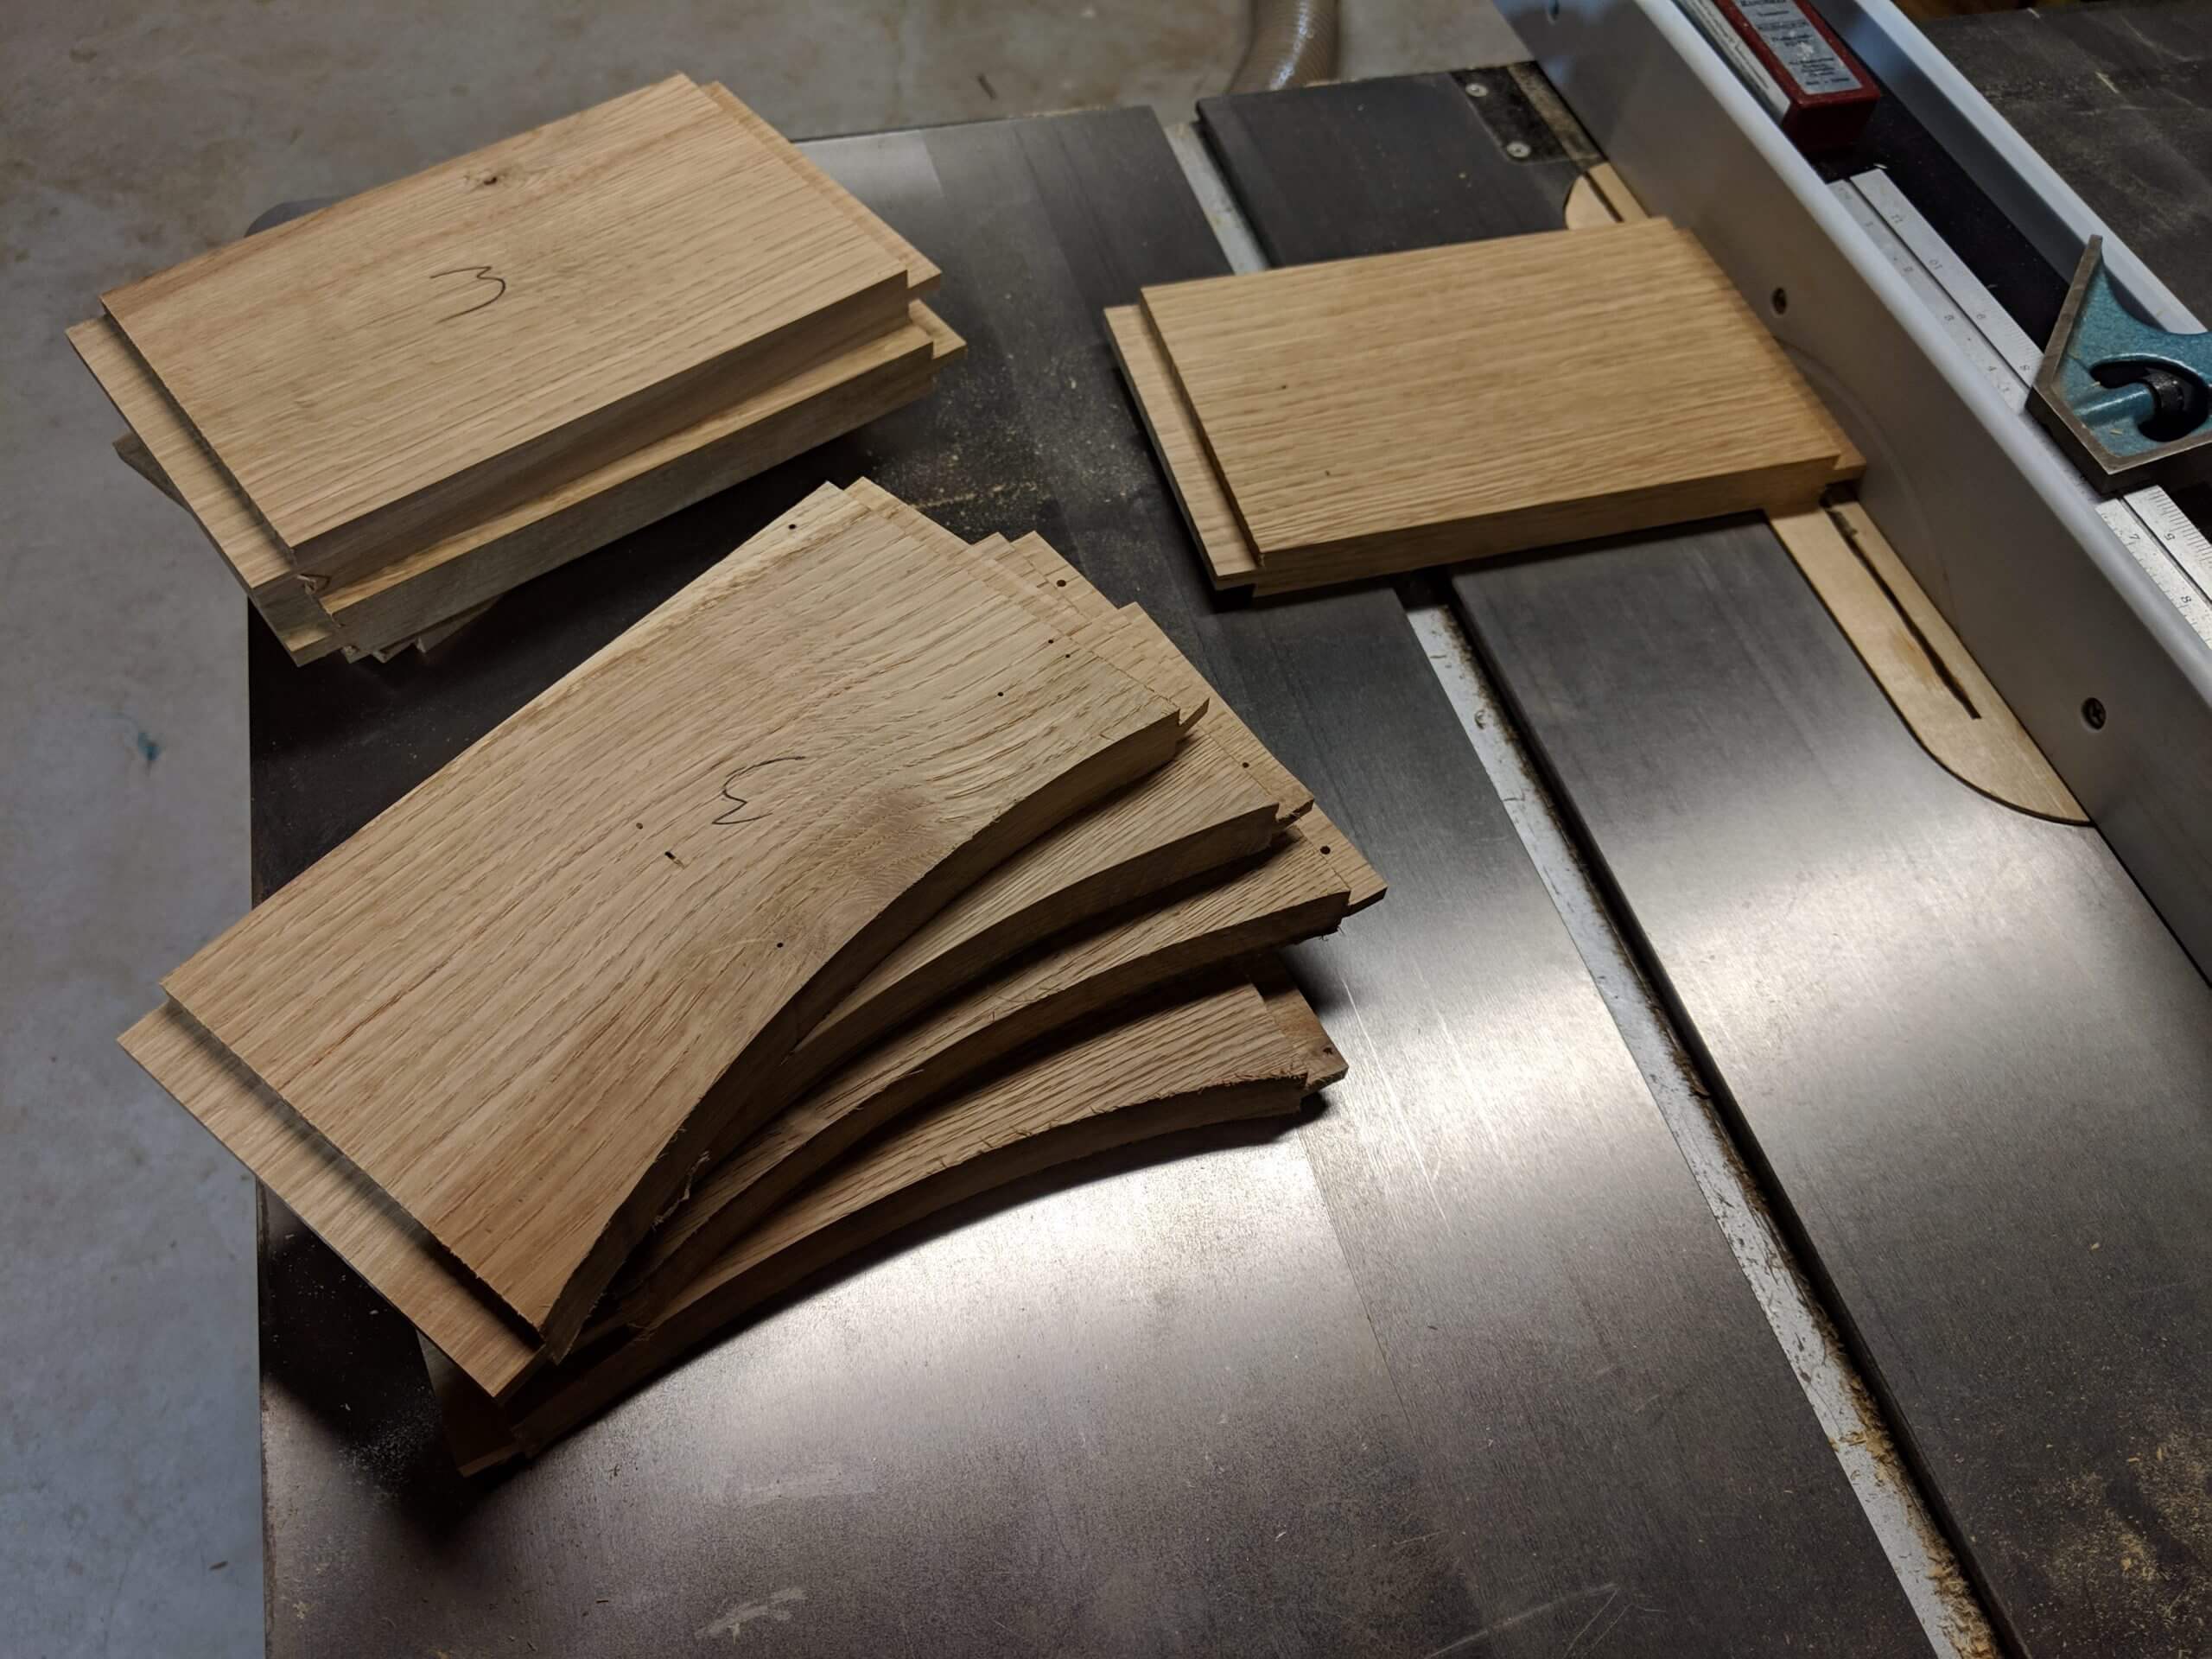
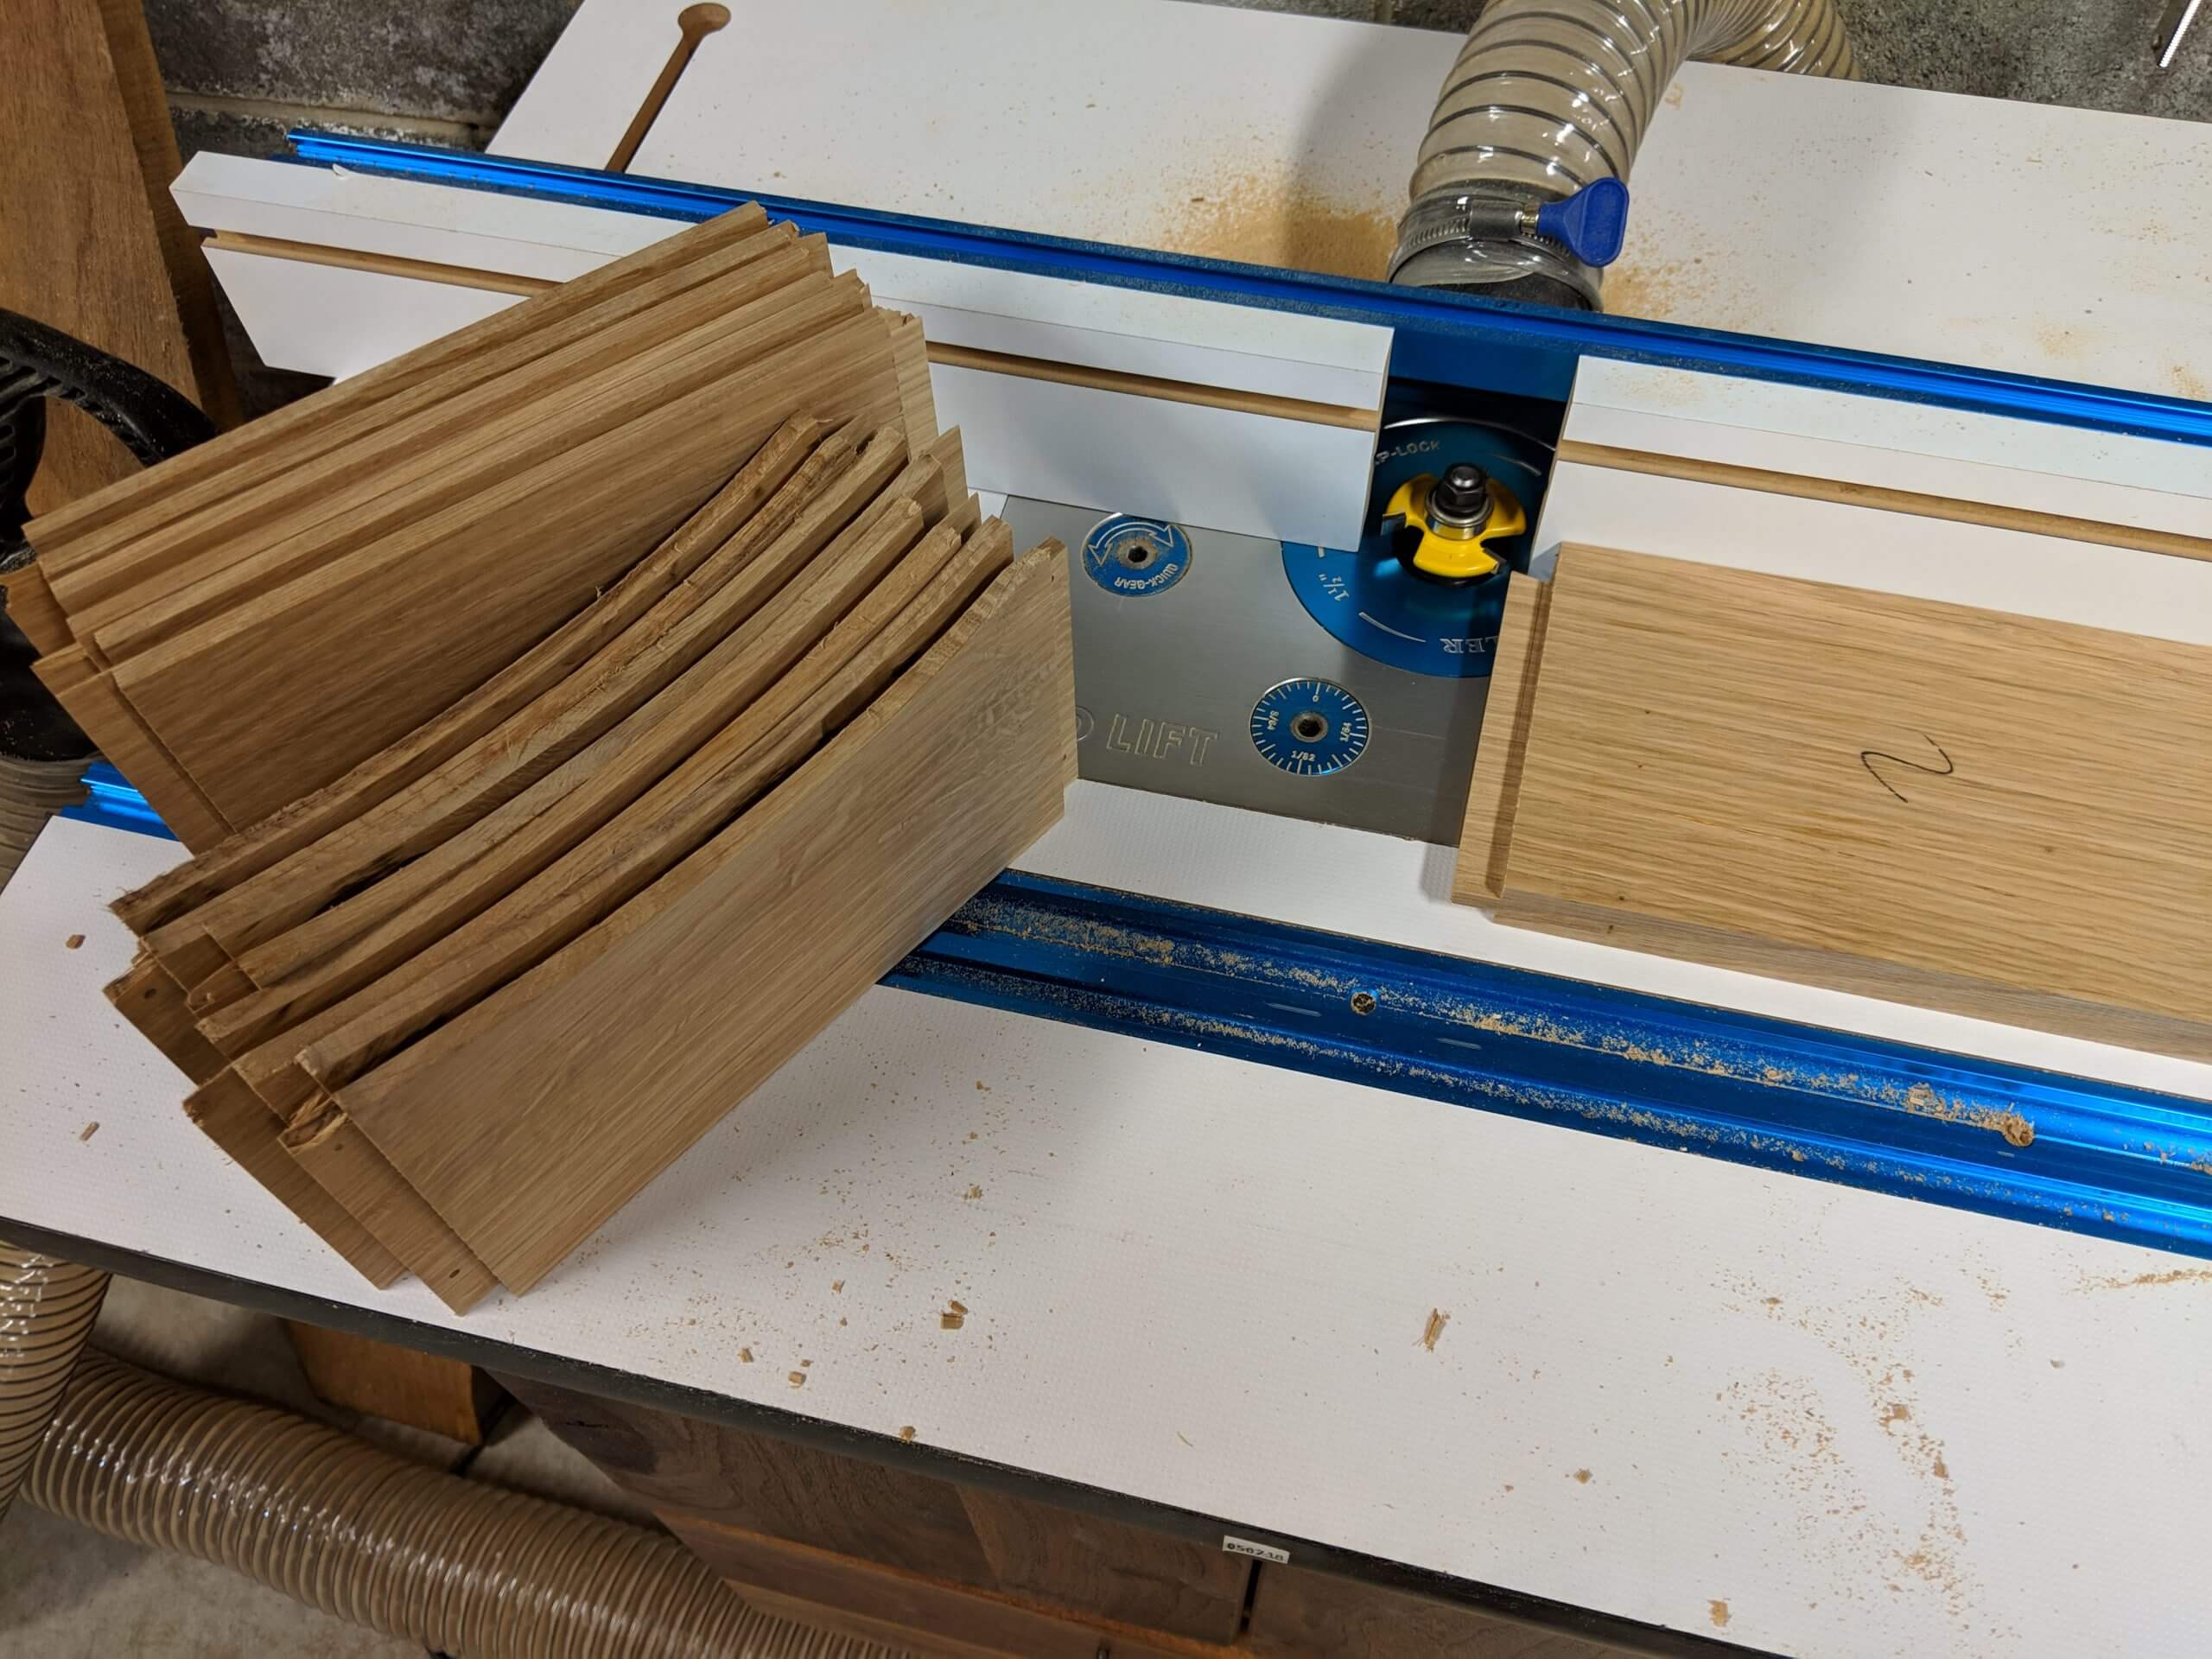
Since the panel only needs to be 1/4″, book matched pairs can be made by re-sawing each board on the bandsaw. After re-sawing the matched pairs are edge glued (I did mine two at a time) then sent them through the planner until they are 1/4″ in thickness.
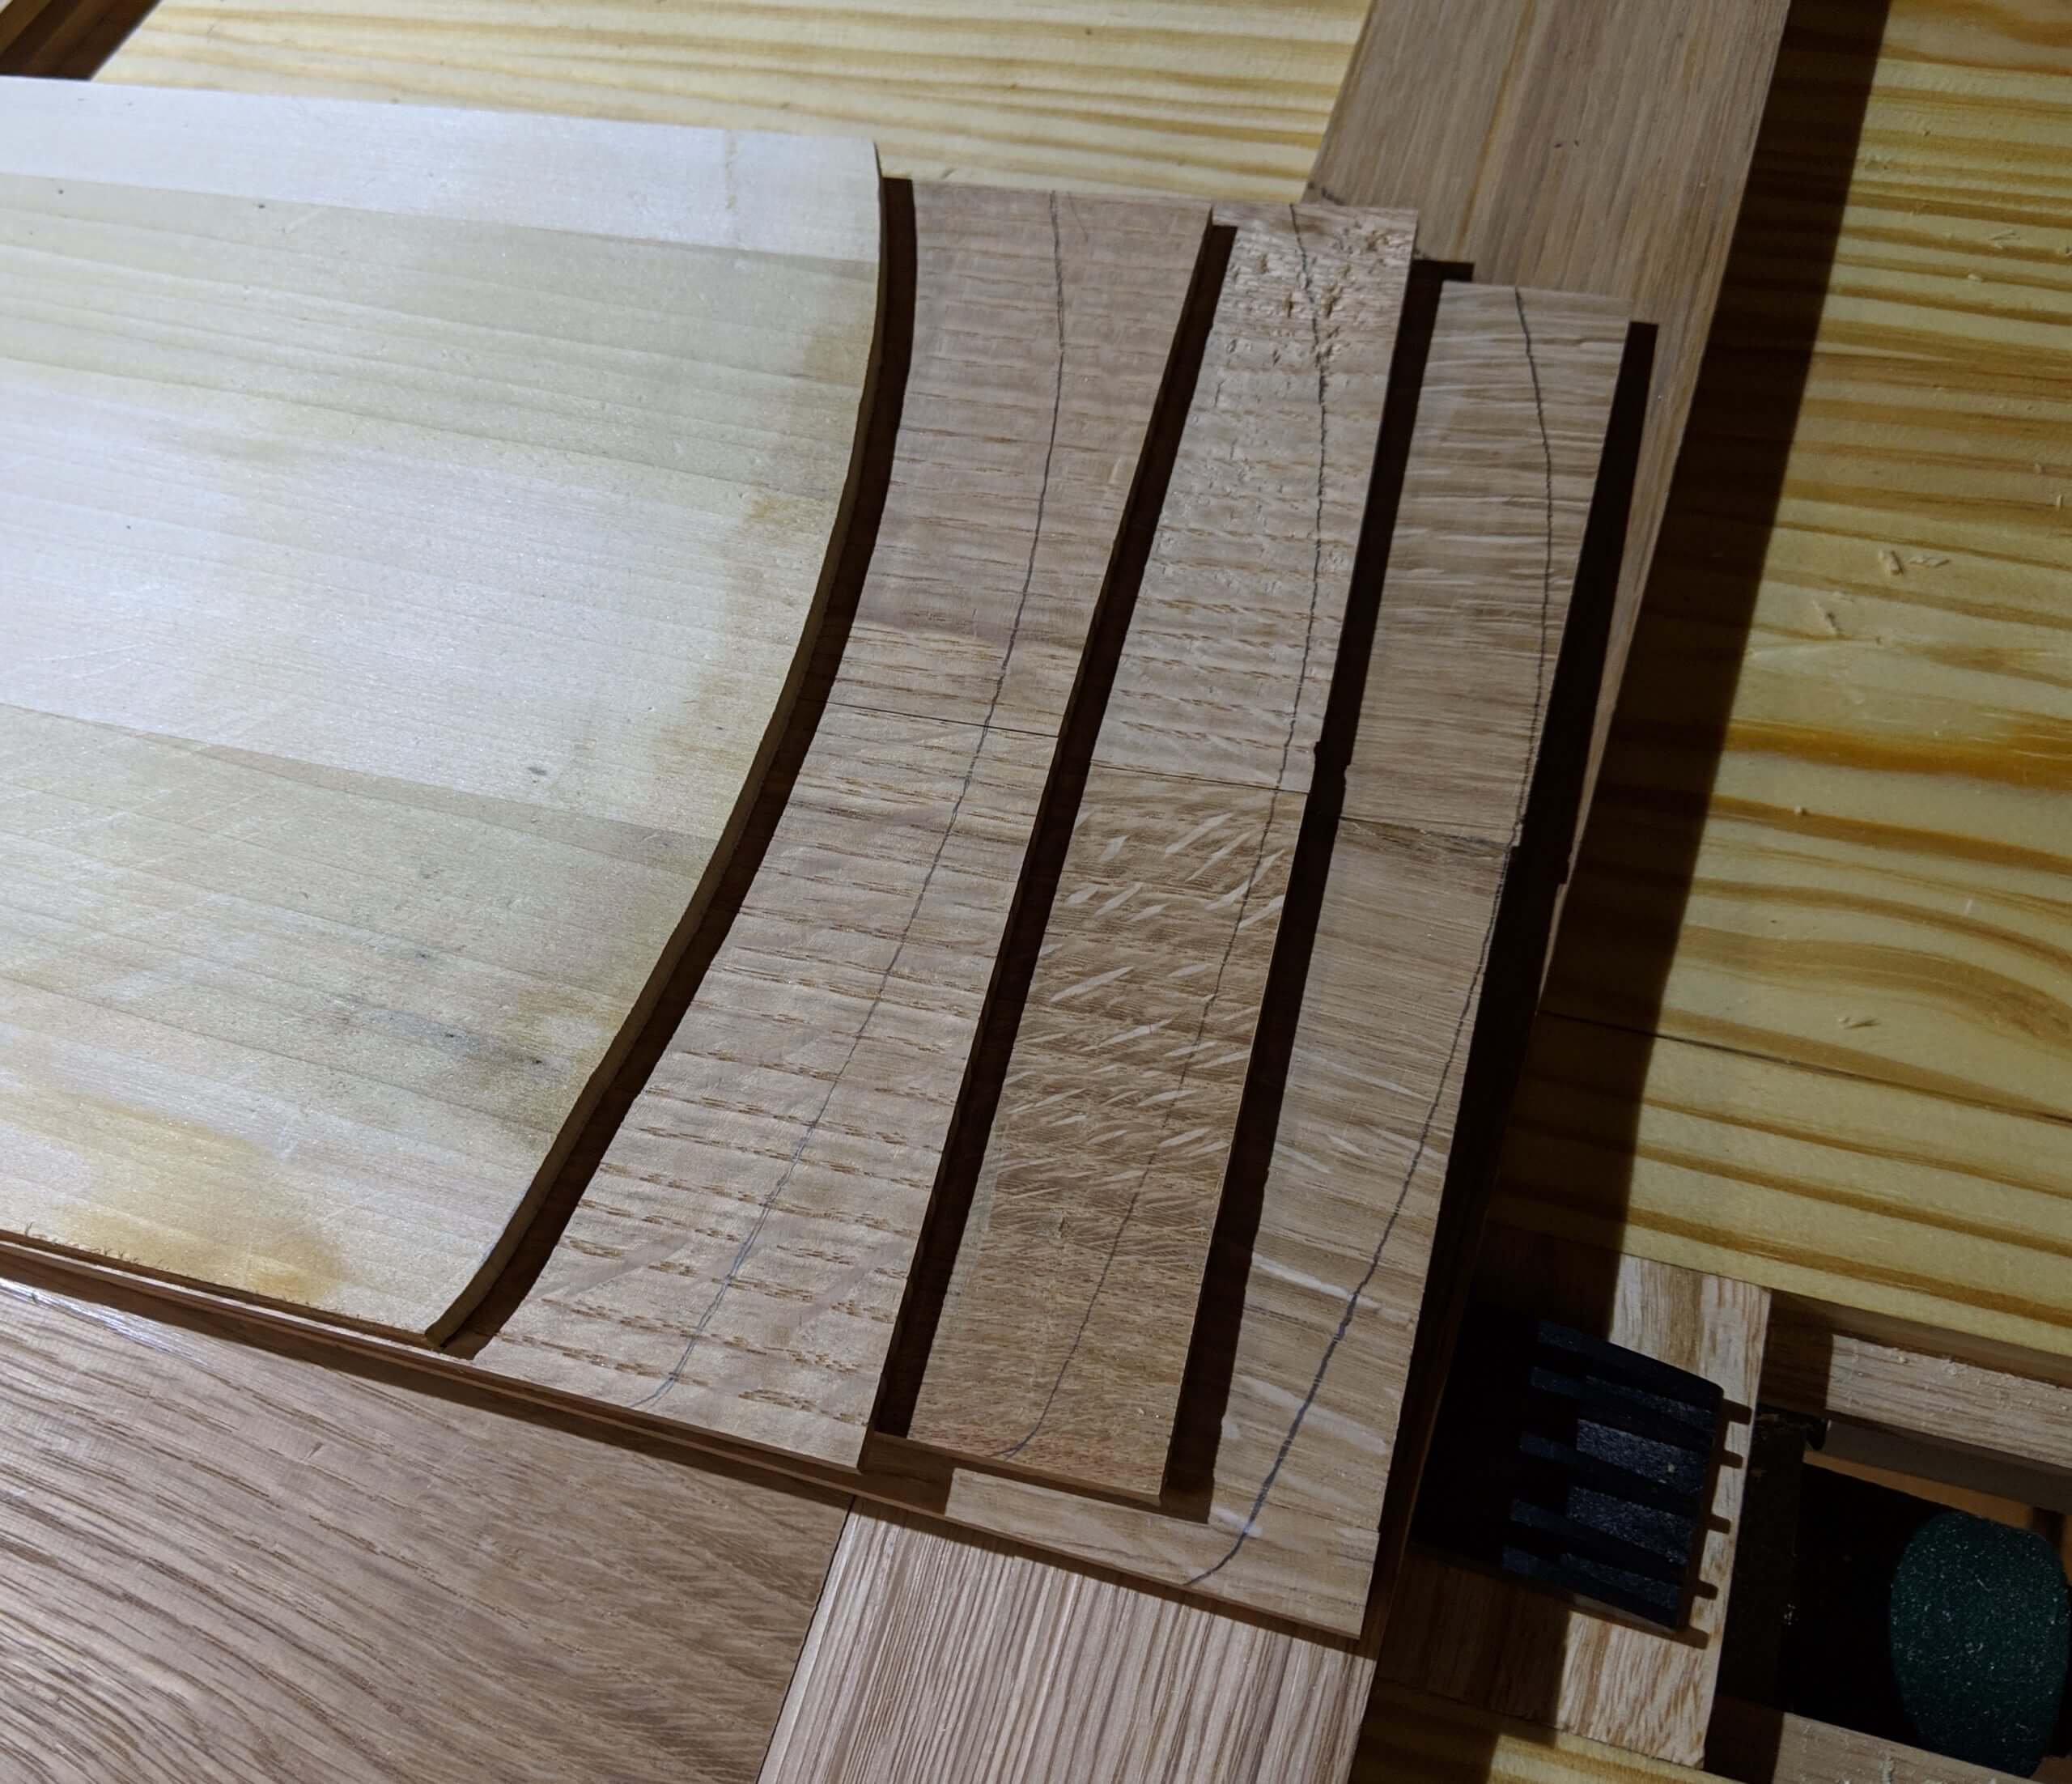
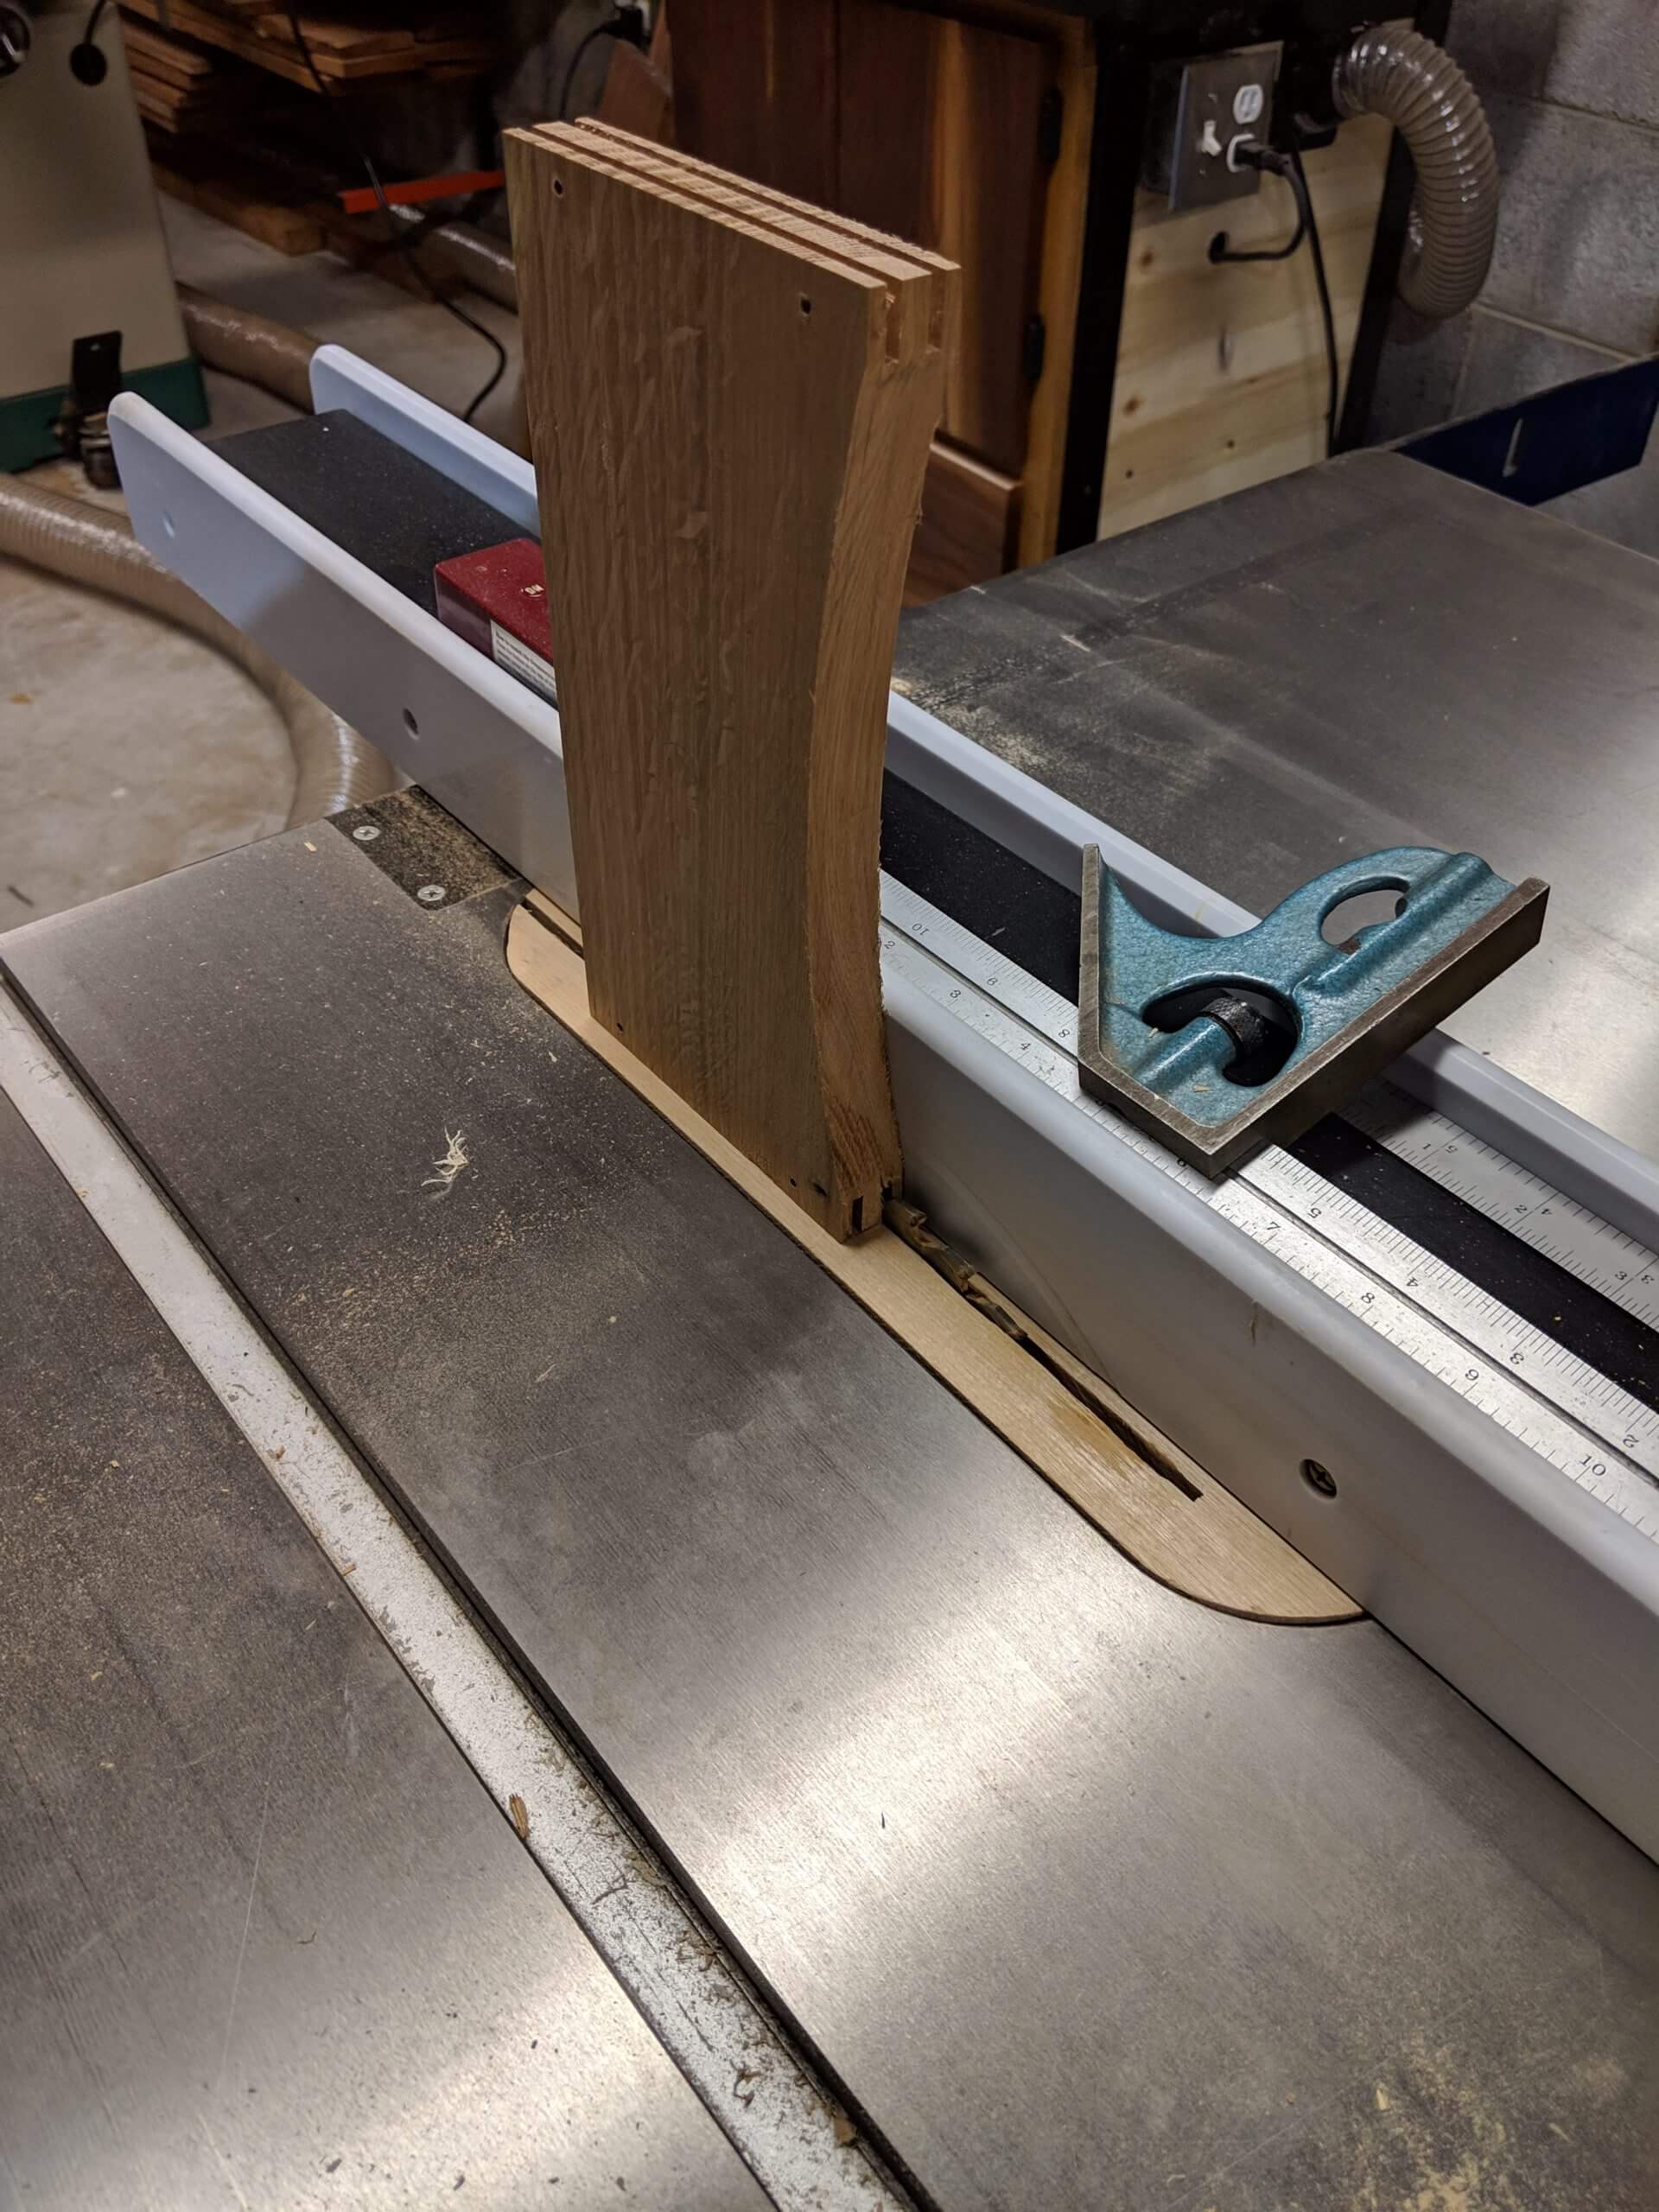
The top curve is created with another templet. The templet is made by making a 1/4″ plywood center panel that fits in width, but is long. This is inserted into the table panel and the top rail is held into position so the curve can be marked on the templet. The arc drawn is then extended 1/4″ out to form an edge on the templet so that the panel will fit into the slot in the rail. The arc is cut on the templet then traced onto each glued up center panel and cut with the bandsaw. A rough cut is fine as this will not show.
With all the parts cut, do a dry fit of each panel and adjust as needed. When you are satisfied with the fit, give each a final pass with the card scraper and a light sanding (I use 220) and glue the panels up, using only glue on the tenons of the rails.
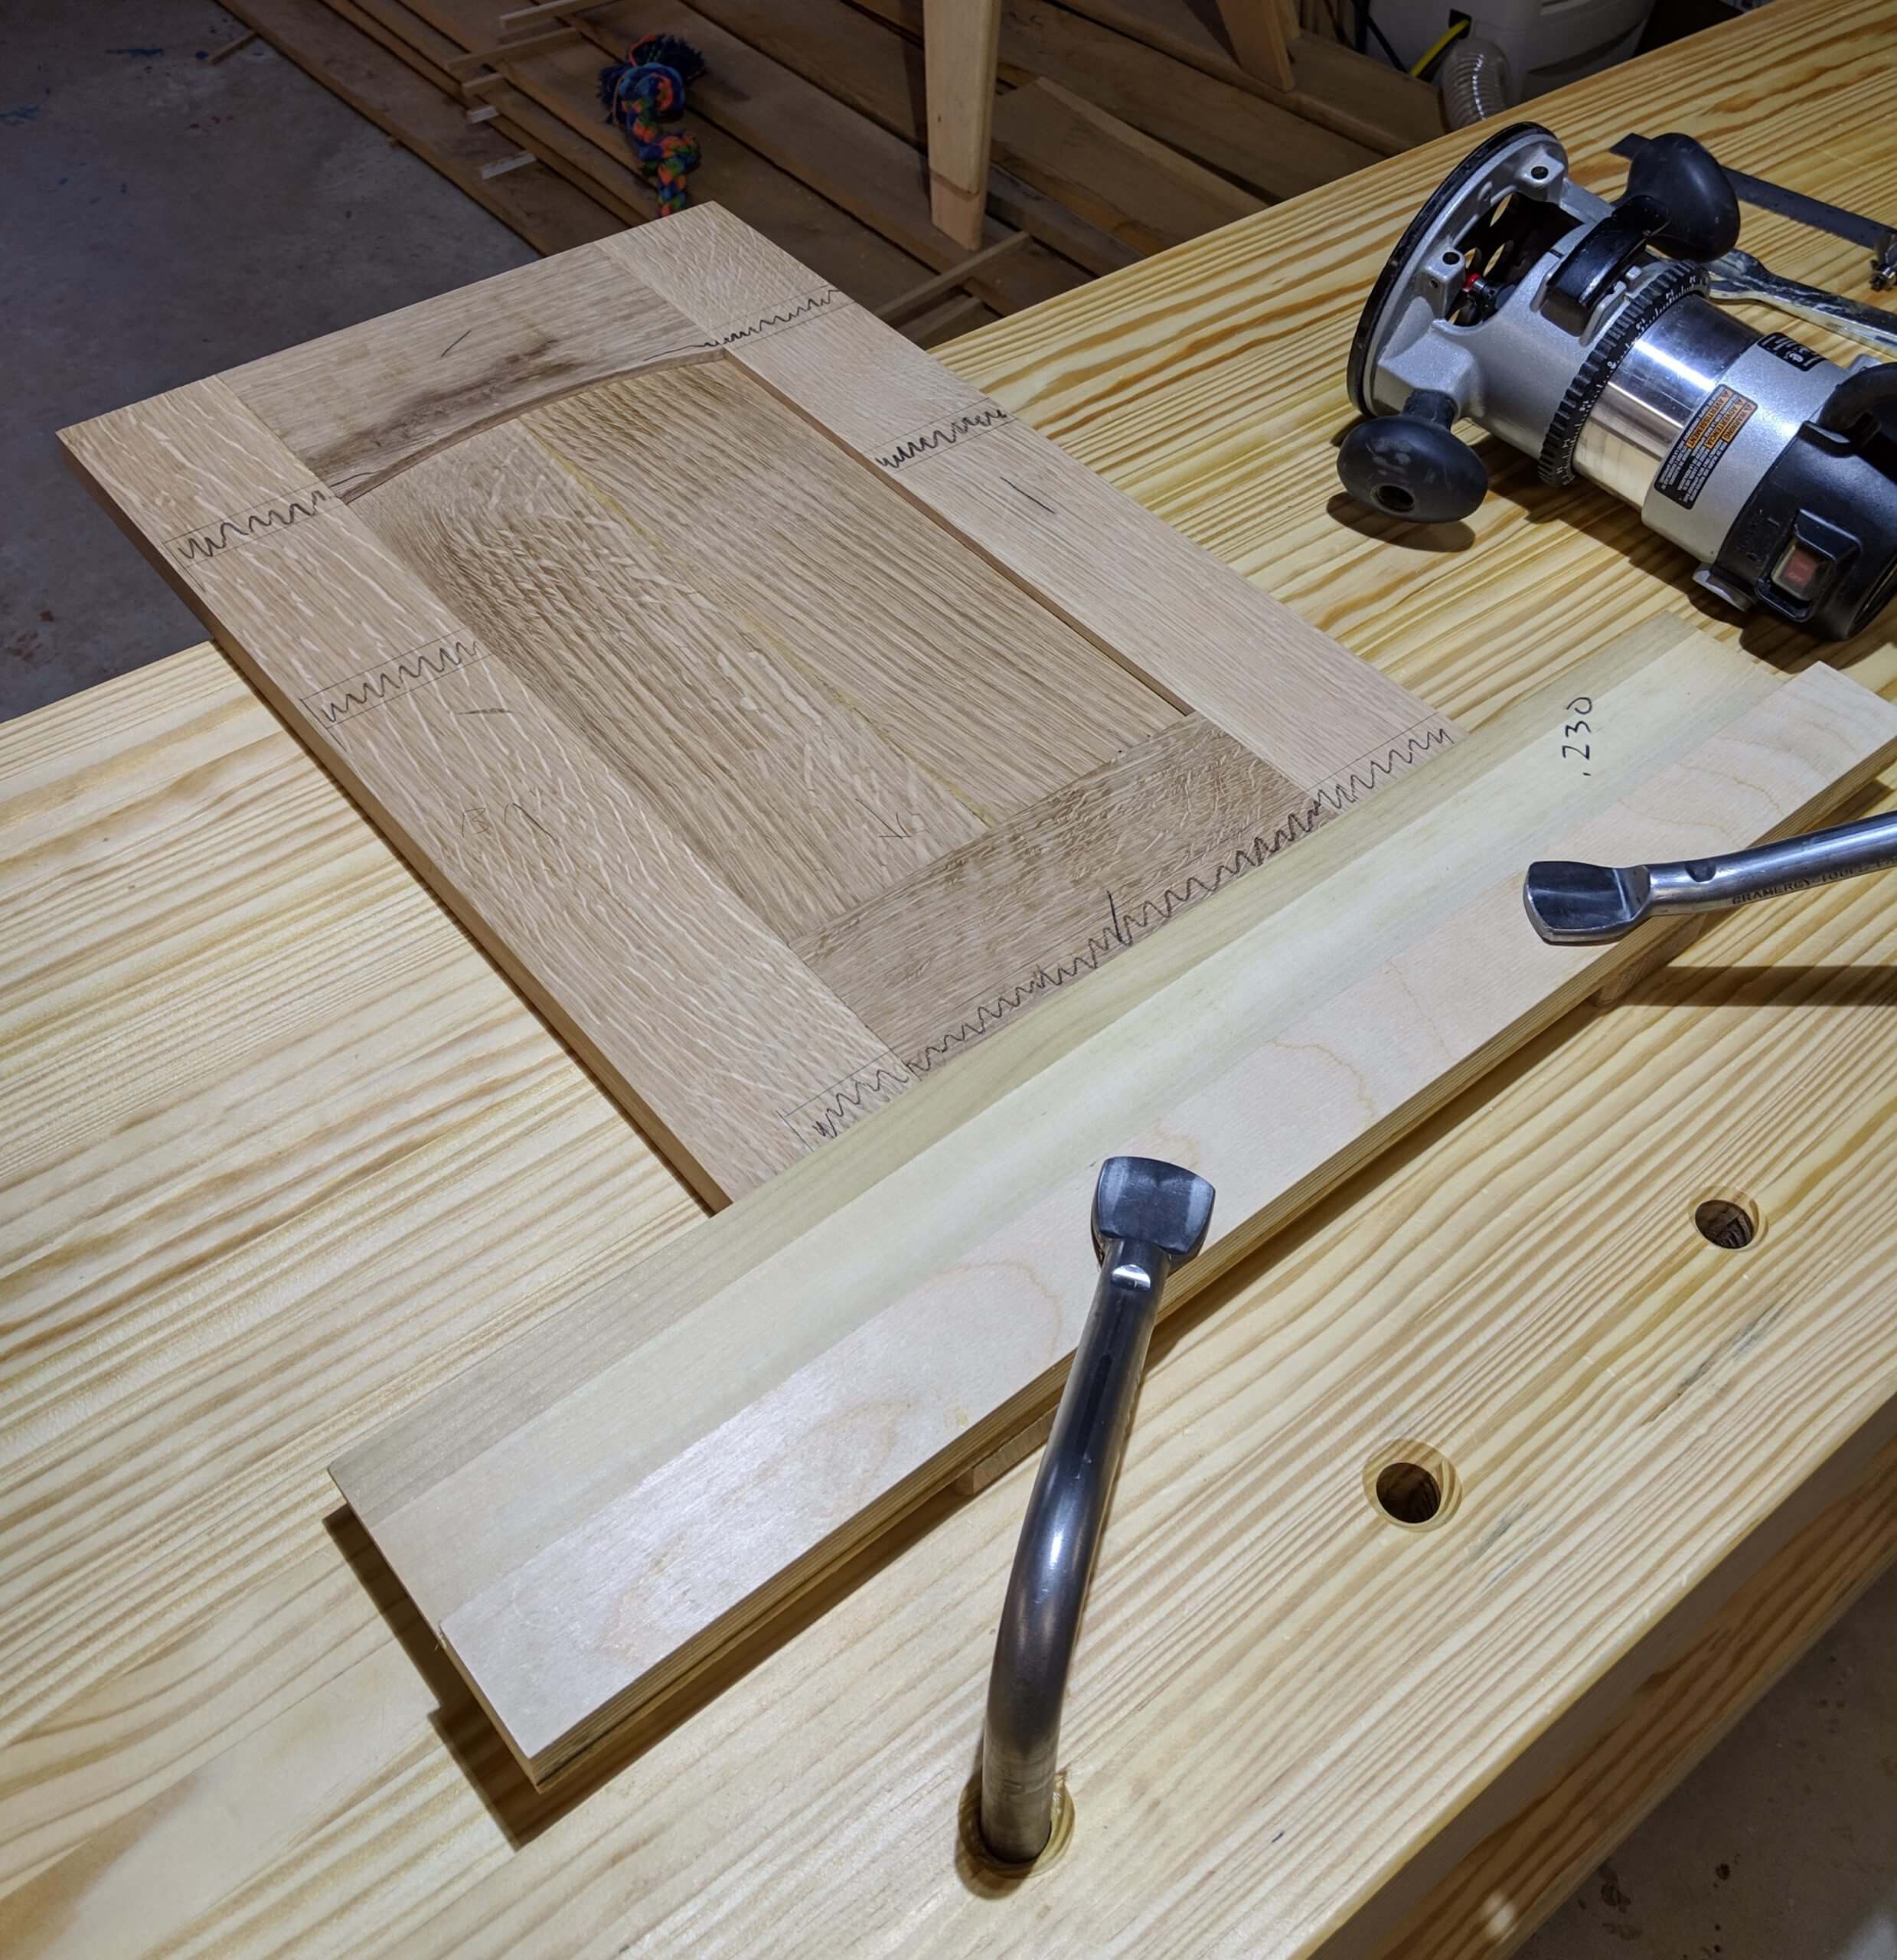
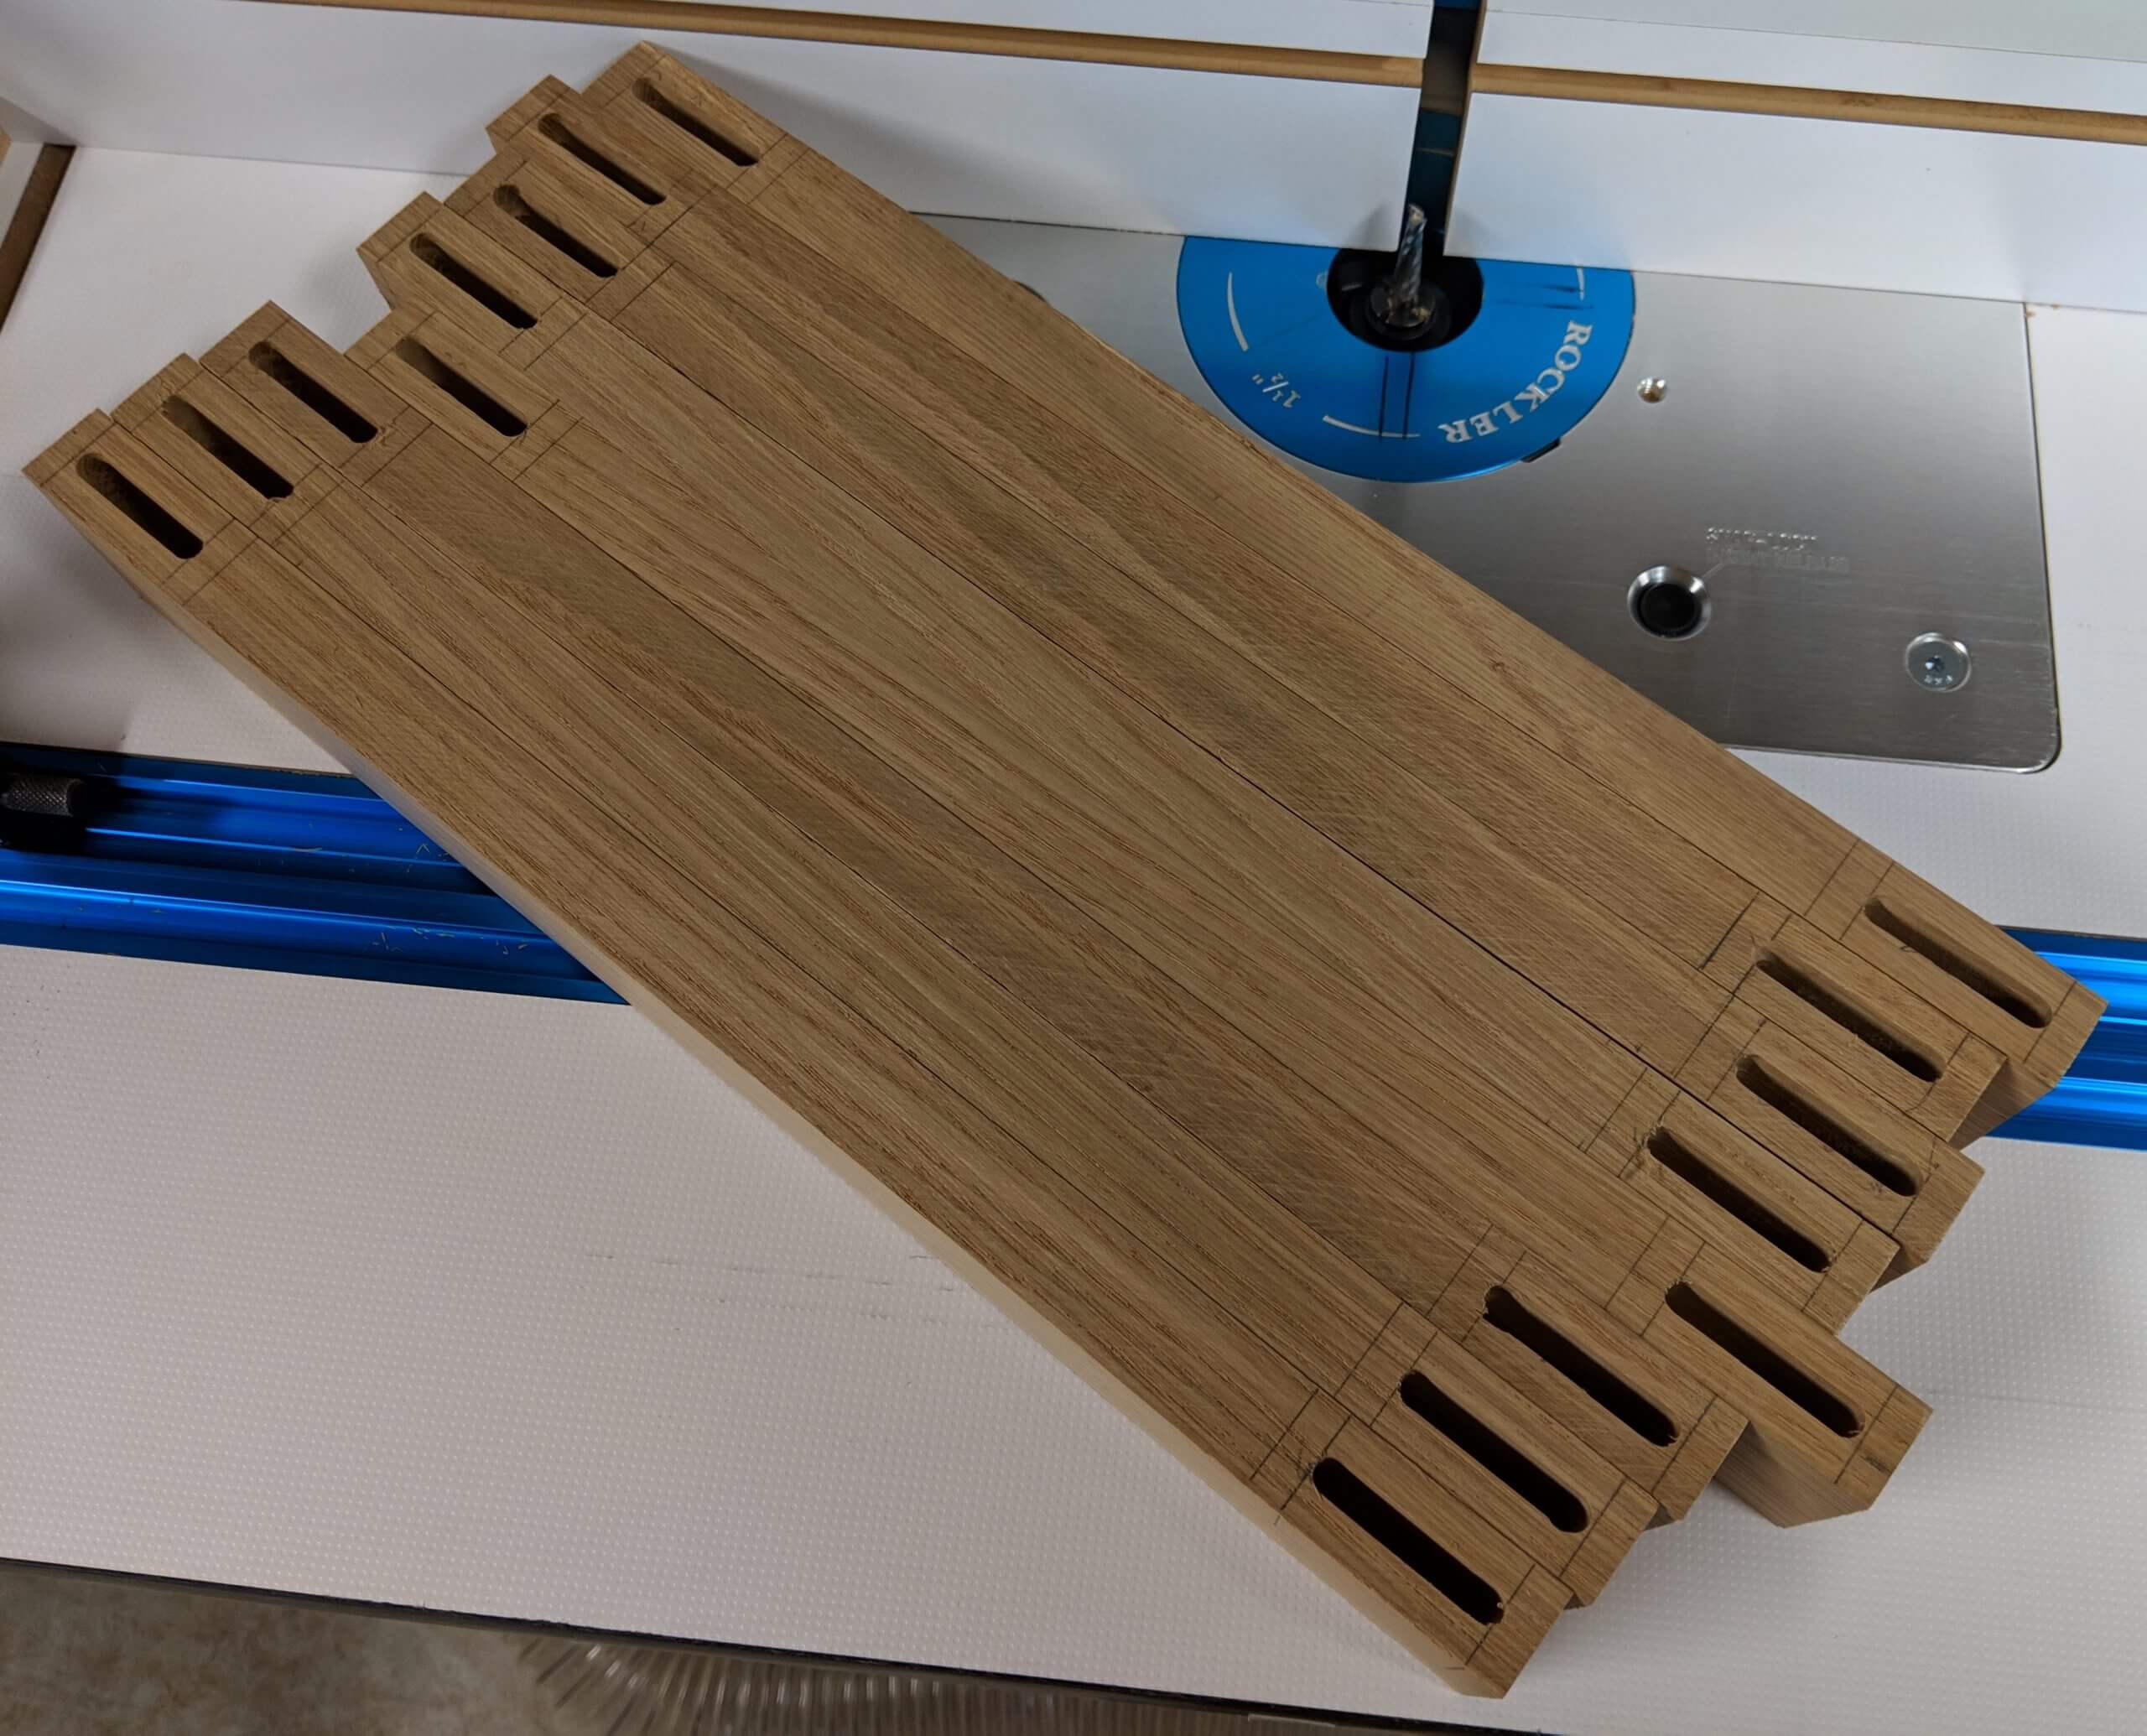
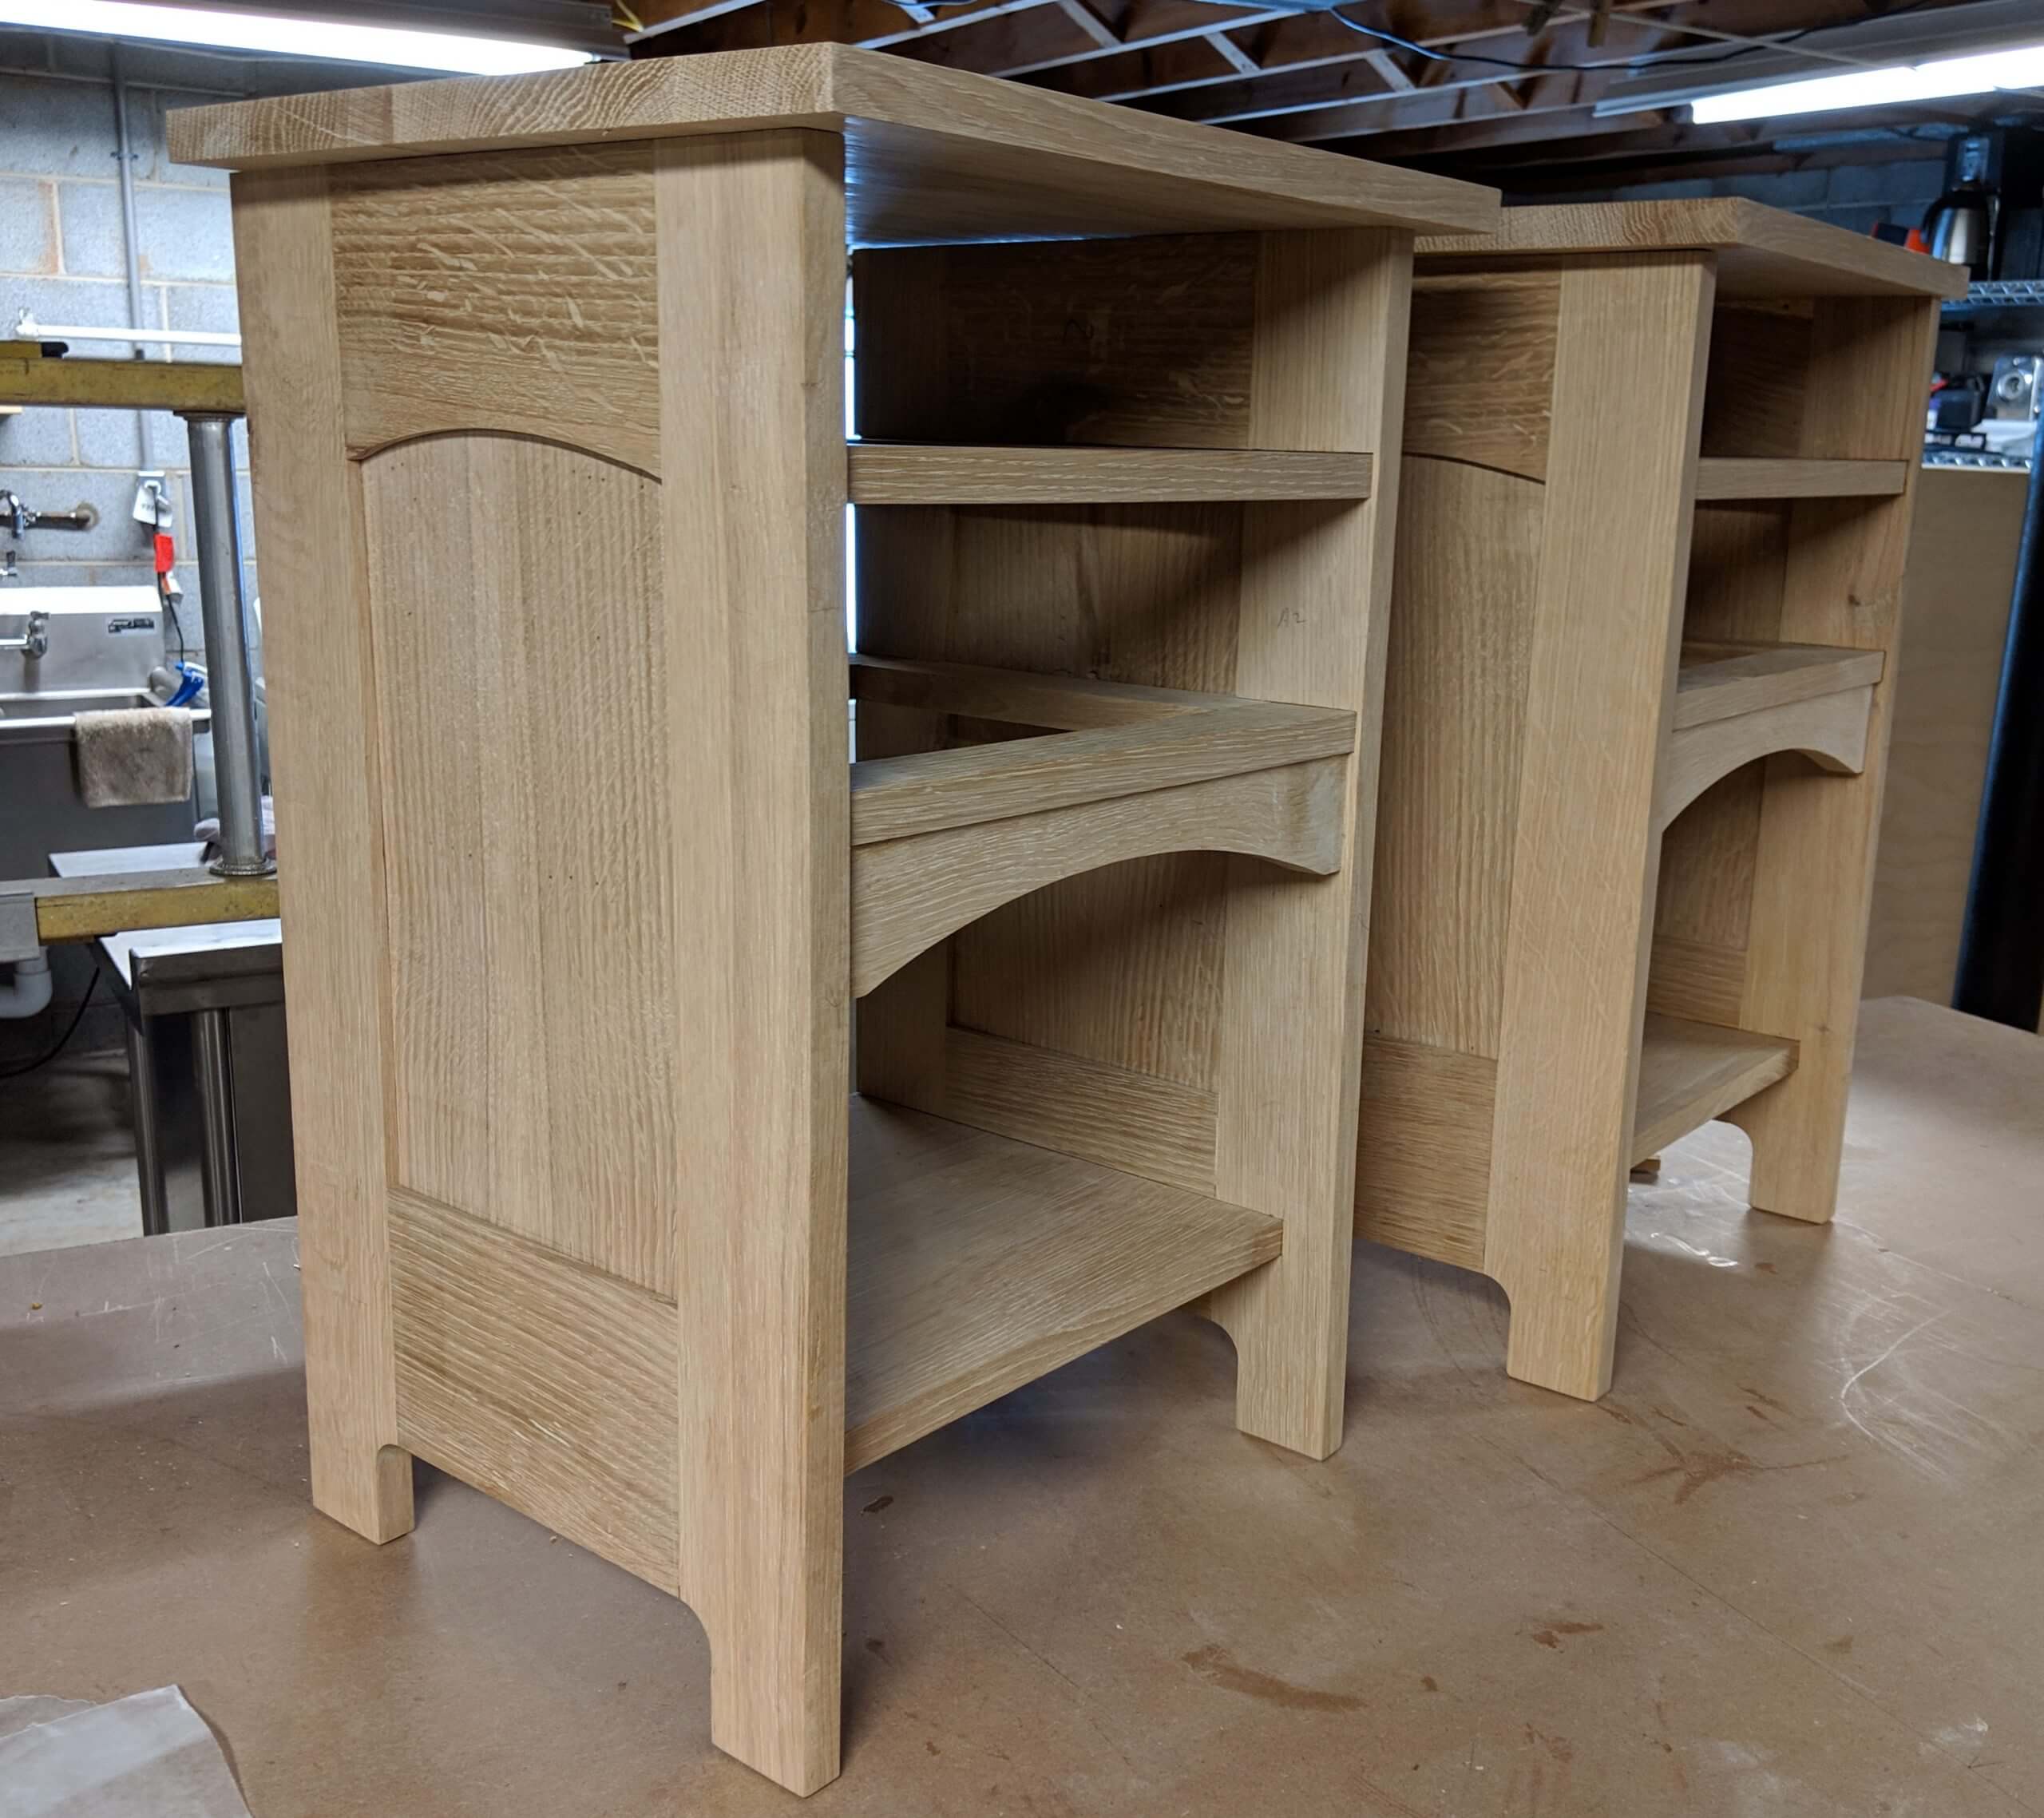
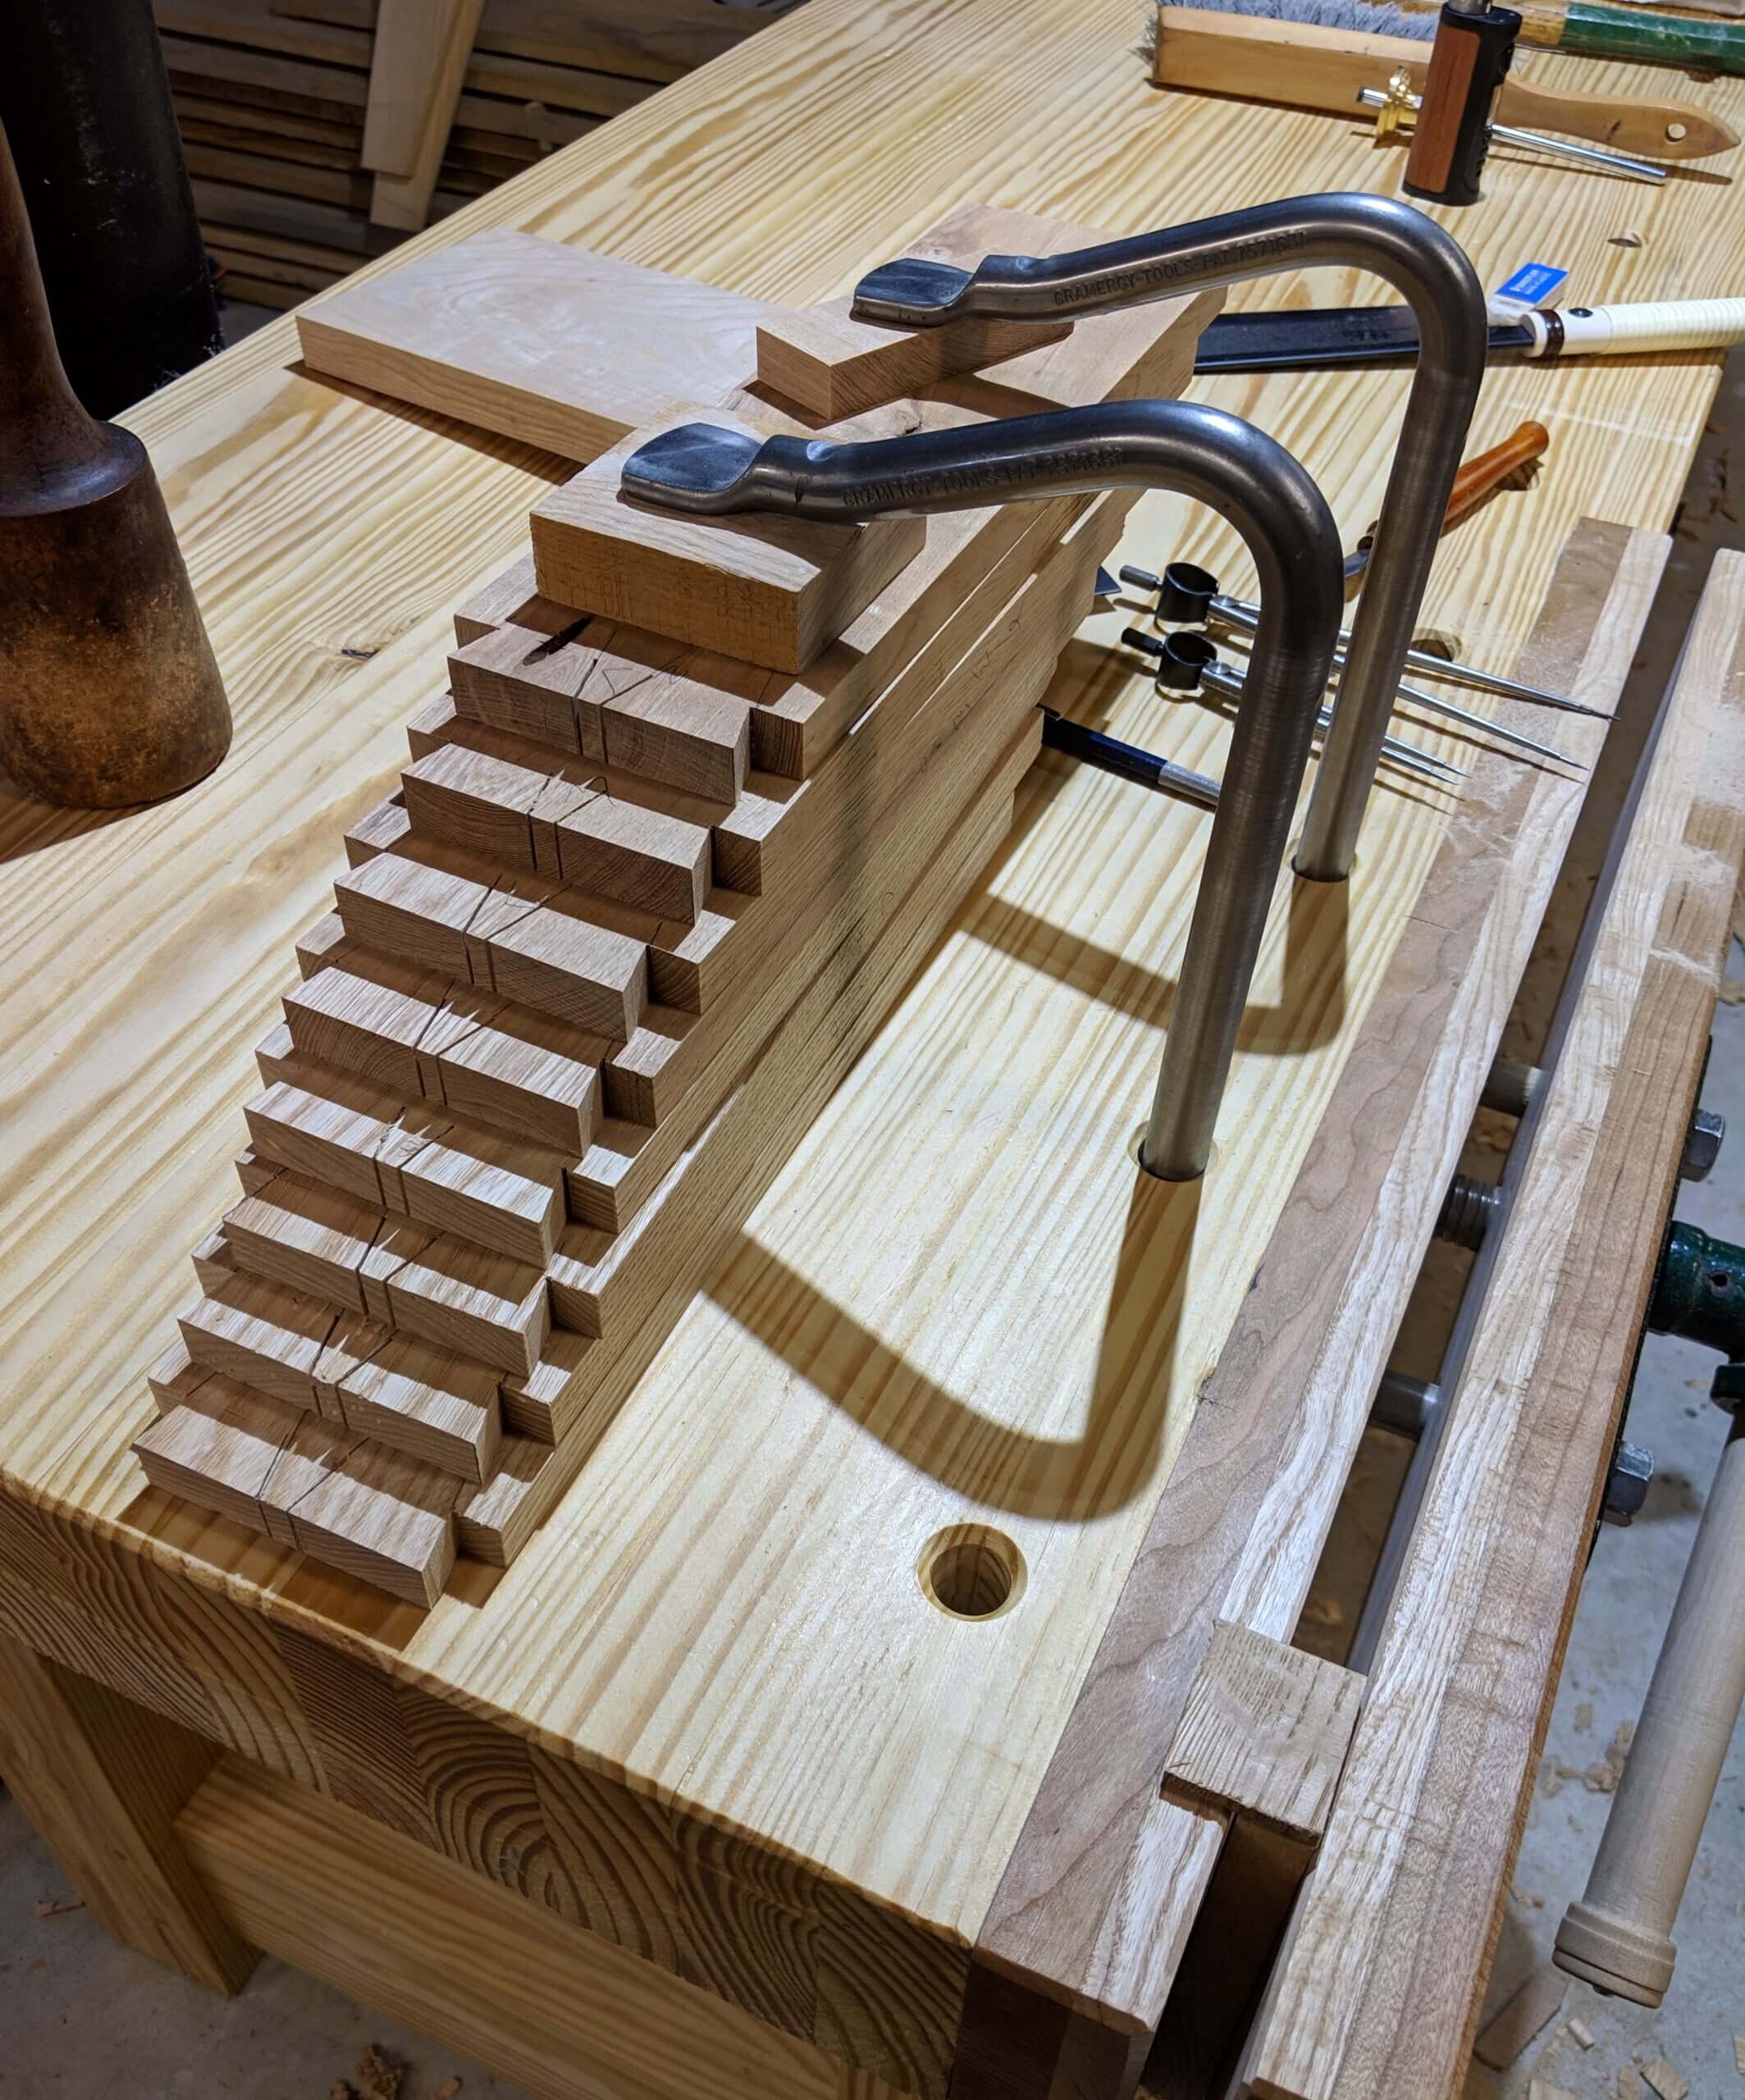
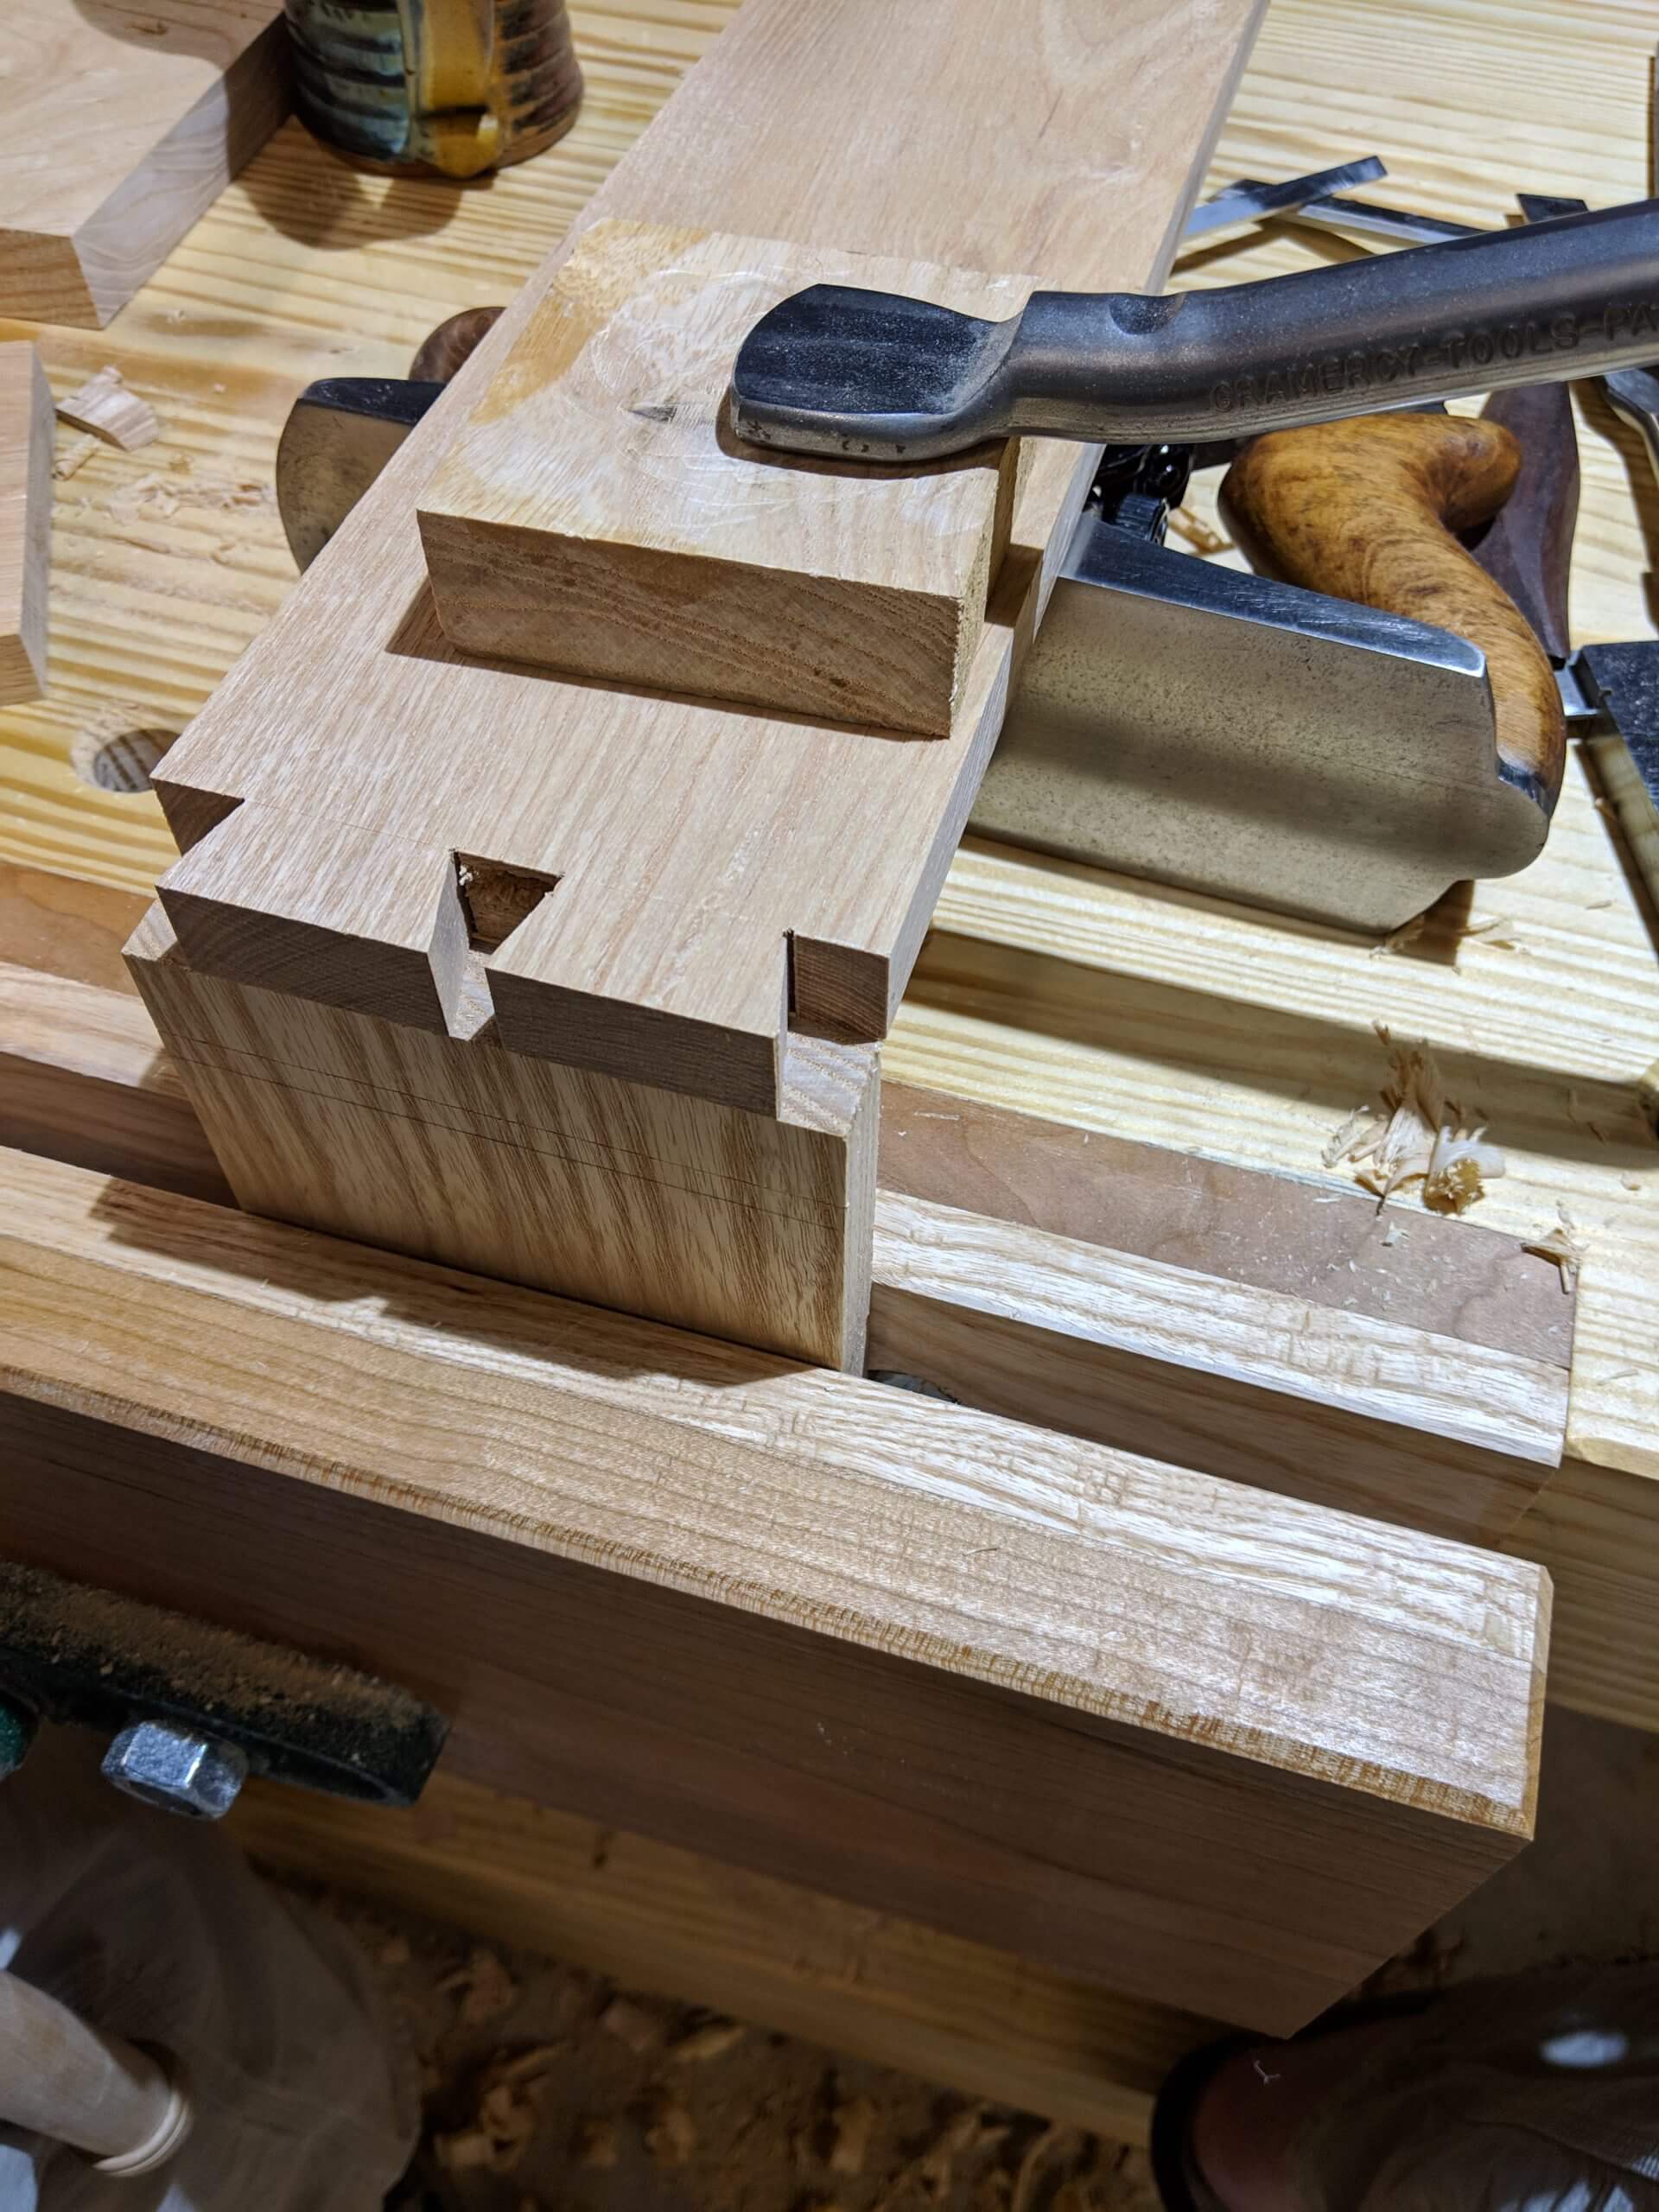
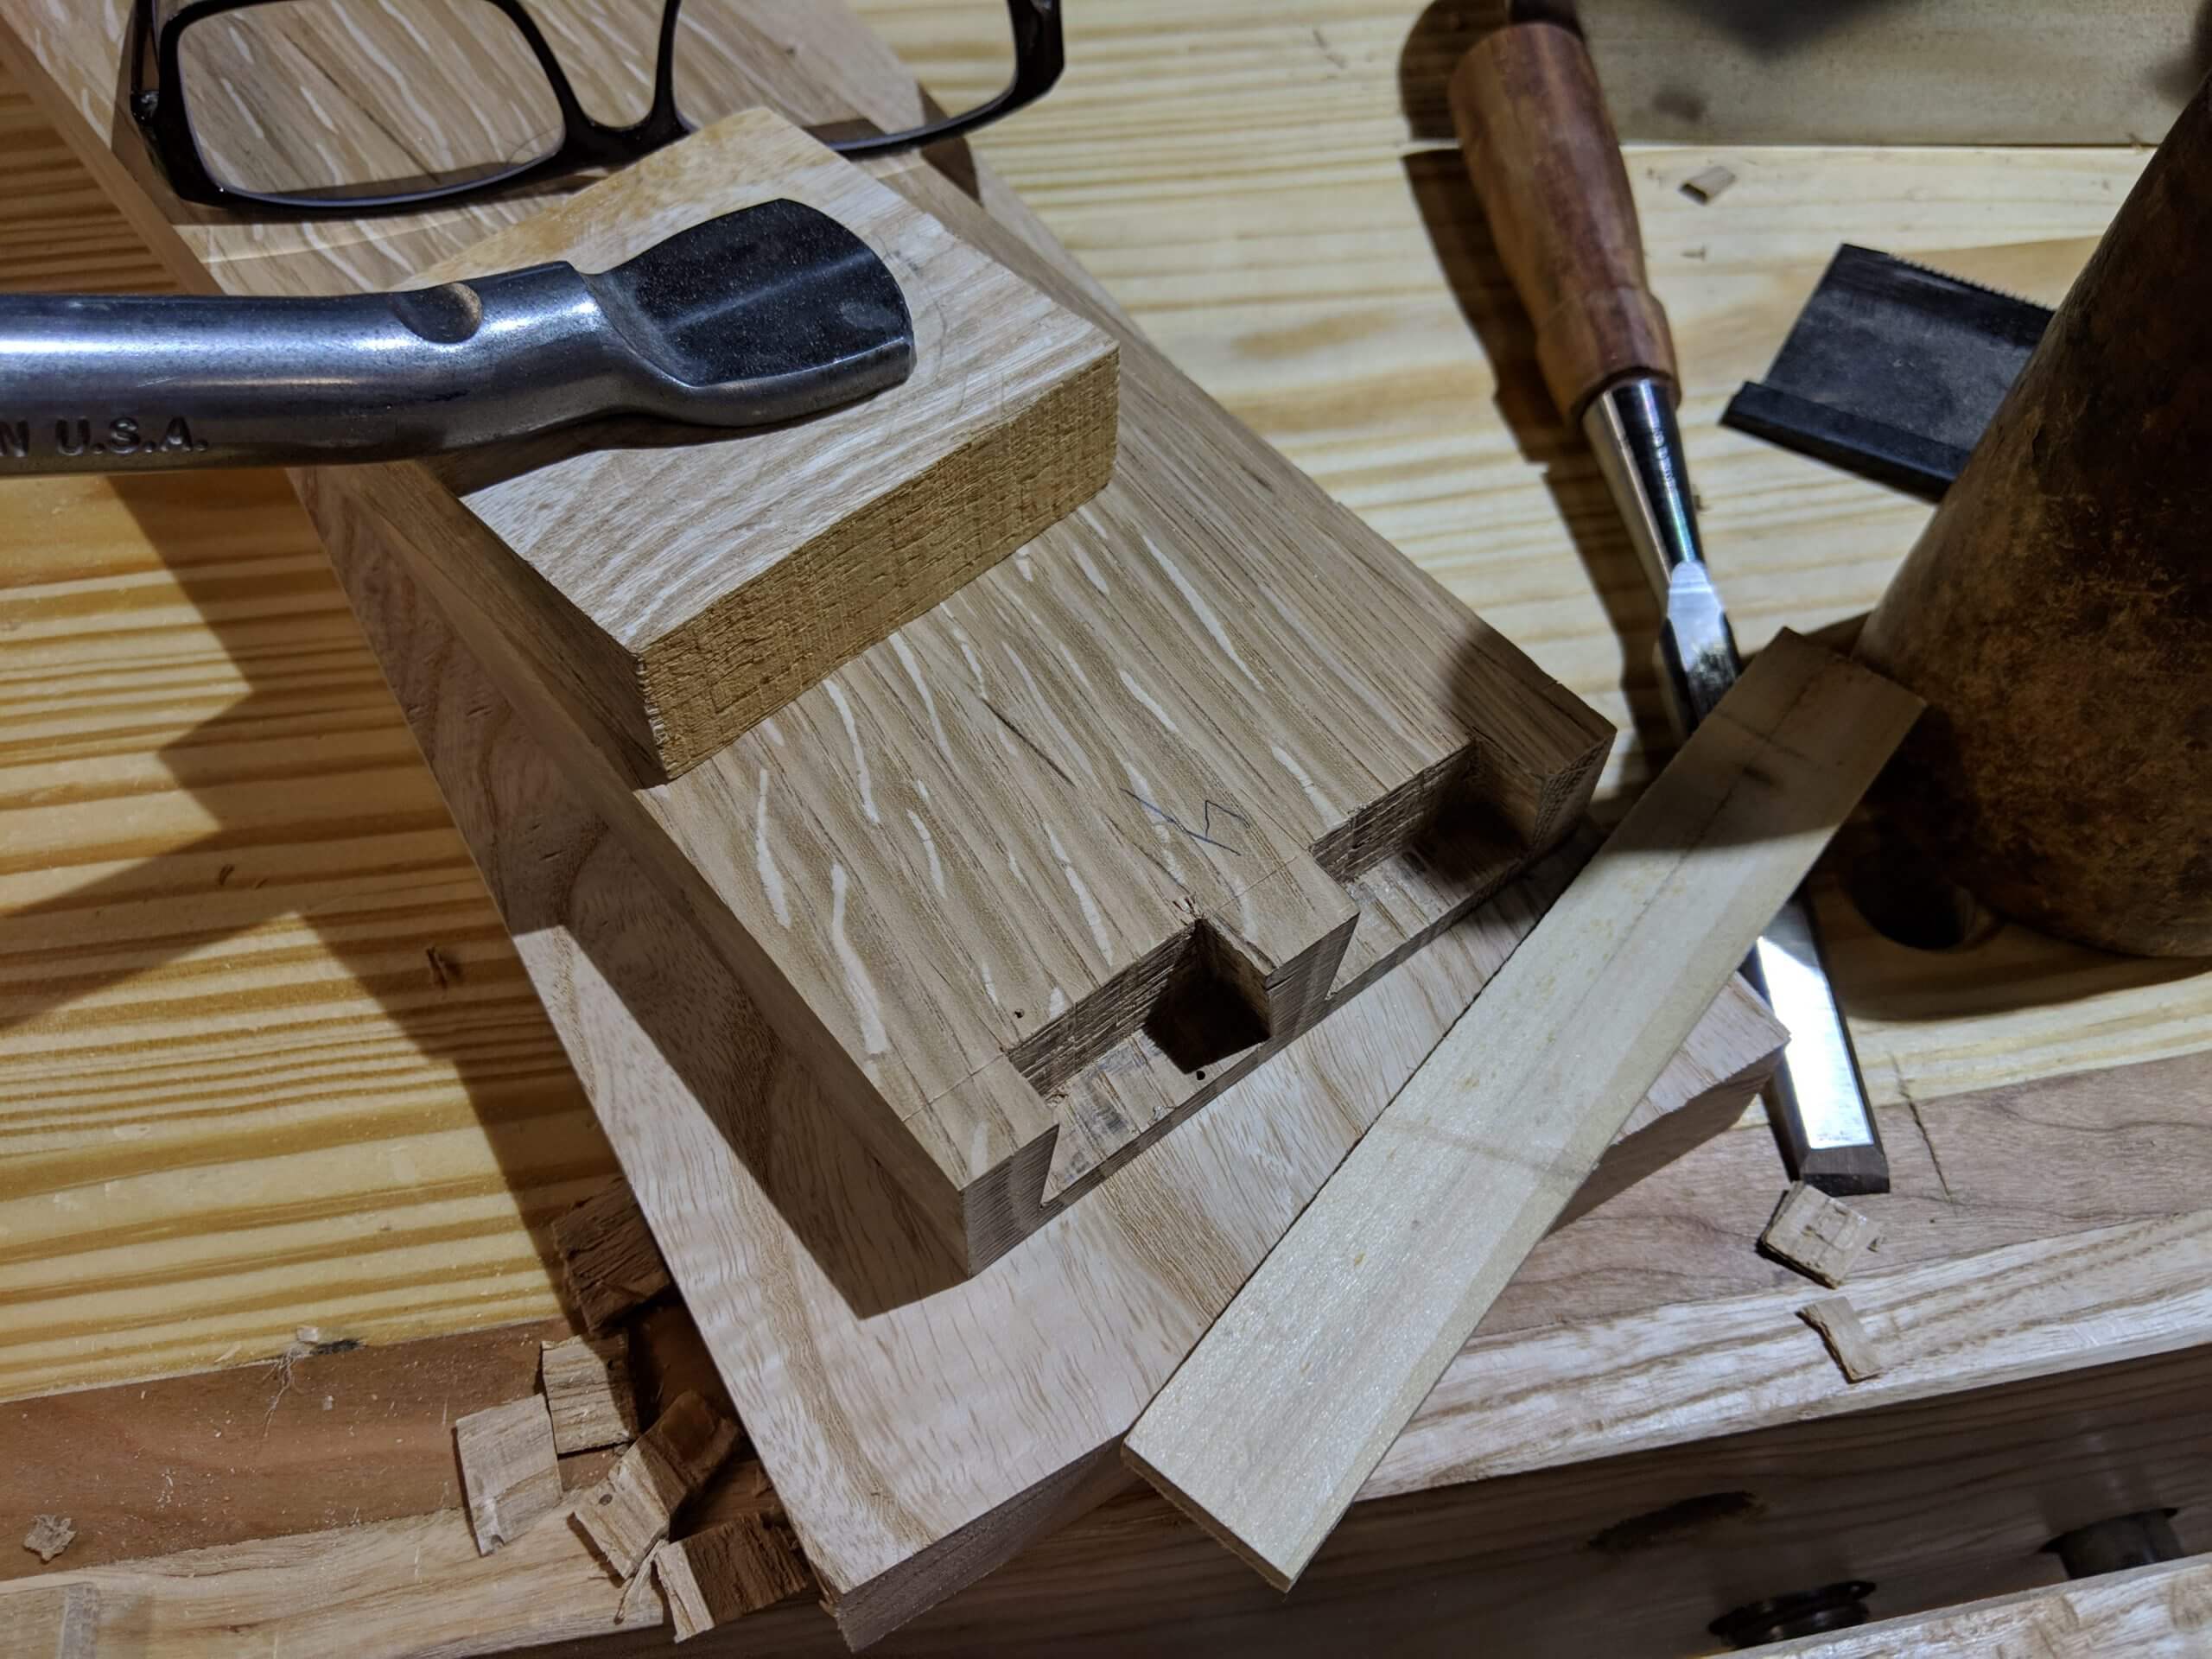
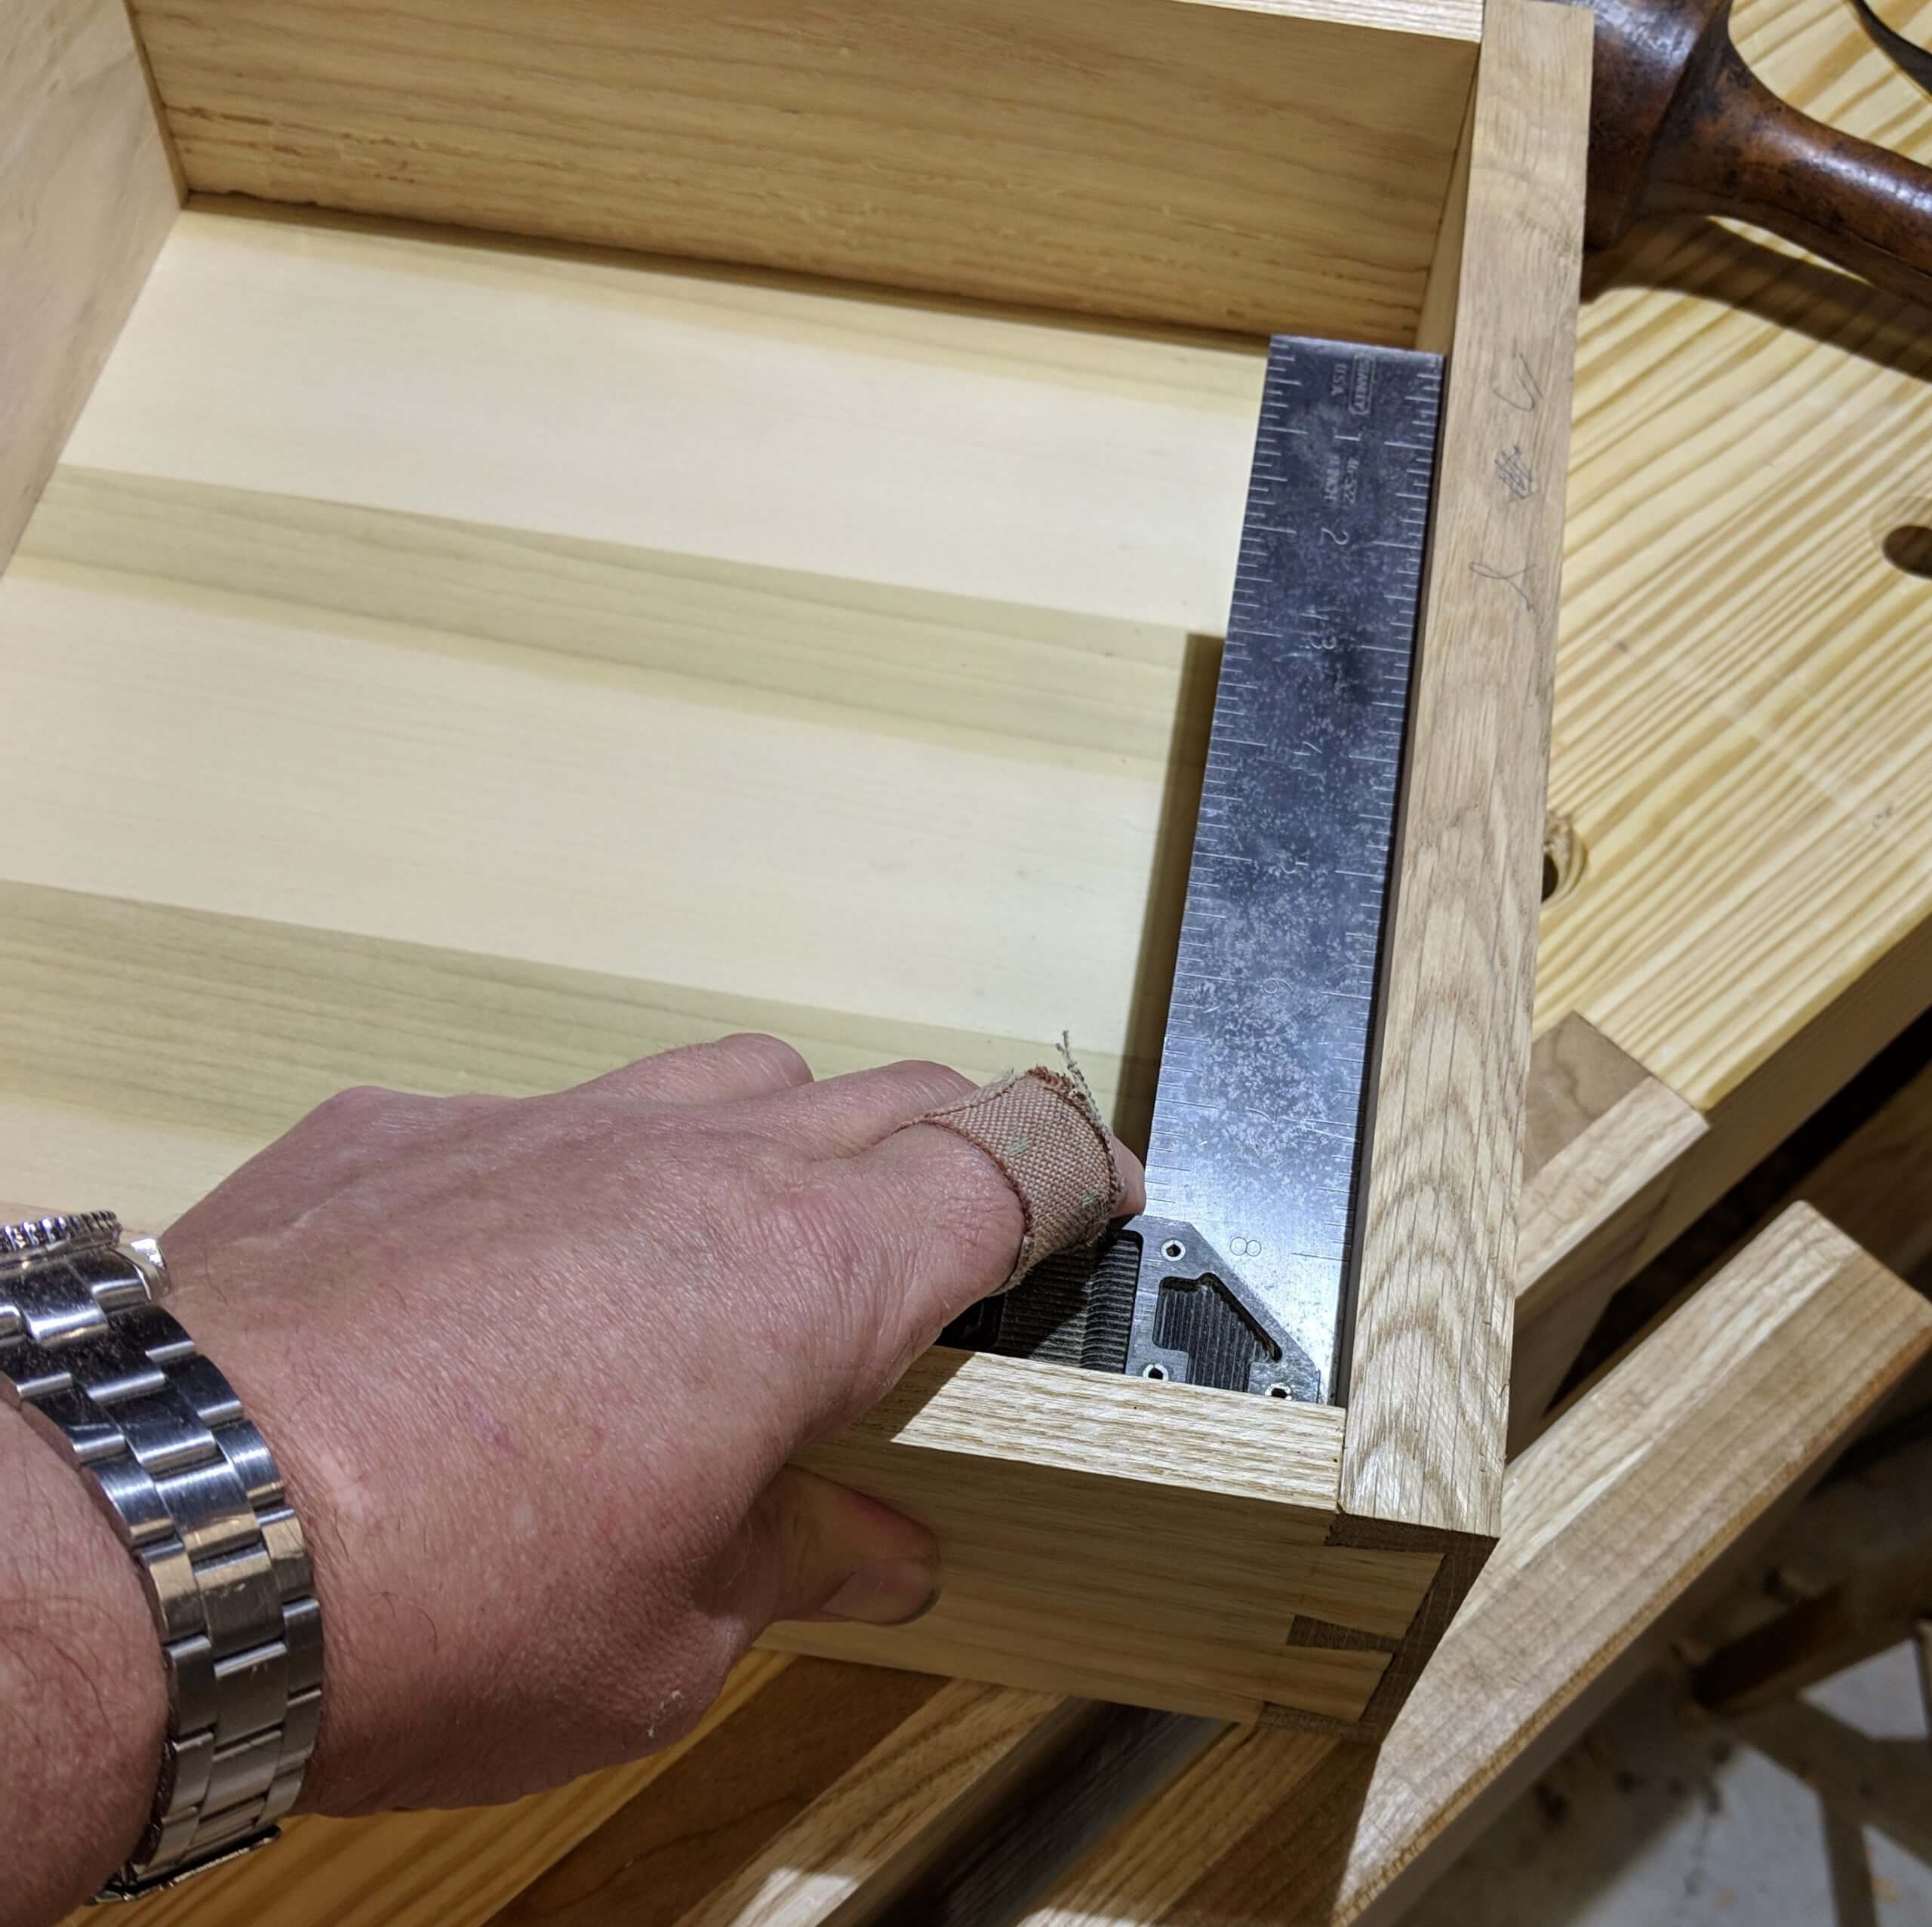
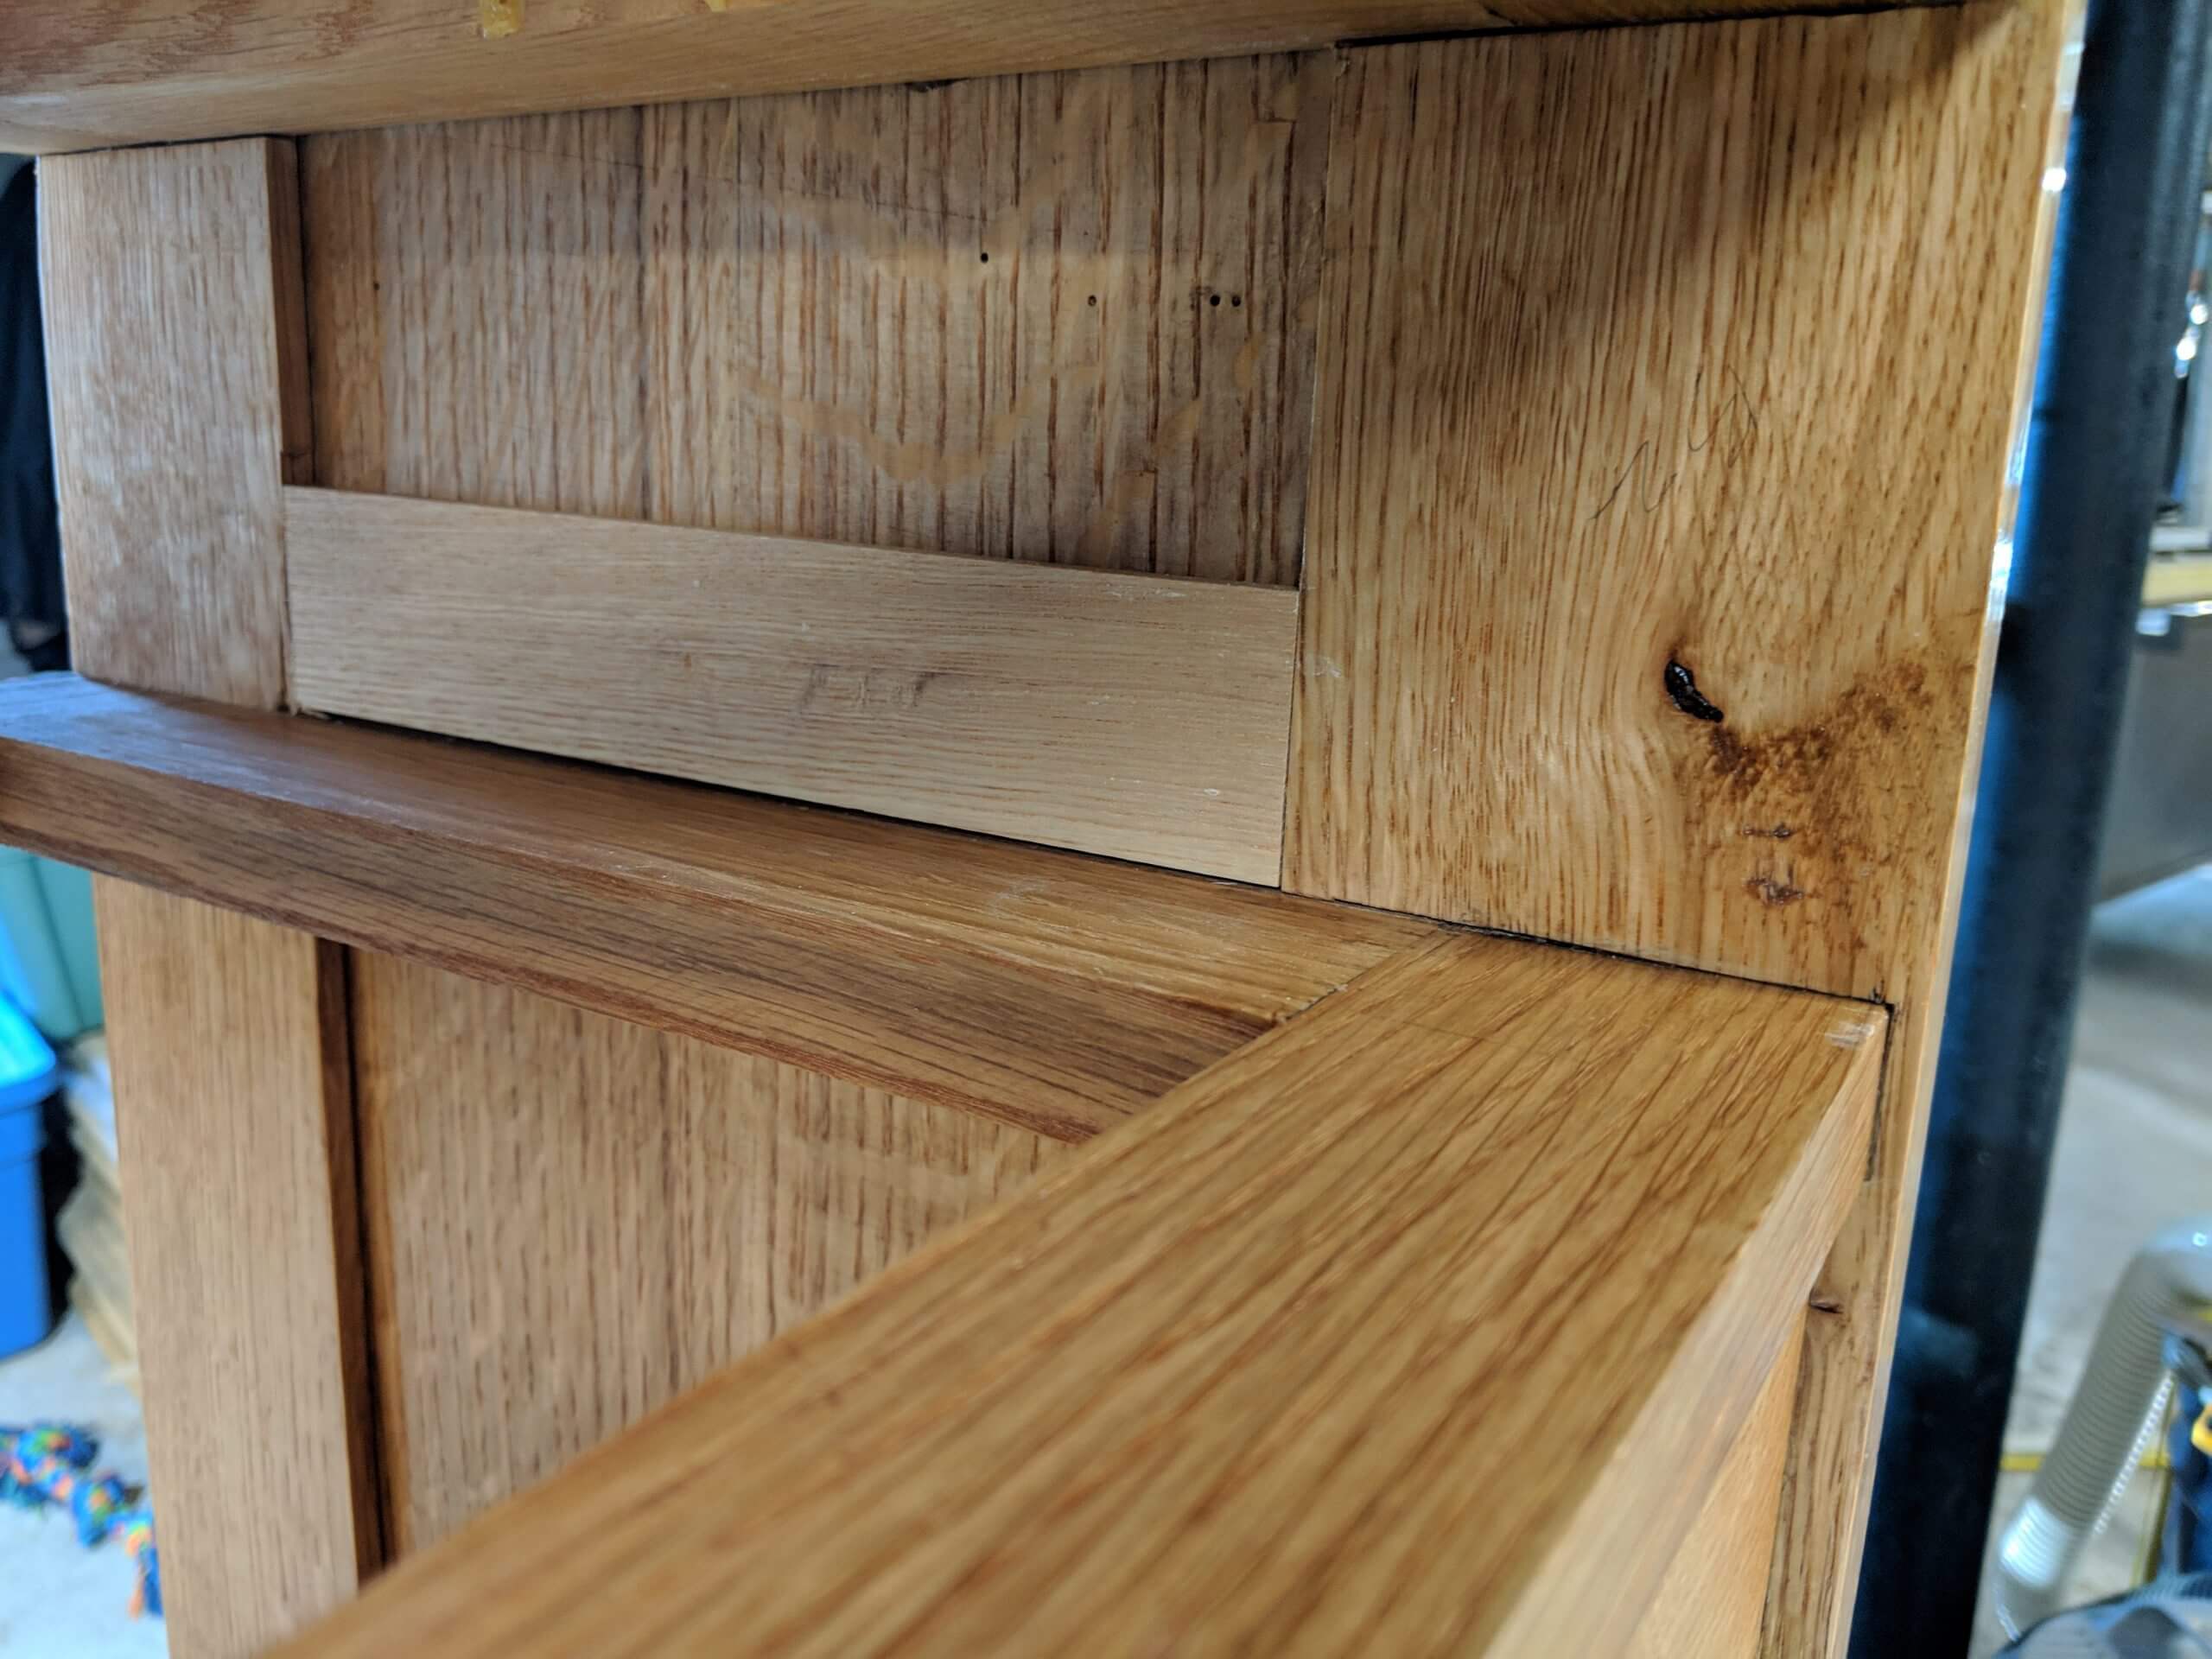
The back of the side panels are the business end. There are drawer supports and a shelf that need joinery cut into the panel. You also have some choices as to drawer spacing and number. For me, I went with two 4″ drawers, so I measured down 4″ and marked a dado the thickness of the stock I was using (milling drawer support stock is next, so you will want to mill it before cutting the dados). After the mark for the dado, I moved down another 4″ for the second drawer and marked an identical dado. I also made a dado for a shelf that is 4 3/8″ up from the bottom.
The dados on each of these are not all the way across. Each is a stop dado. The drawer supports stop 1/8″ from the edge to provide a shadow line in keeping with the period’s style. The shelf is also recessed 1 5/16″. I cut them with a router and a zero clearance fence.
The fence is aligned with the dado edge and clamped securely. When cutting, avoid the end marked for the stop, leaving at least 1/8″ to hand cut.
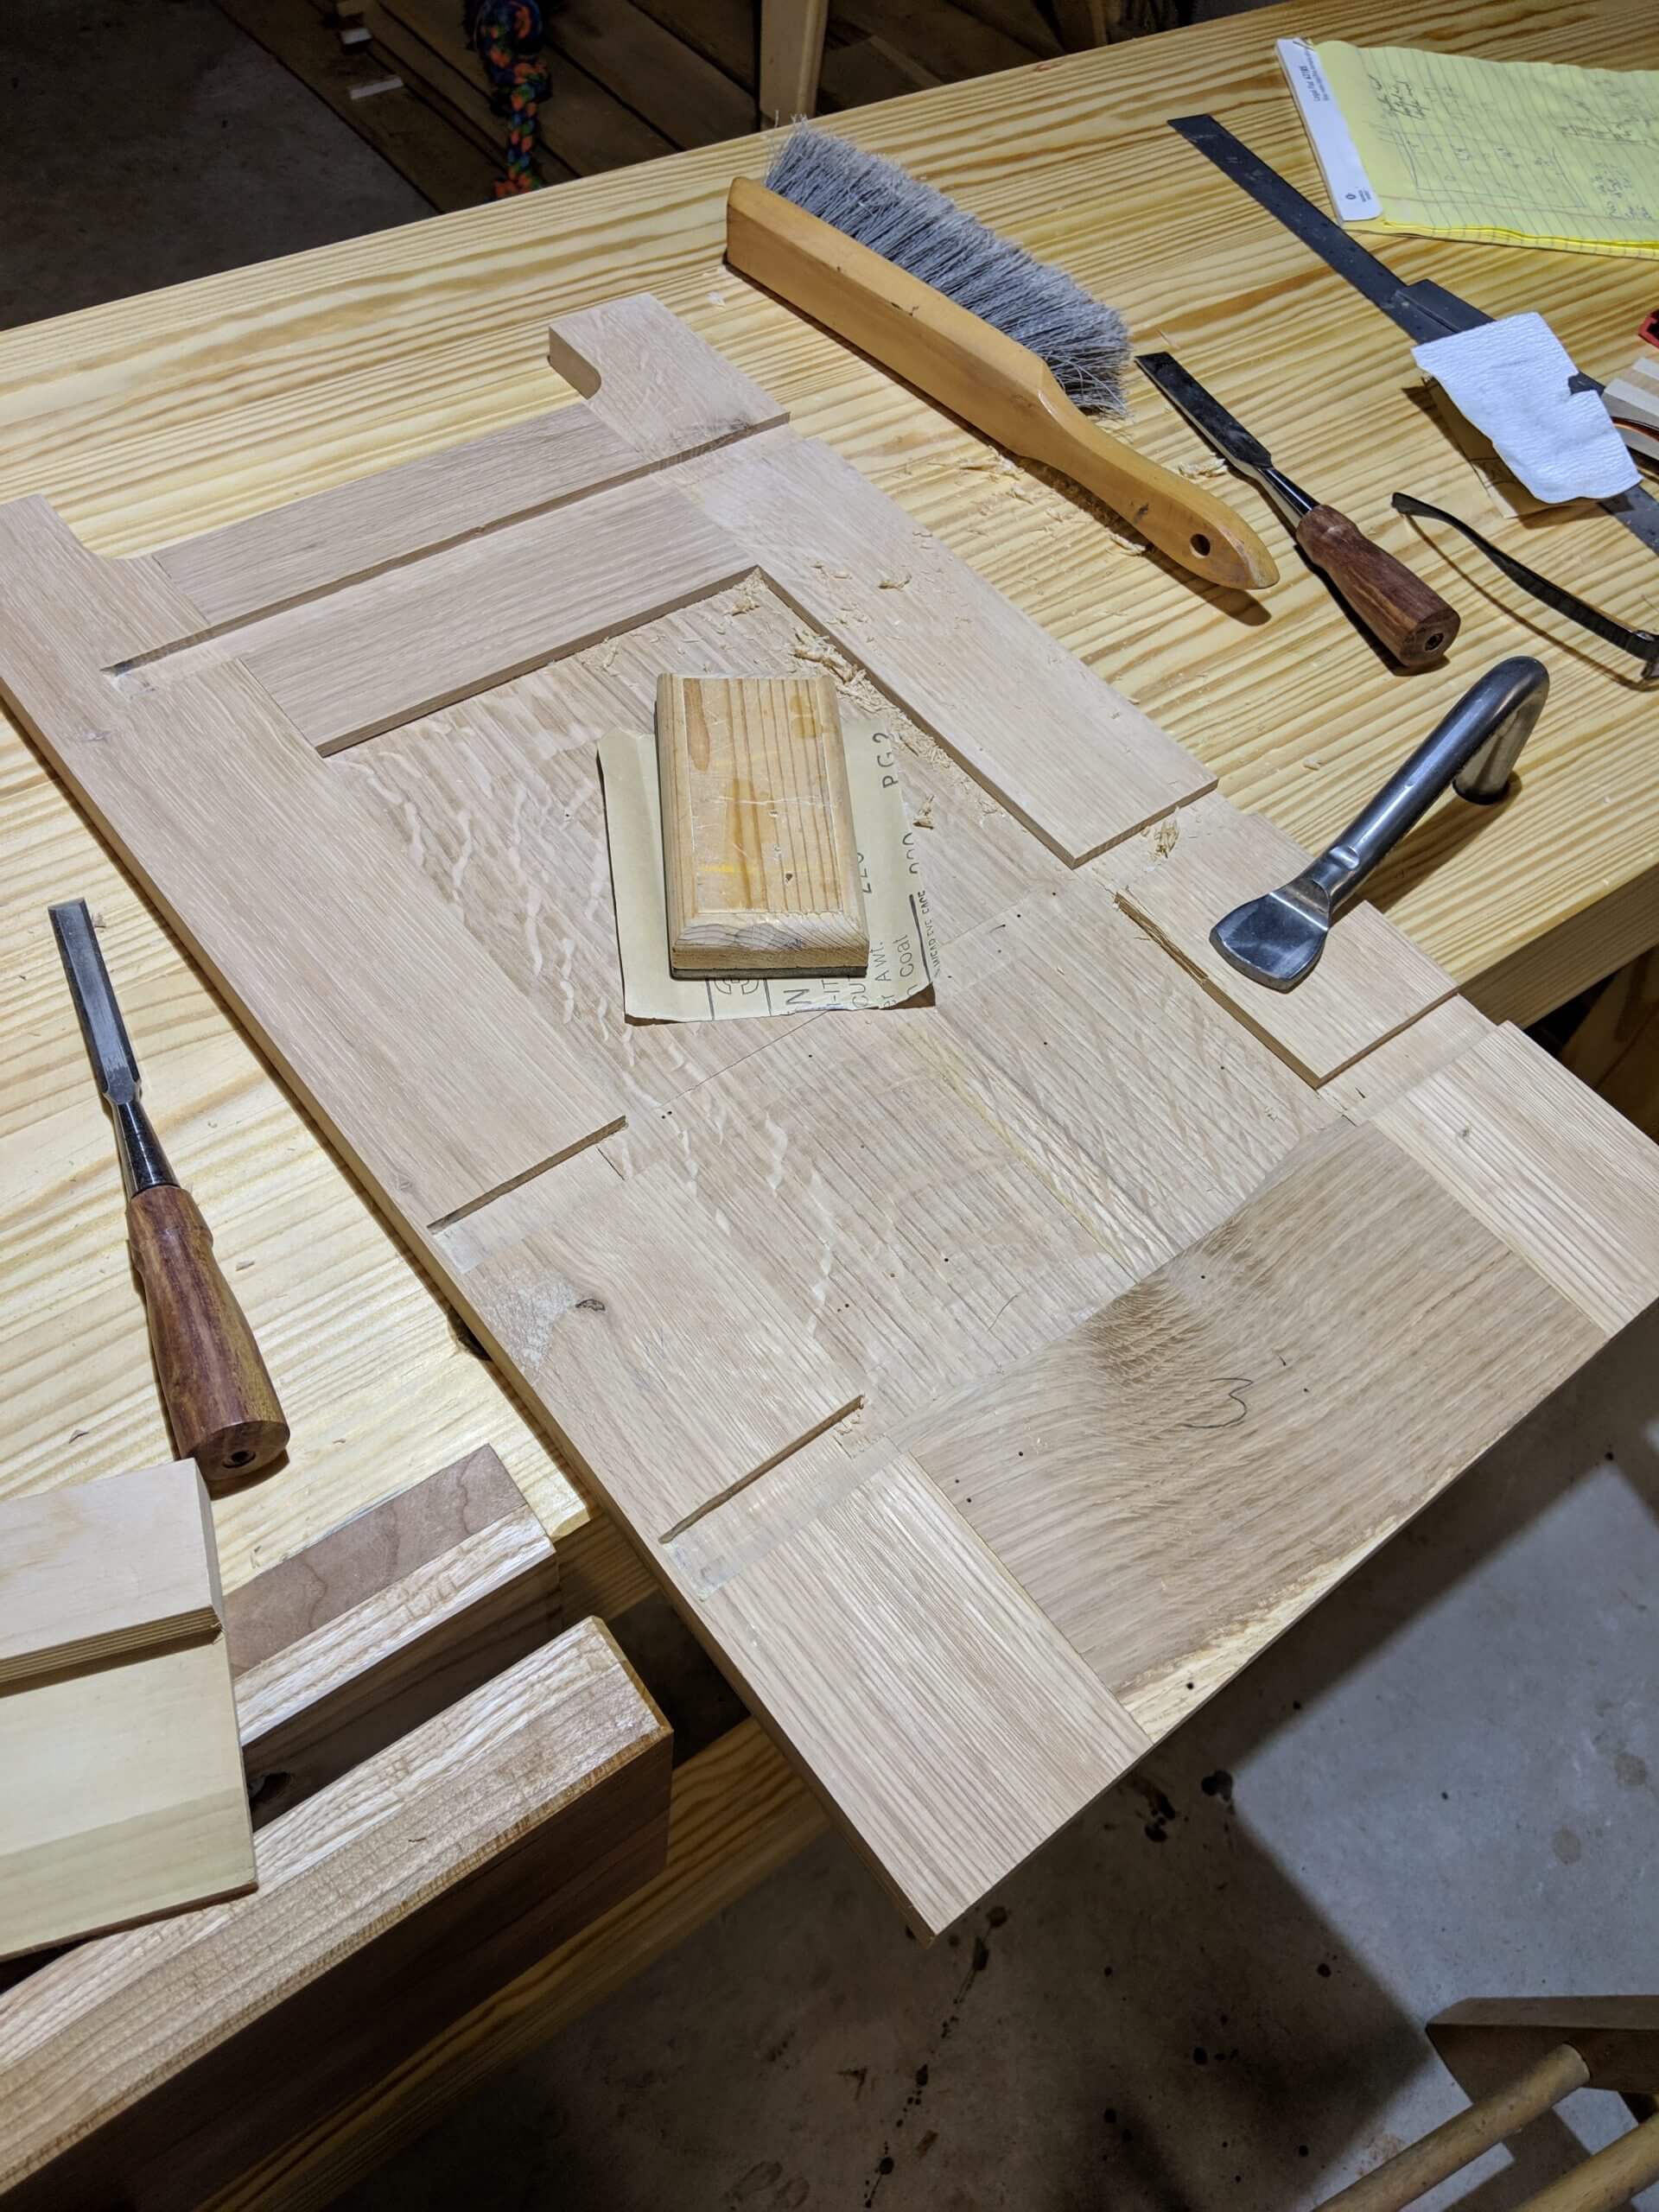
At 1/4″ deep, the dados do not penetrate into the center panel (if your stock is 3/4 or greater).
Hand cut the dados to the stop line using a chisel. There is only 1/8″ on the front edge of the drawer support dado, so be patient and go slow. You can to a through dado and just increase the depth of the drawer supports, but the appearance of the small 1/8″ reveal is worth the effort.
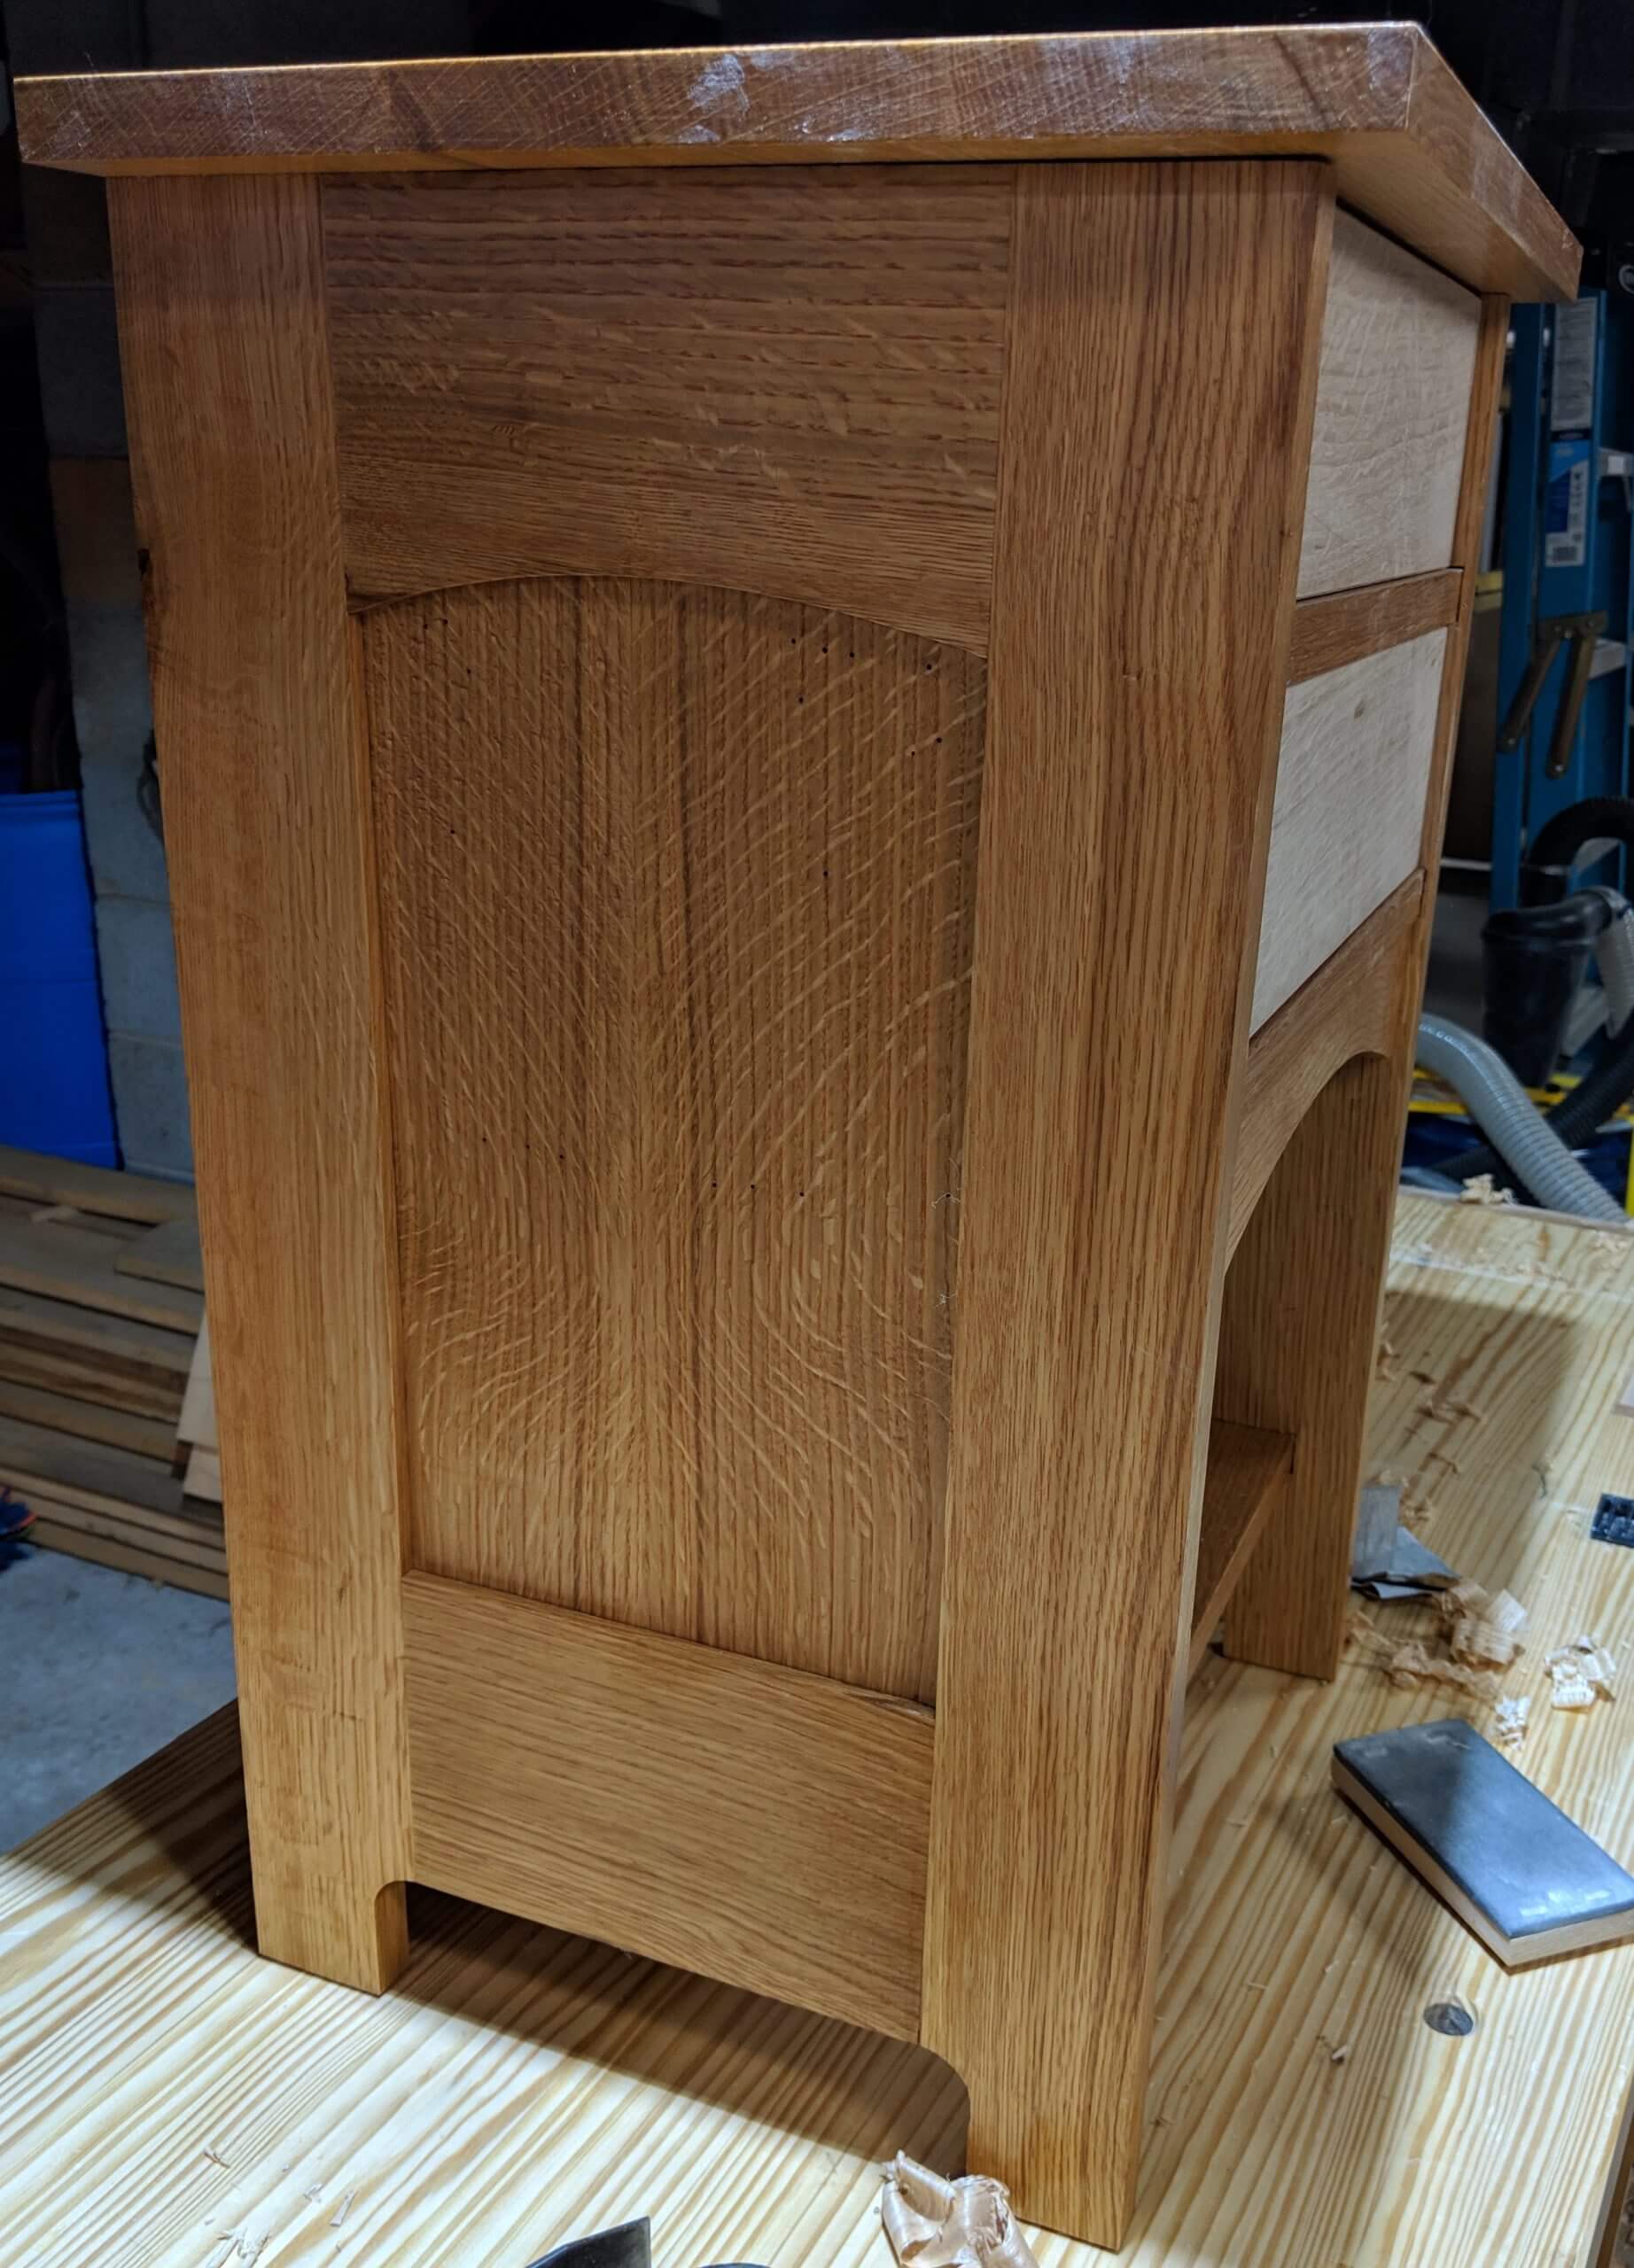
After cleaning up the dados, give the inside a final pass with the scrapper and a light sanding. Hit the edges with sandpaper to soften them and put a chamfer on the bottom of the feet to avoid splintering when sliding on the floor.
Drawer Supports
Drawer supports have one show face on the front of the table and could be made with one piece of quality lumber then an inferior species for the internal parts. For simplicity sake I made all my parts out of white oak.
Each table needs four “front to back” supports and four “side to side” supports. Since the front of the table shows the front edge of the side to side supports, it is the one that will be solid and connected front to back by shorter supports.
The front and back supports were milled to 14 1/2″. 14″ for the width of the table and 1/4″ on each side to fit into the dado.
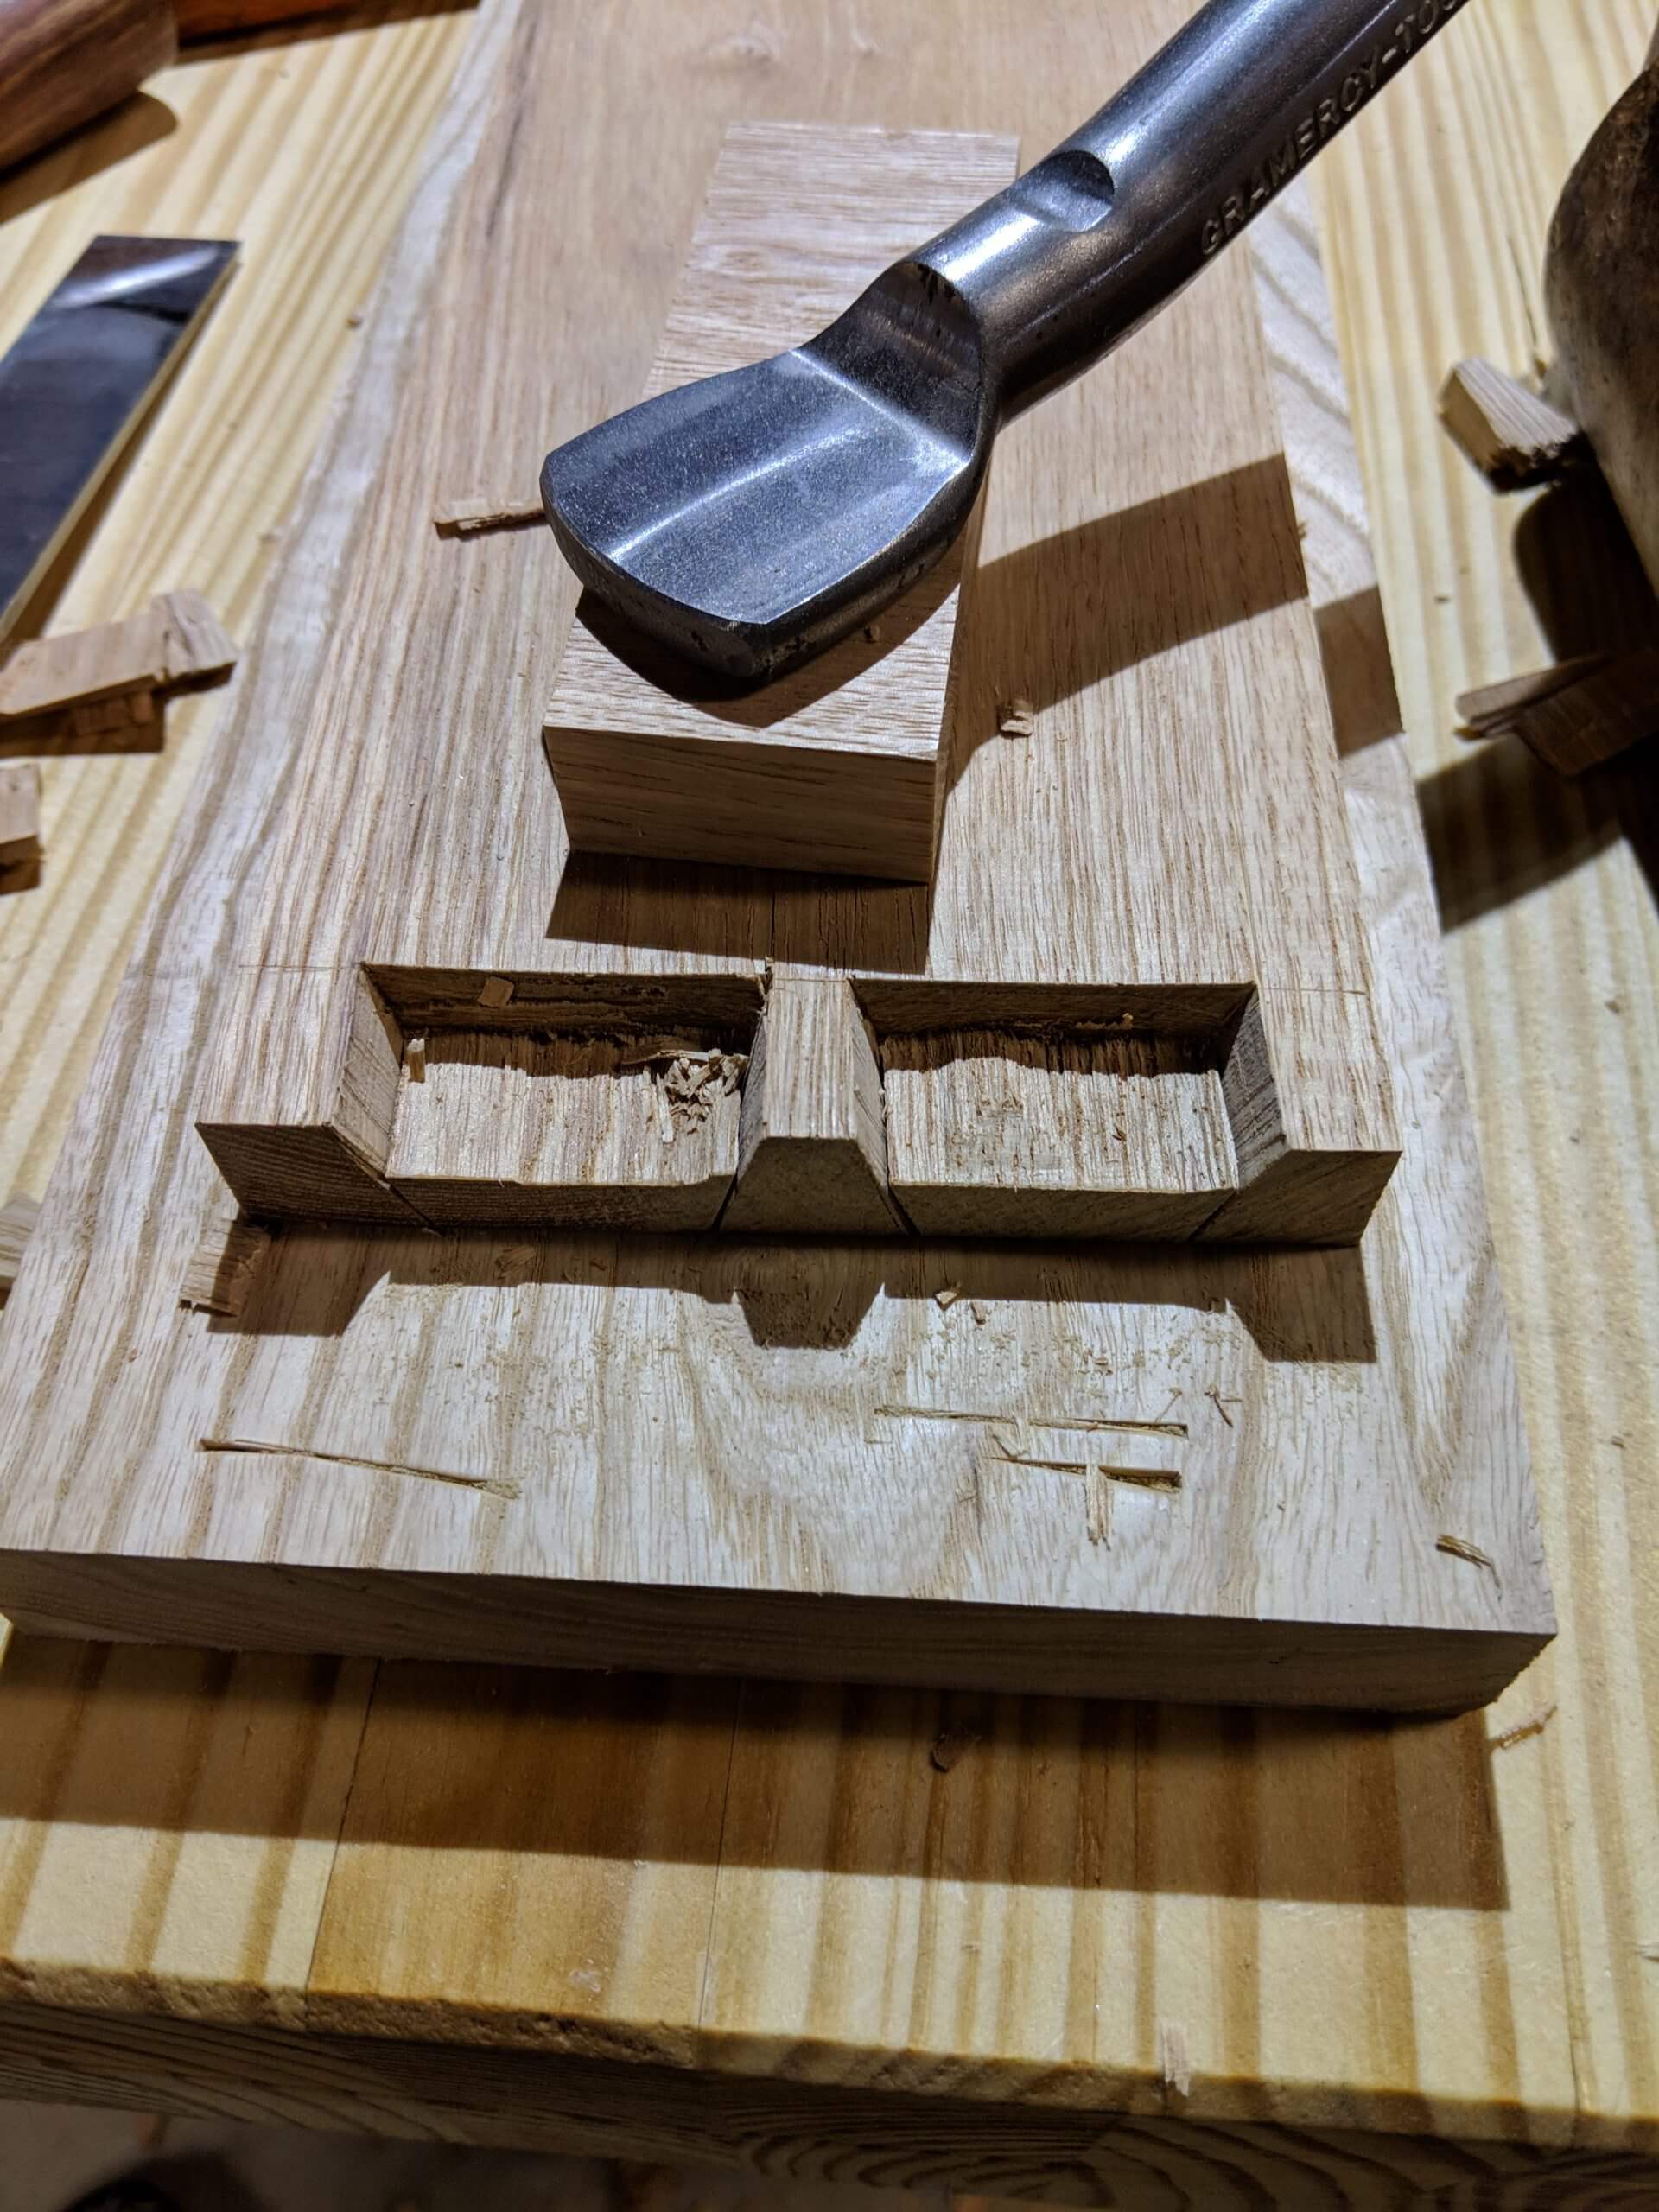
The side “front to back” supports were milled to 10 7/8″ length this is the 14″ depth of the table, less the 1/8 reveal, less the two 2″ front and back supports (4″ combined) PLUS 1/2″ on each end for a tenon.
A mortise marking gauge was used to mark the 1/4″ wide by 1/2″ deep tenon on the short supports and they were cut out by hand. This is a structure joint, not a show joint, so finesse is not essential. Also, the parts were too small to safely cut on the table saw.
The long supports were marked for the mortises and they were cut on the router table using a 1/4″ spiral up-cut bit. I did this in three passes (working up to a 1/2″ depth).
This makes a round mortise, so the edges of the tenons were eased with a file.
Test fit each assembly and adjust as needed.
When gluing them into groups, pay particular attention to squareness. These form part of the structure and an out of square drawer support will make the rest of the project hard to assemble.
Also, when dry, pick the best looking face on the long support and label it as a face. Pick the smoothest side and label it “up” then use a plane, cabinet scraper, card scraper and sand paper to get that face smooth. This is the face that the drawer bottom will slide on and you want and even surface.
Top and Shelf
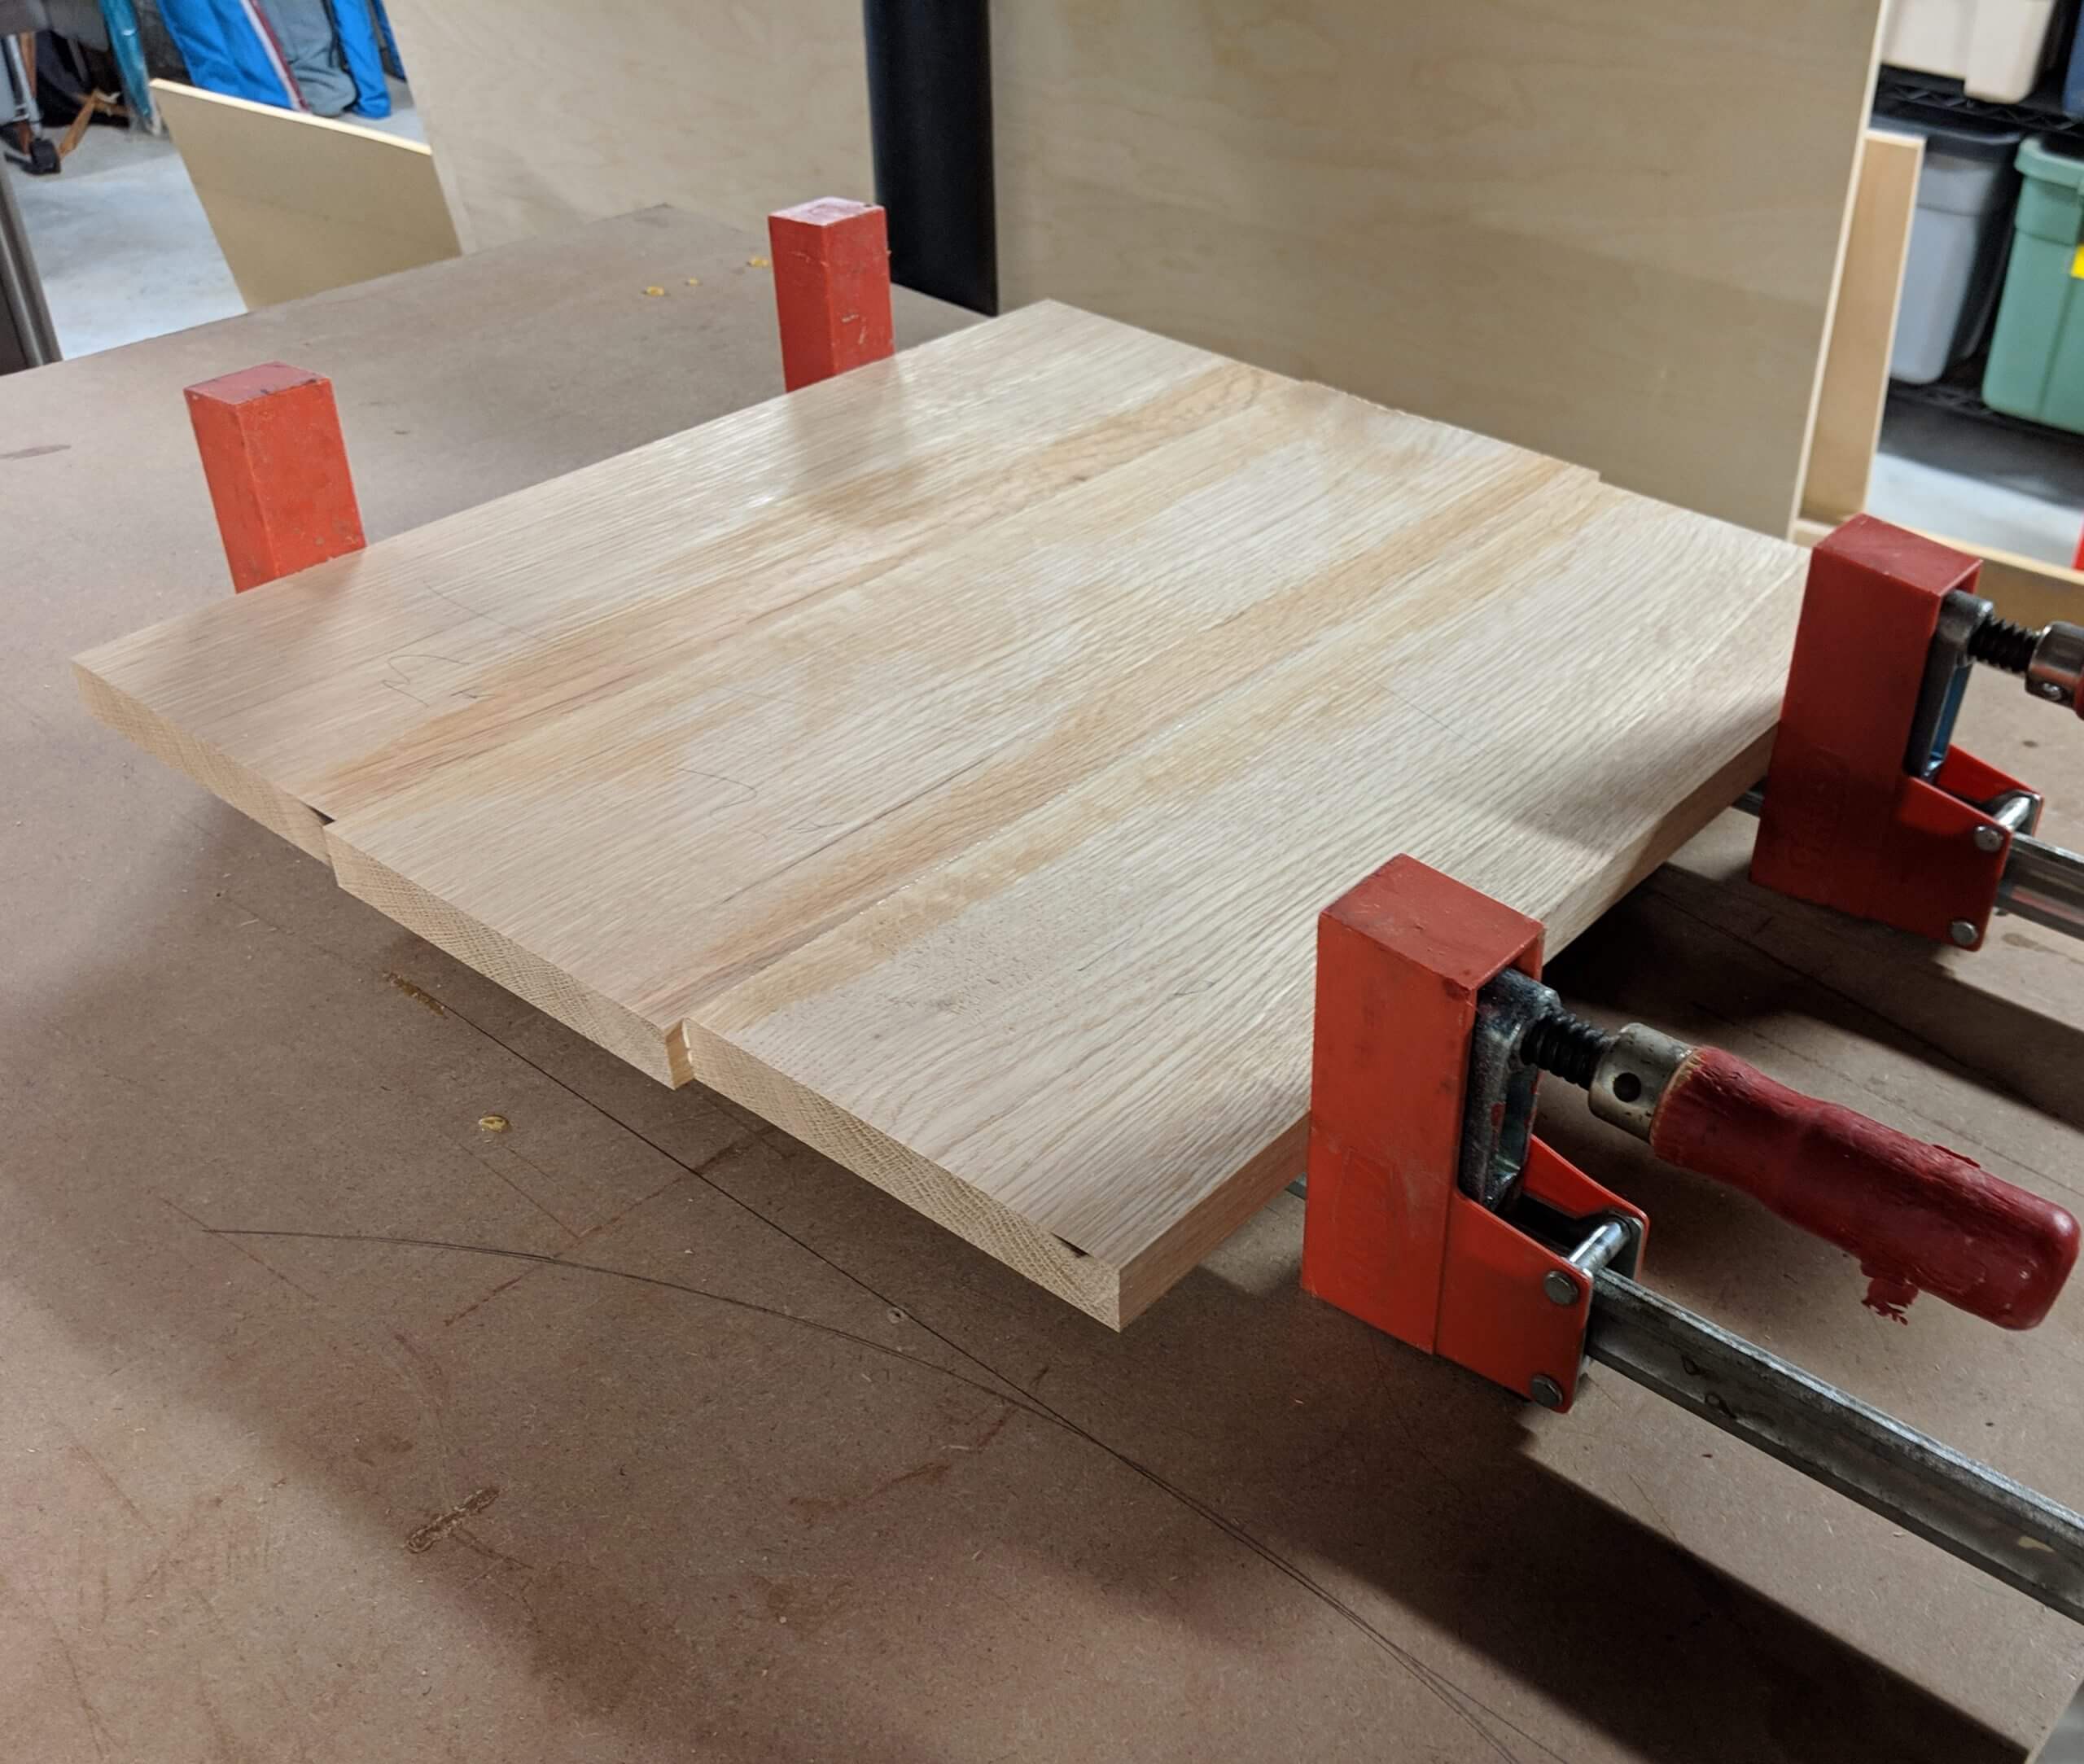
The top and the shelf are uneventful in that they are just glue-up of flat milled stock. Each are made much larger than their target size (top is 18″ X 14 1/2″ and the shelf is 14 1/2″ X 12 3/4″). The only guide is to use good stock for the top as it will be seen more than the rest of the table. Also note that the 14 1/2″ for the shelf includes a 1/4″ allowance for the dado.
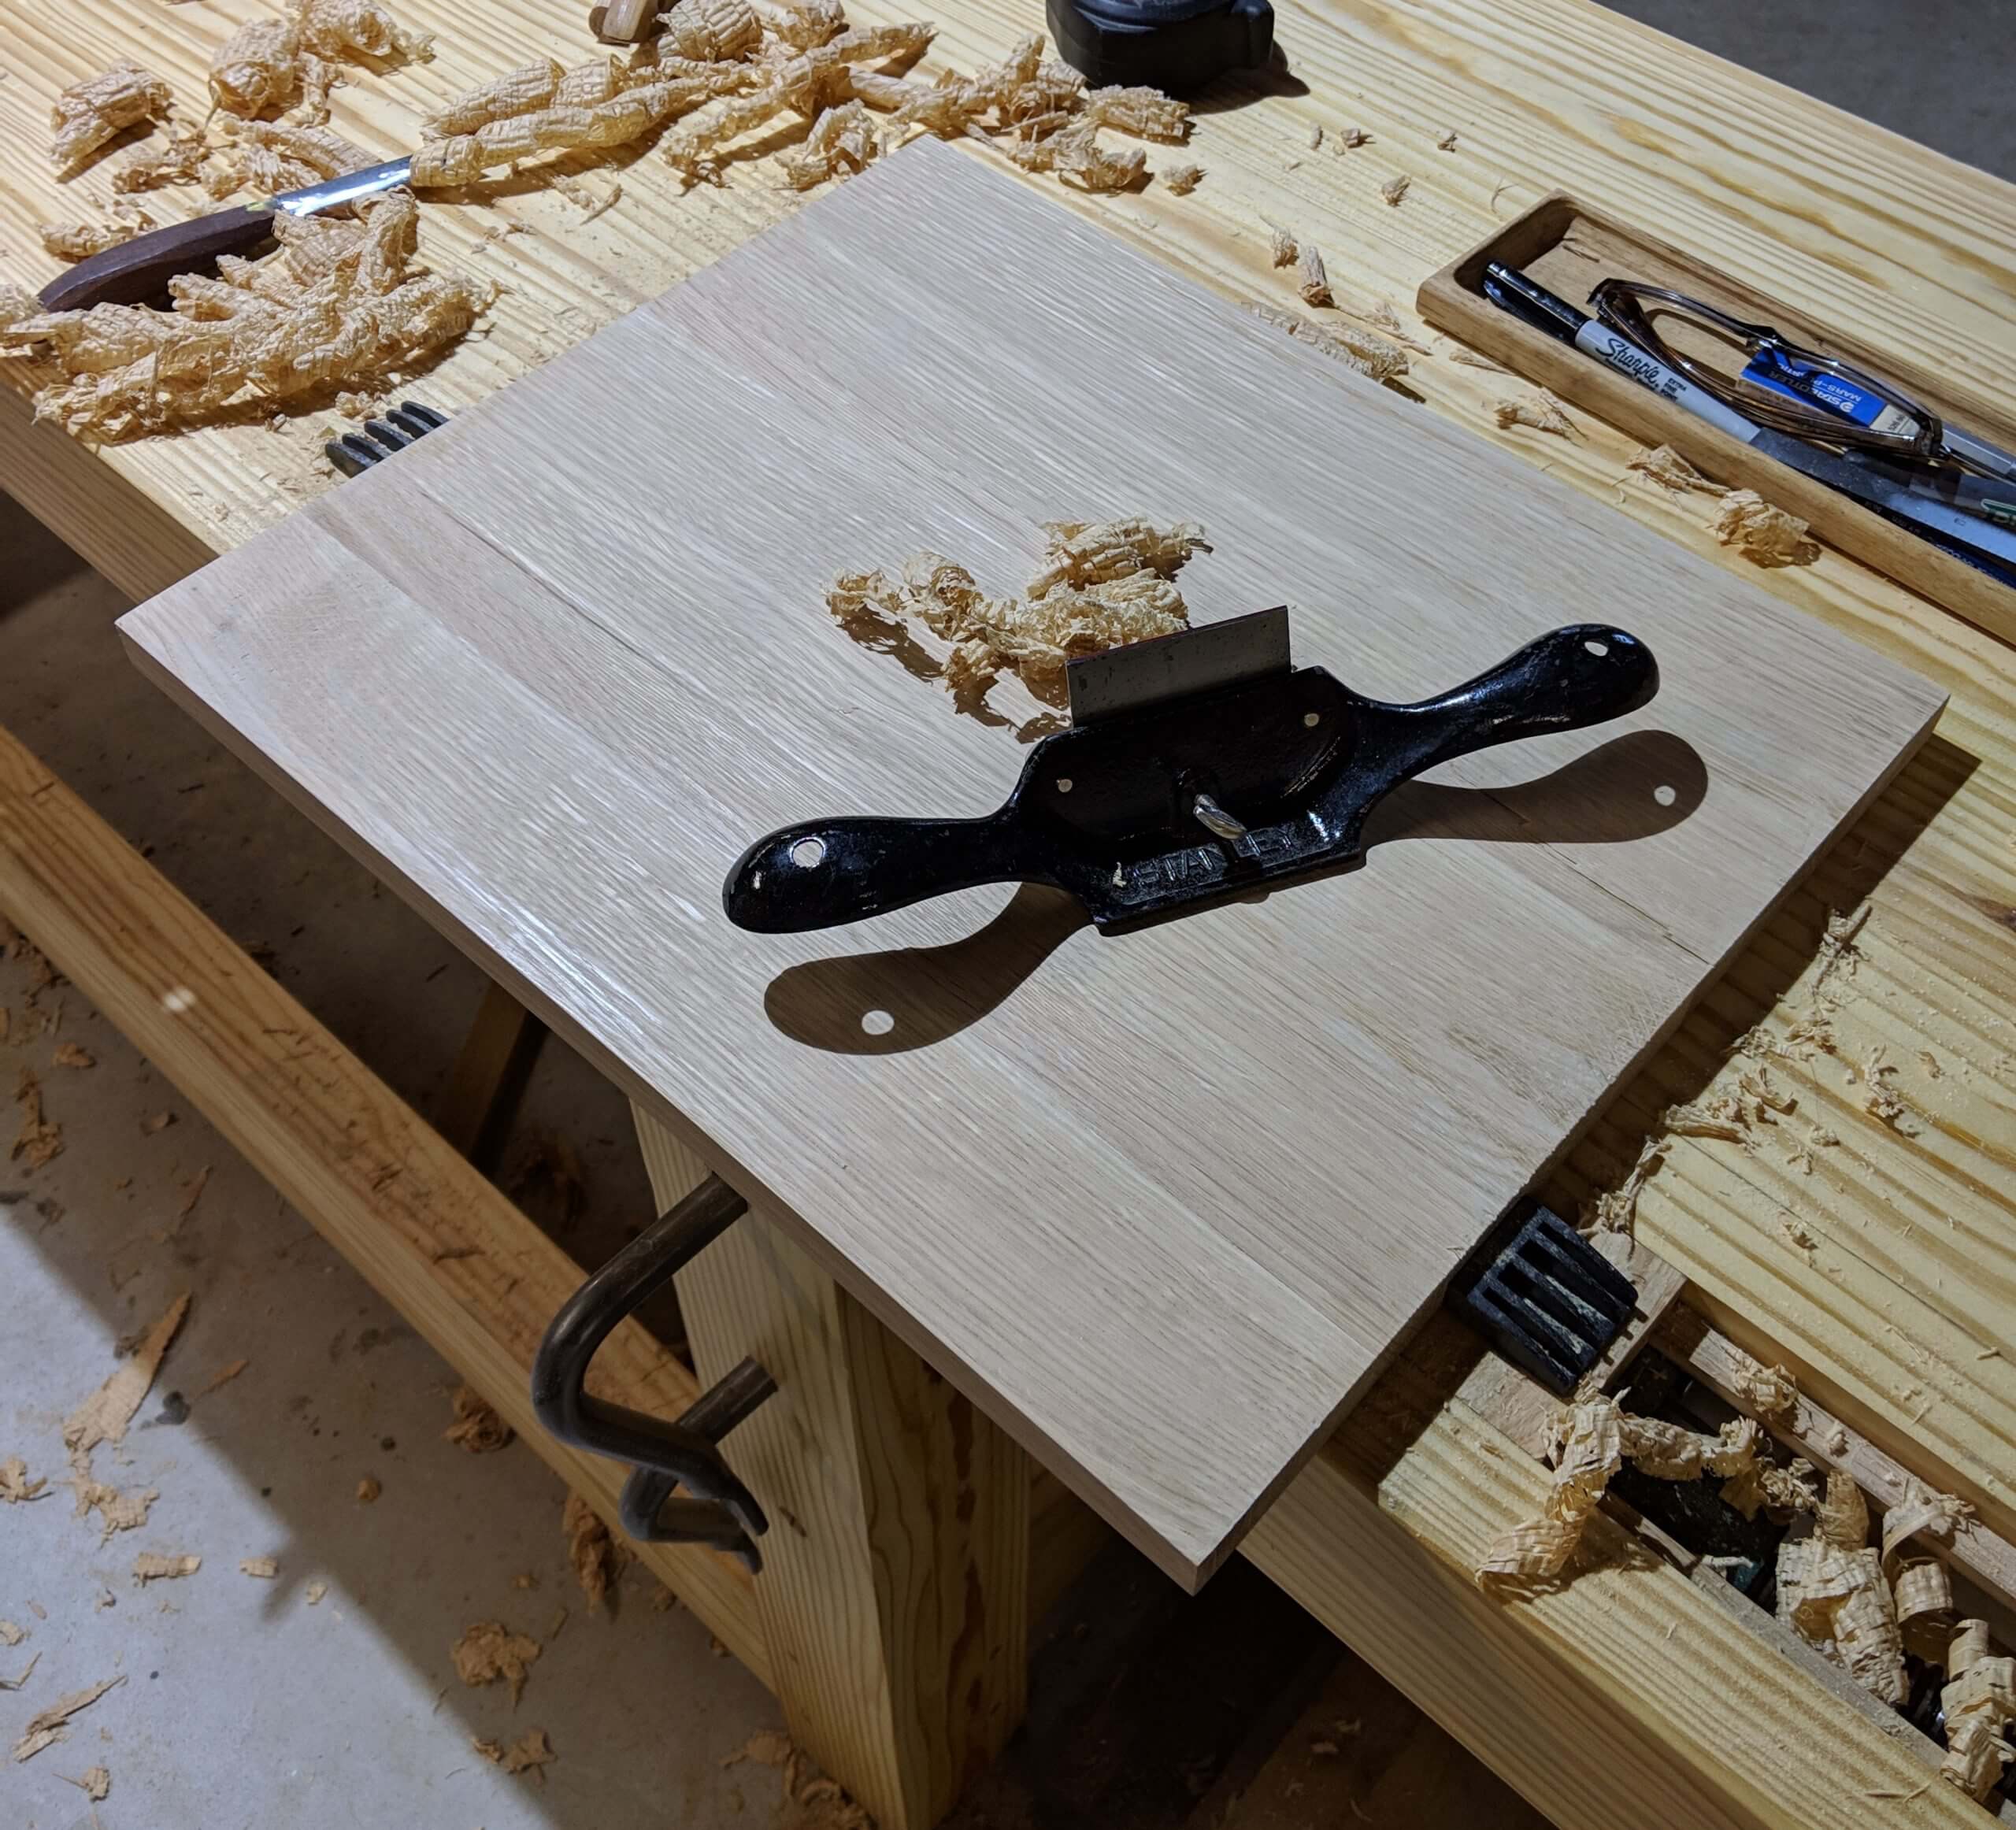
The top just fits though my planner, but even with a planned finish, I still went at it aggressively with a cabinet scrapper.
Arch Fascia and Glue Up
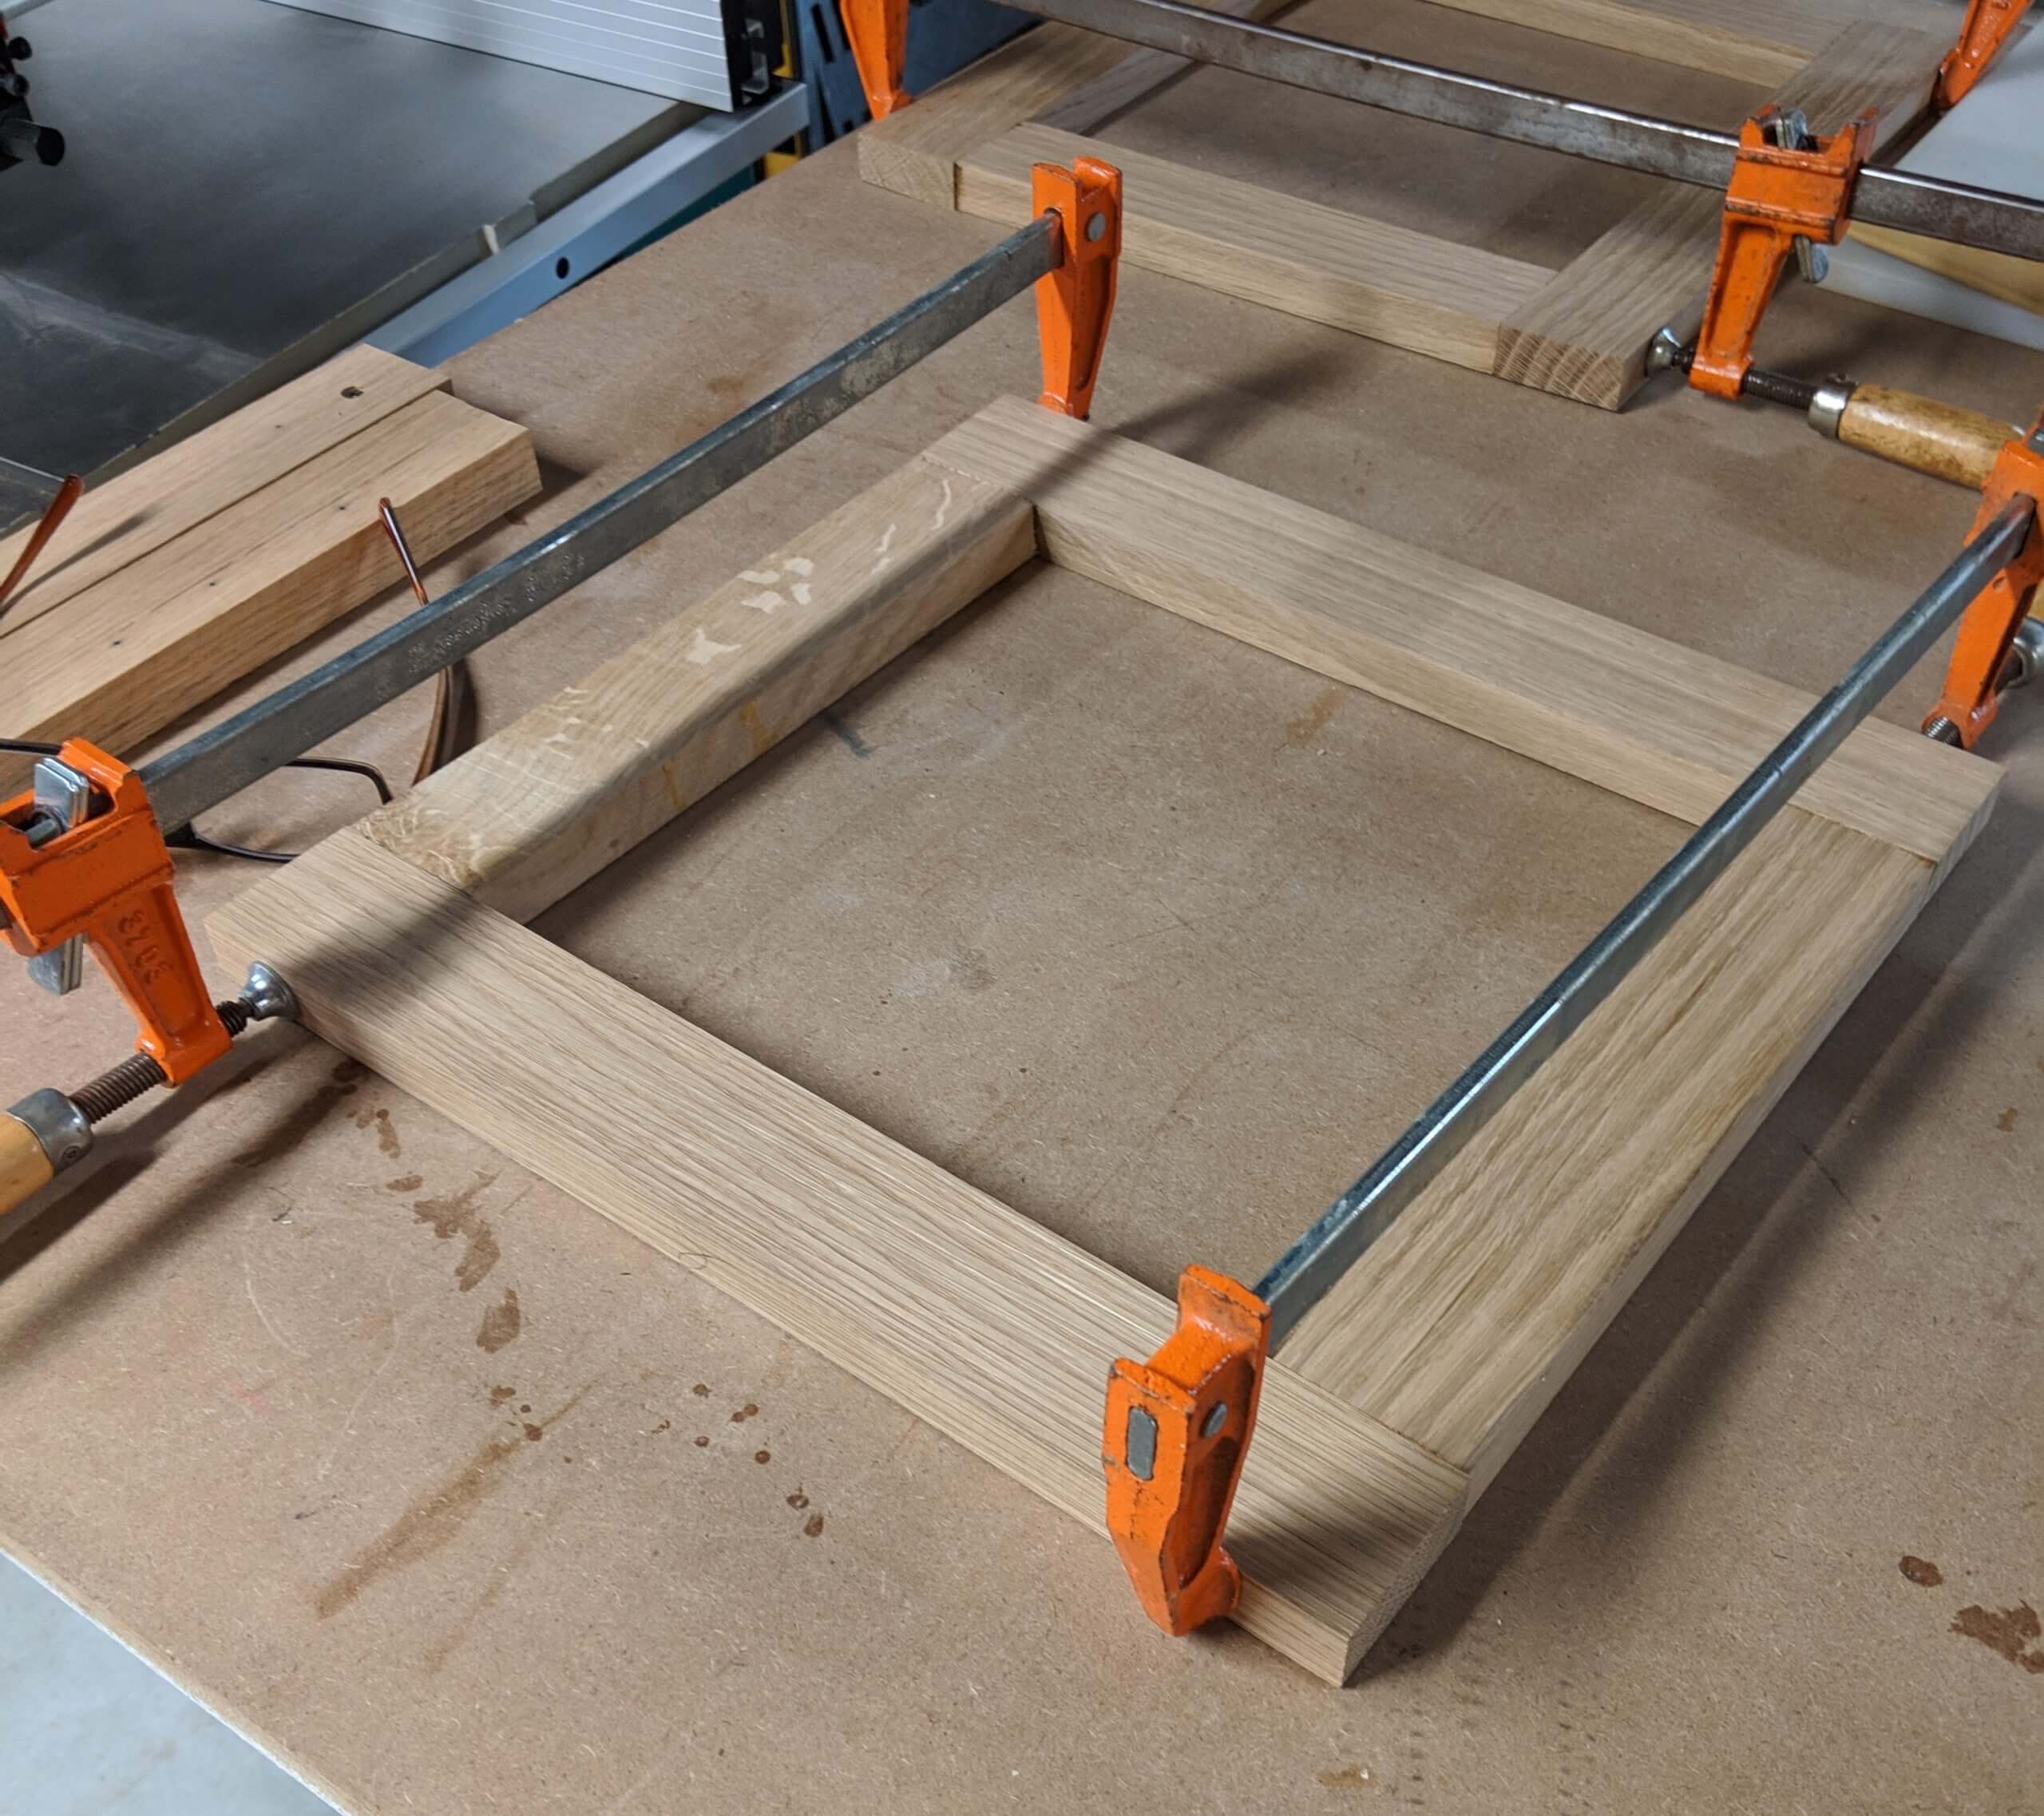
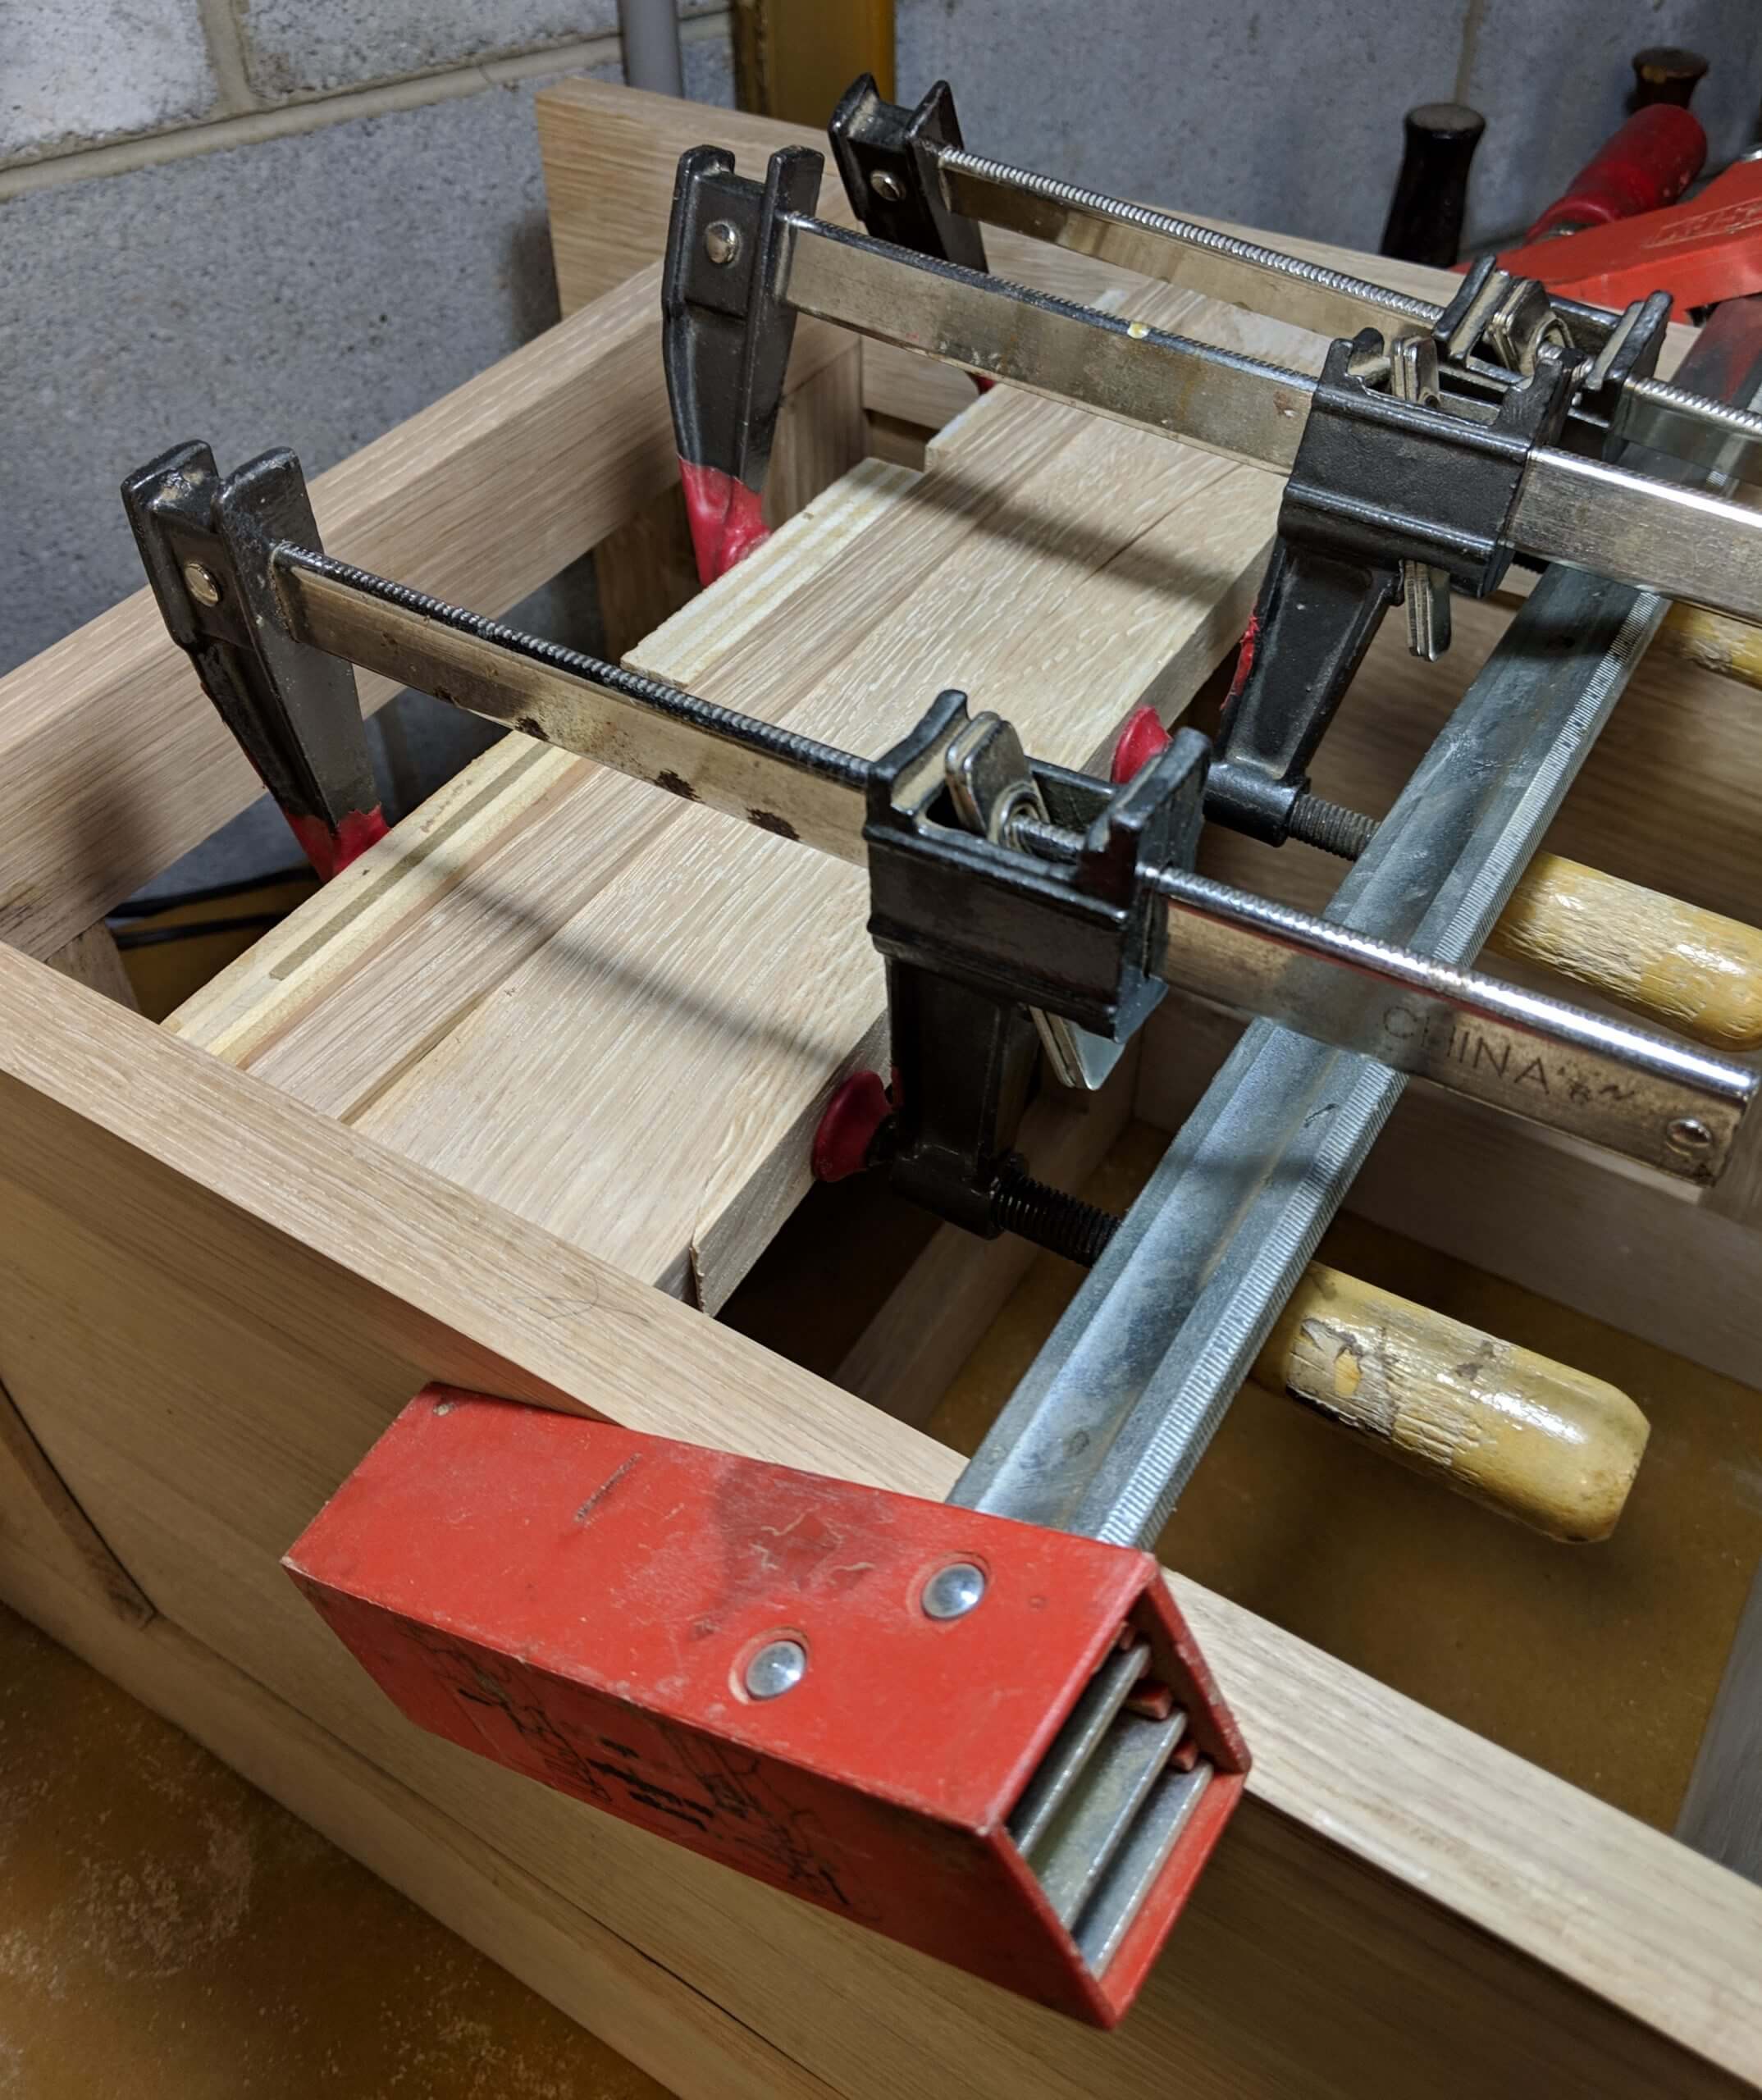
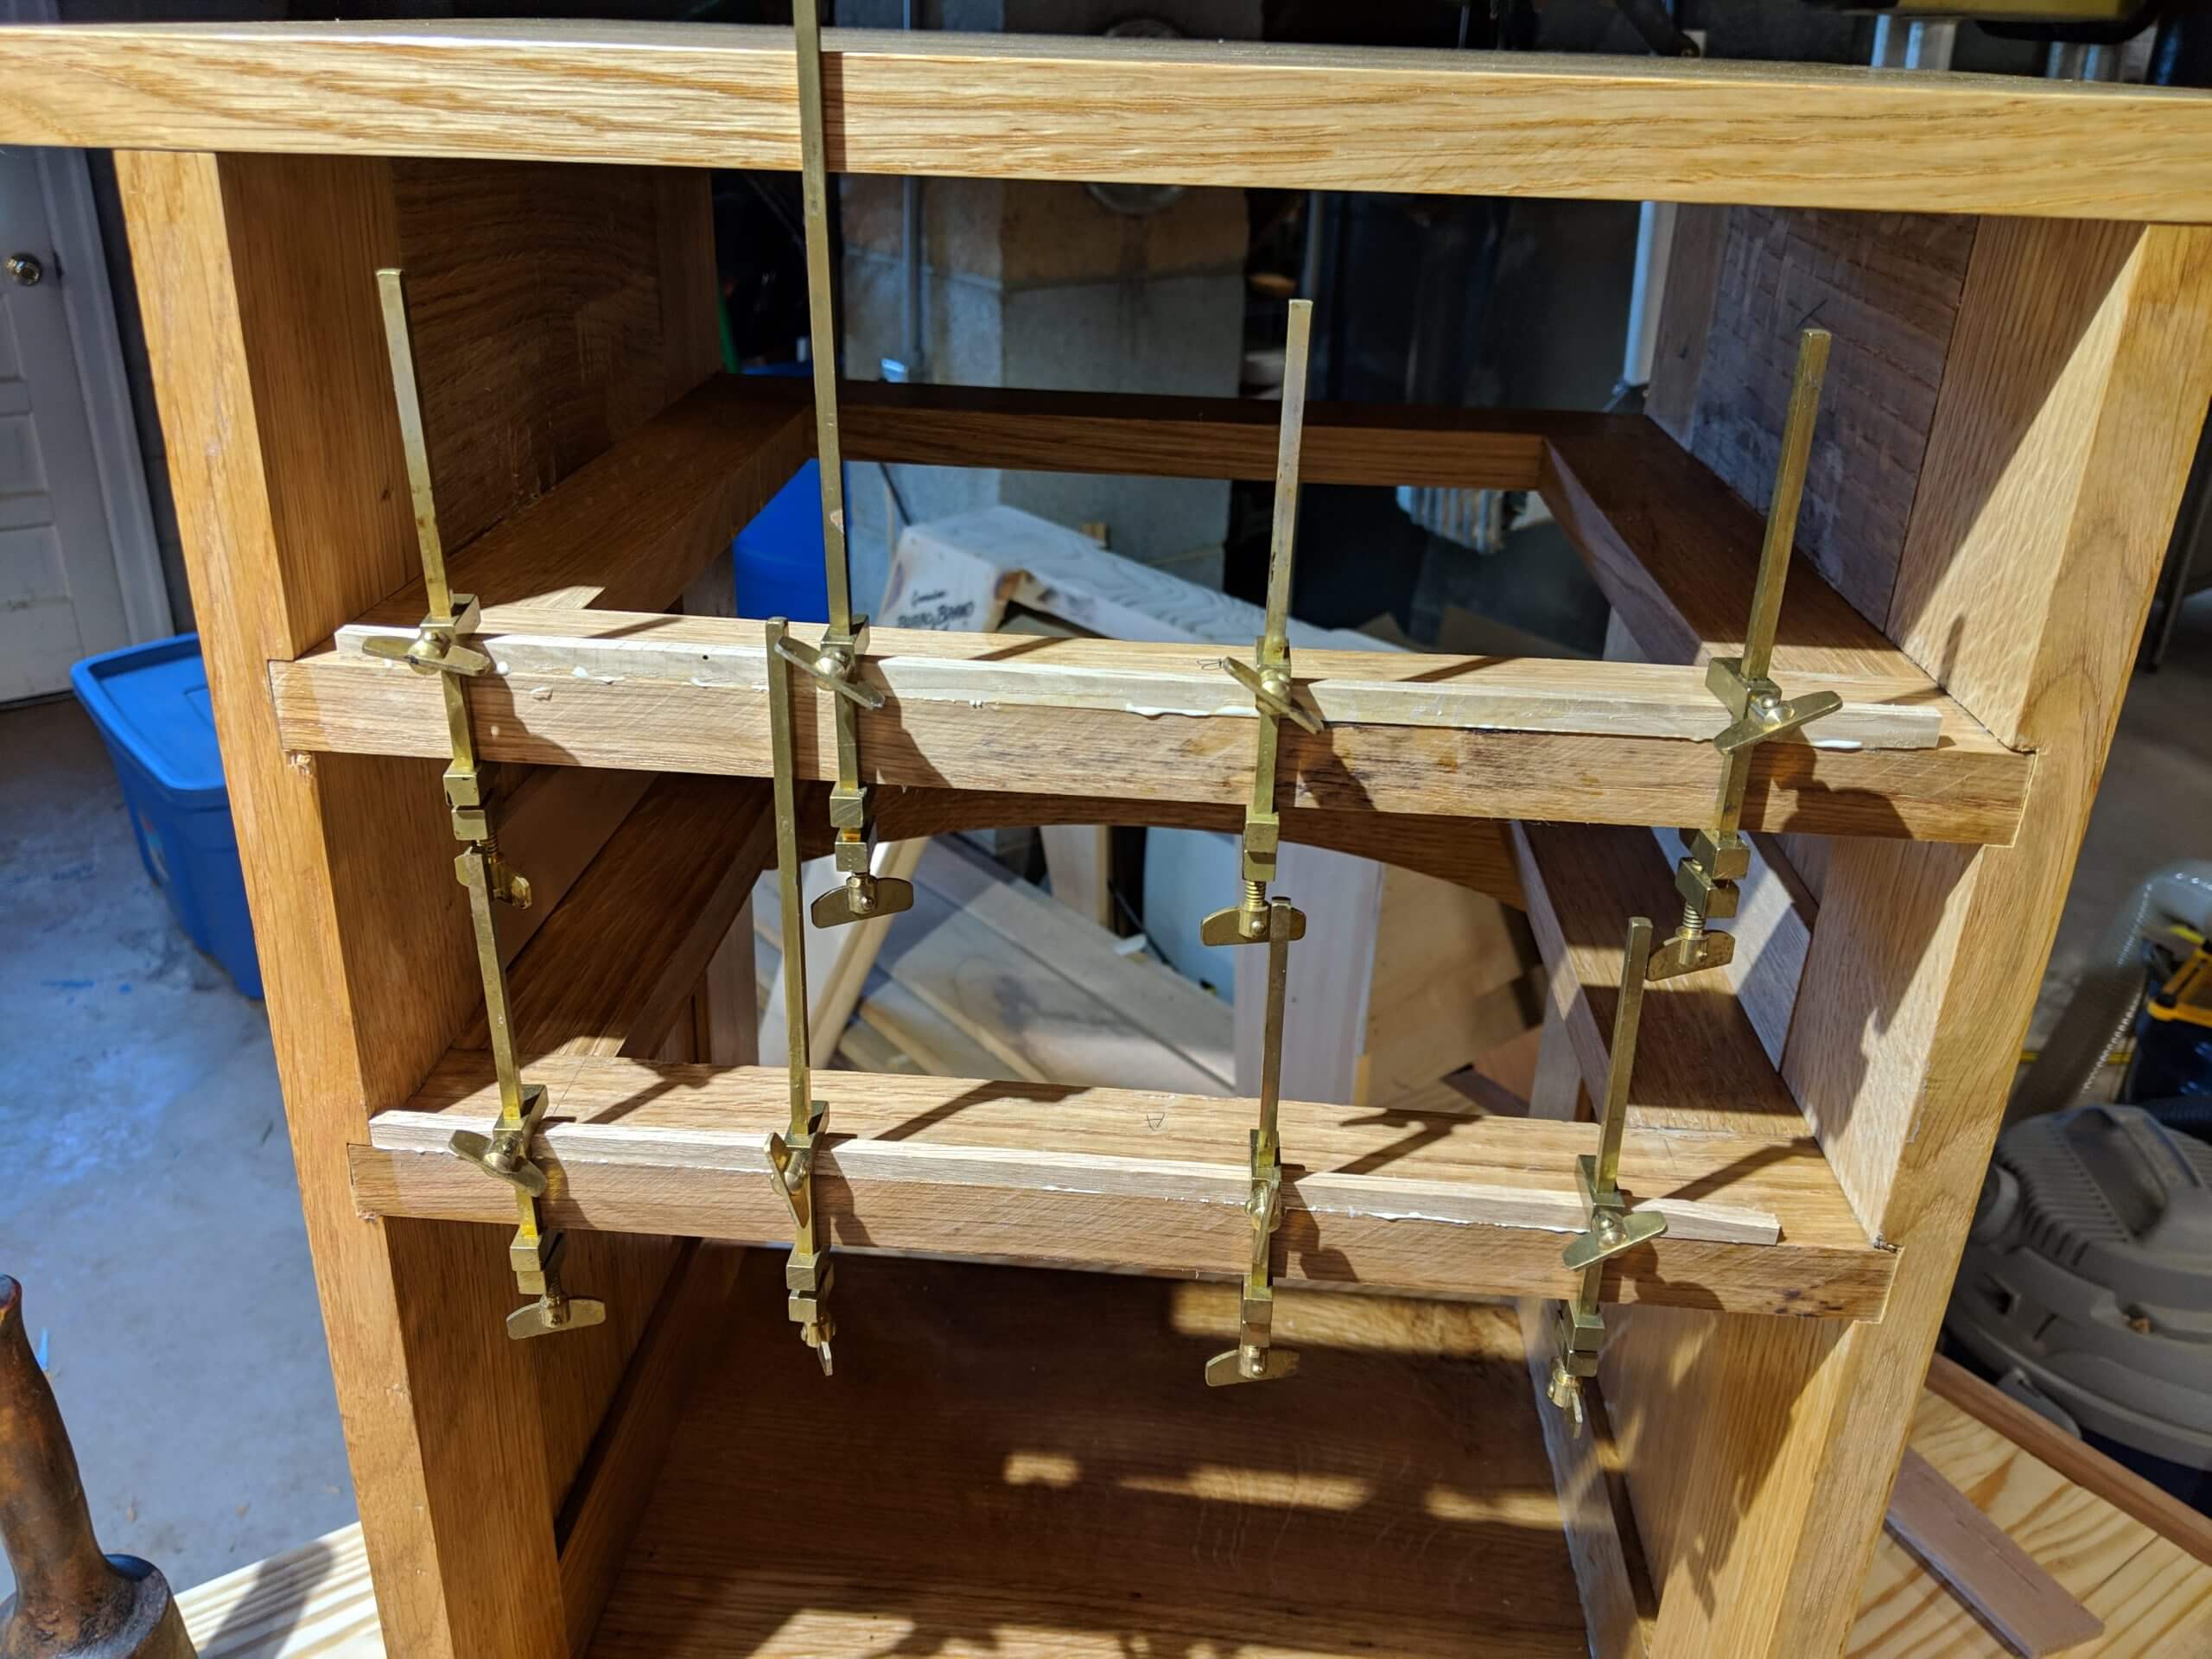
Dry fit the table together and adjust the dados and edges as needed to ensure that come glue-up things will fit.
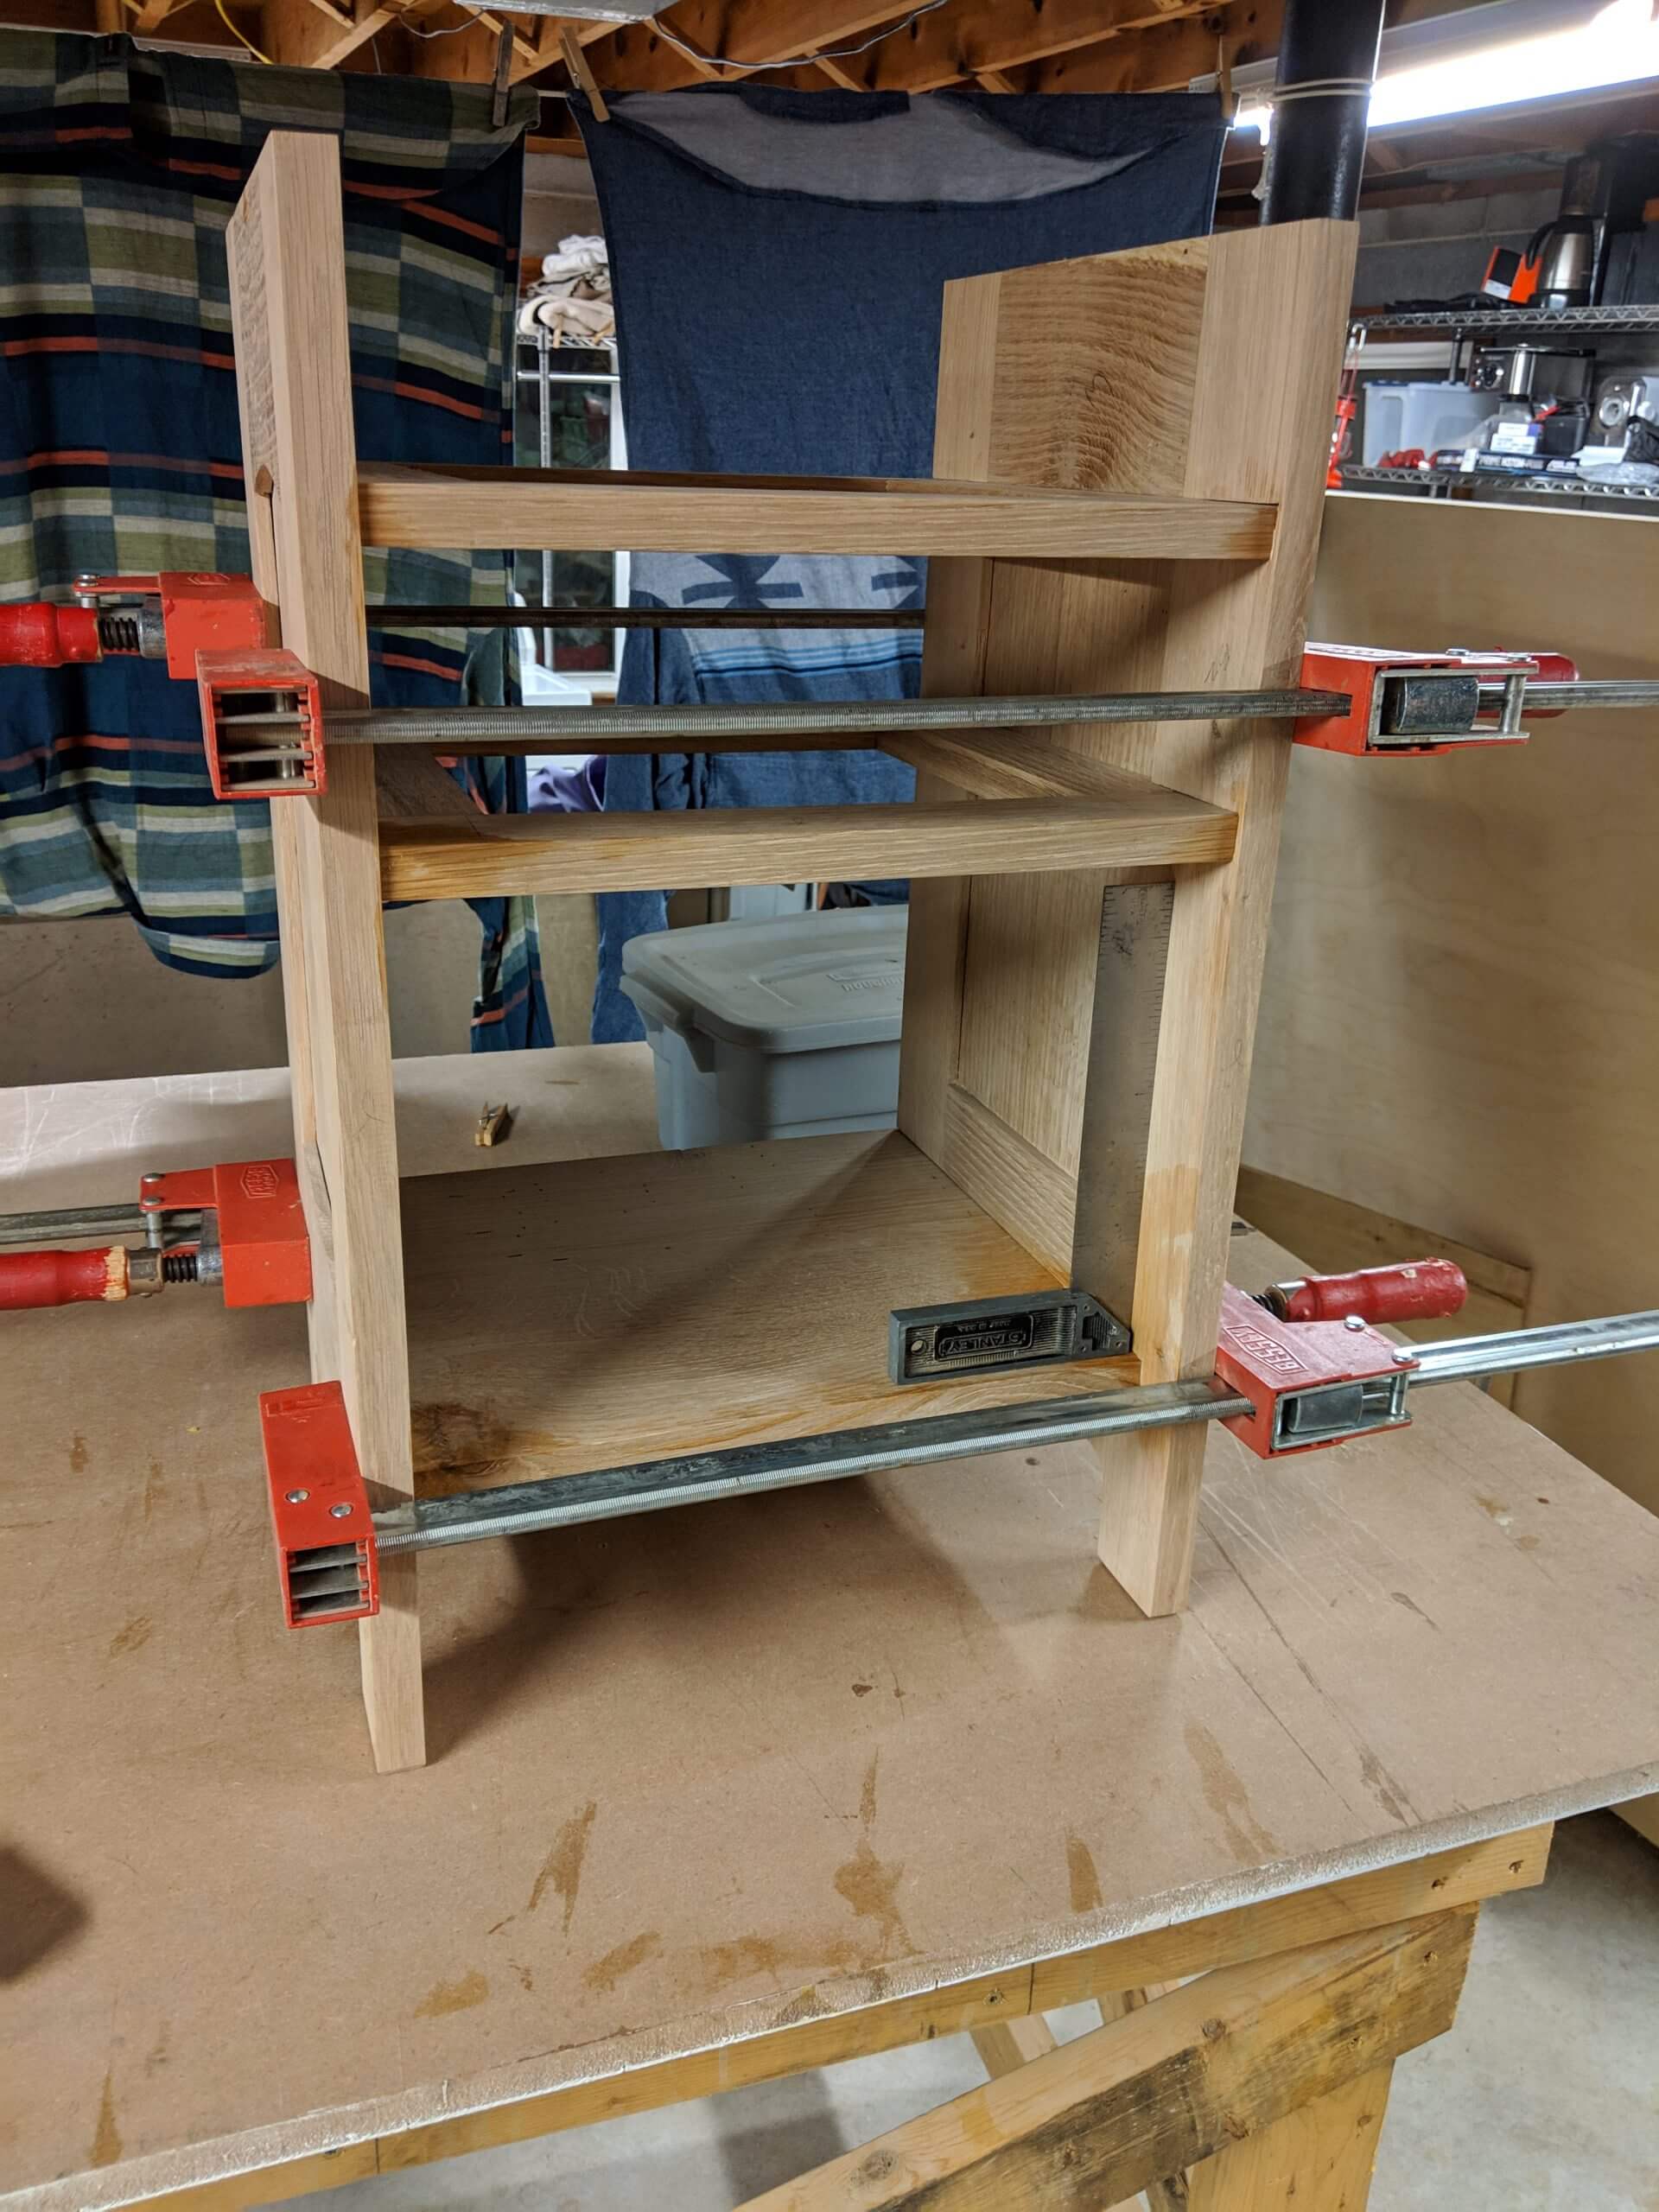
Apply glue to the stiles of the panels and to the stile and rail for the bottom shelf. My shelf is from quarter-sawn stock and I am not that worried about expansion, but if you are, just glue the front stile, leaving the rest free to move.
Insert the shelf and the drawer supports then apply glue to the opposite panel and fit the assembly together.
Test for square while clamping. The closer it is to perfectly square the easier it will be to make the drawers and the better they will work.
Pull the drawer supports and shelf forward to make a snug fit and close up any gap to the relief edge left on the two front stiles. Add front to back clamps if needed to pull them forward. Be careful not to put too much clamping pressure on the thin reveal strip.
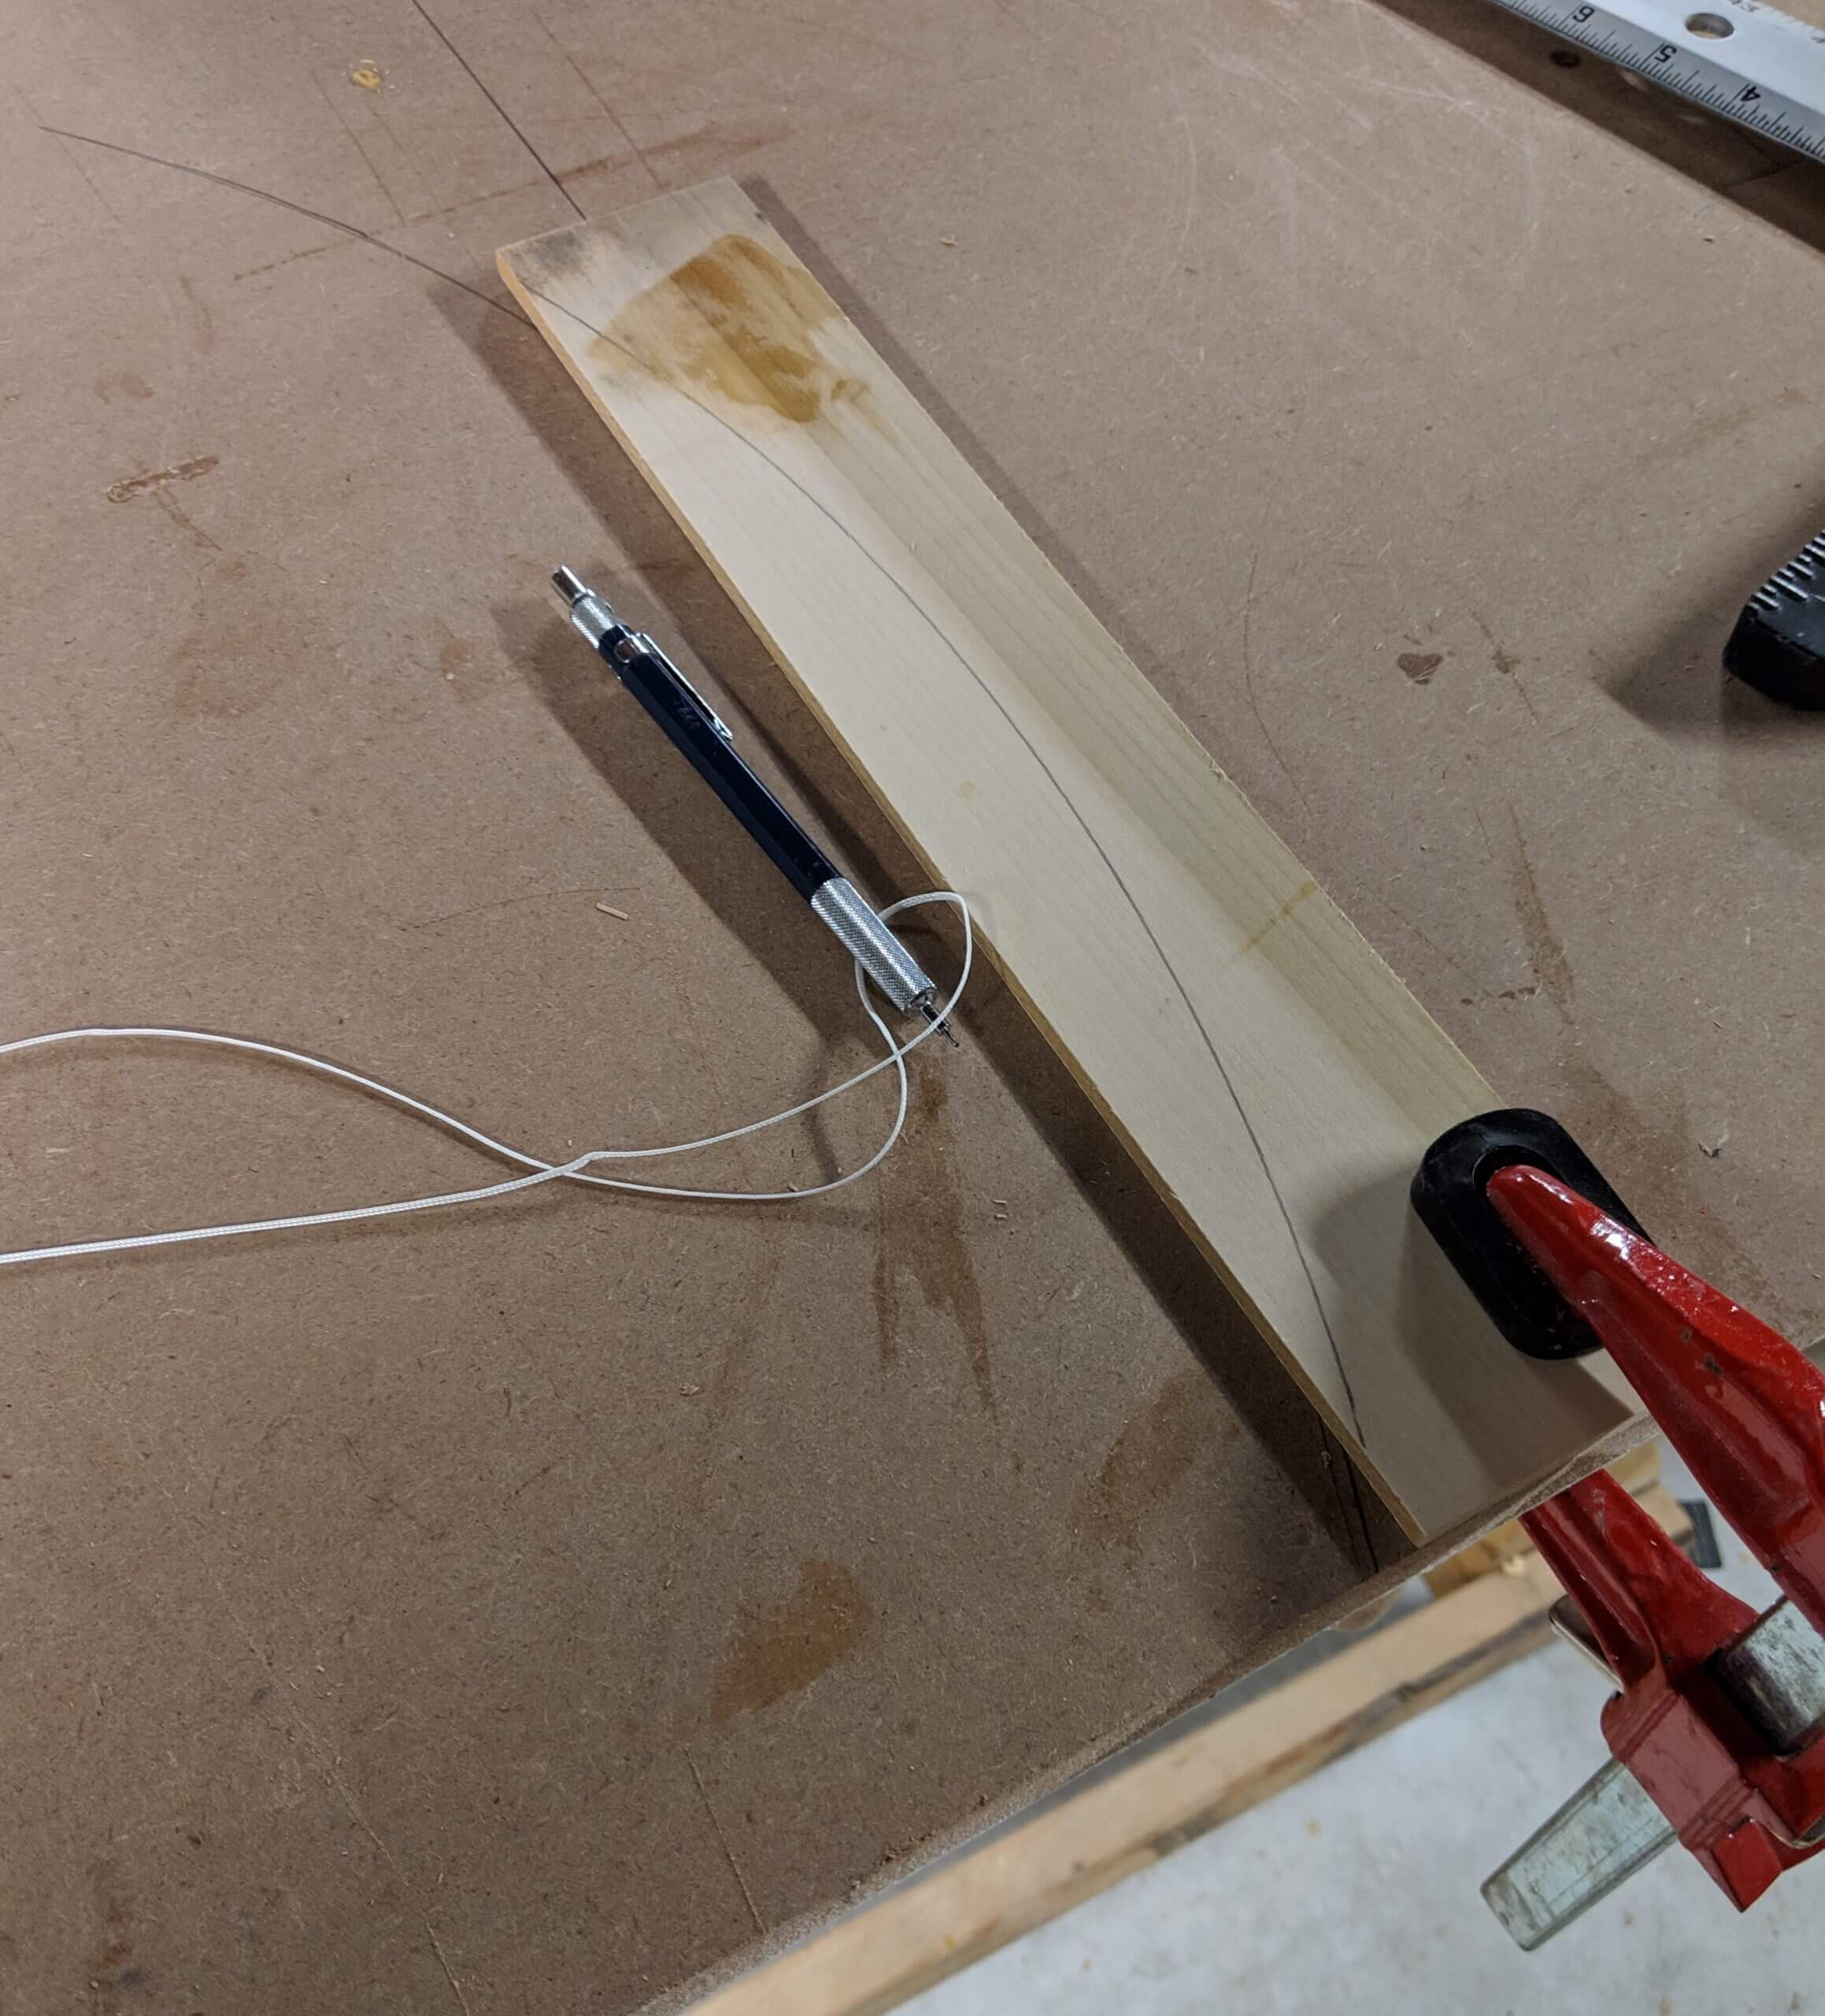
The front has an arch fascia piece that is purely decorative, but helps the flow of the table and compliments the arch in the top rail. Leave the stock for the fascia piece at least 1/8 long at first so it can be fit exactly to the opening.
This is made by making a template that is the same size of the uncut lumber, 2 3/8″ X 14″. Draw a line along the center of the work bench, then use a square to make a line 90 degrees to this line that is at least 8″ long on each side. Mark a point down on the first line 17 1/2″ down from the 90 degree line and put a nail at this point. Use string and a pencil to draw an arc that that runs from the nail to the intersection of the two lines. This is an arc with a radius of 17 1/2″. Place the template over the arc and move it up and down so that the arc cuts through the template about 1/2″ in from each side. Make certain it is square and clamp it down and draw the arc on the template. Cut the arc out and smooth the line with sandpaper.
Before tracing the arc on the stock, test fit the stock as it was left long. Trim until it is a solid friction fit in the opening
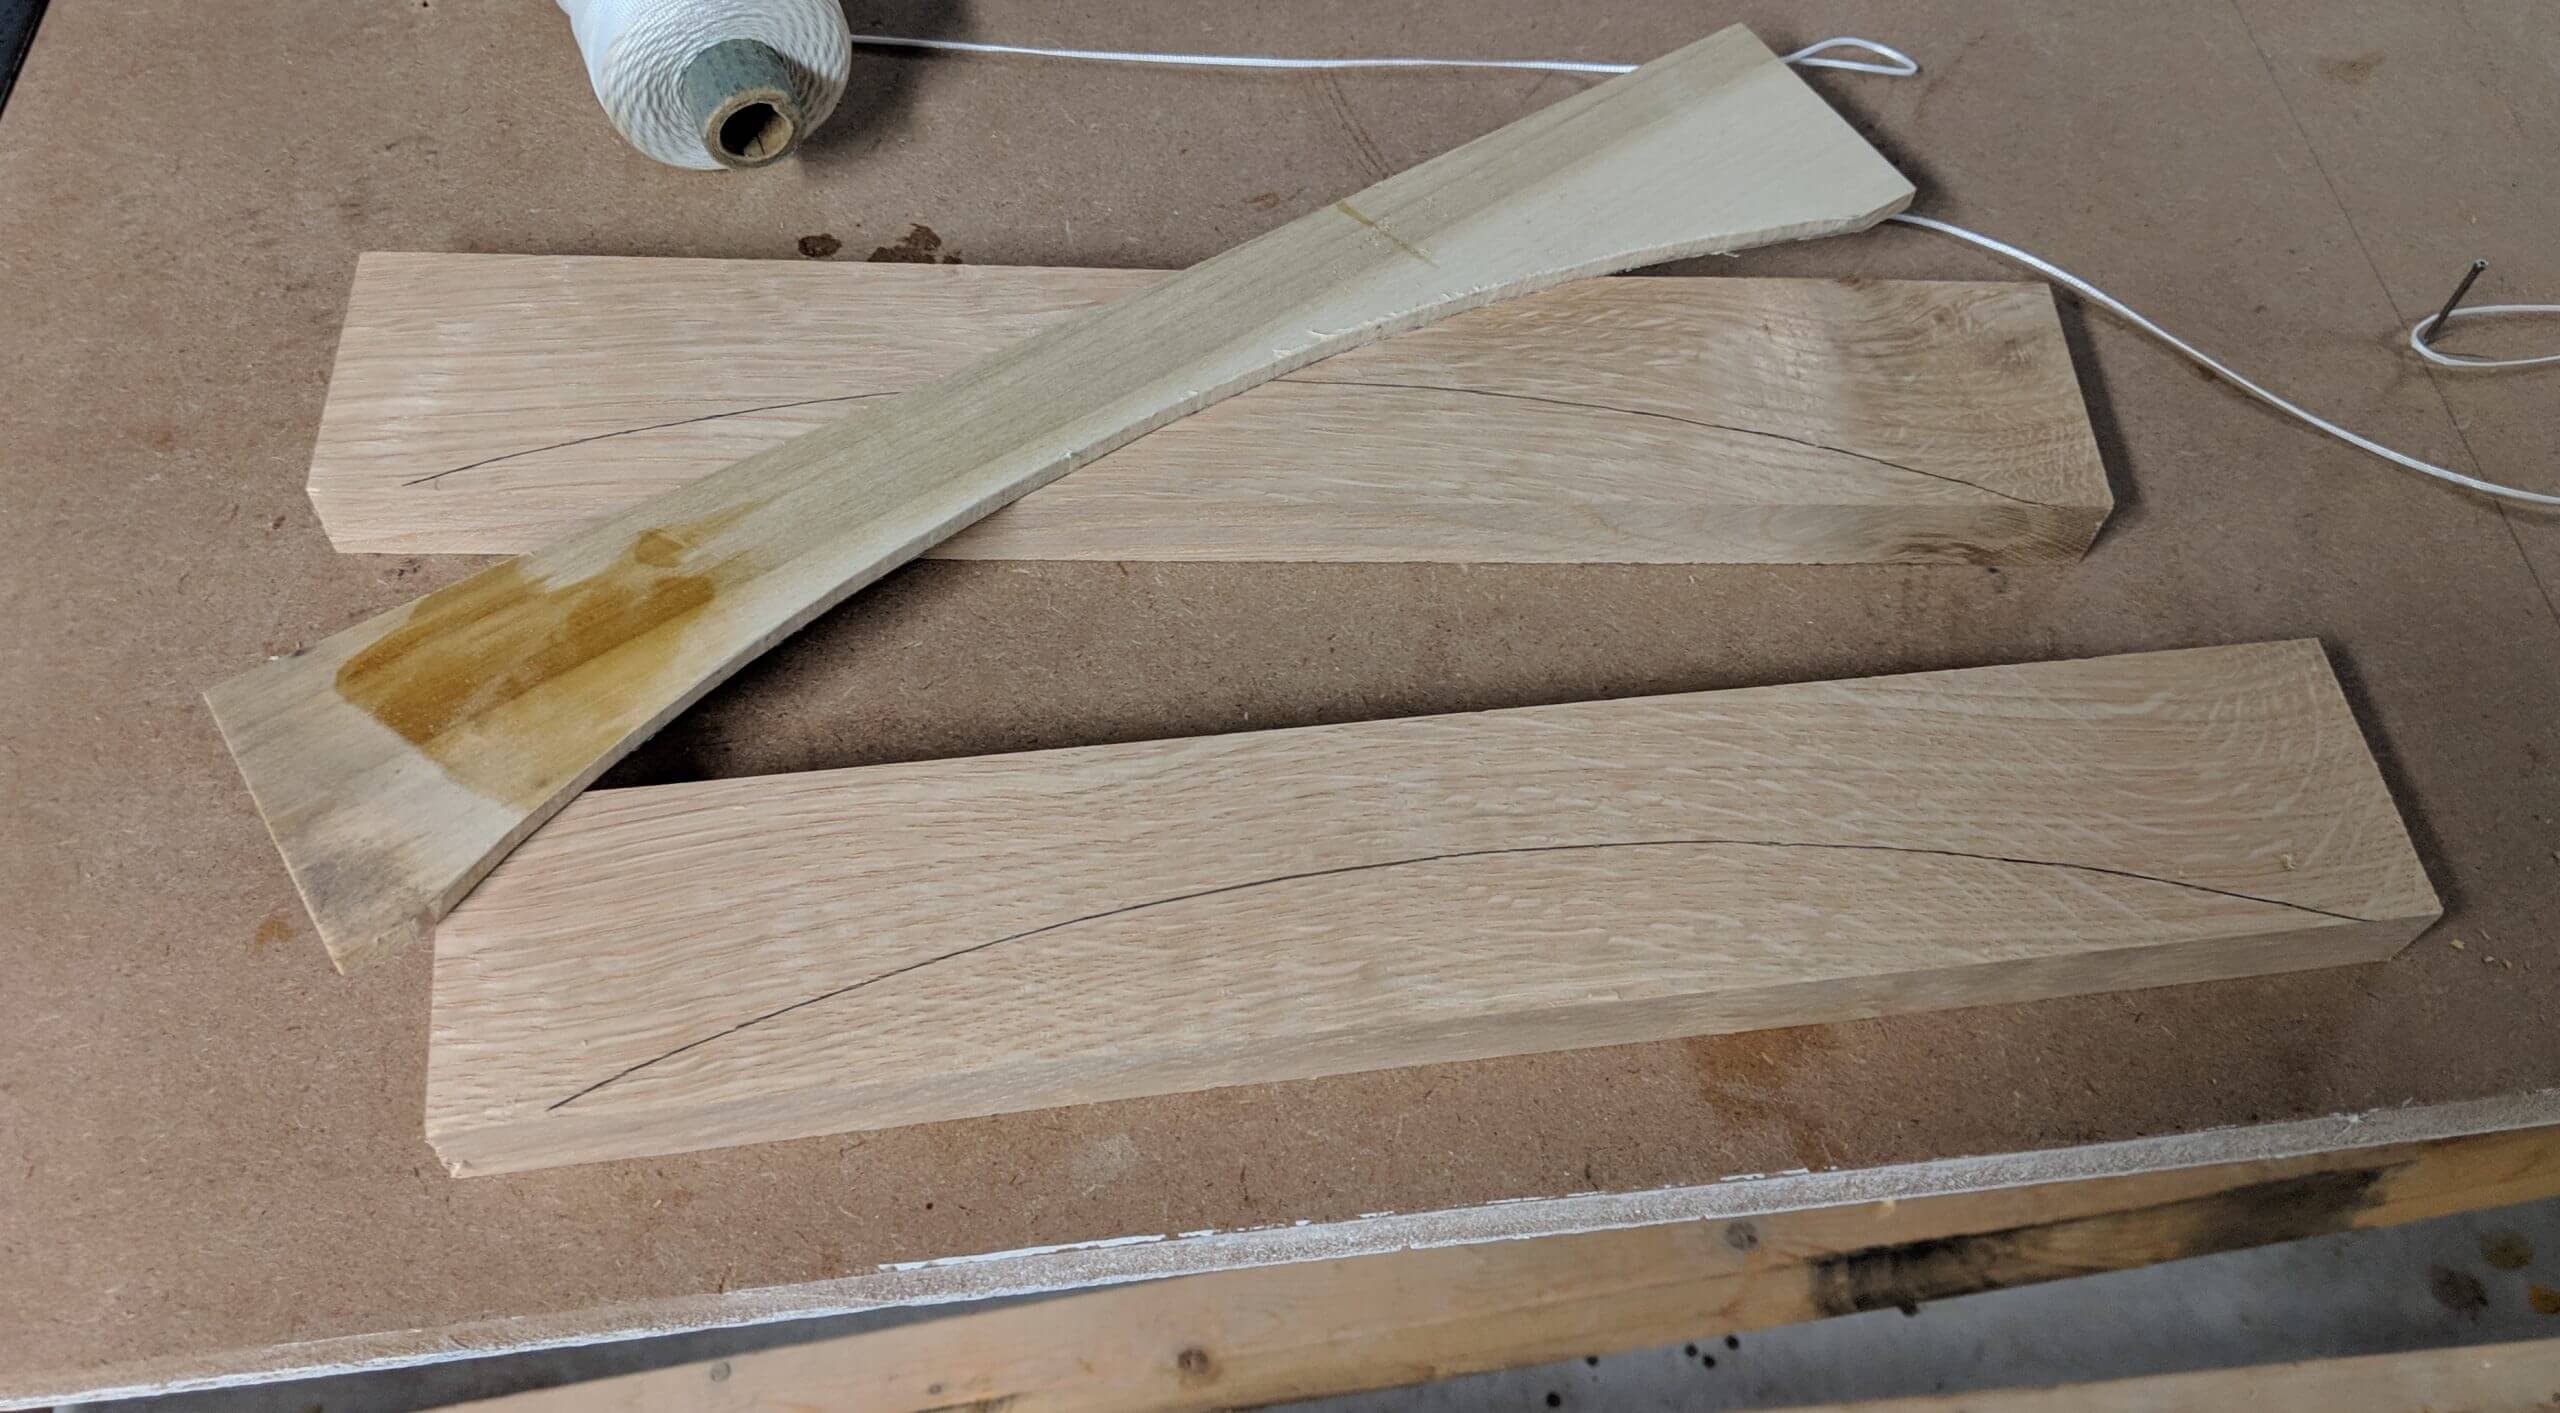
The arc can then be traced on the stock then cut out with the bandsaw. Save the off-cut to use as a clamping caul. Glue and use the caul to clamp the fascia with another 1/8″ reveal (this will match the drawers).
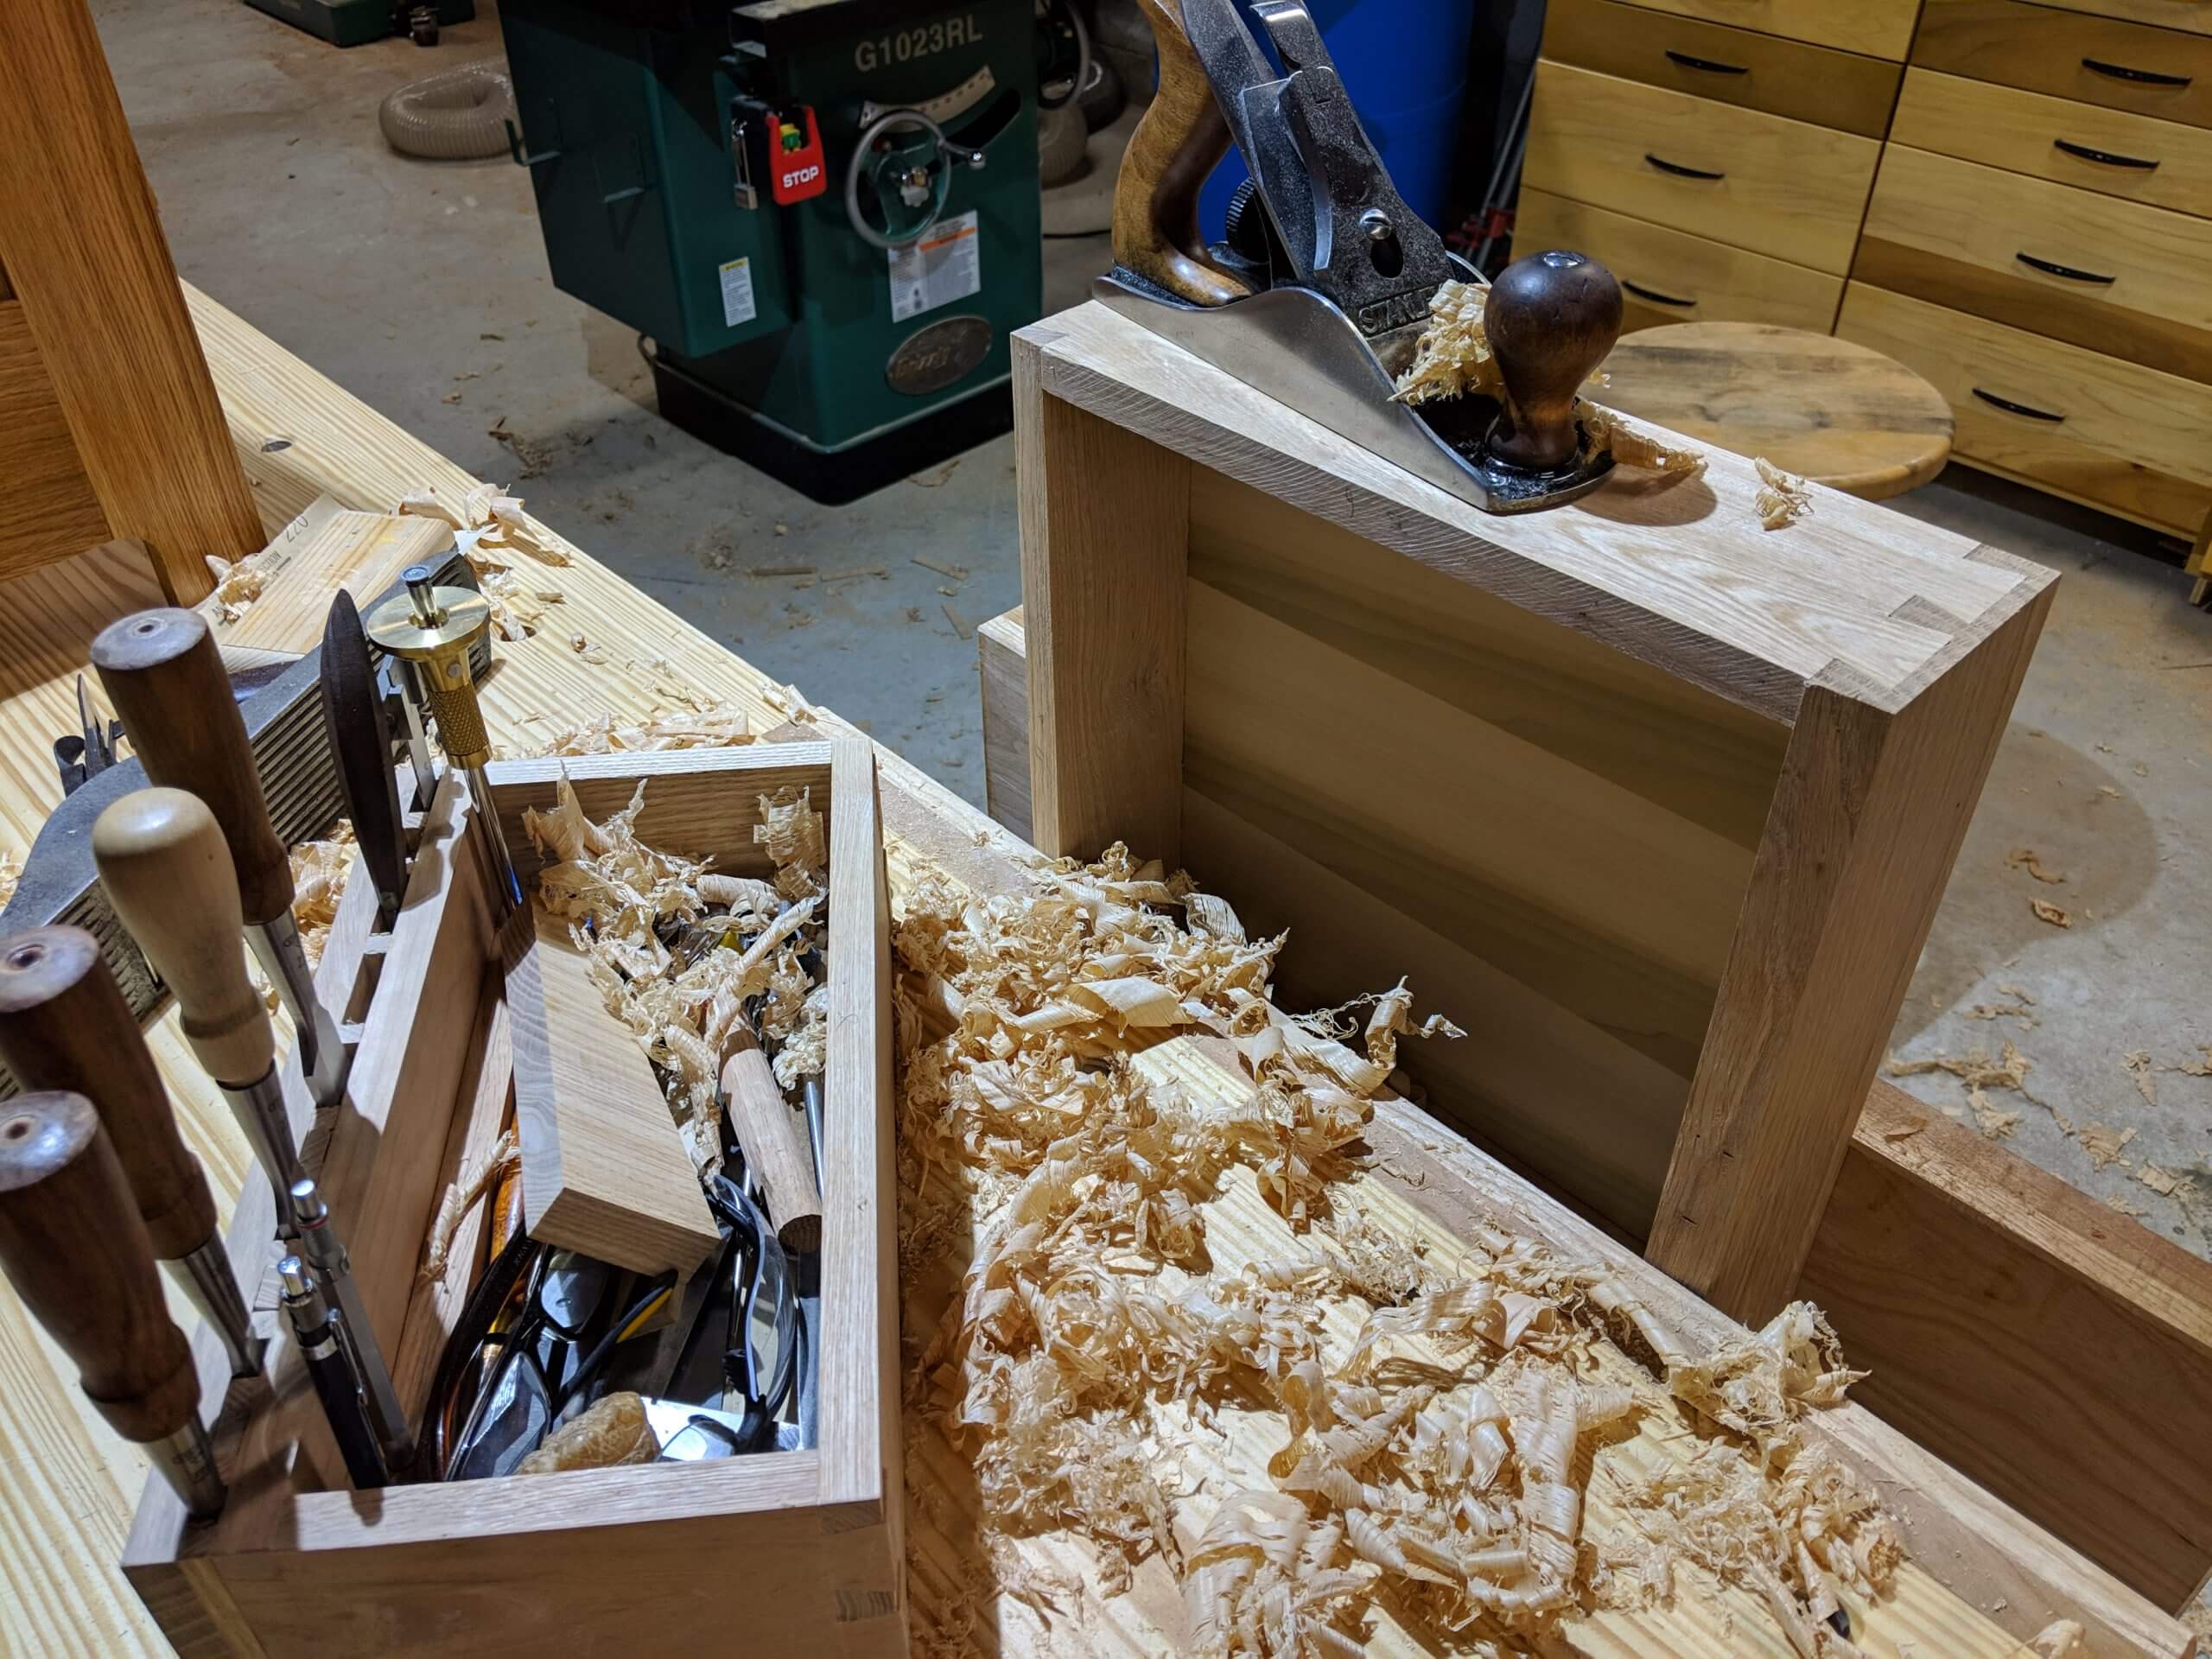
Drawers
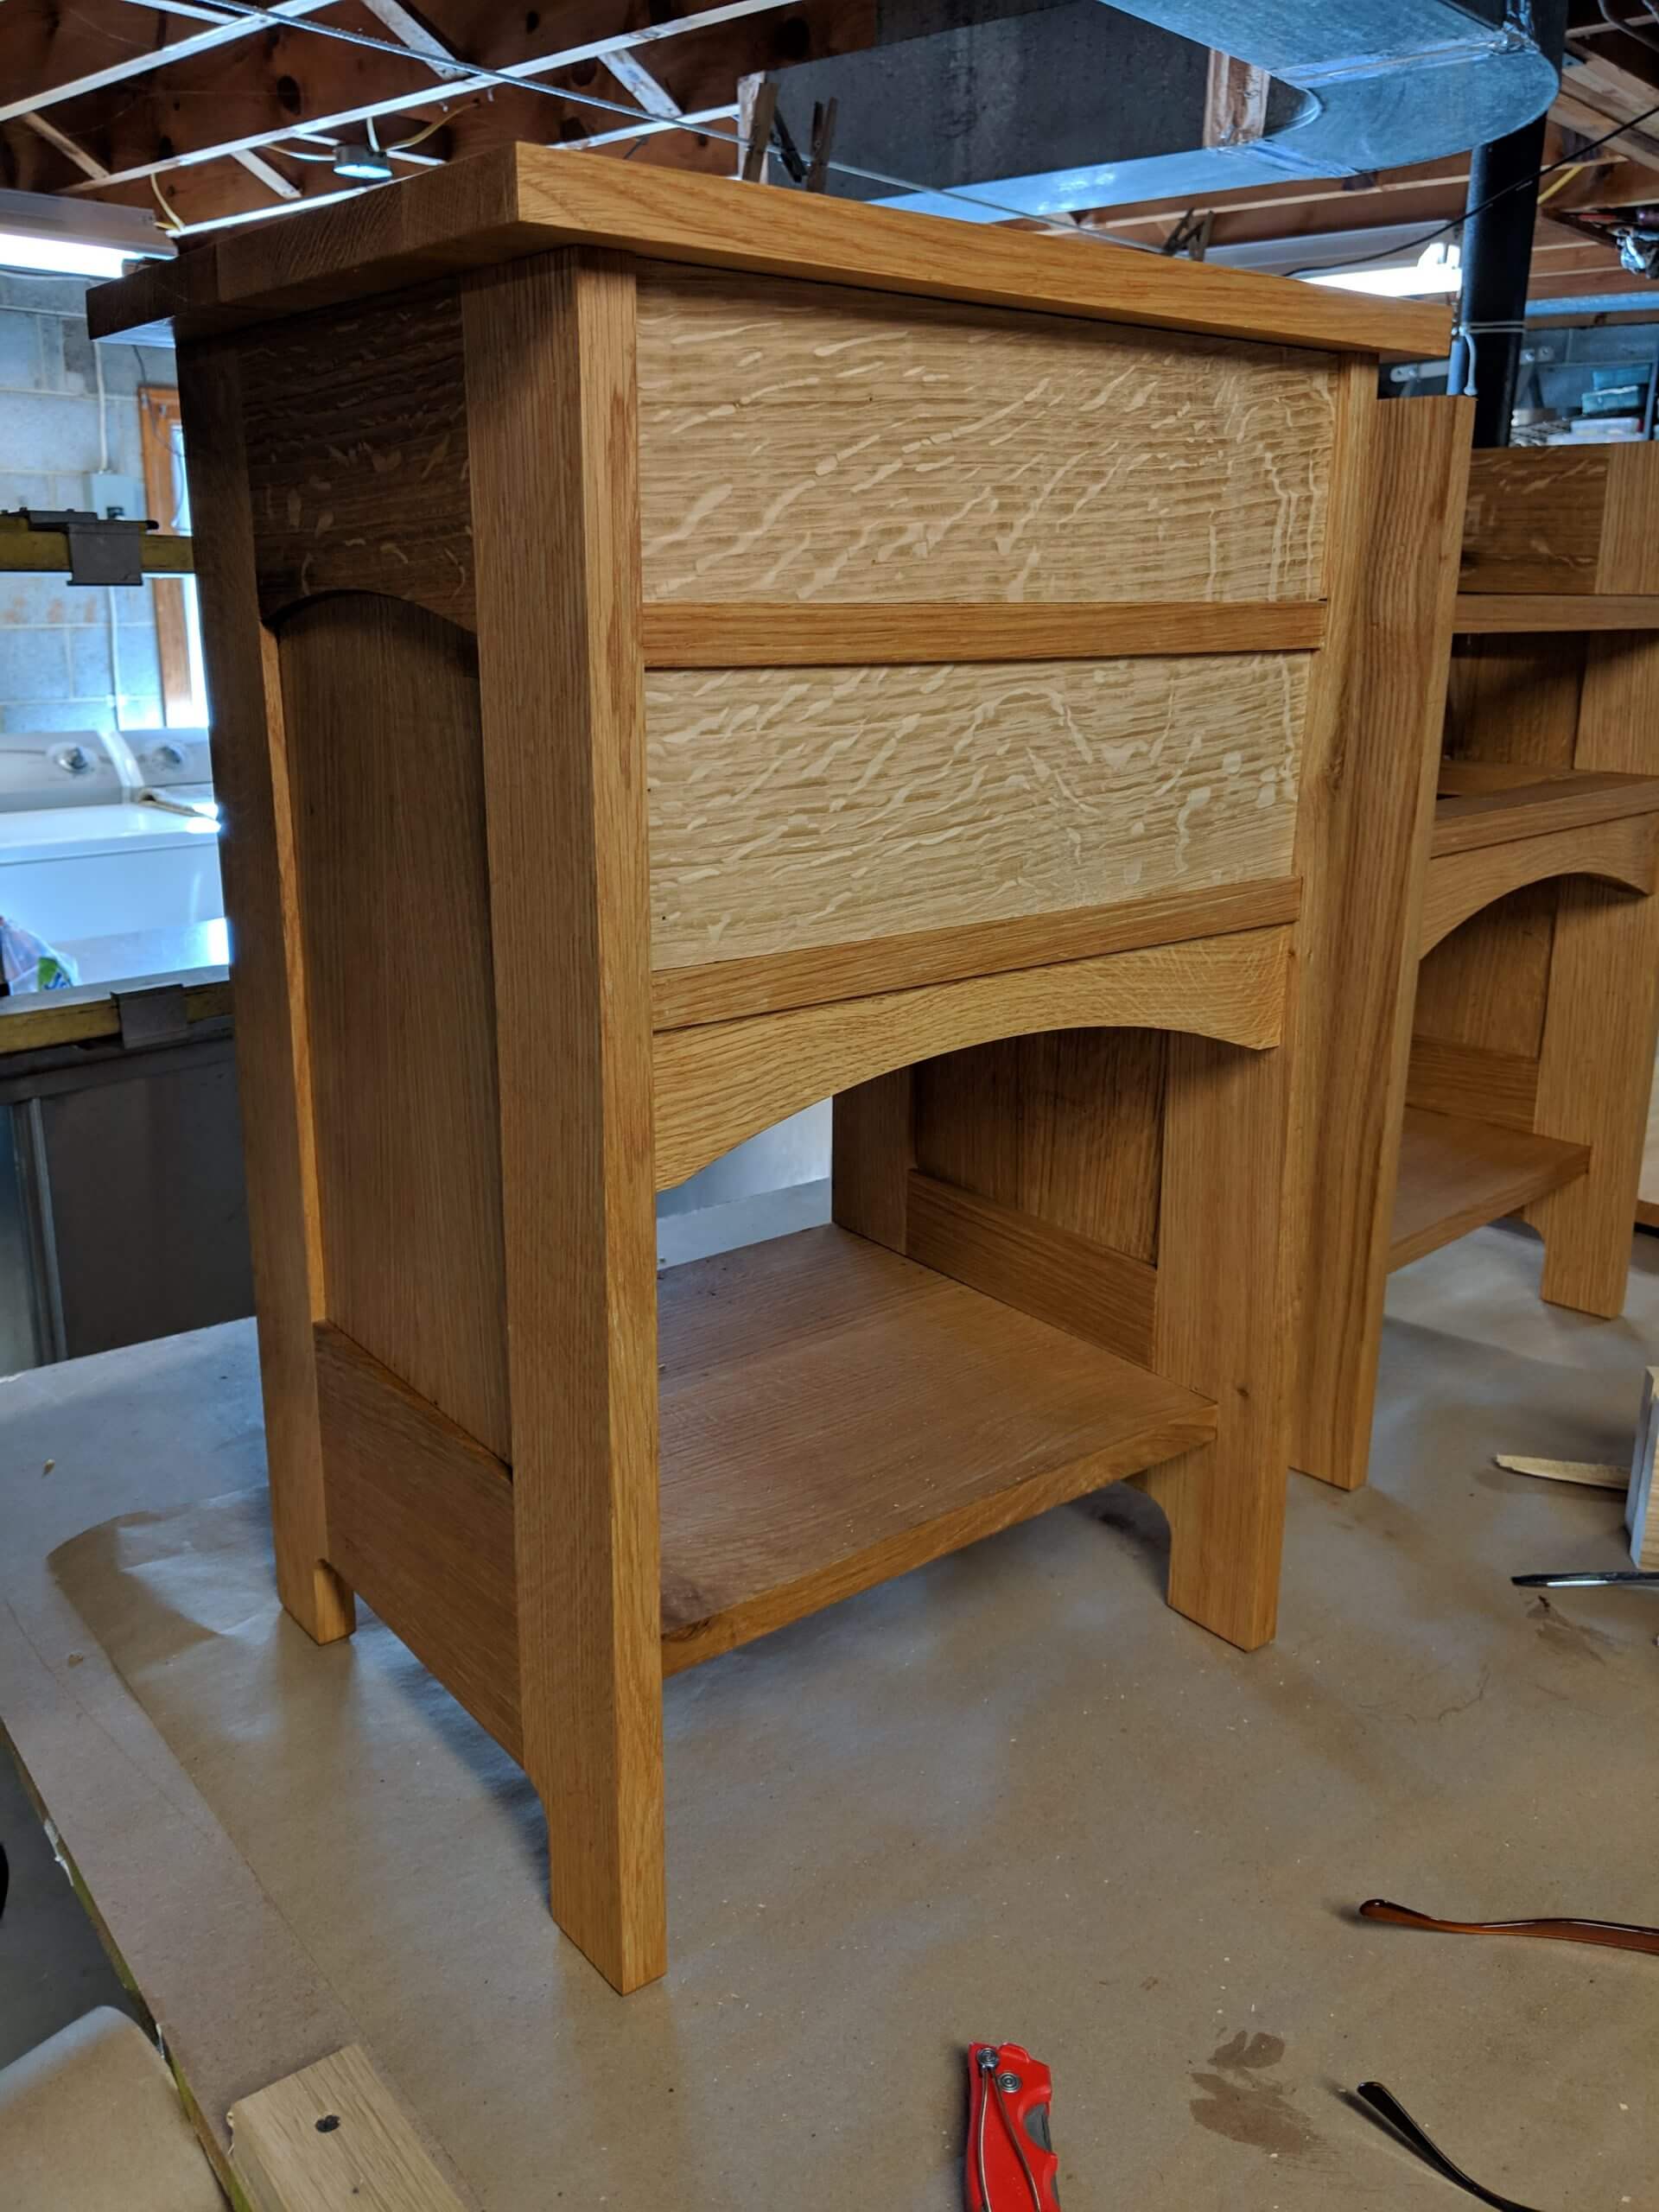
In some of the drawer images the top is shown. It is not attached yet, but is in place for measuring. Also note that some of the images of drawer work show the carcass stained. The finishing process is going on while the drawers are being made to save time waiting for stain and finish to dry.
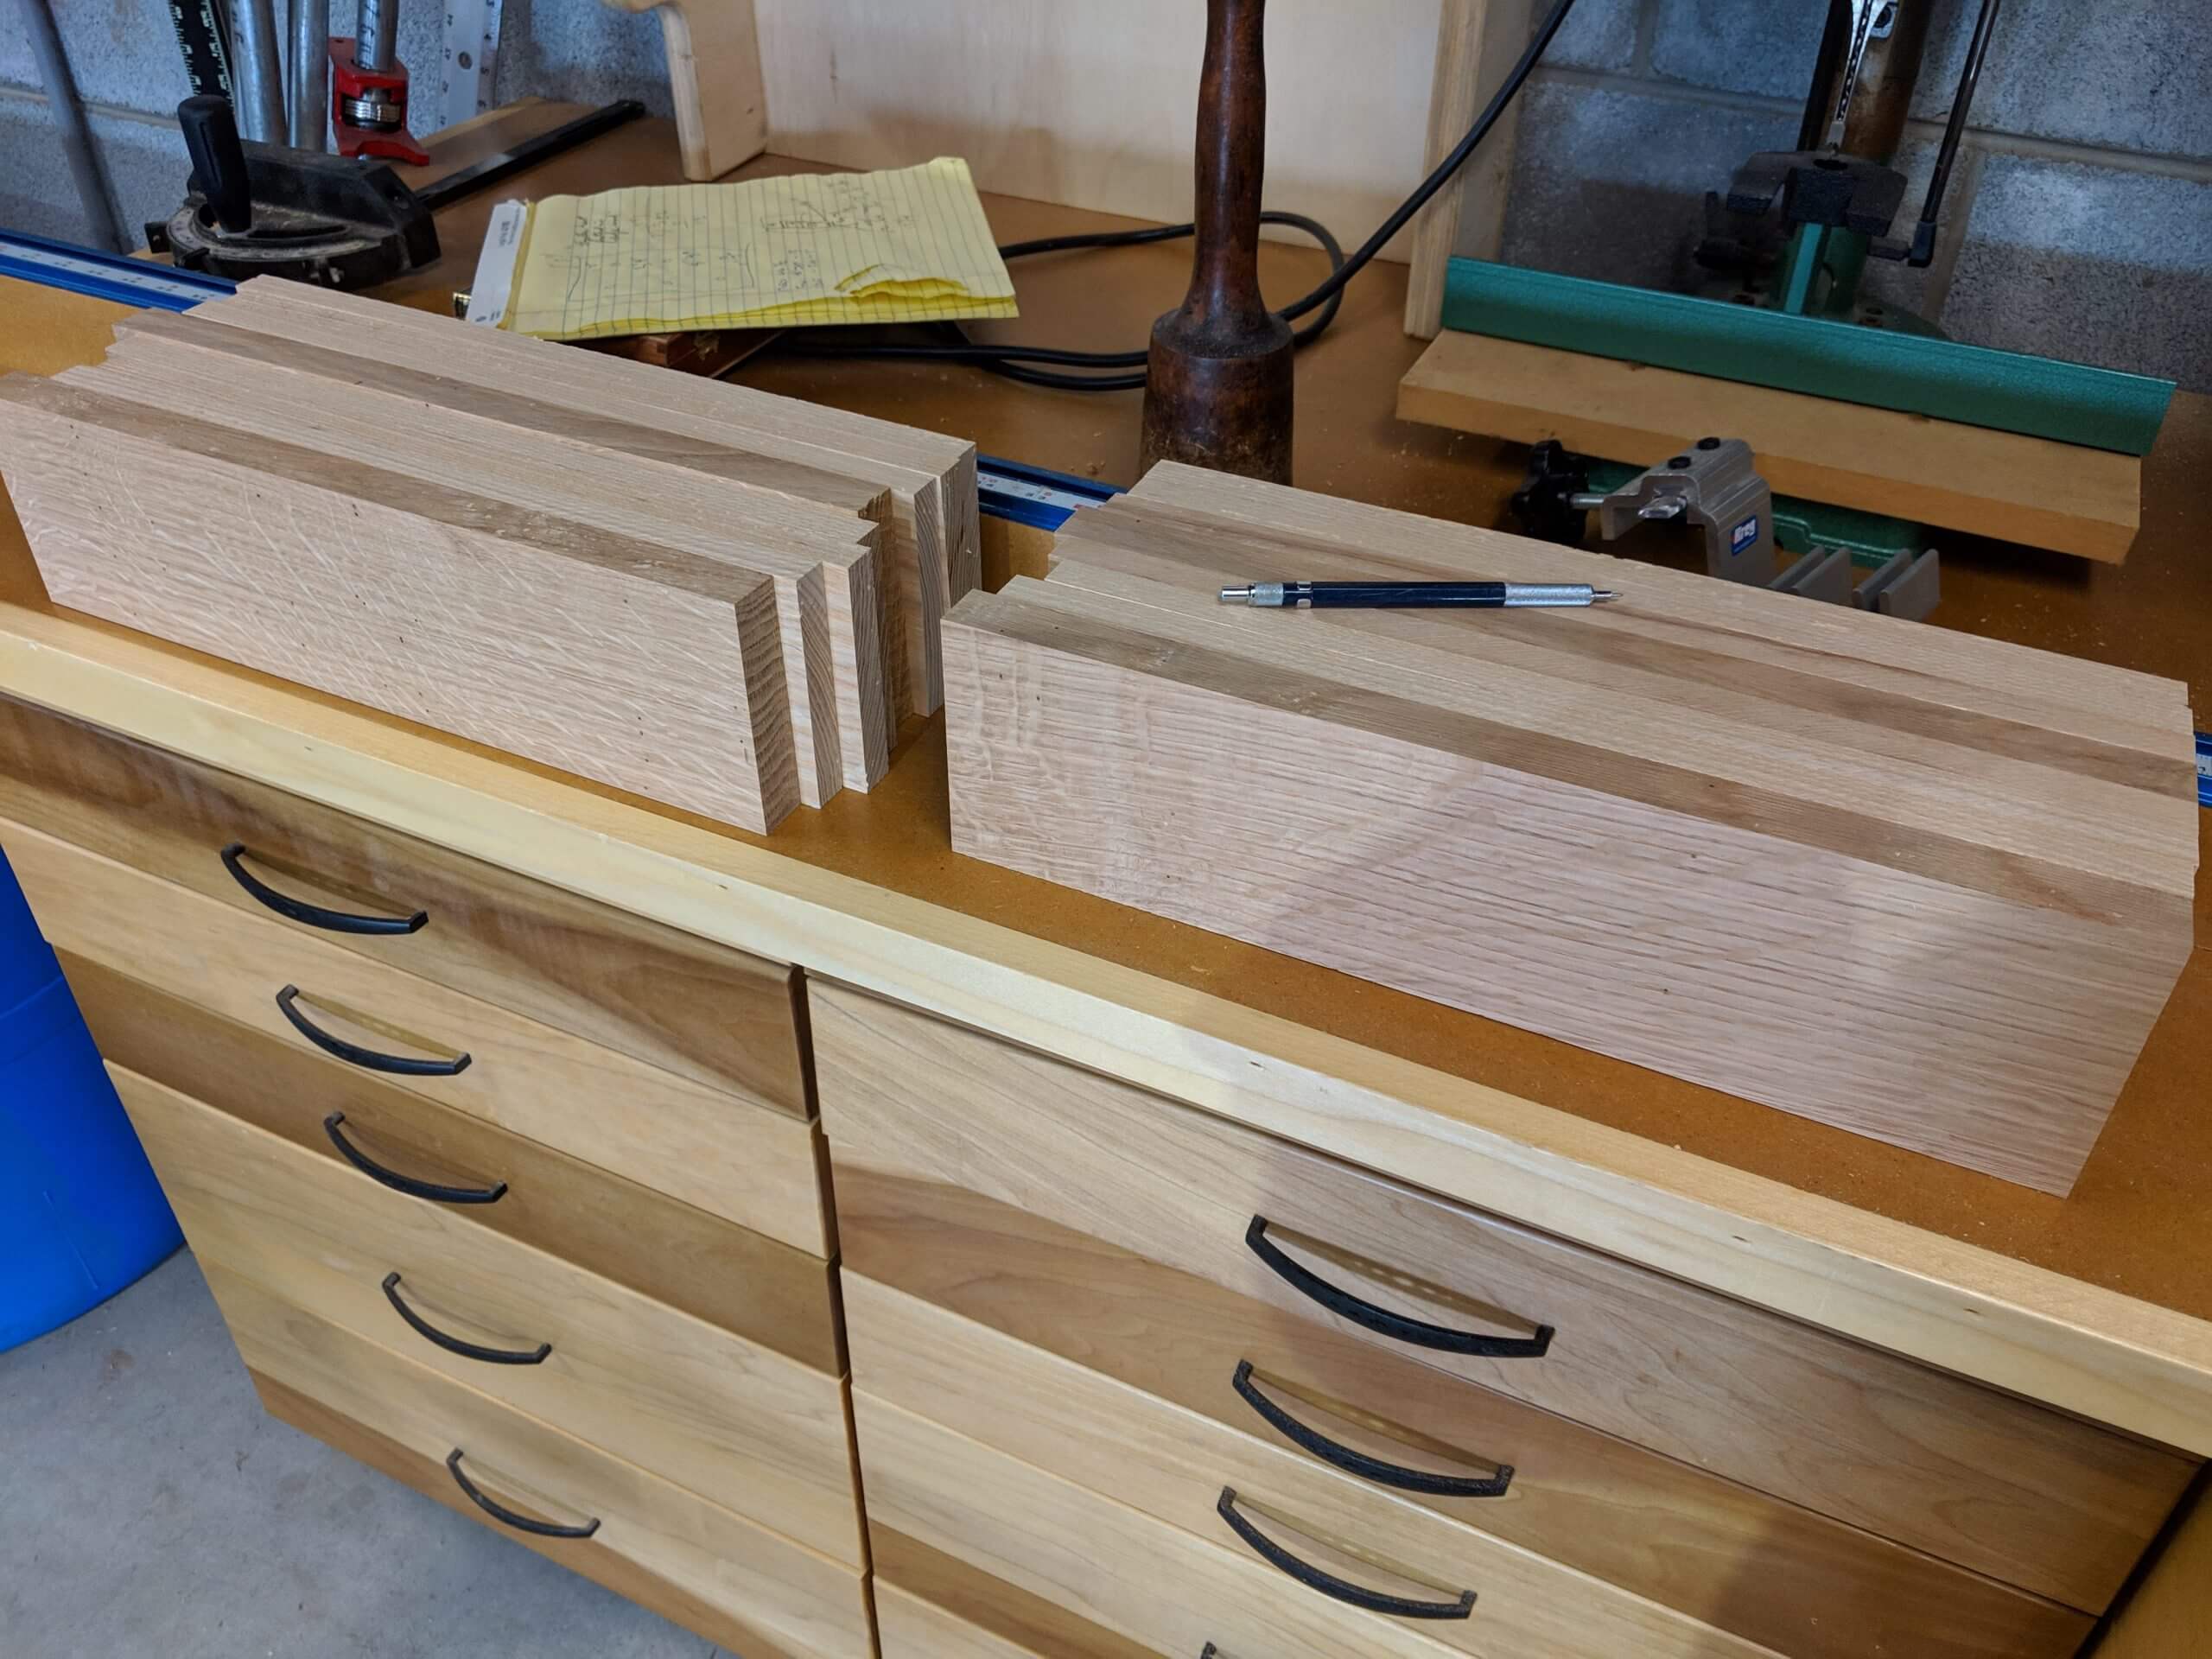
The first step in the drawers is to select the lumber. I chose ash for the internal parts and selected a white oak board with great grain for the drawer fronts.
The ash started as 3/4″ stock, but I planned it down to just over 1/2″. The oak was 1″ and ended up just above 3/4″. Parts were rough cut to 15″ long and 4 1/4″ wide at this point. If you are making taller drawers, give yourself an extra 1/4″ at this step.
The extra is to fit the draw parts into the drawer openings. Though I worked hard to make a perfect 4″ opening, I know from experience that each drawer opening will vary slightly. Group each set and label them and label the draw openings so that from this point on you can associate a drawer part set to a drawer opening. Group your drawers sets at this point and label them for the drawer, outside face and number the joints so you can mate up the right parts when cutting the joints.
Square one edge of each part and mark that side so you can reference off of it. Start with the front piece. First measure the height of the opening and trim the front down to the point where it fits but with friction. Get close with the table saw, and get spot on with a hand plane. Once you have this setup on the table saw, rip the sides and back to the same height. Test fit them and add a few stokes with a hand plane to enable them to slide into the opening. Being tight now is the goal as it will be planned down later. For my drawers I had to rip parts out at 3 31/32″, 4″ and 4 1/32″.
Hold the face piece up to the opening and mark the length, with the square end against the table carcass. Cut it to length, but “sneak up” on the perfect size. When you have a perfect friction fit left to right, cut the back identically. You will need to place the top on for the top drawer measurements. Weight it down.
The drawer sides can be cut to length based on the depth of the drawer support and your planned style of joinery. My table is 14″ front to back, with a 1/8″ reveal on the drawer support. The drawer will have an additional 1/8″ reveal and a 1/4″ space in the back for a stop block to keep the drawer from being pushed too far back. Additionally I will be using half blind dovetails and the drawer front will have a 1/4″ deep web (the part that extends past the tails on the drawer sides). So the Length of my sides is 14″ – 1/8″ – 1/8″ – 1/4″ – 1/4″ = 13 1/4″.

Once cut to length, the sides get a rebate (rabbet) on the front that is 1/4″ deep and as wide as the thickness of the drawer front less the depth of the web you will leave. This will help register the piece when marking the pins on the front, but will also significantly reduce the amount of cutting needed for the half blind pins.
Cutting dovetails is beyond the scope of the build but I encourage you to try your hand at them. A great resource (especially for half-blind ones is this video by Tim Rousseau. I cut the tails first and the only essential items are square cuts across the end for the tails and square bottoms. The tails will match the angle you cut at. I cut all my dovetails at 11 degrees which is actually 1:5 ratio. It is what I like and you are free to make yours as you see fit. The sides can be gang cut for the rear tails as well as the front tails. When cutting the front tails, use a support piece that is 1/4″ thick under the dado.
The drawer parts get a slot on the bottom to take the size plywood you will use for a drawer bottom. I will use 1/4″ poplar veneered MDF. The slot has to be high enough up the side of the parts that it falls within the tail portion of the sides (so you don’t see it on the side of the front, nor the front for a half-blind and it only shows on the back). This sets up a challenge for having a thick and tough pin on the tip of the back and front, but also one that is thin enough to not push the drawer bottom up too high. You can cut the slot on the table saw or with a slotting bit on the router table.
I am not blessed in being able to cut “saw to assembly” dovetails, so I rely on getting close with the saw and finishing with the chisel.
Top and Drawer Fitting
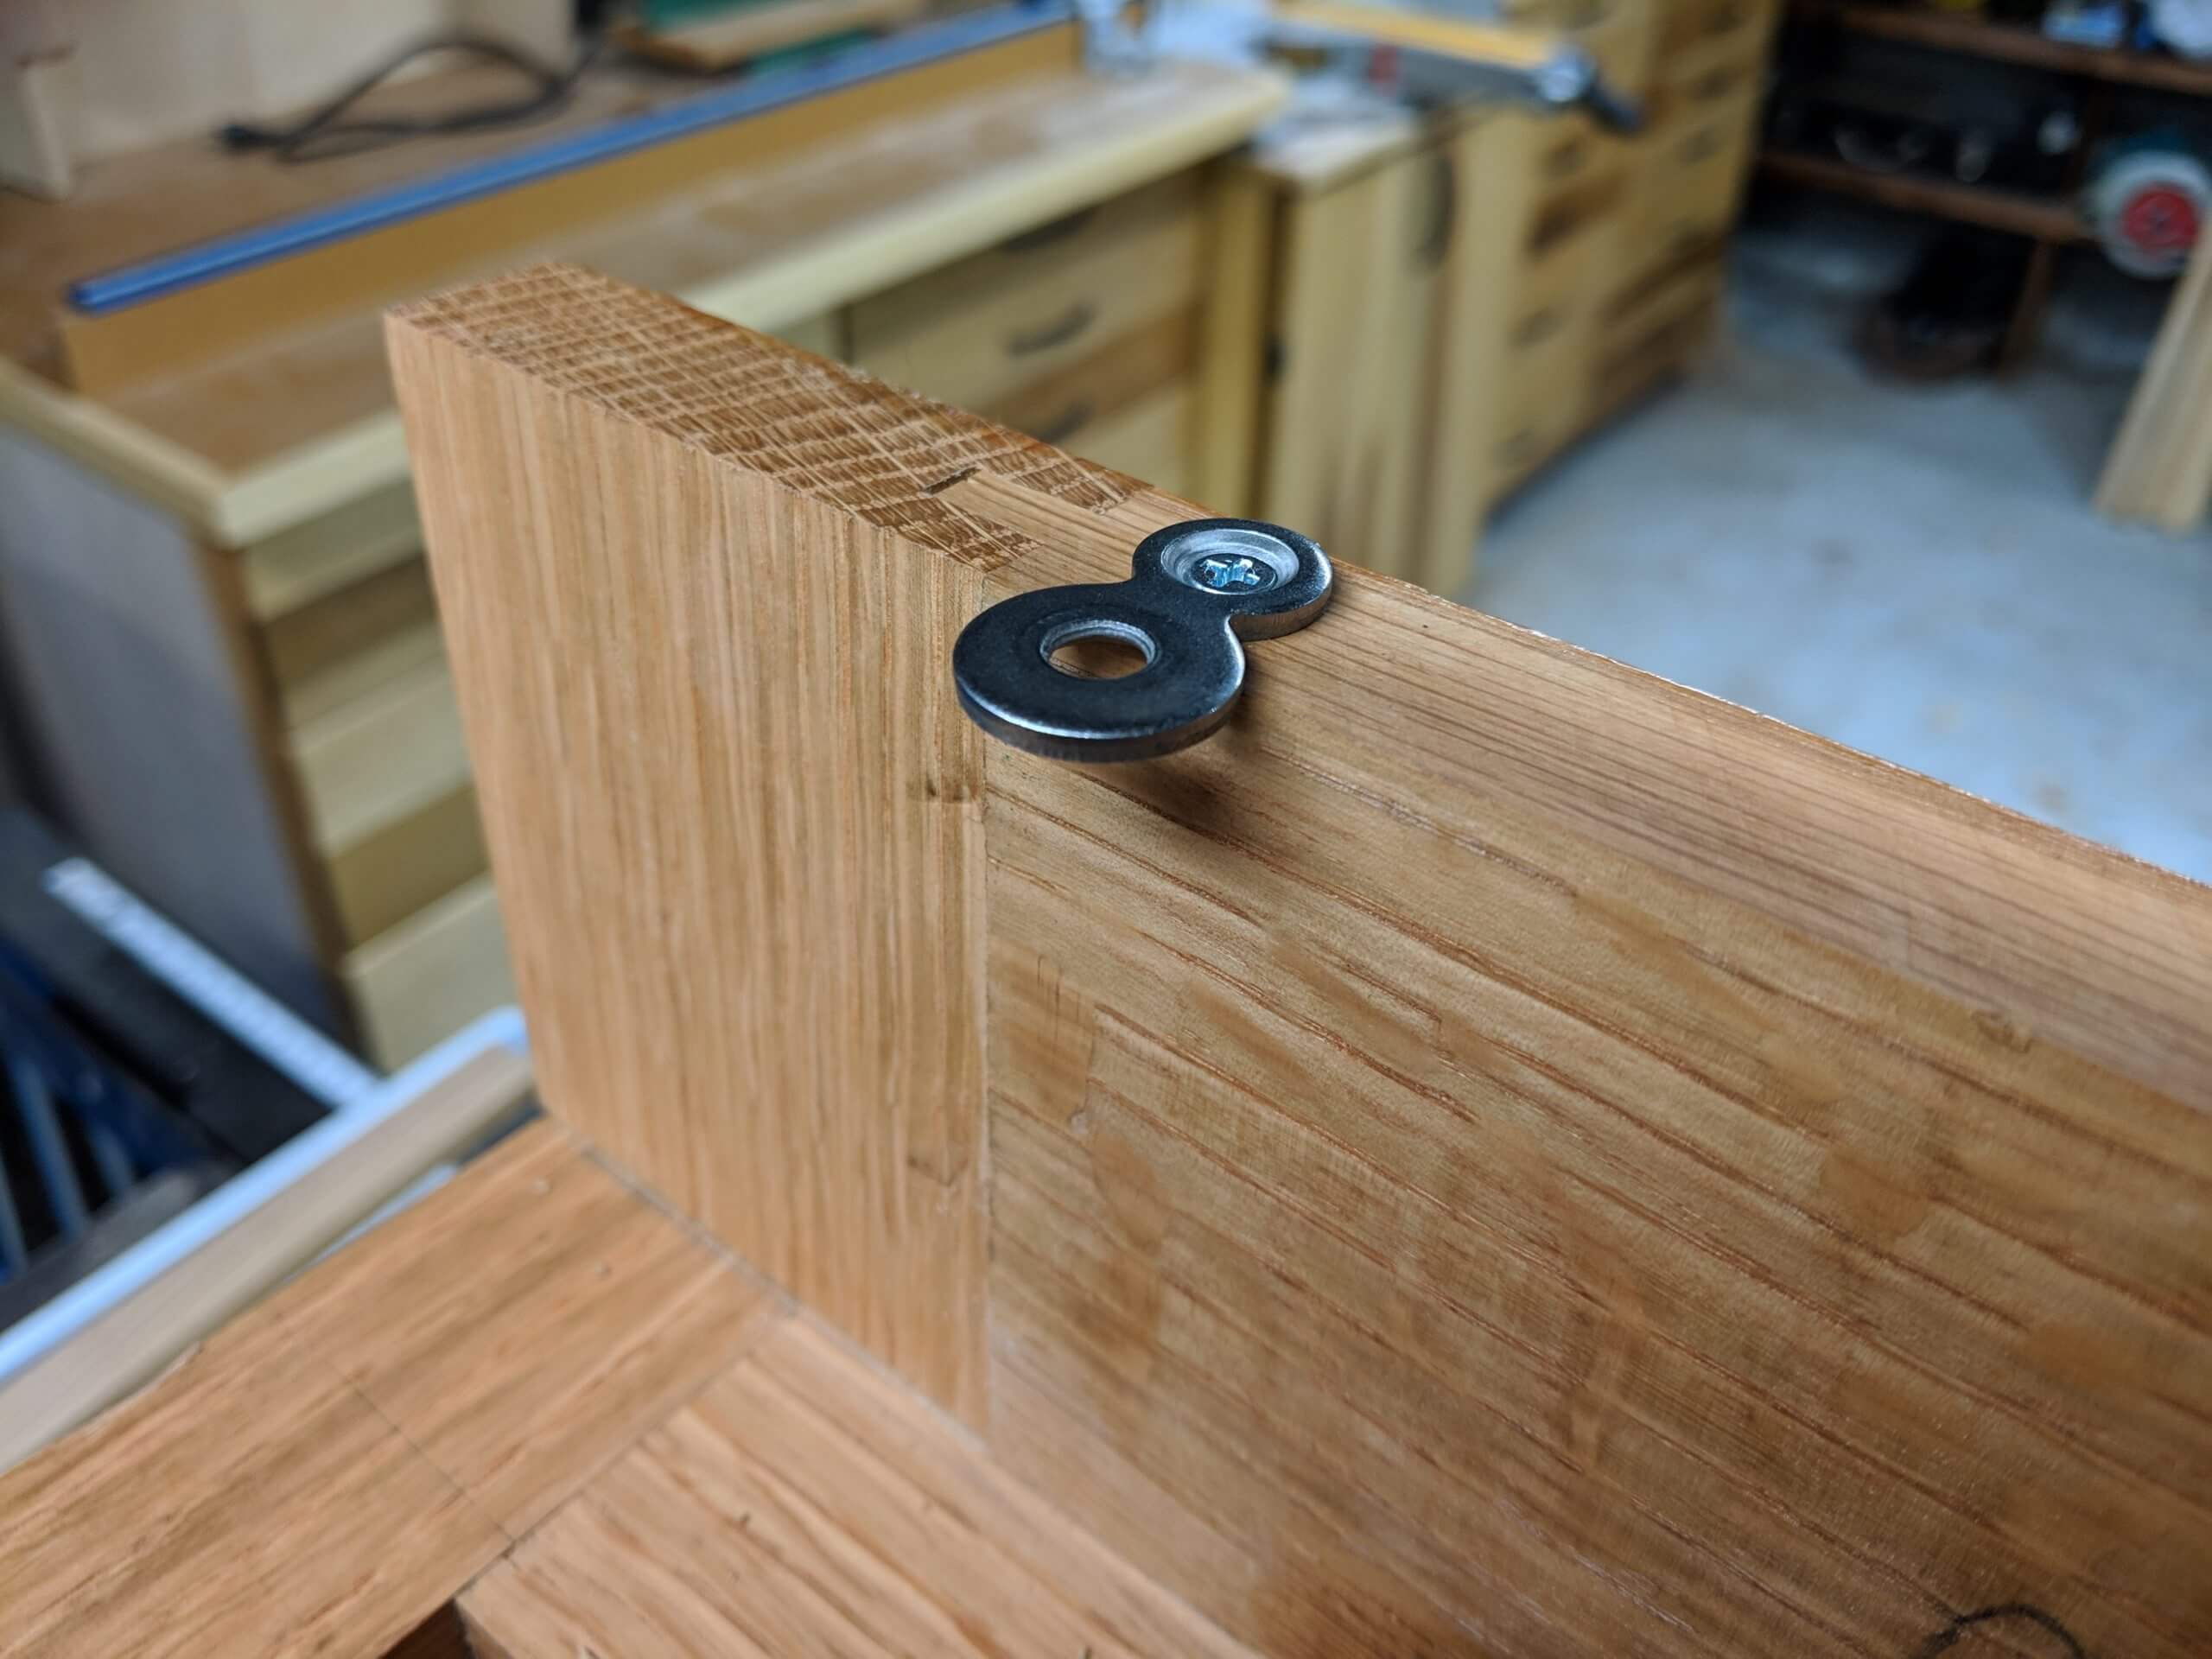
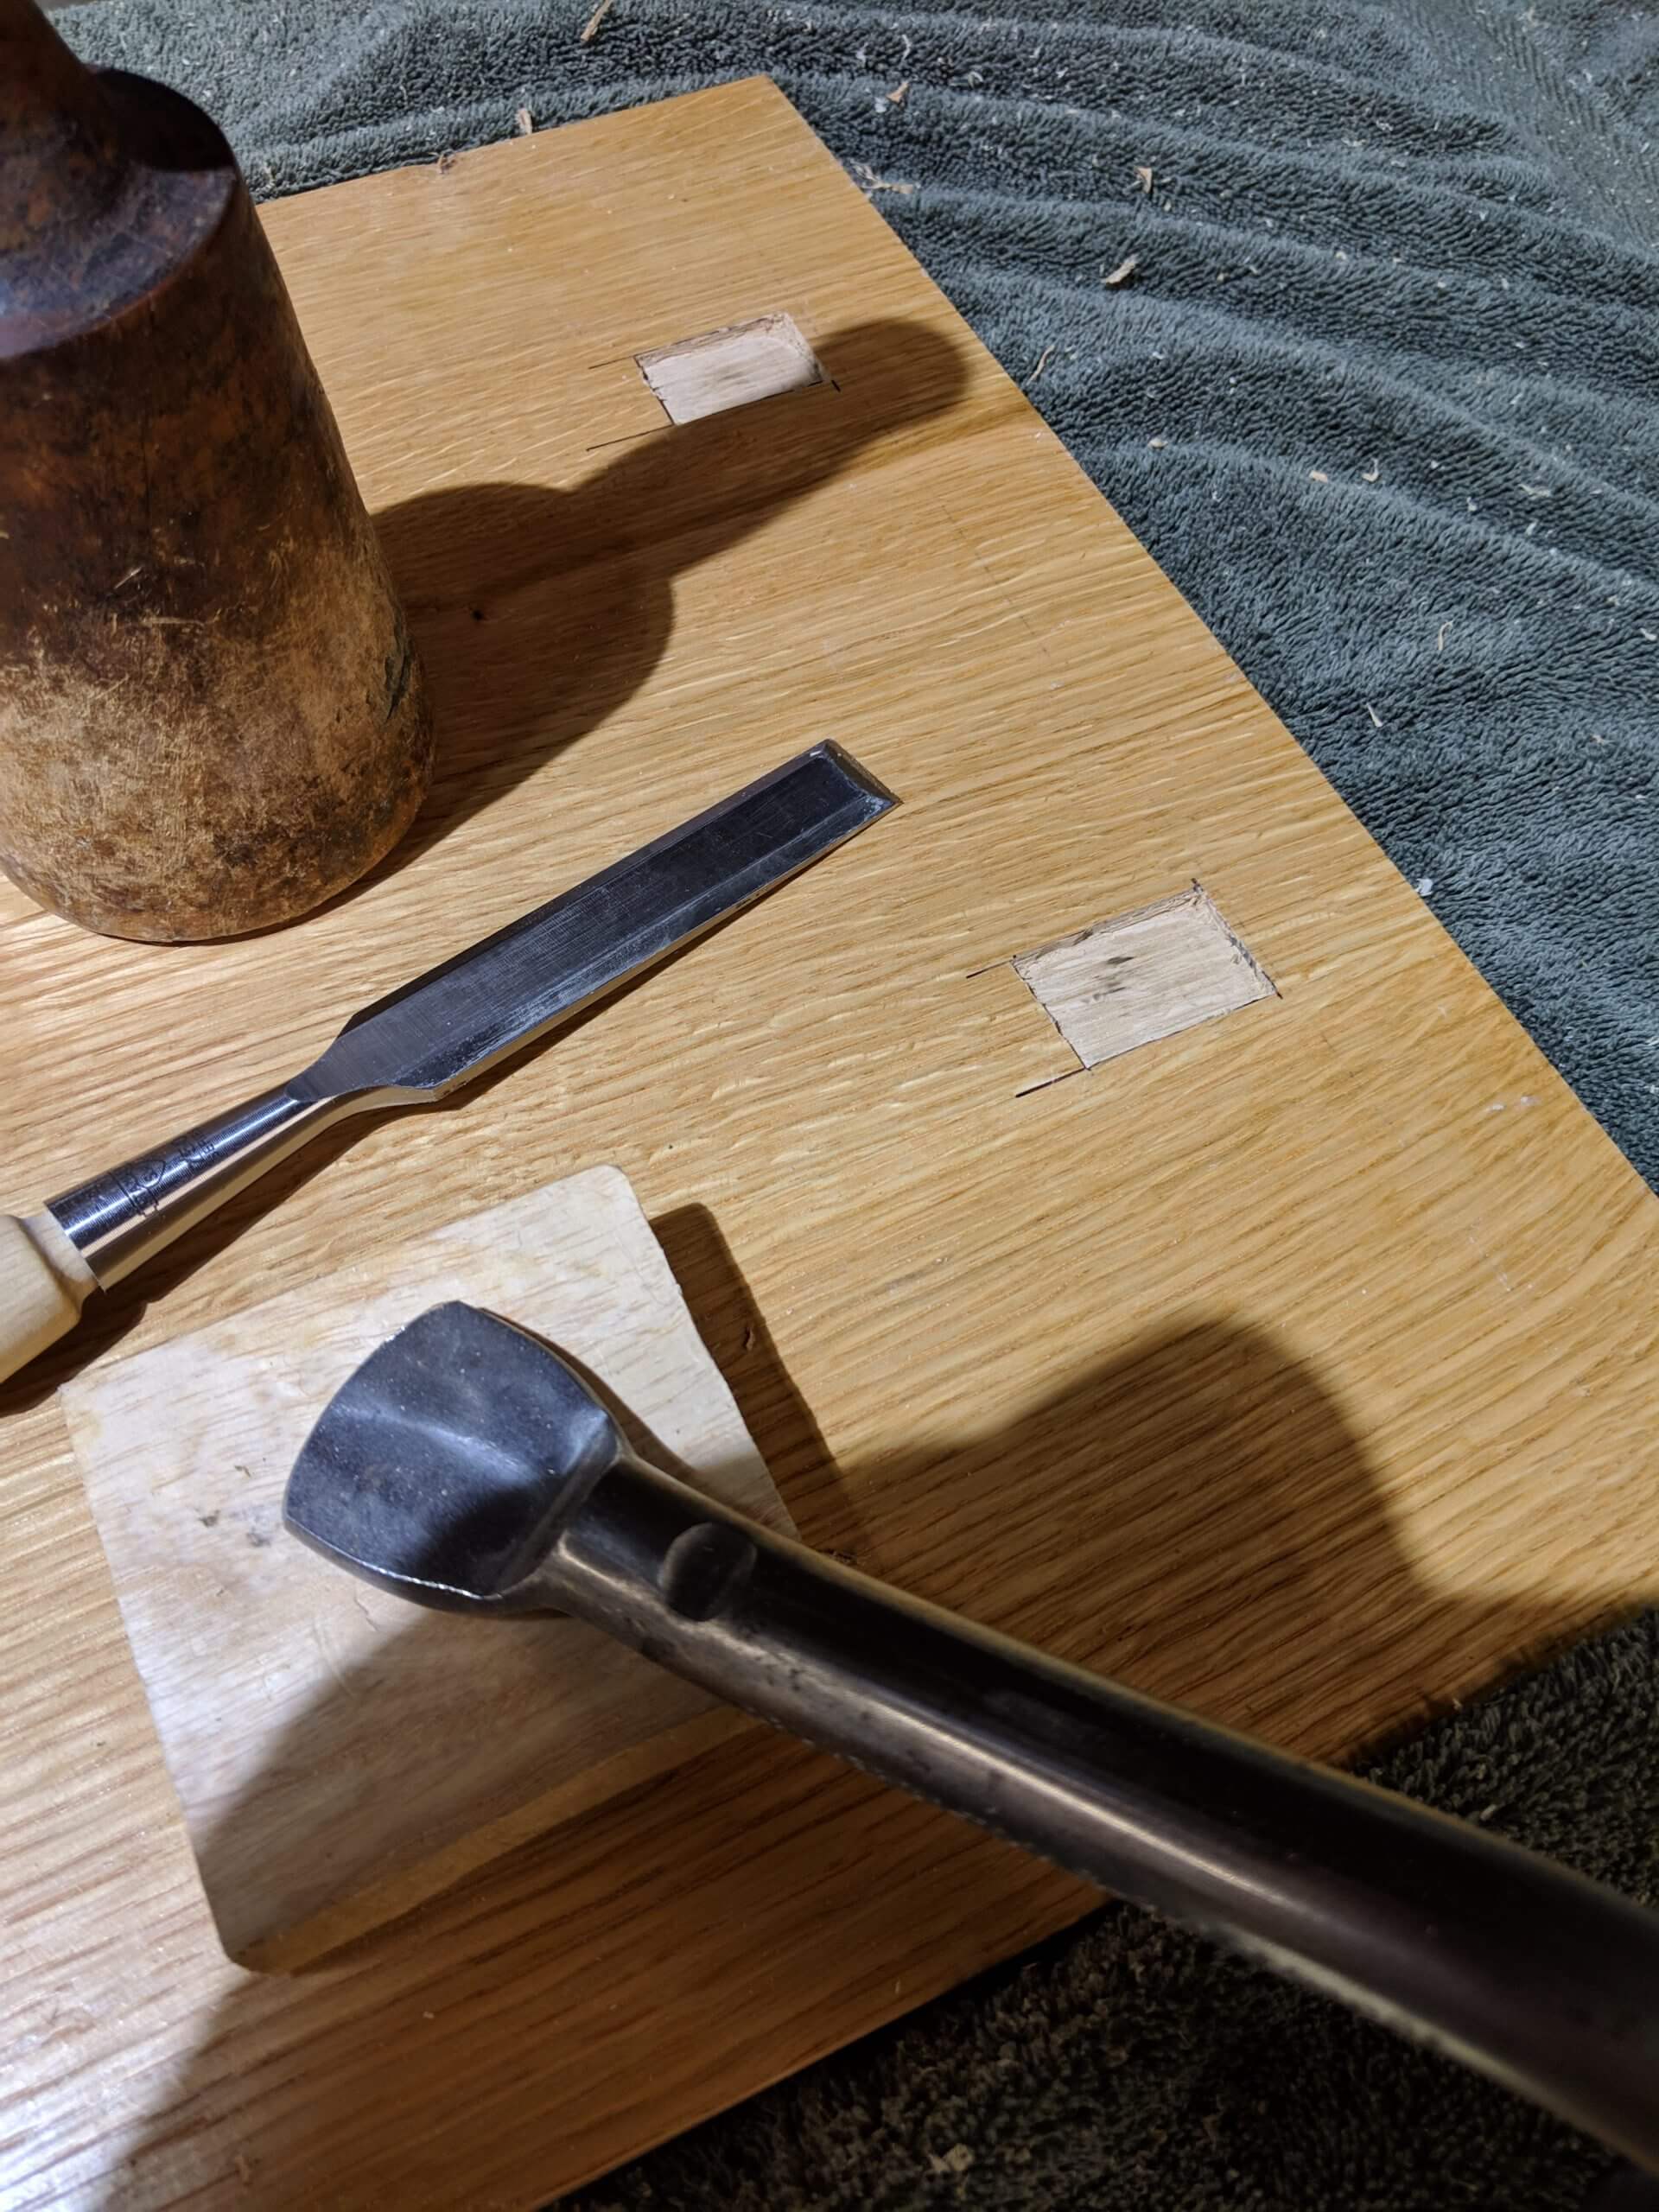
The top is solid wood and will expand and contract as the seasons change. To attach it with room to move, figure eight washers are used. They are however installed reverse of traditional, they are recessed into the top versus the table structure.
Attach four per table into the long grain of the top rail. Put the carcass upside down on the underside of the top. Align the top so it is flush with the back and has equal amounts of space showing left and right. Mark the location of the figure eight washer, then cut out the marked area. Mark the edge of the carcass on the top so you know not to cut into that area. Relive the depth needed for the washer plus 1/32″ (so the top is pulled fully down) with either a chisel or a router.
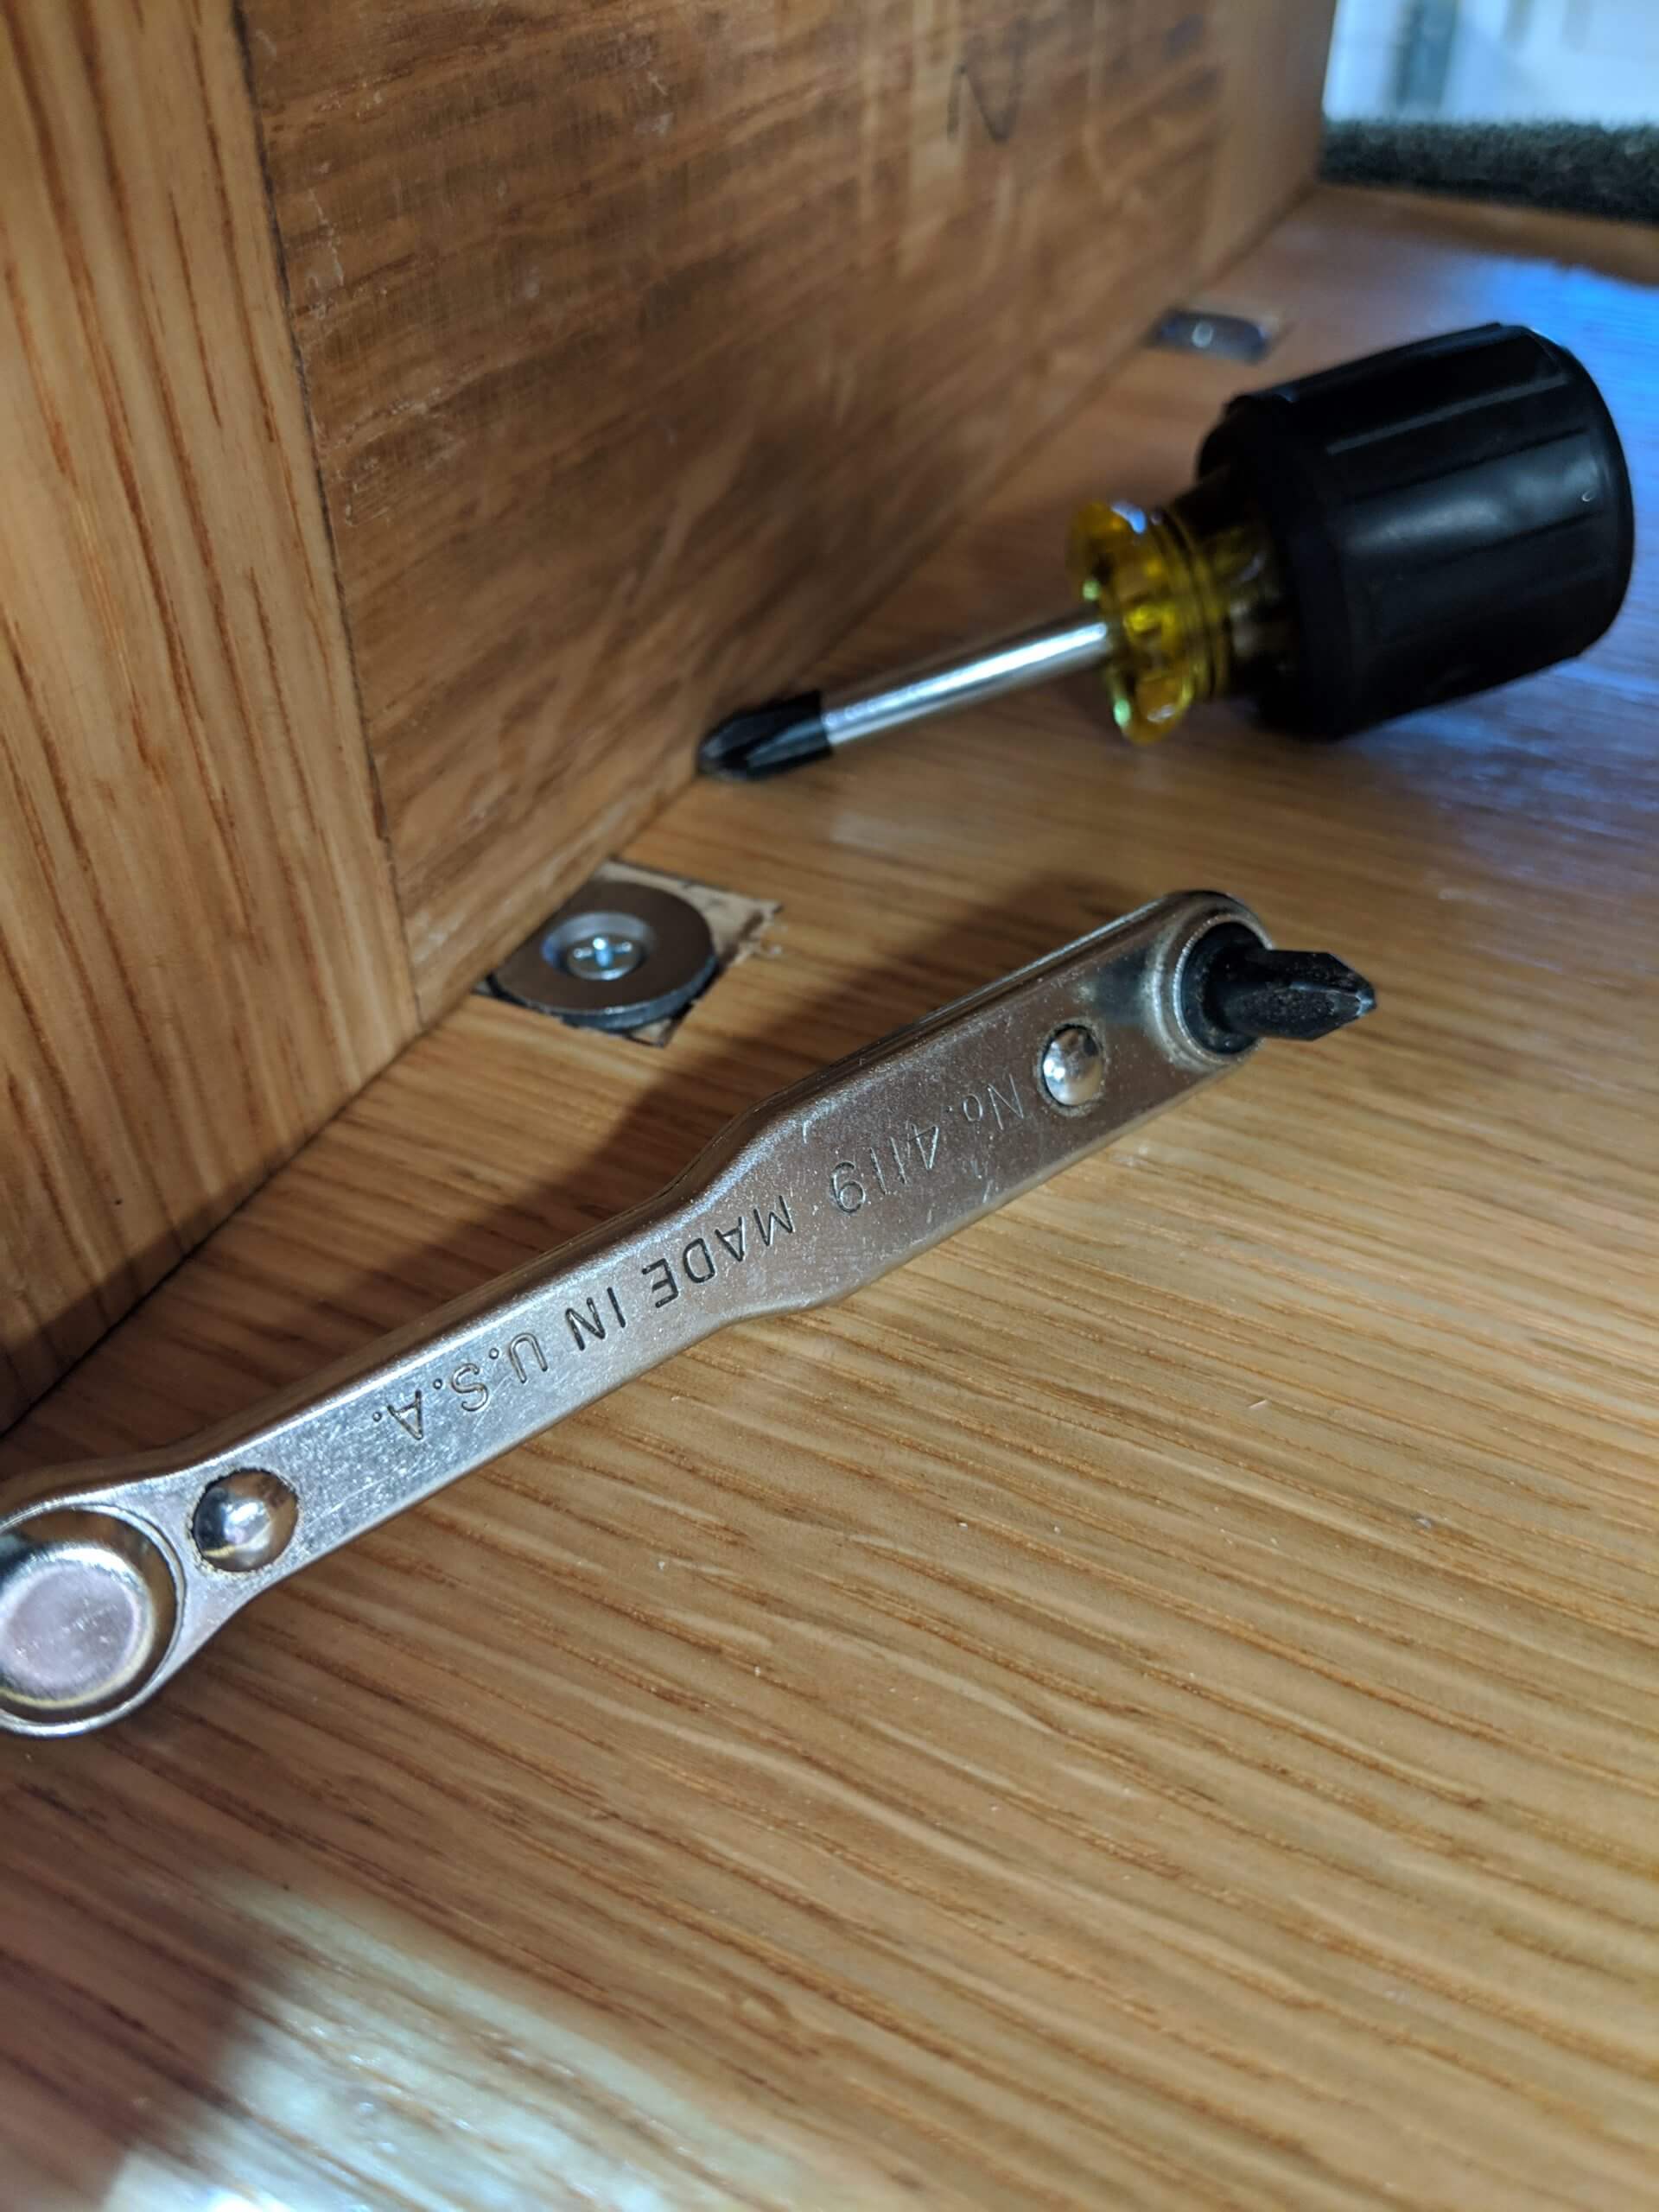
Put the carcass back on the top, upside down and use a nail to mark the center of the hole, then remove the carcass and pre-drill being careful not to penetrate the top. Mount with screws.
Drawer fitting is time consuming but worth the effort. The drawers have all been made in groups sized generally for the opening they will go in. Offer a drawer to its opening and take note of where it is tight. The height of the drawer is easy to start with as you can put the face and back of the drawer in and see easily if it needs to be reduced. The face only needs to fit into the front, but the back will need to fit through out the slide distance. Thin where needed with a plane, working until the drawer slides easily, but is snug.
On tip is to slide the drawer in until it binds then rock each corner up and down to see where the bind it.
At this stage there is no spacer to stop the drawer from being caught if it hits the back stile at an angle, so work carefully.
When each drawer fits well, finish sand the outside and tops and bottoms.
Finishing
Each sub-assembly has been finish sanded, but it is a good idea to go over the tables one more time looking for spots that have been overlooked or suffered shop rash.
Quarter sawn white oak is prone to tear out, so I went over a few problem areas again with a card scraper.
Once satisfied with the surface, use compressed air if you have it to blast accumulated saw dust out of the grain and wipe down the tables from top to bottom.
I start with one coat of Minwax Pecan Stain. It emulates the fume effect used in traditional arts and crafts pieces well and results in a pleasing look.
Once dry I use Osmo Hard Wax Oil. A total of four coats is ideal. Rub out the third coat with #0000 steel wool using wool lube and make the fourth coat very very light. Osmo leaves a smooth but non-the-less woody feel. If you try this product, you will drop just about every other method. It “appears” expensive, but is not that bad considering the coverage you get. It is suitable for floors, so is tough and long wearing.
When the fourth coat is dry, apply paste wax to the drawer supports and to the underside of the drawers to aid in sliding. You can also wax the drawer sides.
I finished the face sides and edges of my drawers, but not the inside. Personal preference.
For pulls I used a product by Hickory Hardware, P7526-WDA Arts & Crafts 3/4″ X 2 5/8″ pull. It is a single hole pull and I mounted it dead center in the drawer.
4 thoughts on “Arts and crafts Style Night Stands/End Tables”